Routers are essential tools in my woodworking shop, where I use them to profile board edges, cut dados and rabbets, and trim wood pieces to a precise size and shape. And on the jobsite, they can be workhorses for cutting out window and door openings in sheathing, pattern-cutting decorative rafter tails, and even duplicating stair stringers. As with other tools, however, routers can also cause a lot of damage to you or your workpiece if they are used improperly or unsafely. I’ve been using routers in my woodworking and trim carpentry business for several years, and in this article, I’ll share some of what I know about this versatile tool, the bits that are used in them, and techniques for using them in a safe and controlled manner.
Safety First
A router bit spins at speeds of up to 24,000 rpm, which guarantees that wood chips will fly, so eye protection is a must. In addition to wood chips and (sometimes) bigger splinters and chunks, routing produces fine dust, so I always use dust extraction when I can or wear a mask when a router isn’t equipped to collect dust. And routers are loud, so good hearing protection is important too. For me, Jabra Elite 65T Bluetooth ear buds provide a good combination of sound quality, durability, and noise reduction. Though they don’t have an NRR (noise reduction rating) for OSHA certification, they have a snug fit that I find works better than regular ear plugs for blocking out unwanted sound.
The business end of a router—the bit that’s spinning up to 24,000 rpm—is sharp but not as visible or obviously dangerous as a spinning saw blade; many tradespeople say because of this, a router is one of the most dangerous power tools. When handling a router, you need to be constantly aware of the cutter as well as what are known as wrap points, where loose-fitting clothing, chains, or loose jewelry poses an entanglement hazard. Avoid wearing these items. If you have long hair, you should always tie it back.
When operating a large router, use both hands to ensure you have full control. And when you are done with a cut, don’t place the router on the workbench until the bit comes to a complete stop.
Choosing a Router
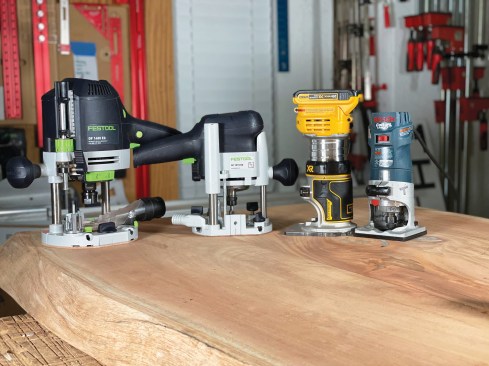
Routers come in two basic sizes—those with 1/4-inch spindles and those with 1/2-inch spindles. Both sizes are fitted with collets that thread onto the spindle and clamp around the shank of a router bit. The router I use most often in my work is a compact trim router with a 1/4-inch spindle. With motors cranking out about 1 hp, trim routers can be operated safely with one hand and have ample power to complete most tasks, though the 1/4-inch collet limits bit size somewhat.
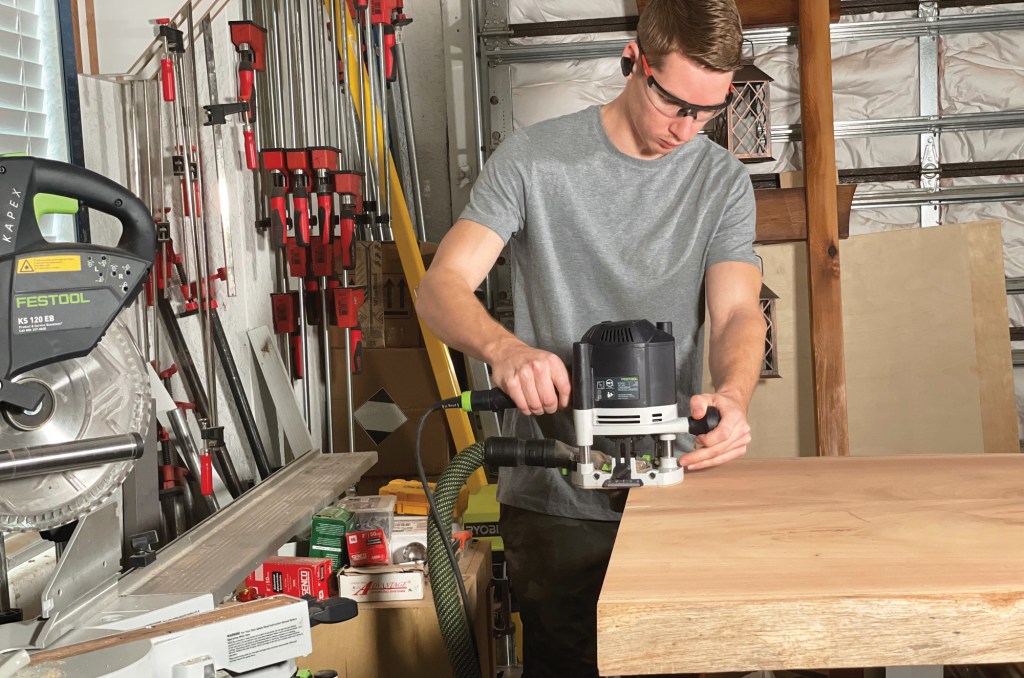
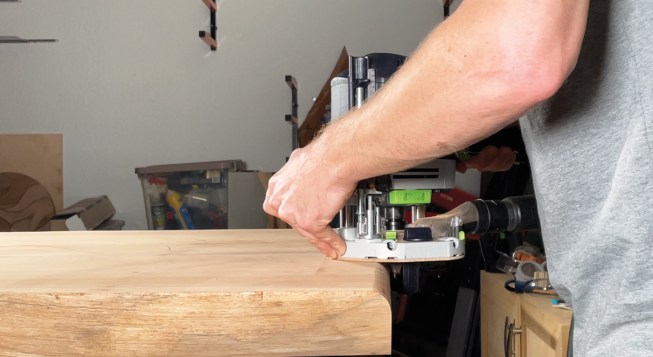
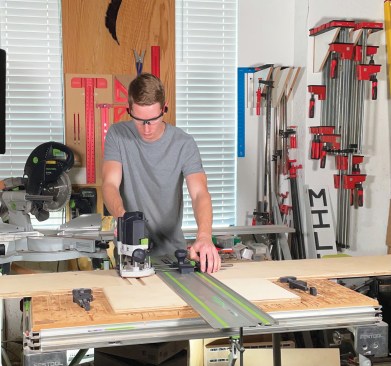
Full-size and mid-size routers offer the most power and versatility, but compact routers—which come in both corded and cordless versions—are capable of most tasks on both the jobsite and in the workshop. Whenever using a router, the author wears safety glasses and ear buds that also provide hearing protection.
I use my trim router for smaller mortises and general template work because it’s easy to control, which also makes it a perfect entry-level router. I like to use it with smaller bits, like a 1/8-inch-diameter round-over where I can just set the bit height and get to work.
Most mid-size routers can be used with either a 1/4- or 1/2-inch-diameter collet (some brands also include an 8mm collet with the tool). This versatility allows for a wider range of bit sizes—and can save money otherwise spent on duplicate bits with different shank sizes. Rated at 1.5 to 2.25 hp, these routers have plenty of power to turn the majority of router bits. They’re common in woodworking shops and are a great, all-around choice. Whenever I tackle a large dado in a built-in, ease the edge of a table with a large, 3/4-inch-diameter round-over bit, or mount the router in a router table, a mid-size router is my go-to choice.
Many mid-size routers are available in combo kits that include both a fixed base and a plunge base. A plunge base offers full height adjustment similar to a fixed base, but it’s usually easier to set and can be dialed in to thousandths of an inch. I commonly use a plunge router when I start a cut in the middle of a workpiece, such as when mortising a pocket door slab that has flush-mounted hardware. The plunge ability allows me to slowly and safely lower the spinning bit into the material with the router base firmly planted on the work surface. Once the plunge cut has been made, a quick turn of a knob or lever locks the router height in place. After the cut is finished, the bit can be easily retracted out of the material.
Most plunge routers have a lever mechanism to raise and lower the bit, but I prefer a twist knob, as on Festool routers. The knob gives me more control when I’m locking or unlocking the base and can also serve as a handle for more control over the tool.
Depth-of-cut adjustment is similar on most newer plunge routers, with a micro-adjustment wheel and a depth stop turret that allows you to dial in three separate depths. The depth stop turret is underrated, but it’s indispensable on projects such as installing modern pocket-door hardware that requires mortises with multiple depths. Not only does the turret save time, but it also reduces the chances of plunging to the wrong depth.
Some combo kits include a D-handle base, which some woodworkers prefer because it has a trigger-style on/off switch. None of my routers has this style base, though the pistol grip–style side-mounted handles on my Festools come close. I like that I don’t have to take one of my hands off the tool to turn it on or off.
Fixed and plunge bases are typically available for full-size routers too, which have motor ratings of 3 to 3.25 hp. With the higher power comes much more weight; two hands are required at all times to operate these large machines, which are capable of spinning the largest router bits. While these machines are great for deeper cuts and larger bits, they are much harder to maneuver than compact and mid-size routers and can be difficult to use on small workpieces or narrow edges.
Corded vs. cordless. Battery-powered tools are common on jobsites now, but is a cordless router a substitute for a corded one? While cutting the cord has advantages, any cordless router bigger than a trim router usually struggles to push larger bits, like a 3/4‑inch dado bit or even a 2-inch-long flush trim bit. Batteries can drain fairly quickly, so several batteries are needed to make it through a typical workday. A cordless router shines, however, on a jobsite where power is scarce or not easily accessed.
On my cordless router, there is no power lock-out. To prevent the router from accidentally turning on when I’m removing the base or changing the bit, or if the battery dies while in the “on position,” I always remove the battery first.
Dust collection. When I’m outside routing a round-over profile on a deck, I don’t worry about dust collection. But routing inside a finished home—quite common for hardware installers—is a different matter. That is where dust collection is critical. Protecting a client’s home is something you can never do too well, and part of that is keeping the home and your work area clean.
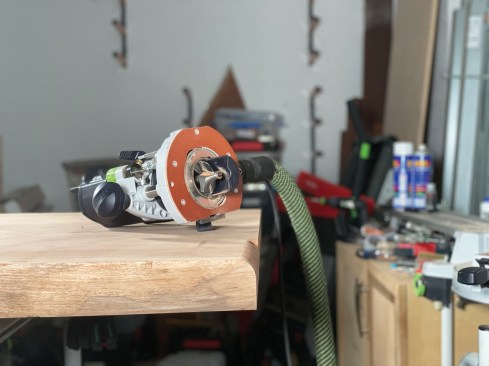
Festool offers a chip deflector accessory that can be fitted to their routers to improve dust collection.
With the right router and accessories, you’re not only keeping your client’s home clean, you’re also protecting your lungs from microscopic levels of dust. And whether you’re working in a shop, in a home, or on a jobsite, removing sawdust at the source keeps your router bit cooler. Heat can lead to premature dulling of the cutter and cause burning marks on the wood.
But there’s always a trade-off. Dust shrouds greatly improve sawdust collection, but they can make the bit hard to see. Some routers have a small slide that opens up the shroud for better viewing. Another handy feature for working in dimly-lit areas is built-in LED lighting, which most brands—with the exception of Festool—now seem to offer.
The best choice. Over the years, I have bought many routers, both corded and cordless, some with dust collection and some without. When working in the shop or a finished home, I typically use the router with the best dust collection.
If dust collection isn’t a priority for you, keep in mind that all the routers mentioned will complete the same tasks, though some tasks will be easier with a larger motor (which also means more weight). If you’re just starting out, consider a trim router. It’s light and portable, with power that can be controlled. Trim routers are more forgiving than the bigger plunge routers and are capable of completing most tasks in my line of work.
If you have some experience, a mid-size router is also a great choice. As mentioned, this size router gives you more bit choices with the option to choose between two shank sizes. Accessories like collets or dust collection shrouds are also much easier to find.
I recommend full-size routers for experienced woodworkers only. These tools are heavy and powerful, and if they’re used incorrectly, things can go wrong quickly. Start small, and work your way up as you gain experience using a router.
Bits
Most router bits are available with 1/4-inch shanks, a size that fits most routers. Bits with a 1/2-inch-diameter shank are better able to withstand the stress and torque produced by the more powerful routers and can plunge deeper into material without the risk of the shank bending or snapping.
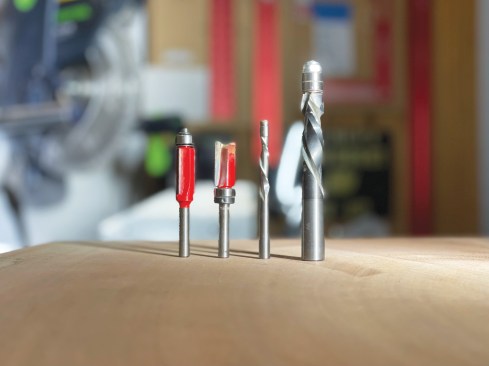
Trim routers typically have 1/4-inch spindles, and can only use router bits with 1/4-inch shanks; many mid-size and full-size routers come with both 1/4-inch and 1/2-inch collets and can use both 1/4- and 1/2-inch-shank bits.
You don’t need to spend a ton of money to get started. Buy router bits as you need them and avoid the large “bargain box” of router bits, as you will probably never use many of them. A variety of straight cut, round-over, and flush trim bits and a 45-degree chamfer bit will get you through most projects. If you find yourself using a particular router bit frequently, spend a little extra coin on the higher-end carbide versions. These higher-end bits will result in a better cut and last longer.
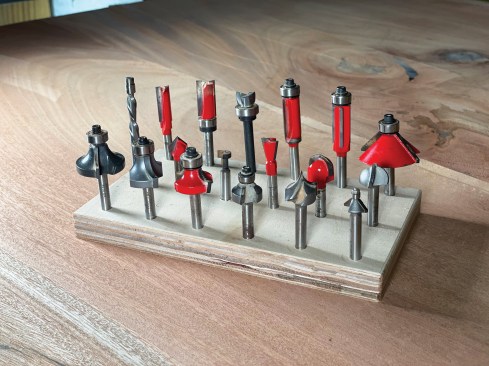
When purchasing bits, the author recommends buying them as they are needed rather than in a boxed set, which might contain bits you’ll never use.
In addition to 1/4-inch and 1/2-inch collets, some routers include a third collet size—8mm—to accommodate 8mm bits offered by some European manufacturers.
Making the Cut
When you’re installing or changing a bit, always unplug the router or remove the battery. This is a good time to inspect the bit for damage or visible dullness. When inserting the shank into the collet, don’t bottom it out but leave a gap of about 1/4 inch between the end of the shank and the spindle as you tighten the collet nut. Some routers require two wrenches to loosen and tighten the collet, while Festool and many other manufacturers now equip their routers with some sort of spindle lock mechanism, which is a lot faster and easier to use.
Unless you are cutting a large workpiece such as a slab or tabletop, make sure the material is secured to your workbench. Friction mats and bench dogs enhance holding ability.
For the safest operation, the router should be fed into the workpiece against the rotation of the bit. Going with the direction of the bit is called “climb cutting”; it’s an easy way to lose control of your router and can be very dangerous. For example, if you’re looking at your router from the top as the router base is sitting flat on the work surface, the bit rotates in a clockwise direction. If you are routing the face of a board or the outside of a frame, you should be routing from left to right in a counterclockwise direction. However, when the workpiece is between you and the router, such as when you’re rabbeting a cabinet door frame for a panel, the router needs to move from right to left, so that the bit is always being pushed into the cut.
Never turn on the router with the bit making contact with the material—doing that can bend the shank of the bit or even the router itself. The same rule applies when finishing the cut: Make sure the bit has cleared the workpiece before you shut off the router, then let the router bit come to a complete stop before you place the router on your workbench.
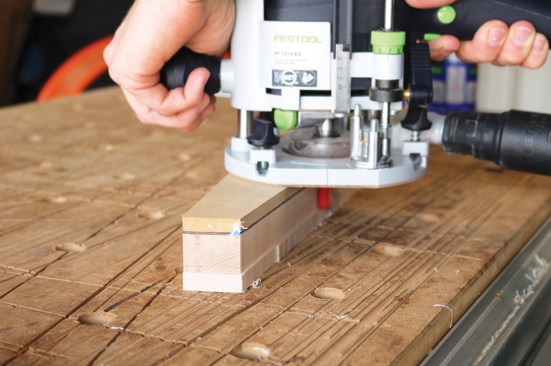
Profiles. Routing a profile on the edge of a board is an easy technique commonly used in both finish carpentry and furniture making. Examples include rounding over the front edge of a shelf or cutting a top profile on baseboard. To guide the cut and ensure that the profile is uniform throughout the entire workpiece, I prefer to use profile bits equipped with a bottom-mounted bearing. Before making the cut, I make sure the edge of the workpiece is smooth and free of bumps or voids—by running sandpaper along it, for instance—as the router bearing will follow this surface exactly. When removing a lot of stock or using large profile bits, take several passes, adjusting the height lower after each pass, to help prevent burn marks or tear out.
Before cutting an edge profile with a router bit fitted with a bottom-mount bearing, the author sands the edge of the workpiece to ensure that the bearing has a smooth surface to follow.
When a profiling bit reaches the end of the material, it can “fall off,” which can distort the profile. To prevent this, add a scrap piece of wood, of the same thickness as the workpiece, at the end. While routing extra material is an easy method, it isn’t always an option.
Dados and rabbets. Commonly used in cabinetry, furniture, and door making, these cuts are fantastic for making strong joints. I often use dados to support shelving, not only because they provide plenty of strength to support the weight of the shelf but also because locking the ends of the shelving into dados cut into the shelf supports helps prevent the wood from cupping.
To maximize strength, a dado joint requires a snug fit. For optimum strength, the width of a dado must be just a few thousandths of an inch greater than the mating piece. An easy way to achieve this result is by using dedicated cabinetry straight cut router bits called “undersized dado bits”.
To ensure a snug fit when cutting dados in shelf supports, the author uses a slightly undersized straight cut router bit and guides the router with a Festool guide stop and track.
A few other techniques and jigs can be used when making dado or rabbet cuts, but my preferred method is using Festool’s guide rail and guide stop (model 492601). I find this method to be very safe, as I can clamp the guide rail to the workpiece and keep a hand on the router and guide stop.
Template routing. Pattern templates are commonly used in furniture making to precisely replicate pieces without sacrificing production speed; they are a great alternative if you don’t have access to a CNC machine. A template is typically made from scrap wood or MDF and then placed either over or under the workpiece. Then, with either a top- or bottom-bearing flush trim router bit, you can follow the template exactly, allowing you to make identical pieces.
To make duplicate table-top supports, the author first makes a pattern, using it to trace the support’s outline on the workpiece, which he cuts out with a band saw. Then he uses double-sided tape to attach the pattern to the workpiece and finishes cutting it out with a flush trim bit that has a top-mount bearing.
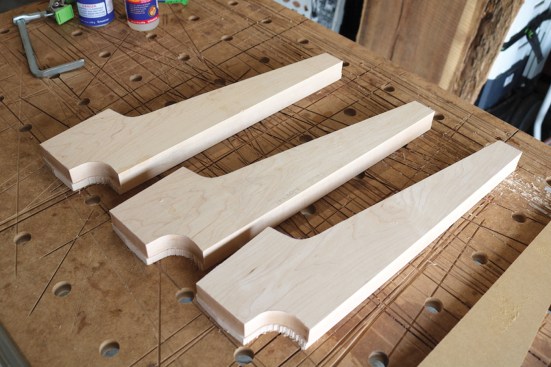
After making the initial cut, the pattern can be removed from the stock and the cut can be completed using the same flush trim bit.
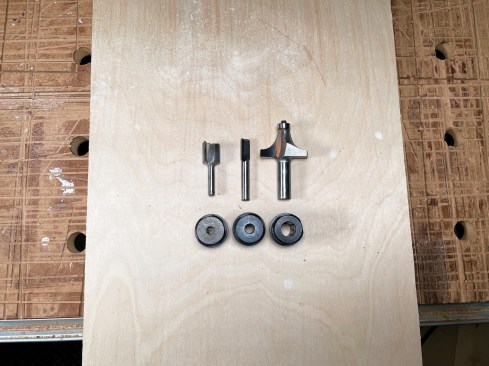
Templates are also great for mounting door hardware, especially when that entails mortising flush-mount pocket door pulls. The template helps me to accurately place the mortise, while it gives me fast and consistent results, along with less chance of making a mistake. On the jobsite (or in the shop), a door hinge template allows you to make precise shallow mortises for hinges on doors, as well as for locks. These kinds of templates have saved me hours of time.
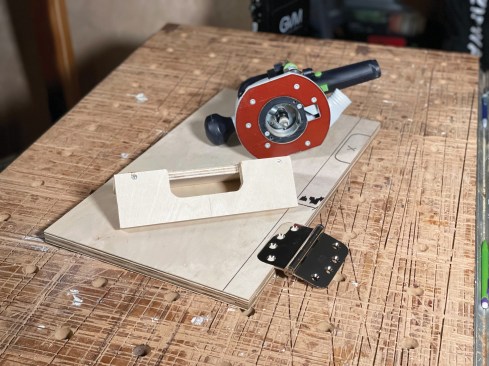
For cutting mortises for door hinges, the author uses a simple plywood template that he fastens to the workpiece with double-sided tape.

The template is sized to fit the hinge template router bit, which typically has a short cutter-to-bearing distance since most hinges aren’t very deep.
Maintenance
I like to keep my routers running like well-oiled machines, literally. The router has a few moving parts, such as the spindle, and on the larger plunging routers, plunge tubes. A quick spray of white dry lube can keep these parts moving swiftly without sawdust sticking to them like it does to traditional oil lubricants. Any overspray can be easily wiped off with a rag once dry.
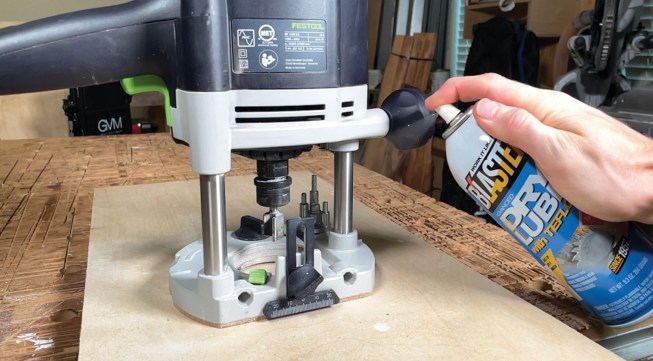
An occasional spray with a dry lubricant will prevent the tubes on a plunge router from gathering sawdust and sticking.
Router bits need a little more care than a quick shot of spray. With router bits, first inspect the cutter head for any damage or nicks; if the bit is not too damaged, it should be sharpened immediately. And just like other woodworking saw blades, router bits accumulate resin and pitch that significantly shorten their life and efficiency. This can be easily fixed with a quick soak in blade cleaner, followed by a brass brush. If your bits are clean, they cut more effectively, which translates to better results.
While the cleaning process removes pitch and resin, it also removes any beneficial oils that previously lubricated the tooling surface, so I restore those oils right after cleaning to prevent surface rust. For lubrication, I spray the sharpened and cleaned bit with a light coat of Blasters dry lube, rubbing it into the cutting surface with a paper towel.
Photos by the author.