The first step in the wall-framing process is to lay out “plate lines” that will help you place the walls straight and square.
Objective
- Demonstrate the process of laying out square lines for the placement of exterior house walls.
Prerequisite Skills
- Ability to read a tape measure.
- Ability to read house plans and transfer measurements from plans.
Tools and Materials
- Heavy duty construction tape measure
- 100-foot tape measure
- Chalk line with permanent chalk (permanent chalk is typically red or black; blue chalk can be washed off and is reserved for interior layout).
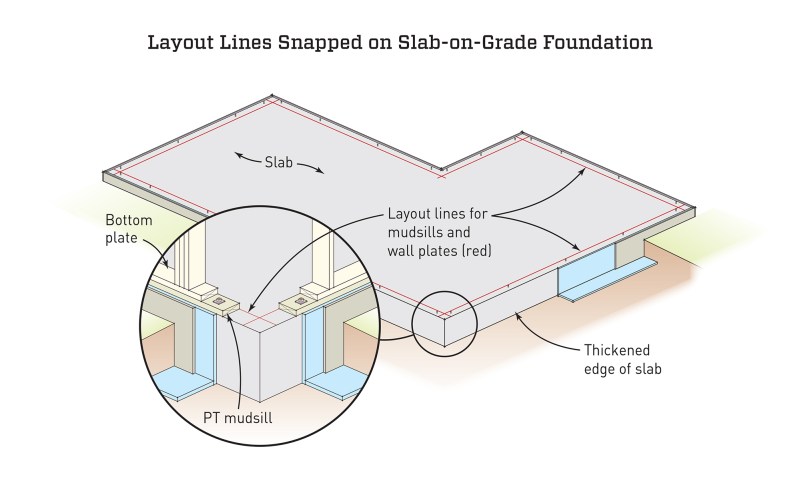
On structural slabs, framers snap out plates lines with a chalk line at the edges of the slab to guide the placement of the mudsills. Then they frame the walls on top of the mudsills.
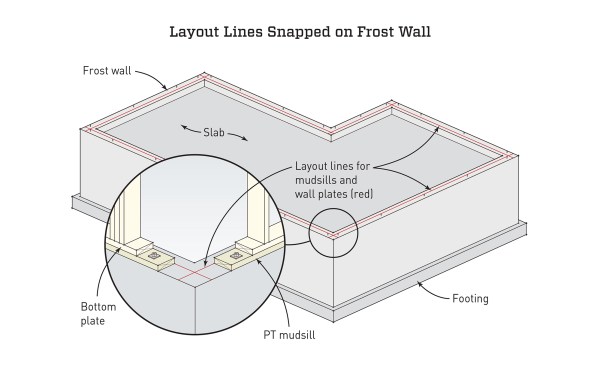
On buildings with frost walls, the crew snaps layout lines for the mudsills on top of the concrete walls, and then frames and stands the walls on the mudsills.
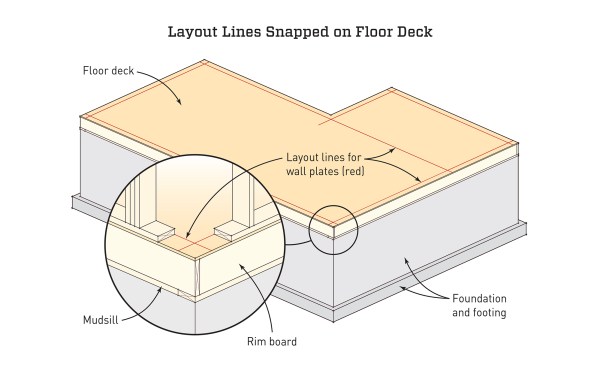
For buildings with foundation walls for full basements or crawlspaces, the framing crew snaps out plate lines for the mudsills directly on the top of the foundation walls. Then they build a floor frame, or “deck,” on top of the mudsills and snap a second set of lines to keep the wall plates true. The layout for this second set of lines is done the same way as it is done for the top of the foundation.
In this article, we show the layout and squaring process on a deck using two methods – the “diagonals method” and the “3-4-5 method.” Regardless of the method used, you need to be as accurate as possible; otherwise, you wind up with an out-of-true frame that will haunt you and every tradesperson on the project for the rest of the job.
Wall Layout Terms
Baseline: Longest wall in a house from which you take all other layout calculations.
Diagonal measurement: Measuring between opposite corners on parallel walls.
Plates: Top and bottom horizontal wall framing members.
Mudsills: Treated wood attached on top of a concrete slab or foundation wall on which framed walls or a floor system is built.
Floor or deck: Horizontal platform consisting of joists and sheathing that covers either a crawlspace or full basement that forms the initial layer for framing a house.
Diagonals Method
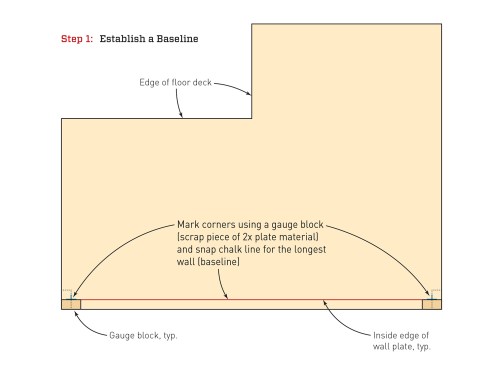
Step 1: Mark corners using gauge block (scrap piece of 2x plate material), and snap line for the longest wall (baseline).
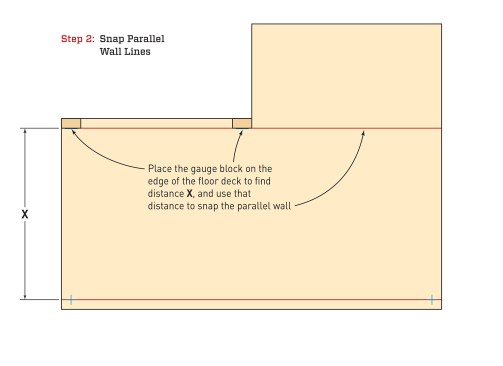
Step 2: Place the gauge block on the edge of the floor deck to find distance X, and use that distance to snap line for the parallel wall.
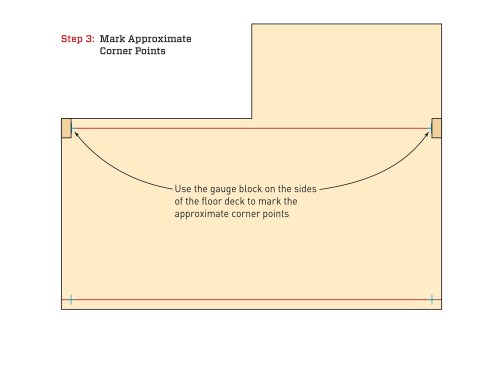
Step 3: Use the gauge block on the sides of the floor deck to mark approximate corner points on the parallel wall line.
Step 4: Measure diagonals and adjust corners until the two diagonal measurements match exactly.

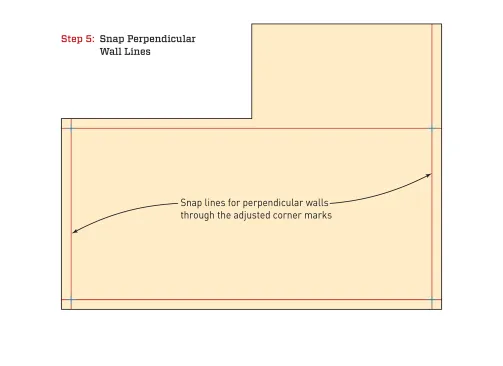
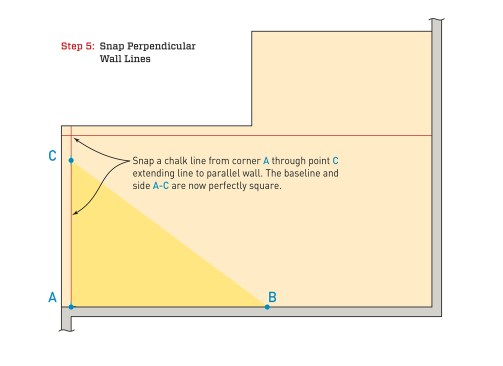
Step 5: Snap lines for the perpendicular or square walls through the adjusted corner marks.
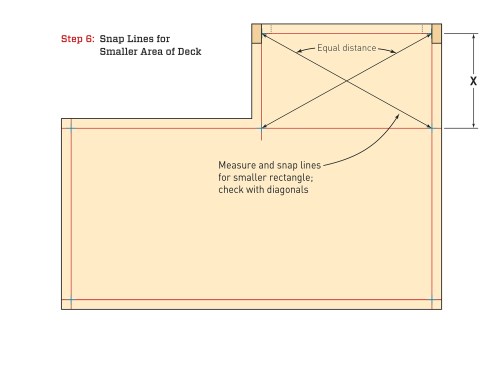
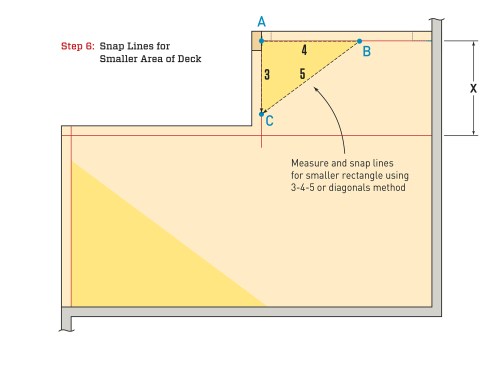
Step 6: Measure and snap lines for the smaller rectangles; check with diagonals
3-4-5 Method
Step 1: For new construction, use gauge block to mark corner points and snap line for the longest wall (baseline). For remodeling from an existing wall, use a gauge block and mark corner point A along the existing wall plate.

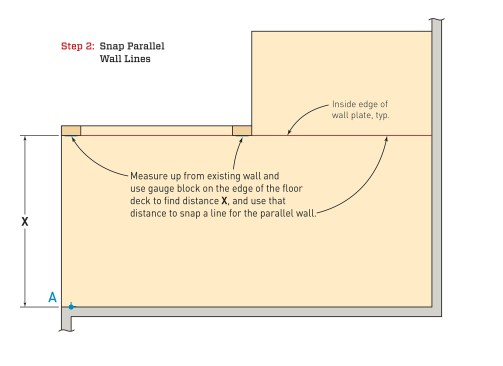
Step 2: Measure up from existing wall and use gauge block on the edge of the floor deck to find distance X, and use that distance to snap a line for the parallel wall.
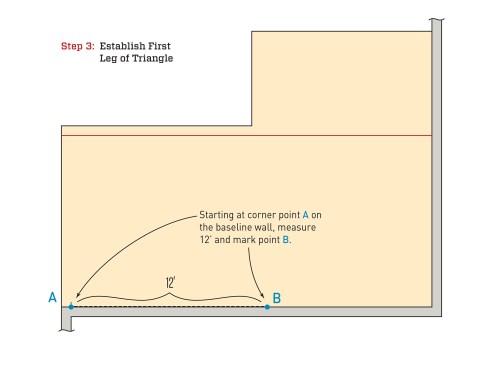
Step 3: Starting at corner point A on the baseline wall, measure 12’ and mark point B.
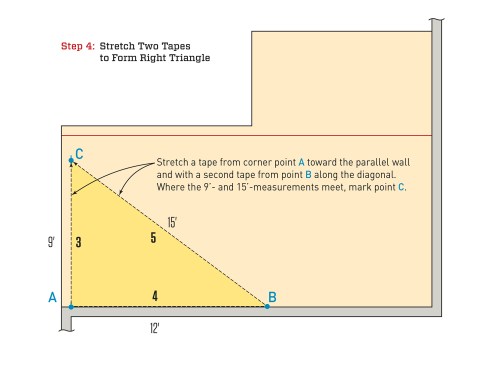
Step 4: Stretch a tape from corner point A toward the parallel wall and with a second tape from point B along the diagonal. Where the 9’- and 15’-measurements meet, mark point C.
Step 5: Snap a chalk line from corner A through point C extending the line to the parallel wall. The baseline and side A-C are now perfectly square. Measure from side A-C to define opposite wall if necessary.
Step 6: Measure and snap lines for smaller rectangle using diagonals or the 3-4-5 method
Next page: Follow a framing crew as it snaps out plates lines on a framed floor deck.