When I started out in the trades the gulf between the tools I had and the tools I thought I needed was vast. Added to that was the fact I didn’t make much money in a starting job. So, I needed to pick my spots in what tools to invest in with my limited resources. I divided my needs into categories: tools to measure and mark material, cut material, fasten that material, and finally, tools to take material apart. Once I had enough of those items to get by in the jobs I was tasked with, I was ready for the next category: tools to shape material. The first tool I bought to do this last task was a laminate trimmer, also called a palm router or trimming router.
My intent in this article is to share with new tradespeople how to assess their tool purchases as their skills and needs advance. I’ve kept in mind that budgets, unlike tools available, are limited. And I’m using the example of my first specialty tool, the laminate trimmer, and sharing some basic tips on what to look for and how to use it.
The categories of tools I just listed off could be applied loosely to any trade. In my case, I was starting out as an apprentice carpenter working on renovations and some custom homes. So it was in that environment that my choices for tools evolved. If you are working on a roofing crew or a crew that specializes in framing, then the some of the items you’ll need will overlap (a tape measure for instance), but there will also be items that aren’t as interchangeable (like an oversized circular saw). The idea is to let your purchases evolve organically with the work you are doing by choosing tools that make the work better and/or easier. Investing in a biscuit joiner, no matter how neat it looks, is not going to help you in roofing or framing. As my grandmother used to say, “You can’t have everything, where would you put it?”
With tool options (as with most things these days), we are overwhelmed with both choice and marketing messages, so the first piece of advice is to keep your choices practical. That way you won’t be left with an under-used tool that represents stranded money. The next piece of advice, which is repeated often, is to buy the best tool you can afford. Here is where discipline is important. The $300 hammer is the example I often come to. Yes, it’s lighter and very cool, and in many ways the best offering for the tool. However, putting that much of your capital here to start may leave you short on all the other things you’ll need. Ask yourself honest questions. Will this improve my work? Will I use it often enough to make me money? Will this make the work easier? If those answers are yes, then look at the price points and features of that category. Then choose the best you can within your budget.
Choosing My First Specialty Tool
In the case of the router, I was starting to do more door and hardware work. Cutting out hinges or finger pulls using hand tools took too long. I was also running into jobs where a consistent eased edge, sometimes with a bit of detail, was required for half-wall caps. Using the old abused company router was a stopgap but did not produce great results. My skills had grown to where I could do this work, and now my tool library had to grow to allow me to do more of it and better.
I could have purchased a full-sized ½-inch router and had greater power and cutting bit options as well as the ability to do hinge recesses and the like. But my job was not growing in that direction. Also, my skills were not there yet. Investing in something that I was not ready to use to its fullest could result in frustration and a poor outcome. I didn’t want to spend more money on more tool than I needed for the foreseeable future, and the work I was doing was not in a shop with space for a lot of setup.
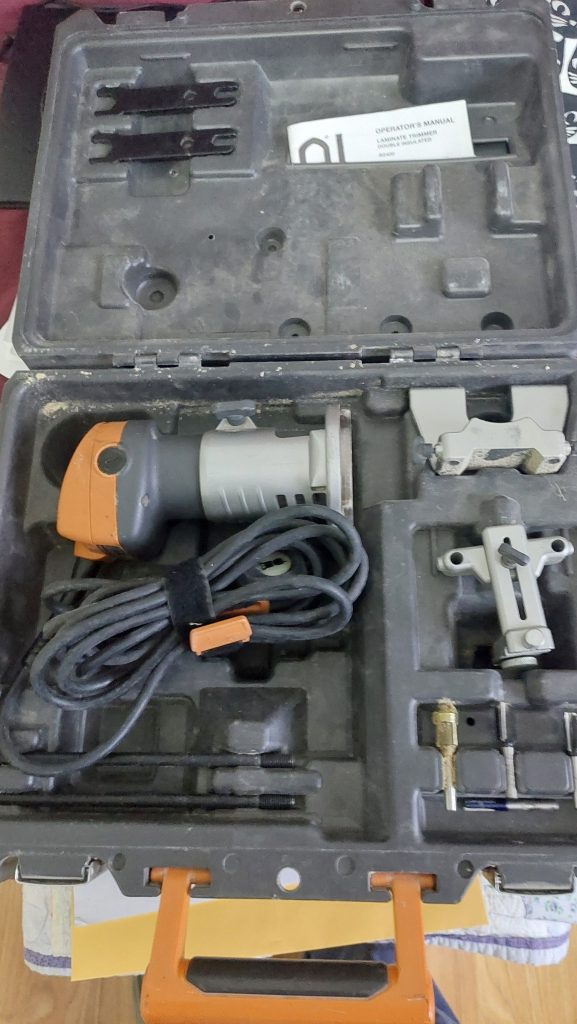
I needed something smaller and more portable, something more suited for onsite or in-place work. The laminate trimmer with its ¼-inch collet, one-handed operation, and modest cost made more sense for what I was doing and what I would be doing going forward.
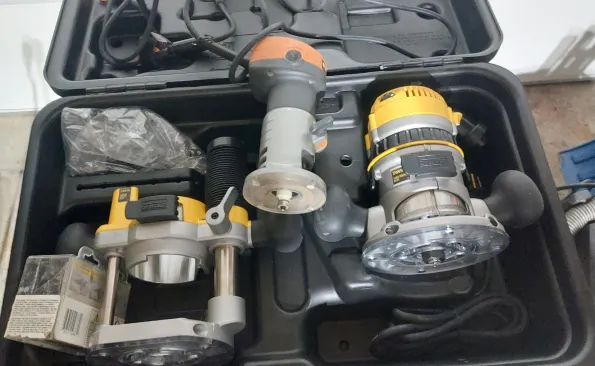
There were four or five different manufacturers that made this type of tool, so I began comparing features and prices. This isn’t a tool review so I won’t go into the specific details of each model, and the information would be out of date anyway. (This was 2002 and cordless routers were not even on the horizon then!) The general factors though were good balance, soft start (a must), a good view of the cutting area, power, and then price. It would have been nice to have a built-in light on offer, but again this was a while ago and therefore still the dark ages (pun intended).

Marc Forget
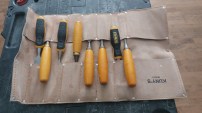
Start small then build up your collection as you need. A few bits will do most jobs.
Some of the options I looked at were more focused on cutting for countertop laminate and weren’t versatile enough. Others were too expensive, well north of $200, and I had a hard budget of under $200. This left me with a Bosch model or a Ridgid, and while I liked the Bosch a little bit more, option-wise the Ridgid was good enough and was cheaper. The point here is that I made a compromise. This is not a bad thing if whatever you end up buying does the task. The best tool you can afford, right? The tradespeople you admire online didn’t start with the fanciest tools. They learned and earned to a point where they could have the latest and greatest. Even then, in many of their cases (I know because I talk to a lot of them), the simpler cheaper tool they bought long ago is still the go-to for their work.
What could I do with the router I bought? Not much until I got a set of bits. Keeping in mind what I would be doing with the router, I purchased a small selection of profile bits (roundover, chamfer, and ogee), along with a couple of straight cutting bits. The other more expensive profiles could wait until I needed them and knew what I was doing.
Using The Router
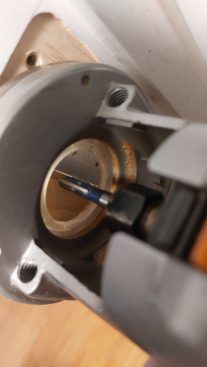
Since I’m using the palm router as an example of tool choice, I want to offer some tips for using it. First, the bit selected is placed into the tool and tightened into the collet (making sure nothing is plugged in or the battery is not in place at this time). Make sure this is tight—a loose bit will damage your work at best, or will fly off and damage you at worst.
Next, we set the depth. Let’s take the case of recessing for a hinge. I take the hinge and set it flat on the router base and adjust the base until the amount of bit protruding equals the thickness of one hinge leaf. You can also do this with a sliding combination square, or in the case of a jamb or door that has a recess already, use that existing pocket to line up the tool to the depth needed for its new matching side. Note that I am still not connected to power.

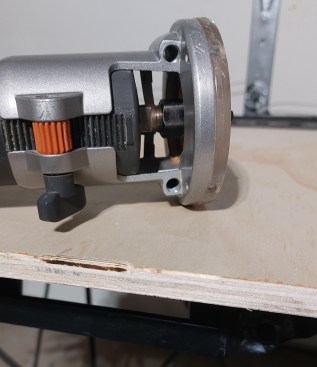
Marc Forget
Setting the depth for the hinges? Just use the hinge as a guide….
Now we power up the tool and run a test on a piece of scrap, confirming with the hinge that the result will be flush. Safety glasses and ear protection are highly recommended. If you are doing a profile this same advice should apply. Test first, as a small change in depth will change the result a lot. When doing the test, and also when doing the actual work, make sure the cutting bit is not in contact with the workpiece when you turn on the power. The edge of the tool base can be held firmly on the work surface, but if the bit is touching at start-up you can get burning or the tool will jump back at you. The “hold firmly” suggestion is because, as the tool spins up, the torque it generates will want to twist the tool in your hand.
On your jamb or door you will have marked the outline of the hinges (after measuring where they need to be located). I do this using the hinge as a template and marking it in pencil. I then go over this line with a knife to help prevent tear-out while routing. Take small passes, about half or less the width of the bit, and work up to the line you want. If you try to push the tool to take out full-bit-width swaths of material, you can bind the tool or overshoot your marks. Don’t be afraid to check with your hinge as you go: If you started small you can still correct any depth issues and go back. Work in small passes left to right until you are done. The left to right is important, particularly if you are new to the tool, because of the direction of spin of the bit. Going with the spin, right to left, can cause the bit to grab and pull itself along the material, potentially going further than you want and burning the wood. This goes for doing a profile on an edge too. Travel around the workpiece counterclockwise or the tool will want to pull you along.
Minor note: If I put the tool down or am away from it while I hang that door or install the workpiece, then I always double-check the depth setting before I start a new set. A bump, or just someone moving my kit out of their way, can change the setting. It’s rare once everything is tightened down, but I have had it happen.
Marc Forget
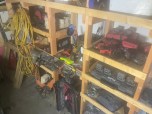
My more expensive kit rarely gets used, and it wasn't purchased until the old one gave me enough confidence and earned the money to pay for it.
Once I got comfortable with this type of uncomplicated task with a simple tool, I was able to move on to more complex tasks, using rabbeting bits for shelves or boxes, V-groove bits for details, and flush bits with a bearing guide that follows along a template. The tool did not change, just the work I could do with it. But it started with keeping things simple and affordable. The work described here and the jobs that came after would not have been noticeably improved by a fancier tool. It was learning to use what I had that improved my skills and the outcome.
I understand the urge to get the best, the newest, and the tool you saw in the latest reel. However, I have never seen someone buy the latest thing and then turn into a master craftsman. If you talk to any one of the people who contribute to this magazine, I am 99.9% sure they will tell you the same. My 20-year-old router has made me more money than the $110 it cost—many times over.
When you just are starting out, grow your tool kit to what is reasonable for the work you do, the pay you make, and the skills you have. Overpaying now or chasing hype will only leave you poorer and resentful of the trade you chose. So don’t get hung up on what you have; work more on what you can do.
Keep the conversation going—sign up to our newsletter for exclusive content and updates. Sign up for free