Tradesmen have been applying decorative finishes to freshly placed concrete for as long as the material has existed (see “Decorative Concrete,” 1/03). By coloring and texturing concrete surfaces, skilled applicators can produce concrete floors that are indistinguishable from stone, brick, tile, and slate. Dyes and stains can create murals or abstract patterns while maintaining the look and texture of a monolithic pour. The color typically goes into the surface of the concrete, so the finished product is as durable as a conventional slab.
In recent years, the development of new polymer-modified concrete overlays has made it possible to apply decorative finishes to existing slabs. It has also made it possible to put concrete floors in structures that won’t support thick layers of conventional poured material. Our company has been using these thin toppings to produce decorative finishes for more than ten years. Polymer materials allow us to create decorative concrete floors in rooms where it’s neither practical nor economical to use conventional concrete.
What Is Polymer Concrete?
Conventional concrete contains Portland cement, water, and mineral fillers such as sand and aggregate. When the cement hydrates, the ingredients bind to form a solid matrix. Polymer-modified cement concrete is concrete that has been modified by replacing some of the Portland cement with ingredients that react to form a synthetic organic polymer when the material is mixed. (A polymer is a type of plastic that is produced by chemically linking a large number of chemically separate molecules into larger stable molecules.) The most common additives contain latex polymers, which are the among the least expensive. This family of polymers includes poly acrylic latex (methyl methacrylate), poly vinyl acetate, polyvinylidene chloride, styrene-butadiene copolymer, and nitrile and natural rubber. Other polymer additives are based on epoxy or polyester that has been cross-linked to styrene. Each type of polymer produces concrete with distinct physical properties. Depending on the formulation, the additives might produce material that is stronger, less porous, more flexible, or faster curing than conventional concrete.
Most of the polymer concrete manufactured is used to resurface existing concrete slabs. It’s expensive and messy to remove and replace an existing concrete slab. So if the existing slab is structurally sound, it’s cheaper and easier to top it with a thin polymer overlay. Common applications include the repair of spalled or damaged surfaces on bridge decks, parking garages, and factory floors. Polymer concrete is much more expensive than Portland cement, so it’s usually applied as a thin overlay, typically between 1/8 and 1/2 inch thick. Some products are formulated to go on thicker, while others can be taken to a feather edge.
Many polymer overlays are designed specifically for producing decorative concrete floors. Some products can be stamped or textured; others should be finished smooth. All can be colored with stain or dye. Most overlays are designed to be used on slabs, but some of them can be applied to plywood subfloors, which is how we create decorative floors in structures that won’t support a thick layer of concrete. For example, a 2-inch slab weighs 24 pounds per square foot, while a 1/2-inch overlay weighs only 6 psf and can be installed flush to the existing floors in adjacent rooms.
Substrate Prep
Polymer overlays are tough, but they’re only as good as the substrates they’re applied to. The toppings will crack or delaminate if you put them on floors that are dirty, overly flexible, or structurally unsound. Good prep work is a must, so if you attempt an overlay job, be sure to carefully read the instructions for the material you are using.
Slabs. Some manufacturers recommend that you acid-etch concrete substrates, while others specifically prohibit it. The concern there is that you won’t properly neutralize all the acid and some will remain to off-gas and break the bond between topping and slab. We neutralize acid by flooding the surface with a solution of baking soda and water or ammonia and water. We remove the solution with a wet vac or mop and then repeat the process with clean water. Another way to remove contaminants is to use a stiff broom to scrub the surface with a cleaning agent or cleaner degreaser.
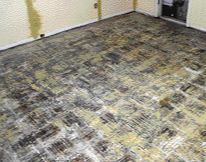
We are frequently asked to apply decorative overlays on slabs that are covered with linoleum tile. Typically, the tile is attached with cutback adhesive. We start by manually scraping the tile and as much mastic as possible off the slab. If the slab is in good shape, we’ll attempt to remove every bit of mastic. Sometimes we can get it all off by scraping alone; other times we have to use chemical strippers. Occasionally, we’ll pay a sub to bring in a shotblasting machine, which shoots a large number of small steel balls into the surface of the slab. It’s like sandblasting, but removes more material — from 1/16 to 1/8 inch off the top. The bottom of the machine is enclosed to prevent the balls from escaping; an internal vacuum collects the dust. Shotblasting is one of the best ways to create a good bonding surface.
Isolation membrane. Unless you take preventive measures, the cracks and control joints in the existing slab will telegraph through the new polymer topping. The overlay might hide them for a while, but they will eventually show. When the existing slab has control joints, we cut new ones at the corresponding locations in the polymer topping or install a crack isolation membrane (NobleSeal CIS, Noble Co., 800/878-5788, www.noblecompany.com). We use the membrane when the location of existing control joints would interfere with the decorative pattern on the finished slab. Control joints are still required, but the membrane allows you to choose where to put them. We also use the membrane when an otherwise sound substrate has a crack.
Primer. Once the substrate is clean and dry, you need to apply a specified primer or bonding agent. These materials can be brushed, rolled, or sprayed onto the surface. With shotblasted or especially porous concrete, we may have to use two coats. Polymer overlay can be applied directly to the primed concrete substrate. If a crack isolation membrane has been installed, it has to be coated with the bonding agent.
Wood-framed floors. Wood-framed floors have some give, so we always inspect them carefully with an eye toward future problems. Because the overlays are relatively light and flexible, most floors that are framed to code are strong and stiff enough. The subfloor should be of the required thickness and material per the overlay manufacturer — usually 3/4-inch plywood. It should be solidly nailed or screwed to the joists. Some manufacturers recommend adding a layer of 1/2-inch plywood underlayment, with staggered joints. We always use crack isolation membrane on wood floors, with diamond lath nailed over it.


