by Mike Guertin
In the days after a nor’easter or tropical storm hits Rhode Island’s south-facing coast, I invariably receive a flurry of calls to investigate “leaking roofs.” Most of those “leaks” are the result of wind-driven rain entering the vents high on the roof — typically through the ridge vent and gable-end vents, though occasionally through the soffit vents as well.
In my efforts to reduce these callbacks, I’ve tried a variety of products, like low-profile or baffled ridge vents and aggressive louvered gable vents, but none of these consistently keep out moisture. A product that may resist water penetration on one house inevitably leaks on another. This may be due to differences in roof pitch or in the angle of the roof to the storm’s force. I haven’t always been able to determine the exact cause, and I’ve yet to find a foolproof, one-size-fits-all solution. However, in the last eight years of working on this problem, I’ve come up with some workable strategies, while also dancing across the lines between what building codes and shingle manufacturers want and what actually works.
Navigating Codes and Warranties
Since most of the storm-driven water intrusion I’ve seen has come through the holes we purposely put in roofs (gable, ridge, and roof vents), I avoid them whenever possible. In other words, I often prefer not to vent coastal roofs. But that’s not always so simple in practice. The International Residential Code (IRC) has two provisions that “require” roof ventilation. The first, in the “Roof Ventilation” section R806, explicitly requires ventilation for attics and cathedral ceilings. The second, R905.1 in “Requirements for Roof Coverings,” instructs builders to follow the manufacturer’s installation instructions (which, of course, usually require ventilation). To calculate the amount of roof ventilation required, see Roof Ventilation by the Numbers.
Roof ventilation is required by building codes and manufacturers for a few reasons. For starters, ventilation cools the underside of the roof sheathing, which prolongs shingle life and reduces heat gain in the living space. Ventilation also reduces the chance of ice damming and flushes out moisture vapor entering the attic or roof assembly through air leaks from inside the house.
In order to install an unvented roof, I need a cooperative building official who’s in tune with building science research on unvented “compact” or “hot” roof designs. Unvented roof designs aren’t new, and they’ve been used successfully for many years. The key to their problem-free installation in a heating climate is to create an airflow barrier/retarder that prevents leakage of warm, moist air into the roof assembly during the heating season. Stop the vapor-laden air from reaching a condensing surface (the underside of roof sheathing, for instance), and you won’t have condensation. I use a two-layer system to accomplish this: After insulating, I cover the ceiling joists and truss bottom chords or underside of the roof rafter drywall with an airtight vapor barrier. Then I carefully seal any penetrations through the drywall.
Most officials to whom I’ve presented unvented roof designs have been amenable to the idea and have approved my plans. When officials have concerns and don’t approve my alternative designs, I go to Plan B: I meet the code by using soffit vents at a 1:150 vent space-to-ceiling area ratio. And I still install an airtight ceiling, knowing that the soffit vents alone will do little to evacuate moisture vapor.
Even with an obliging code official, there’s still the sticky point of shingle manufacture warranties. If you don’t follow the instructions, you void the warranty, despite a large body of evidence that climate, roof exposure, and shingle color have a much greater effect on roof temperature than ventilation does. So I resign myself to the fact (and explain to my clients) that installing an unvented roof may void the roofing material warranty.
Soffit Leaks
In my experience, soffit vents let water inside only when the plane of the soffit is at a level equal to, or above, the wall top plate and ceiling inside, and when the vents are strip or rectangular style. This is most common with raised-heel trusses, but may also occur when a bottom chord overhangs a truss. I’ve never seen water enter soffit vents on cut roofs or top-chord overhang trusses in which the soffit is below the top plate and the ceiling plane. I suspect that some wind-driven rain gets into the soffit in the two latter cases, but there’s not enough air pressure to drive it up and over the wall. Instead, the water drains back out through the vents or at the soffit joints.
With this in mind, I detail vents differently when the soffits match the wall-plate line. I start by leaving a 1 1/2- to 2-inch space between the inside edge of the soffit panel and the wall. After the siding is installed, I mount Cor-A-Vent S-400 soffit vent strips (Cor-A-Vent, 800-837-8368, www.cor-a-vent.com) over the top edge of the siding and cover it with a 1×4 or 1×6 frieze board, leaving an attractive shadow line (Figure 1). There are a number of vent details you can devise using S-400, depending on the exterior trim details of the house. Alternatively, you can use a behind-the-gutter detail using DCI Products’ FaciaVent (DCI Products, 800-622-4455, www.dciproducts.com). In both cases, the products and details create vent paths of several inches at right angles to the soffit that resist water intrusion.
Figure 1. To prevent wind-driven rain from entering the soffit, the author details soffit vents as shown here.
Custom Gable Vent
Remodeling projects often present one problem I can’t overcome: an existing ceiling that isn’t airtight. I try my best to seal penetrations, such as lighting fixture boxes, wall-plate joints, and other obvious air-leakage points. On projects that include replacing old roofing, I know I’ll need to include adequate ventilation to flush out moisture, especially when we’re installing ceiling insulation. Soffit vents are a given, but I want to include vents higher on the roof to maximize the ventilation’s effectiveness. For this, I borrow a gable-vent design I found on an old shingle-style home (Figure 2).
Figure 2. On remodels where the ceiling plane is too porous to ensure a safe “hot roof,” the author builds this eyebrow gable vent.
To create this gable vent, I first side the wall to a course about 4 feet down from the gable peak. Then I take a 1×10 or 1×12, and cut it into a bow about 3 feet wide with an oblong hole in the center, leaving 1 inch to 1 1/2 inches of material around the perimeter, as shown in Figure 3. After covering one side of this bow with insect screen, I mount it to the wall about 1 inch up from the bottom of the next shingle course. About 8 inches above the bow, I cut a 12-inch hole through the sidewall sheathing.
Next, I cut one or two tapered 2x “rafters” with a base that matches the width of the bow. The rafter supports the middle of a 1/4- to 3/8-inch plywood cover that forms the shape and structure of an eyebrow. This custom gable vent provides a right-angle vent pathway for air that proves reasonably weather resistant. Still, such a high gable vent needs to be coupled with soffit vents to provide effective attic ventilation.
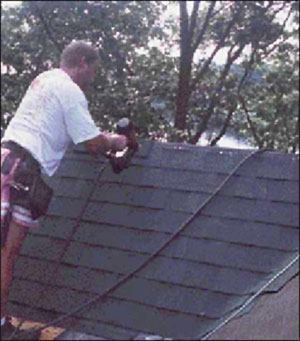
Figure 3. To create this gable vent, Guertin begins by cutting a bow like this from a 3-foot-long 1×10 or 1×12. About 8 inches above the bow, the author cuts a 12-inch hole through the sidewall sheathing, then frames an eyebrow with triangular 2x rafter blocks. This structure will be wrapped with 3/8-inch plywood and shingled over, as seen in the photo above.
Hot-Climate Roofs
My experience is primarily in coastal heating climates, but what about coastal roofs in cooling climates? Typically, builders don’t worry as much about moisture vapor entering the roof assembly from within the house. Instead, they have to worry about thermal moisture drive.
Moisture condenses on the roofing as nighttime surface temperatures drop. Capillary action wicks water between the shingle laps, and when the sun returns the next morning, and roof surfaces heat up, driving the water between the shingles away from the surface, through the underlayment, and into the roof sheathing. To prevent moisture from being driven into the roof, Joe Lstiburek of Building Science Corporation, a leading building-science consulting firm, recommends using a less permeable roofing underlayment, particularly over unvented roof assemblies where thermal-driven moisture can get trapped and is slow to dry. (For more information, see the Building Science Corp. article “Unvented Roofs, Hot-Humid Climates, and Asphalt Roofing Shingles,” www.buildingscience.com resources/roofs/unvented_roof.pdf.) Several new roofing underlayments meet the permeability criteria for this application, including Tri-Flex 30 (www.flexia.ca/products/building/construction.asp), Typar RoofWrap 30 (www.typarhousewrap.com/roofwrap.html), and Titanium-UDL (www.interwrap.com/titanium/Ti_FCPhysical.html). ~
The standard roof ventilation requirement used in building codes and asphalt roofing manufacturers calls for 1 square foot of “net free ventilation area” for every 300 square feet of ceiling area (attic floor area) when vents are evenly divided — half of them high on the roof at the ridge, gable, or a high roof, and half low on the roof at the eaves. The alternative is to vent only with low (soffit) vents, by doubling the “net free vent area” to 1 square foot per 150 square feet of ceiling area. All manufactured roof venting products (soffit vents, venting drip-edge, gable vents, roof vents, and ridge vents) are labeled for “net free vent area.” In the case of soffit vent strips and ridge vents, this capacity is listed in square inches per linear foot. For fixed-sized units, the capacity is published for the entire unit. Often it’s necessary to convert the square footage of vent area to the published net free vent area in inches to make sure you are meeting the requirement. For example, a house with a 28-foot by 40-foot ceiling has an area of 1,120 square feet. With soffit vents only, you’d divide that area by 150 square feet to come up with the “net free vent area” in square feet (1,120 / 150 = 7.47 square feet). But because the net free vent area for most vents is listed in square inches, I find it easier to convert the calculated square foot vent area into square inches. There are 144 square inches in a square foot (12 inches x 12 inches), so I multiply 7.47 x 144 = 1,075.68 square inches of net free vent area. Using a strip vent product listed for 9 square inches per linear foot requires you to make only one simple division calculation: 1,075.68 / 9 = 119.5 linear feet of vent. — M.G. |
Promising Future
One product I have not used, but look forward to trying, is X-Treme X-5 from Cor-A-Vent. The X-5 has a hinging baffle that closes and seals the vent opening when winds exceed 10 mph, reportedly preventing wind-driven rain and snow from entering. The manufacturer claims that the harder the wind blows, the better the vent seals. And while a storm’s force closes the windward side of the vent, the leeward side remains open. — M.G.
Mike Guertin is a builder and remodeler from East Greenwich, R.I., and the author of the book Roofing with Asphalt Shingles (Taunton Press, 2002).


