For any number of reasons — energy efficiency, aesthetics, easier operation — many homeowners eventually decide to replace their old windows. Sometimes they make the move as part of a larger remodel; other times, it’s a stand-alone job.
Generally speaking, there are three kinds of replacements: full-frame, sash, and insert. Over the years, my remodeling company has used all three methods, but we prefer insert replacements. They do the best job of maintaining the original look of the fenestration. Also, they aren’t as invasive or labor-intensive as full-frame replacements, and they offer better thermal performance and easier installation than sash-only jobs.
Full-Frame and Sash Replacements
With a full-frame replacement, the entire window — sash, frame interior, and exterior trim — is removed, and a new-construction unit is set within either the existing opening or a new rough opening. After the unit is installed, new interior trim — and sometimes exterior trim — is applied. Since this method is so labor-intensive, we choose it under only certain circumstances: when existing window frames or sills are rotten beyond repair; when the original windows were improperly installed; or when the customer wants a different type of window, such as a casement instead of a double hung.
In terms of material costs, replacement sash kits — which are available from several manufacturers — are the least expensive option, and they offer modern, high-performance glazing designed to match the original windows’ appearance. The problem with this method is that window frames are seldom perfectly square, so adjusting the new sash to fit the old opening can take up an inordinate amount of time. Also, we’ve found that effectively weather-stripping a sash replacement is difficult.
Insert Replacements
An insert replacement window is a double hung set into its own narrow frame (31/4 inches wide by 11/4 inches thick on the product we use). The insert fits into the space left after the sash and parting stop of a typical double hung have been removed. The existing jambs, sill interior, and exterior casings are left intact, so this process is much cleaner and goes much faster than a full-frame replacement. Because we don’t disturb interior or exterior finishes, we don’t have to worry about matching colors and trim.
Best of all, a good-quality insert replacement usually costs our customers between 30 percent and 50 percent less than a full-frame replacement and — since we don’t have to make adjustments to the sash — can be installed in less than an hour.
On the following pages, I’ll describe how we measure and install the window our company uses most often, a Marvin Clad Ultimate Insert Double Hung replacement window. Since we work mainly on houses that are at least 60 years old, our clients typically want to maintain the look of the original windows. We feel that this is best accomplished with the Marvin clad wood units. Marvin offers almost unlimited options in size, cladding color, and grille patterns. In addition, these inserts have better locking and tilt mechanisms than any other replacement window we’ve found. These qualities help us compete against the window-replacement specialists who typically push inexpensive vinyl units with far fewer options.
The one complication inherent to an insert replacement is that it narrows the sash opening by approximately 11/4 inches per side. However, few of our customers find this objectionable. Once the frame is finished, it’s hard to discern any change in appearance.
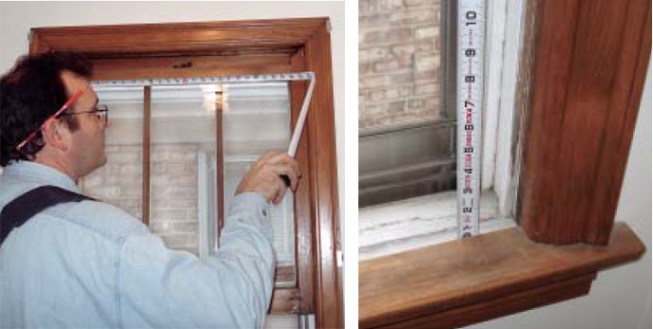
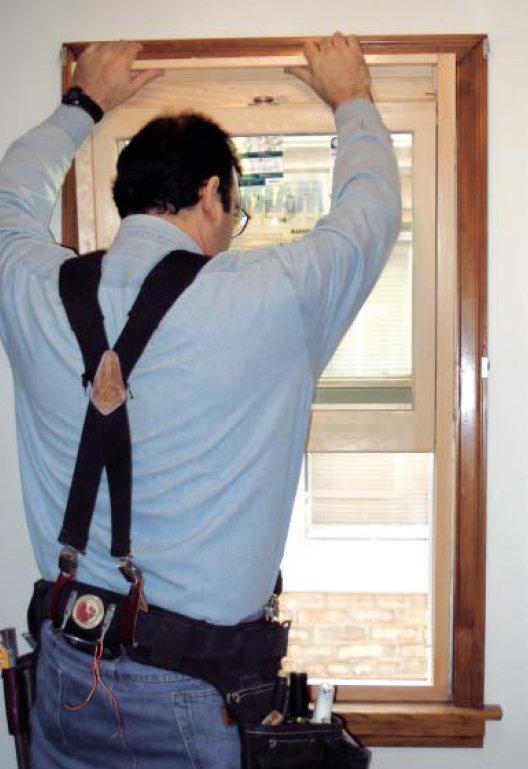
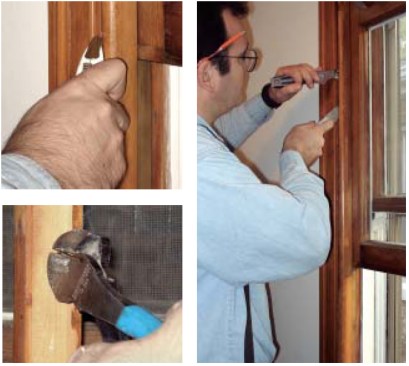
It’s important to measure both the width and the height of the sash opening in at least three places, then use the smallest measurement for ordering. The ideal way to measure for height is to open both sash and slide a tape measure between them, but if the top sash is painted shut, the author measures from the head jamb to the bottom of the stool.
Measuring
The most critical aspect of the installation procedure is measuring the opening for the new window. I take measurements for both width and height at three or four different locations on the jamb, always using the smallest dimension as my ordering number.
Measuring for width is easy: You just go from one side of the frame to the other. Height is a little harder. When possible, I open both sash and slide the tape measure between them. Unfortunately, the top sash is usually painted shut, so in that case I open the bottom sash and measure from the sill at the inside edge of the stool to the head jamb. When both sash are painted shut, I measure from the top of the stool; I then find another window in the house to measure the stool thickness and add that number to the original measurement. It’s imperative that measurements be accurate, since there’s almost no room for error.
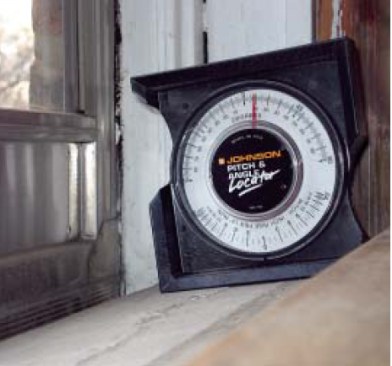
Marvin’s insert replacement window can be made to virtually any sill angle; if the angle is 5 degrees or less, the insert will be constructed with a flat sill.
If I’m called to estimate a window job, I roughly measure each opening. These measurements are just for pricing purposes; I would never use them for ordering.
Once the contract is signed, I take final, careful measurements, noting each window and its location. I measure the angle of each sill with a simple incline gauge.
We record all this information on takeoff sheets we’ve developed, then give copies to our supplier. Our supplier, in turn, writes an order and faxes it to us for final confirmation. I’ve learned to never trust anyone else’s paperwork, no matter how many years I’ve worked with that person. I double-check and sometimes triple-check every dimension against my original takeoff sheet.
After I sign the confirmation, the order is sent electronically to Marvin.
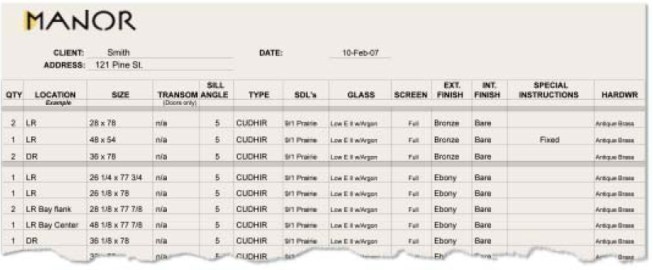
This customized Excel spreadsheet helps the author keep track of window orders, and makes it easy to doublecheck the dimensions on the manufacturer’s order sheet.
Unpacking
On average, it takes Marvin about four weeks to complete and ship the windows. The aluminum-clad unit shown in this article had a screen and low-e glass, and cost about $375.
When we accept delivery of the windows, we inspect them for visible damage and check the sizes printed on the packaging of each unit against our order sheet. Once we’re ready to begin installation, we unwrap each window and check further for any shipping damage. If we’re satisfied the unit is in good shape, we write the location on its jamb with a marker and group the windows by room. That way, the carpenters can grab the three or four units they need for a specific section of the house without having to shuffle through 20 or 30 to find them.
After scoring the joints with a sharp utility knife, the author inserts a putty knife and a thin pry bar between the interior stop and the jamb, then carefully pries away the stop. Since these stops will be reinstalled later, they have to be removed carefully.
Removal of Old Sash
Before installing the new sash, we take out the existing ones, removing the stops first. Once the interior stops are free, we pull any nails from their backs using a pair of dull end cutters, then bundle them together — labeled by window location — and set them aside. Since we don’t reuse the parting stops, we simply pry them out of their grooves with a flat bar or a pair of locking pliers.
Then we scrape the jamb free of any paint or dirt that might interfere with installation of the new unit.
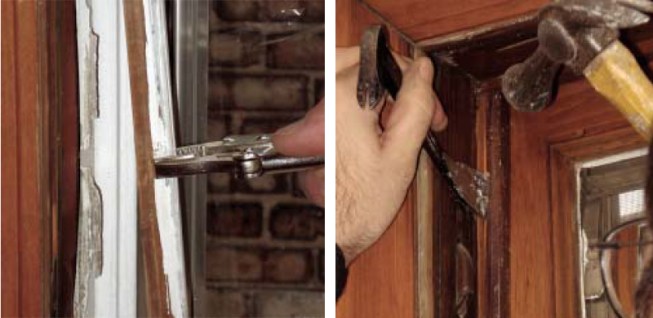
Less care is required when removing parting stops, which won’t be reused. A pair of locking pliers provides a good grip, making it easier to pop out the smooth-sided stop.
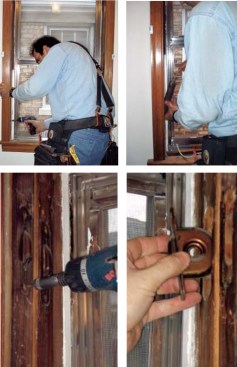
Weight pockets are located on the side jambs, behind rabbeted doors typically secured with flat-head wood screws. Once the doors are removed, the weights and pulleys can be taken out and discarded.
Next, we remove the sash weights and pulleys. We cut the sash weight cords or chains (if they aren’t already broken) and allow the weights to fall to the bottom of the weight pockets, which are accessed by means of a rabbeted door at the bottom of each side jamb. Then we unscrew and dispose of the pulleys.

After the old balance system has been removed, the weight pockets are filled with fiberglass. To confirm that the insulation has reached the top of the pocket, the author looks into the hole that previously housed the sash weight pulley.
An important part of this process is insulating the now-empty weight pockets. We rip unfaced fiberglass insulation into strips slightly larger than the pockets. Using a push stick — an old piece of parting stop works well — we carefully slide the insulation up into the pockets. Then we permanently secure the weight-pocket doors by driving a couple of brads through their faces and into the jamb.
We dry-fit the window in the opening, checking to be sure we’re happy with the placement and that nothing is obstructing the installation. A final step on the prep side is to thoroughly vacuum the sill and all surrounding areas.
Installation
After all that careful preparation, the installation itself is a snap. We begin by applying a heavy bead of butyl caulk to the inside edge of the blind stops and on either side (end) of the sill. Then we put in place the window, firmly pressing the new frame against the blind stops and down against the sill, creating a positive seal around the perimeter.
As a rule we don’t worry too much about plumbing and leveling the window; instead we look at the margins between the new and old frames and around the new sash. If an existing opening is slightly out of whack, it’s best to tweak the new window visually so as not to draw attention to the discrepancy. At the same time, though, it’s critical that the window operate, seal, and lock properly. Too much tweaking could lead to problems down the road — which is why we don’t install inserts in problematic openings in the first place. A racked opening can signify something more serious than a poorly fitting old window and should be investigated and corrected before any replacement is attempted.
The author sets the new window against the outer stop in a bed of butyl caulk. Butyl sticks well to both aluminum and old wood, and its nonhardening formula helps it absorb seasonal movement better than other sealants.
The Marvin units we use are secured with three screws per side — one each at the top and bottom, and one “jack” screw in the center. The jack screw allows the installer to push or pull the center of the jamb toward or away from the frame to adjust the margins. It also secures the unit at the lock rail.
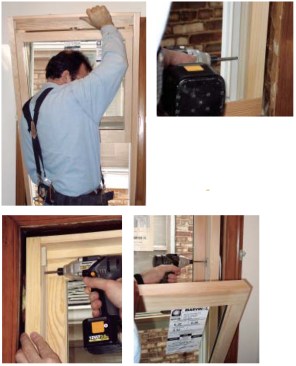
With screws, the author secures the new window in the opening. The center “jack” screw adjusts the reveal for the best appearance and smooth operation. Plugs hide the screws on the interior and exterior; a piece of weather stripping hides the jack screw.
Our next step is to inject a low-expanding foam between the new and old window frames. It’s crucial to use a low-expanding foam designed specifically for this application. Regular or high-expanding foam could bow the jambs and cause the window to bind.
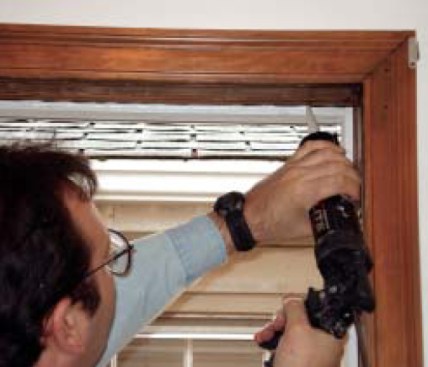
Once the foam is cured, we peel away the excess and then reinstall the stops. We use a cordless nail gun for this so we don’t have to drag an air hose through the house.
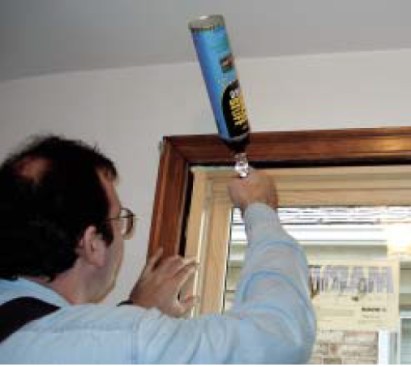
Polyurethane-foam window and door insulation fills the gap between the new window and the old opening. A high-quality professional foam gun provides greater control and makes less mess than strawequipped cans.
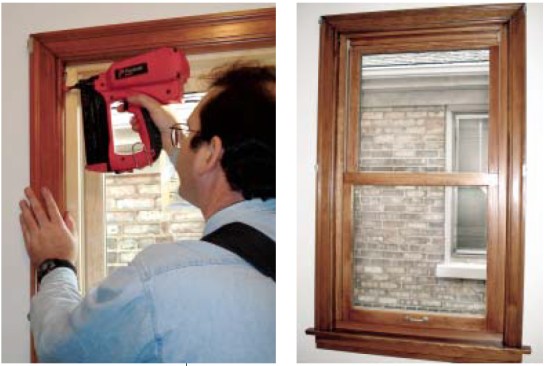
The last step is reinstalling the stops. The author fastens them with a Paslode cordless brad nailer, which spares him from having to drag a potentially dirty and dangerous air hose through the client’s home. Once the new window is finished, it looks very similar to the original — except it’s more energy-efficient and tilts in for cleaning.
At this point the only things left for us to do are attach the sash lifts, clean up, and pick up the check.


