Ceramic tile shower floors have long been regarded as a sign of high-quality construction. Unfortunately, improper installation can turn this durable floor system into a problematic one. In this article, I’ll explain the methods I use to build a leak-free and long-lasting ceramic tile shower floor.
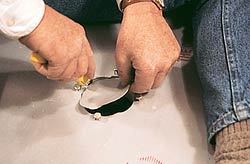
A clamp ring drain is set (but not fastened) to the subfloor.
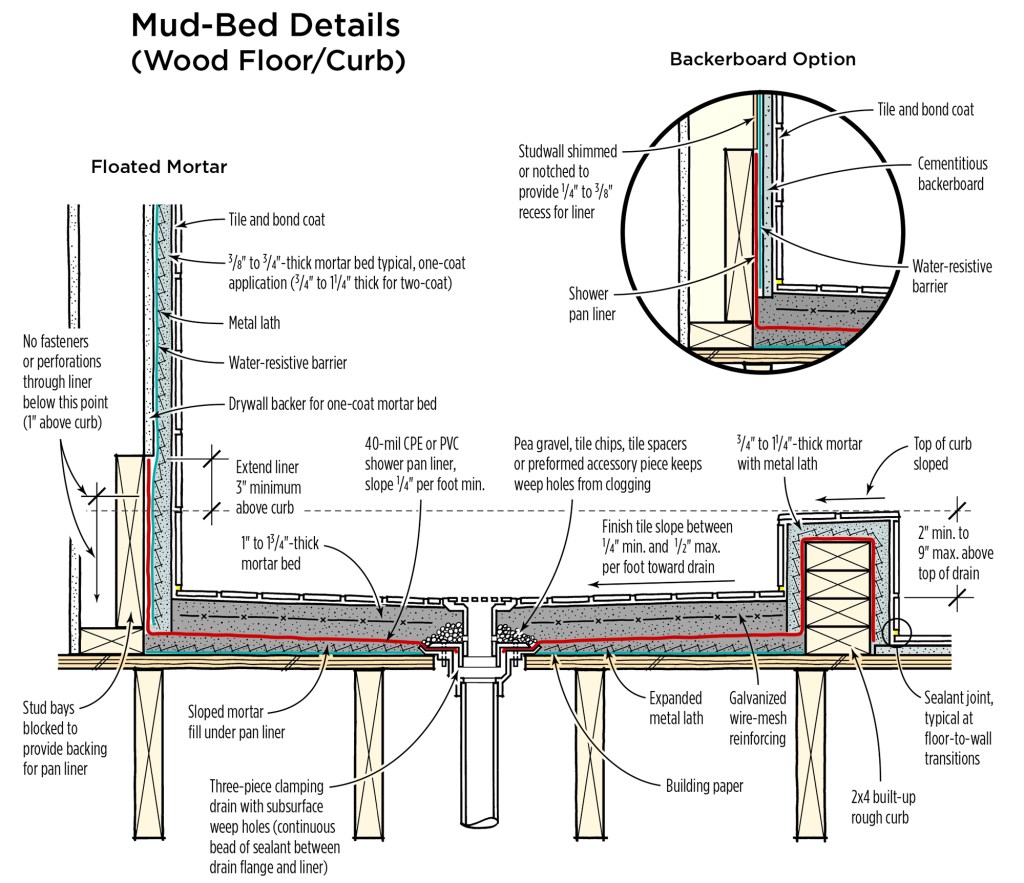
Anatomy of a Shower Floor
Shower floor systems are unique in that they must perform flawlessly under water. Since the curb at the shower door acts as a dam, the floor drain is the only safety valve preventing the shower floor from becoming a swimming pool. If the drain is blocked (by a dropped washcloth, for example), the shower floor ends up under water.
To prevent a submerged floor from springing leaks, I use a multi-layered mortar bed system (see illustration). The layers include a sloped subfloor, a continuous waterproof shower pan liner, and a floated mortar bed.
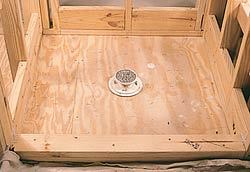
Clamping ring drain. There is only one kind of drain that I use with a shower pan: a clamping ring drain. The upper half of this two-piece fitting works like an ordinary drain, accepting water runoff from the surface of the shower floor. The bottom half provides backup drainage, allowing any water that seeps under the tile onto the waterproof membrane to weep into the drain pipe. I place the supporting flange of the drain housing directly on the plywood subfloor. No fasteners are necessary for the bottom half of the clamping drain, because the mud bed will hold everything in place. The supporting flange prevents any downward movement when the drain is stepped on.
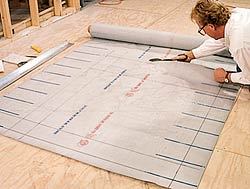
First the membrane is cut to size.
Creating a Sloped Subfloor
I always place the shower pan on a sloped subfloor. The sloped subfloor directs moisture that finds its way down to the shower pan liner towards the weep holes in the drain. Since the weep holes are located above the mounting flange of the drain, a pan liner installed on a level subfloor actually ends up lower than the weep holes, and moisture will collect in this shallow depression. This condition is one of the primary causes of the mildew and mold that often discolors grout joints.
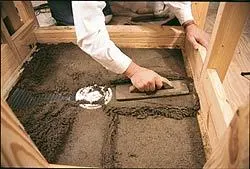
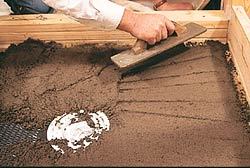
The floor framing itself can be pitched to create the slope, but I find it much quicker to mold the slope into a thin latex-modified mortar bed. The minimum recommended subfloor slope is 1/4 inch per foot. After calculating the proper slope, I fasten 3/4×3/4-inch float strips around the perimeter of the shower floor to serve as guides when I’m placing the sloped mortar bed.
The last step is to trowel out the latex-modified mortar (known in the trades as “deck mud”). To shape the slope, I let the wood float ride over the float strips and the drain flange, and compact the mortar by tamping it with the float. Since the cross-section of this deck mud can be as thin as 3/8 inch at the drain area, I always use a strength-enhancing latex additive instead of water when mixing the mortar. I let the sloped mortar bed harden overnight before installing the shower pan membrane.
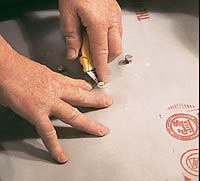
To fit the membrane around the clamping drain, first cut small h…
Installing the Shower Pan Liner
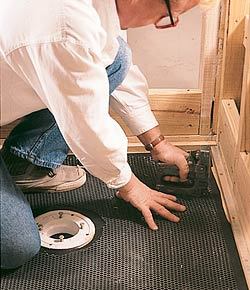
A shower pan is a waterproofing system that channels water into a drainage system. Since buildings move, shower pans must be able to accommodate movement. In the old days, lead or copper sheeting and hot-mopped shower pans were common, though they were difficult to work with and prone to leaks. For the past 20 years, I’ve been using chlorinated polyethylene (CPE) sheet membrane to fabricate pan liners for showers, sunken tubs, fountains, and other wet tile installations. Available from the Noble Co. (614 Monroe St., Grand Haven, MI 49417; 800/878-5788), CPE membrane, called Chloraloy, comes in 4-, 5-, and 6-foot-wide rolls, and can be bonded to itself to make shower pans of any size.
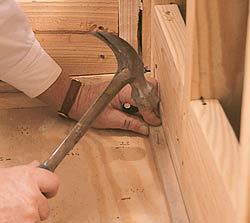
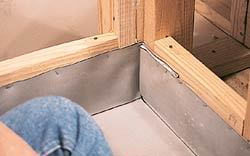
I install blocking between the studs around the entire perimeter of the pan area, making sure the blocking extends at least 1 inch above the upturned sides of the pan, and that all fasteners are countersunk or flush. Local codes will vary, but I typically make the sides 8 to 9 inches high.
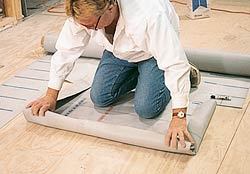
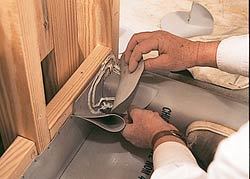
I make a sketch of the shower floor area and the upturns where the membrane meets any walls or curbs. I unroll the membrane in an open area, reproduce the sketch on the CPE membrane, and cut it to size. Next, I crease the corners, fold up the membrane, and place it on the shower floor for a dry fit. When I’m sure of the fit, I refold and remove the membrane, loosely screw the membrane clamping bolts (bolts that clamp the two halves of the drain together) into the lower half of the drain, and run a bead of rubber sealant around the lower drain flange. I use Noble’s proprietary sealant, NobleSealant 150, when working with its CPE membrane.
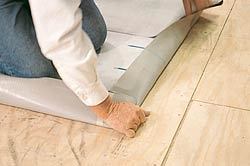
I then reposition the bundled liner over the shower floor and lower it into place. After creasing and folding the excess corner material, I staple it flat to the wall blocking, holding all staples to within an inch of the top edge. I apply sealant between the layers of the corner folds to hold the material tight against the wall blocking.
On large installations, I install the membrane in several smaller sections, then use NobleSealant 150 to join the pieces together.
The membrane material should lie flat against all surfaces. Wrinkles in the membrane will create air pockets behind the mortar, weakening and reducing the compressive strength of the mortar bed. On large pan systems, I often use a laminating adhesive (NobleBond 21) to bond the CPE to the subfloor and blocking, in an effort to eliminate potential air pockets beneath the membrane.
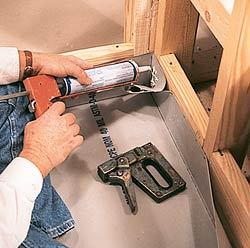
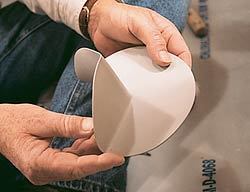
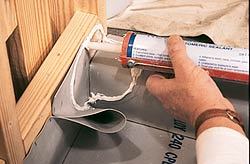
Where the upturned membrane meets the shower curb, I install prefabricated dam corners, available from the membrane manufacturer. I apply two 1/8-inch beads (spaced 1/2 inch apart) of sealant to the pan membrane, then use a trowel to bed the dam corners into the sealant.
I try to place all fasteners in the top inch of the upturned edges. If a fastener has to be used below the 1-inch line, I seal it with a small CPE patch bedded in rubber sealant.
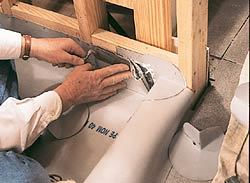
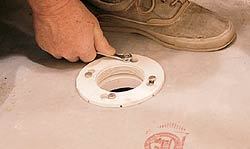
With the membrane pan in place, I carefully cut around the bolt heads protruding from the drain, and press the membrane over all four bolts. Finally, I snug down the bolts and cut a hole in the membrane to open the pan to the drain.
Testing the shower pan. I plug the drain with an expansion-type stopper and fill the pan with water up to the top of the curb. Local codes may only require a few hours testing, but I prefer to let the water sit at least overnight. Sunken tubs with whirlpool jets should be tested with all pumps running.
Shower Walls Next
After the pan assembly is completed and tested, I install the wall tile substrate down to the pan membrane, covering the upturned membrane that is fastened to the walls. Then I set the wall tile, positioning the bottom edge of the first course of tile 1/8 to 1/4 inch above the finished floor tile height to allow room for a control joint (backer rod and sealant). It’s important to use control joints wherever walls or walls and floors intersect (see “Preventing Tile Failures,” 2/97, for more on tile control joints).
The main reason I set the wall tiles first is that it would be hard not to damage the floor tiles while setting the wall tiles.
Floating the Mortar Floor
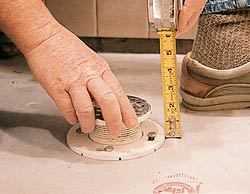
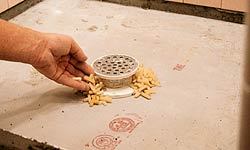
Before installing the mortar bed, I thread the adjustable drain screen into the body of the clamping ring drain, setting it at the finished height of the tile floor. Then I place a free-draining material like pea gravel or even plastic tile spacers around the base of the drain to prevent the deck mud from plugging the weep holes.
I float out approximately half of the deck mud, lay in a piece of reinforcing wire, then cover the wire with the remaining deck mud. For reinforcement wire I use 16/16-gauge 2×2-inch mesh, 13/13-gauge 3×3-inch mesh, or 16/13-gauge 11/2×2-inch mesh.
I compact the deck mud by beating it in with the wooden float, then float the bed to its final slope. The finished height of the mortar bed should position the floor tile 1/16 to 1/8 inch above the top of the drain, and 1/8 to 1/4 inch below the bottom edge of the wall tile. I’ve notched the top front edge of my wood float so that it rides along the bottom edge of the wall tile and leaves the proper space. Using a damp sponge, I’m careful to remove any deck mud that finds its way onto the wall tile.
I use thinset mortar to bond the tile to the mortar bed. The floor tiles can be installed while the deck mud is fresh or the next day, when the setting bed has hardened. Since Portland cement shrinks slightly as it cures, setting tiles over a fresh mortar bed is tricky. For this reason, I prefer to let the mortar harden before setting the floor tiles. The thinset mortar should be allowed to cure for at least 24 hours before grouting (check with the manufacturer for details).
The Secret to Good Deck Mud
To the untrained eye, properly mixed deck mud looks like it’s far too dry to be of any use. Most tradespeople assume that deck mud should be plastic and pliable — similar to brick mortar.
But good deck mud should have just enough moisture to hold the mixed ingredients together when squeezed into a ball. This stiff consistency allows the mortar to be tightly compacted, which is critical for tile floors.
The working characteristics of deck mud also differ significantly from other types of mortar. I "carve" (rather than trowel) deck mud to final height, using the lead edge of my wooden float.
Students at our classroom facility in Clemson, S.C., are taught to test their finished floor setting beds by standing on the bed immediately after it has been floated and finished smooth. If the setting bed is mixed and compacted properly, the fresh bed should not show any heel marks after it’s been walked on.
Setting bed mortar contains two ingredients: Portland cement and sand. An acceptable mix consists of four to six parts clean, sharp sand to one part Portland cement. Sharp sand particles compact better than rounded ones.
I mix my deck mud in a large mortar box. I place all the sand in the box, sprinkle some water on top, and use a mason’s hoe to pull the sand back and forth to lightly coat the particles with water. I add the Portland cement and pull the mixture back and forth until it’s thoroughly mixed. Finally, I add just enough water to achieve the required consistency, then mix it thoroughly again.
A liquid latex additive, available from Custom Building Products (310/598- 8808) or Bonsal (704/525-1621) can be used to improve the performance of the deck mud. When using a latex additive, always follow the manufacturer’s proportioning and mixing instructions.


