My company specializes in kitchen and bath remodels, so we install a lot of tile floors. We sometimes have to begin the job by addressing structural deficiencies in the floor. But even sound wood subfloors and concrete slabs may not be flat enough for tile – a problem we most often solve with a self-leveling cement underlayment, or SLU.
SLUs can be poured to a feather edge, so they’re well-suited for smoothing out uneven, poorly finished slabs. They can also be used to fill low spots, making them a good choice for fixing sagging, out-of-level wood-framed floors. And SLUs are fast: We can usually prep and pour the underlayment in one day, then come back and start installing tile the next.
We still prefer to correct floors that are more than a couple of inches out of level with a traditional mortar bed – but SLUs are our first choice for flattening most other subfloors.
Substrates
SLUs are versatile and easy to use, but they’re also finicky, so we’re scrupulous about following manufacturer instructions. Getting even one step wrong can lead to the failure of the whole job.
Wood floors. We always begin by checking the size, spacing, and span of the floor joists and the thickness of the subfloor. Tile industry standards call for a pretty stiff substrate – deflection from a concentrated 300-pound load can’t exceed L/360 under ceramic tile – so we’re especially careful if we see spans longer than 10 or 12 feet, sawn joists sized smaller than 2x10s, or joist spacing greater than 16 inches on-center. Engineered joists are easier to check because their span ratings are usually stamped right on them.
Wood floors are also subject to concentrated deflection – or deflection of the subfloor between joists (see Michael Byrne’s article “Tiling Over Plywood Subfloors,” 3/11). We address this by laminating 1/2-inch or 5/8-inch exterior-grade plywood to the existing subfloor with full-spread yellow glue and closely spaced screws. According to the manufacturer (203/393-0010, laticrete.com), the LatiLevel 84 and 86 compounds we typically use can’t be installed directly over OSB. This is also true of most other SLUs I’m familiar with. So we always cover an OSB subfloor with an additional layer of exterior-grade plywood, regardless of the structural rating of the OSB.
Any SLU substrate must be clean enough for paint. After making all needed repairs, we thoroughly vacuum the floor, then wipe it down with damp sponges or rags.
Concrete. Slabs can be structurally sound yet still require a little more prep than a plywood floor. That’s because any contaminant like moisture, paint, or grease that would cause adhesion problems under tile will also cause adhesion problems for the self-leveling underlayment. As with a wood subfloor, our goal is a clean and paint-ready substrate.
A new slab has to be fully cured before an SLU is installed over it, but even a cured slab can have ongoing moisture problems. If we have any doubts, we test the slab (see “Testing for Moisture in Concrete Slabs,” 6/07) and consult with the SLU manufacturer before proceeding.
If there’s paint on the slab, we remove it by abrading the surface with a bushing bit mounted in a demolition hammer. After vacuuming up the debris, we clean the slab off with Aqua Mix Heavy-Duty Tile & Grout Cleaner (800/282-8786, custombuildingproducts.com), a high-alkaline cleaner and degreaser, then give it a clear-water rinse.
Movement joints. Self-leveling underlayments require movement joints wherever the floor meets vertical surfaces – walls, tubs, or pipe penetrations, for example. The thickness of the joint depends on the room dimensions, but usually 1/4 inch is adequate.
We use strips of sill seal for movement joints around the perimeter of the room – the material is inexpensive, widely available, and easy to work with (see Figure 1). We can staple it to framed walls or use double-sided tape or adhesive caulk to glue it to block walls and tubs. To keep liquid underlayment from flowing underneath during the pour, we caulk the joint between the sill seal and the floor. After the pour, we leave the sill seal in place until the tile has been set to ensure that we leave a clean joint, free of thinset and grout.
Figure 1. Once the reinforced subfloor has been cleaned, a worker installs sill seal around the perimeter of the room to create a movement joint (A). To contain the waterlike underlayment, seams and joints must be caulked (B). Striking the sheathing joints with a putty knife helps force caulk into the joint (C). Penetrations through the flooring, like this toilet flange, also must be dammed off (D).
To avoid unexpected leaks (remember, liquid underlayment has a waterlike consistency), we also seal seams and penetrations through the subfloor. We squirt caulk into sheathing joints, then strike it off with a putty knife to force it into the joint. Depending on how wide the joint is between the toilet flange and the sheathing, we use leftover material – felt paper, backer rod, even cardboard – to prevent spillover. To dam off entryways, we screw down a wood strip. Once all the dams are in place, we caulk everything, essentially creating a room-sized shallow tub to hold the liquid underlayment.
Primer
Every SLU requires a specified primer. Brushed onto the substrate before the underlayment is poured, the primer helps with adhesion and seals the substrate, allowing the SLU to retain moisture until it has properly hydrated and cured (Figure 2).
Figure 2. Primer is needed to seal the subfloor. A worker rolls it on (left), then uses a stiff bristle brush to force it into the fibers of the plywood (right).
Primers have roughly the same thin consistency as a latex admix. They usually need to be applied within 24 hours of pouring the SLU, but they also have to be dry when the underlayment is poured. Because drying can take a few hours (depending on temperature and humidity), we keep a couple of fans on hand and sometimes circulate air around the room when we’re priming in humid conditions.
Concrete usually requires only one coat of primer, but for absorptive substrates like plywood we dilute the primer with water to make a sealer coat. We roll on the thinned primer, agitating it with a bristle brush to force the liquid into all the nooks and crannies in the plywood subfloor. As soon as the sealer coat has dried, we apply the second coat, again using the bristle brush after rolling it on. This may seem like overkill to some installers, but we’ve never had an underlayment failure.
Lath. In between primer coats, we cut and fit 3.4-pound-per-square-yard galvanized diamond metal lath, which is needed to reinforce any SLU poured over a wood subfloor (Figure 3). We don’t wait for the first coat to dry while we’re doing this, but we do take care not to track in dirt as we work. Because the lath is self-furring, we can work on top of it without getting our shoes wet. Once the second primer coat is down, we fasten the lath with staples so it won’t lift up during the pour, overlapping the seams by a couple of inches.
Figure 3. Expanded metal lath is needed over wood subfloors to reinforce the SLU.
Floor map. Before mixing the SLU, we use a laser level to make a quick “contour map” of the floor (Figure 4). Identifying the low spots helps us decide where to concentrate the SLU and minimizes the need to push the wet material around after it’s been poured.
Figure 4. Measuring down from the laser’s benchmark elevation, workers drive screws into the floor to identify low spots and mark the final height of the slab.
On wood floors, we mark low spots with drywall screws, leaving the heads about 1/8 inch proud of our target floor elevation so that we can back the screws out after the SLU has hardened (Figure 5). If we’re pouring over a slab, we glue pieces of scrap mosaic tile to each other and to the slab with fast-setting Laticrete 310 epoxy, making tiny pillars that will remain slightly lower than the finished level of the SLU. After the epoxy dries – usually within a few minutes – we brush primer onto the pillars.
Figure 5. Before pouring an SLU over a wood subfloor, the author reinforces the framing as needed and installs an additional layer of plywood sheathing to ensure that the floor system meets minimum floor deflection requirements for tile (above). Screws driven into the subfloor – or, in the case of a slab, mosaic tile piers epoxied to the concrete (left) – help guide the pour. An antifracture membrane isolates the tile from any movement in the structure.
With experience, we’ve learned to quickly guesstimate the number of bags we’ll need for a certain amount of coverage, but manufacturers also include a coverage chart with their technical information and installation instructions. For example, Laticrete says that one 55-pound bag of Laticrete 86 will cover 6.7 square feet at a nominal thickness of 1 inch. Our rule of thumb is that a bag is equal to about 1/2 cubic foot of material.
Installation
The trick with any SLU is to get all of the material in at the same time. That’s because there’s a limited “self-healing” period once the material is mixed with water, typically about 30 minutes. Within this time, different buckets of material will flow and merge together, but once the half-hour is up the material starts to clump and skin over, then quickly sets up and becomes unworkable. We’ve learned the hard way that you don’t want to still be working the material after it starts to go, so we make sure to stage the job carefully and work quickly.
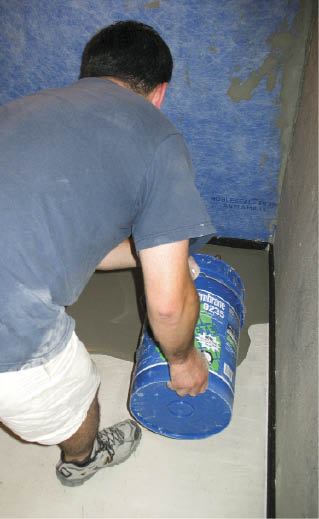
Mixing. There’s no need to guess how much water to use or what the proper consistency should be. Each manufacturer specifies the exact mix ratio, which we follow precisely. For example, a 55-pound bag of Laticrete 86 requires 6 quarts of clean water. When we’re ready to pour, we measure out the water needed for each bag in advance and dump it into a bucket. We make sure to have a bucket ready for each bag that we need (Figure 6). If there are any lumps of material in the bag or if the bag is more than about six months old, we won’t use it.
Figure 6. An exact amount of water is dumped into the bucket, and then a bag of powder. Each bag gets its own bucket, and is mixed for two minutes with a 1/2-inch drill equipped with a special mixing paddle.
A 5-gallon bucket holds one bag of material plus water, but just barely. To give us a little extra room for mixing, we use the less-common 6-gallon buckets that some of the other tiling products are packaged in. After we dump in the powder, we mix each bucket for two minutes with a drill-mounted mixing blade, then quickly move on to the next bucket. Hot water will accelerate the cure, so we always try to use room-temperature or cooler water. For bigger jobs, we make sure to have several paddle-equipped drills on hand.
Once we’ve mixed the underlayment we plan to use, we give each bucket another quick mix before pouring it onto the floor. We fill the lowest points first, then work toward the high points, using our screws or pillars as guides (Figure 7). If we have to move material around, we use a rake or a spreader. A flat trowel is handy for areas where we have to feather-edge the material.
Figure 7. Starting with the low spots, all of the buckets of SLU are poured onto the floor (A). To move material around, the crew uses a flat trowel-like spreading tool (B), a standard garden rake (C), and a gauge rake with adjustable wire sleds (D).
Most of our repairs require between five and 15 bags of SLU. With careful staging, we once mixed up 35 bags for a single pour on a 300-square-foot floor, but that was about the limit for our three-person crew. More often, we’ll do larger pours in a couple of lifts, but this requires that we allow time for the first lift to cure and be reprimed, which adds a couple of days to the process. For us, it’s more cost-effective to sub out large jobs to a company with a pump truck.
Curing. Air movement and direct sunlight both cause self-leveling underlayments to start to skin over and significantly shorten self-healing time. To avoid this, we keep windows closed while we pour the material, and we tape kraft paper over them if necessary to block out the sun.
Only a small fraction of the water in the mix is actually needed for hydration; the rest of the water is there to help the material flow. As the SLU cures, this water rapidly evaporates and produces a lot of condensation. This can be an issue, depending on whether the finish flooring is water-sensitive and how soon it will be installed, so most manufacturers offer underlayments with “standard” and “rapid” curing times. Laticrete 86 cures in three to four hours, while Laticrete 84 takes 12 to 16 hours. If our tile schedule is tight, we use the 86 and pay the premium; otherwise we save some money and use the less-expensive 84.
After a pour, it’s normal to see minor spiderweb cracking in the underlayment. If there’s substantial cracking all the way through the underlayment, that’s an indication there was a problem with the pour.
Antifracture Membrane
Though not required, we almost always install an antifracture membrane over the underlayment before we tile (Figure 8). In addition to providing insurance against cracking and other problems, this helps make the installation water-resistant.
Figure 8. To install this sheet-style antifracture membrane, the crew spreads adhesive with a notched trowel (left), then beds the membrane – already cut to fit – with a roller (right). Once the adhesive has been cleaned up, the floor is ready for tile.
On jobs where we can’t wait for the multiple coats of a liquid-applied membrane like Laticrete’s Hydro Ban to dry, we install a sheet membrane like NobleSeal CIS (800/878-5788, noblecompany.com), a composite made from chlorinated polyethylene (CPE) with polyester fabric laminated to both sides. We simply cut the sheet to size, comb out modified thinset mortar onto the floor, and bed the membrane into the thinset with a roller. With either a sheet or a liquid membrane, it’s easy enough to waterproof the room by turning the membrane up the walls and taping the joints. At that point, we’re ready to start tiling.
Cost
Right now, Laticrete 84 costs about $21 per bag in my area, while faster-curing Laticrete 86 costs about $32 per bag. Some contractors charge a fixed price per bag (say, $125) to install SLUs, but I use a slightly different approach. I give my clients a fixed price based on the specific number of bags I think we’ll need, then add bags on a prorated basis if we find we need more.
Rob Zschoche is a tile setter and licensed remodeling contractor in Chantilly, Va.


