by Jon Henderlong
My family business, Generation Homes, has been building steel-framed houses in northwestern Indiana for about five years. Most of the 25 houses we build annually are small- to mid-sized duplexes, starter homes, or mid-sized homes, priced in the $130,000 to $240,000 range, and we’ve found steel framing to be a good fit with this competitive market. In an earlier article (“,” 8/00), I discussed the approach my company takes to framing floors with steel. In this article, I’ll look at some of the details we use for framing roofs with steel.
Stick Framing vs. Trusses
Some builders who frame with steel prefer to use wood trusses for roofing (see “,” 6/00). Steel trusses are another option, but we’ve passed up both in favor of stick framing with conventional steel track and C-section material. Given the relatively simple roof forms we ordinarily use — most of our houses have simple gable roofs, with an occasional hip roof — this is the cheapest way to go, and it simplifies scheduling because we don’t have to coordinate our construction schedule with truss deliveries or crane availability. Light but tough. The uniformity of steel is nice for walls, but it’s especially evident in roof framing. Steel rafters are absolutely straight, so there’s no need to inspect each one for crown before cutting. They’re also lighter and easier to handle than wood. Yet the 16- and 18-gauge material that we use for joist and rafter stock is surprisingly rugged. We once had a set of steel rafters blown flat by a windstorm (the crew hadn’t had time to brace them as the storm moved in), and although the attached ceiling joists were bent, none of the rafters were damaged. We were able to unscrew them from the joists and continue to use them. Wood rafters subjected to the same treatment would have been splintered beyond repair.
Framing the Ridge
The basic reference for anyone interested in framing with steel is the Prescriptive Method (NAHB Research Center, 301/249-4000), which consists of a series of pre-engineered span tables, fastening schedules, construction details, and related information for use by builders, architects, and code officials. In short, it is the light-gauge steel industry’s version of the span tables and standardized practices that the wood industry developed decades ago, and it provides a complete system for residential construction with light-gauge steel framing. In some areas, though, we’ve found that the methods dictated by the Prescriptive Method are unnecessarily complex and time-consuming. One example of this is at the ridge assembly of a gable roof. Beyond the Prescriptive MethodThe Prescriptive Method detail calls for a ridge member consisting of a nested C-section and track, with the rafters cut to the required angle and fastened to the ridge with clip angles (see Figure 1).
Figure 1. The gable ridge connection specified by the Prescriptive Method can be built without an engineer’s stamp, but it’s both time and material intensive.
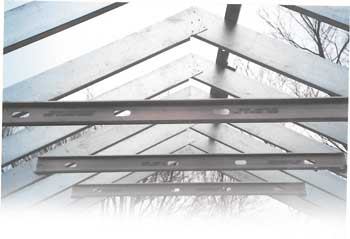
Our ridge detail eliminates both the ridge member and the clip angles. Instead, we simply cut a section of flange from the end of one rafter and overlap and screw the rafters together to form what is essentially a gusset (Figure 2). A C-shaped stud, typically 5 1/2 inches wide by 8 feet long, is screwed to both rafters as a collar tie.
Figure 2. In this simplified ridge detail, the flange of one rafter is notched and the two are lapped together and fastened with six #10 self-tapping hex-head screws. For maximum strength, the notched portion of the rafter should be as short as possible. This approach requires an engineer’s approval.
Pre-approved details. Because this ridge detail is a departure from the Prescriptive Method, it must be approved by an engineer before use. We’ve dealt with this by putting this and all of our other nonstandard details in a spiral-bound book, which we’ve had stamped by our engineer. As long as we don’t exceed the design criteria set by the engineer, we can use these alternatives as often as we like. This approach satisfies the building inspector — we’ve provided him with his own copy of the book — and eliminates the need for separate stamps on each set of plans.


