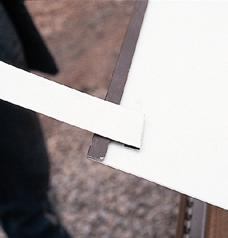
Allowing for movement
Many builders nail the aluminum valley flashing along the
edges to hold it in place. But metal flashing that is loaded
with nails will buckle as it expands, making for an unsightly
valley. In my area of northeastern Pennsylvania, for instance,
a 10-foot length of aluminum coil stock will change up to 1/2
inch in length between the cold of winter and the heat of
summer.
To allow for this movement, I fold a hem along the edge of
the valley flashing and use site-bent clips to hold the
flashing in place (Figures 2 and 3).
| Figure
2. To allow aluminum flashing to expand and
contract, the author uses a site-bent hem-and-clip
system to secure valley flashing. |
| Figure
3. He places the hem clips every 2 to 3 feet
along the edge of the flashing. |
To prevent the flashing from creeping downhill, I drive one
nail at the top edge of the flashing. Before I position the
flashing, I again clear out any loose nails that have found
their way into the valley.
Laying a Closed Valley
There are three generally accepted methods for shingling a
valley: the closed valley, the open valley, and the woven
valley. I use the same underlying flashing details for all
three methods, and any of the methods will perform
satisfactorily when installed properly.
Closed valley
I prefer the closed valley. It's the quickest and easiest to
install, it protects the valley with a double layer of
shingles, and, to my eye, it's the best looking.
| The finished valley has a crisp appearance
- and three layers of protection. |
After I've installed the valley flashing, I begin shingling
the main roof. When I reach the valley, I run the first layer
of valley shingles all the way through the valley and onto the
secondary roof plane (see illustration). The trick here is to
avoid driving any nails through the aluminum. Nails driven at
the edge of the flashing may not cause a leak, but they will
"short circuit" the expansion clips.
At some point, however, the shingle coursing will naturally
end in the middle of the valley. In this case, I remove a full
tab or two from the preceding shingle so that the "run-through"
valley shingle falls where it can be nailed on either side of
the flashing.
Once the run-through shingles are in place, I shingle the
secondary roof plane, trimming these shingles at the centerline
of the valley. The line formed by the cut shingles is a strong
visual cue, so I make sure my cuts are straight and the
finished valley line is crisp. Homeowners and superintendents
will quickly complain about a wavy valley.
Open valleys
In an open valley, the shingles stop short of the valley
centerline, leaving the flashing exposed. I'm not sure why open
valleys are used so often. Twice as many shingles must be cut
at the valley, and the exposed flashing is not protected by a
layer of shingles.
When a customer insists on an open valley, I install the
membrane and flashing as though it were a closed valley. I lay
out my shingle cuts so the open portion of the valley is
slightly wider at the bottom than the top. The widening trough
allows ice and snow to creep out of the valley.
Woven valleys
A woven valley is essentially a closed valley formed by
alternating the shingles that run through the valley. The good
news is that none of the through shingles need to be cut to
length. But for some reason, I'm always frustrated by shingles
that creep up on the coursing lines as I weave the valley. The
finished valley also has a "mushy" appearance. For these
reasons, I try to avoid woven valleys.
Whichever style of valley you choose, take the time to
install it correctly. A leaky roof leads to a leaking wallet.
>