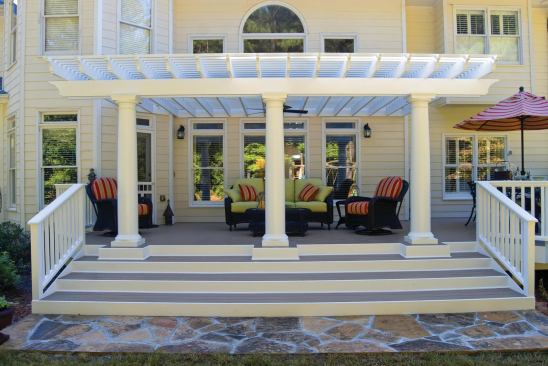
Arbors built from framing lumber create shade and define outdoor…
Arbors built from framing lumber create shade and define outdoor rooms. Scroll cuts on the ends of the beams and joists provide interest, and attachment to the house provides rigidity.
Bobby Parks
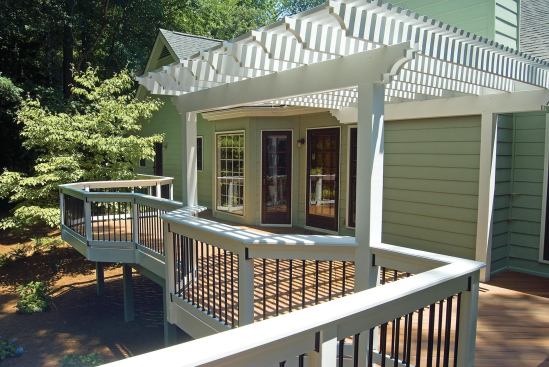
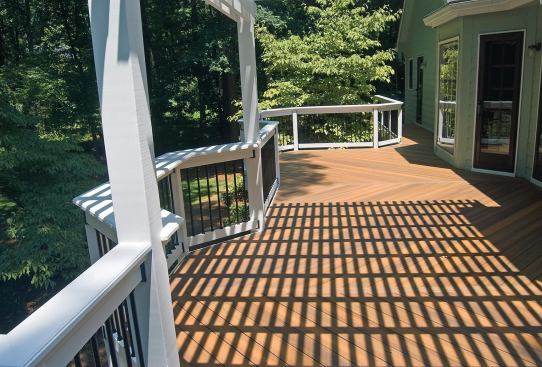
In the middle of the day, most of an arbor’s shade comes from …
In the middle of the day, most of an arbor’s shade comes from the lath. Tightening the spacing provides more shade.
Bobby Parks
Bolting the posts to the framing provides a great deal of rigidi…
Bolting the posts to the framing provides a great deal of rigidity. With freestanding arbors, more bracing may be needed — in the form of knee braces or, as in the photo, triangular shapes made by the lath, joists, and beams.
Bobby Parks
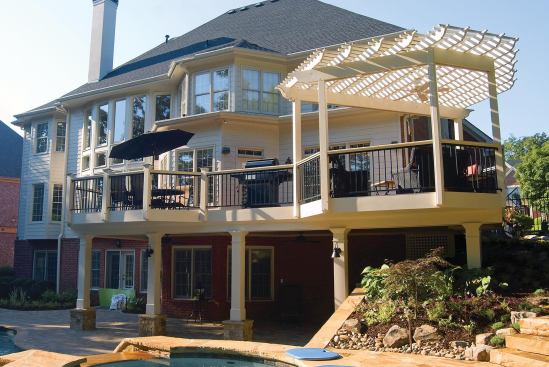
Porches cost more than arbors, but provide shelter from the rain…
Porches cost more than arbors, but provide shelter from the rain as well as the sun.
Bobby Parks
A hardscape patio can be covered with a porch roof in a hybrid p…
A hardscape patio can be covered with a porch roof in a hybrid project.
Bobby Parks
With the addition of an under-deck drainage system and a patio, …
With the addition of an under-deck drainage system and a patio, the space below a deck becomes a dry, shady refuge.
Bonnie Kilpatrick
Hiding wiring in an arbor can be a challenge. Running it behind …
Hiding wiring in an arbor can be a challenge. Running it behind posts and atop the lath are two tricks of the trade.
Bobby Parks
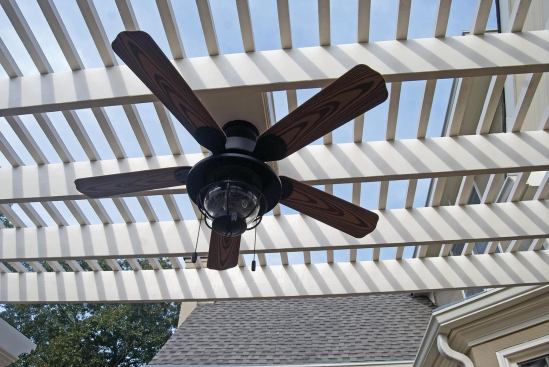
Mounting a ceiling fan attractively requires cooperation between…
Mounting a ceiling fan attractively requires cooperation between the carpenters and the electrician.
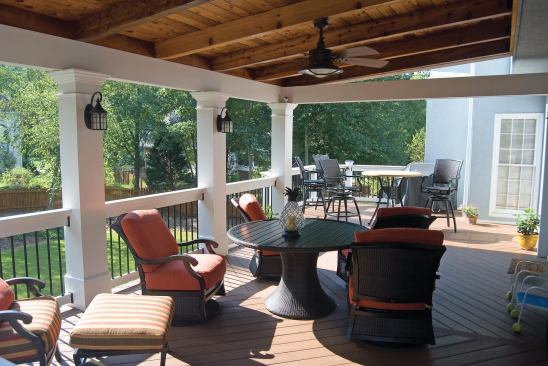
Our industry is all about creating useful outdoor living spaces. One problem with a lot of decks, though, is they can be too hot to use on a summer afternoon. But they would be comfortable even on the hottest days if they were under a big shade tree with a nice breeze blowing. The trick is to create that environment on your customer’s deck or patio.
You can duplicate the shade effect of a tree by covering an area with an arbor or a porch roof, or by using the space under a deck. Porch roofs or covers are the better options in terms of functionality, but they’re also the most costly. Trellises, arbors, or pergolas (depending on how you refer to them) don’t provide as much shelter but cost less to build. Any of those options will then give you a place to install ceiling fans — to generate the breeze.
No matter which structure you build, always consider the orientation of the sun. During the summer, it will be almost overhead and slightly to the south throughout the middle of the day. In the late afternoon — when decks tend to see a lot of activity — it will be more to the west, becoming almost horizontal at sunset. Plan the shade structure with this in mind.
Arbors and Pergolas
Arbors provide broken shade and define a space, giving the feeling of an open outdoor room . Plants can be hung and vines such as wisteria grown for interest and additional shade. Many arbors are attached to a house; others may be freestanding. Some are located over a feature such as an inlaid octagon, or on an outer corner of the deck.
Arbors can be very detailed and ornate, but my approach is simple. I build with wood — mostly treated southern pine — and PVC trim, and finish the structure with a solid stain or paint. For a natural look, cedar or redwood are great in place of PVC. My painter uses Sherwin Williams stains on them, and particularly likes the company’s Duration paint for use on PVC.
Symmetry and scale are important. I prefer a heavier look, and depending on spans, go with a minimum of 2×8 beams and 2×6 joists on 16-inch centers. In most cases, I use 2×10 beams and 2×8 joists, or 2×12 beams and 2×10 joists. Joists are always one size smaller than the beams. I overhang the joists and the beams by 18 to 24 inches to avoid a stubby look. Scroll cuts at the ends also help with this.
The direction of the setting sun can be a factor in how I run the joists — as the sun angle gets lower, joists placed on a north-south axis provide more shade. Often, though, it’s more practical to determine joist direction based on the orientation of the house.
The lath work above creates most of the shade. The tighter the cross-members are spaced, the more shade; for example, 5-inch on-center spacing is pretty typical but reducing that to 4 inches will block more sunlight. To make the lath, I rip treated 2x4s in half and install the ripped stock across the joists with the 1 3/4-inch side down. These perform better than factory 2x2s, which are often only 1 1/4 to 1 3/8 inches thick. I fasten the pieces with ring shank nails (screws would work too), overhanging the lath beyond the end joist by 4 to 5 inches — longer overhangs could bow — and beveling the ends at 22.5 degrees.
For posts I use 6x6s, at a minimum, and often wrap them in PVC for a beefier look, or I use round columns. I tie all the posts into the framing for lateral stability.
For additional support and lateral stability, I like to attach arbors to the house. I approach it as I would a deck, mounting a ledger with lags or LedgerLoks (FastenMaster; 800/518-3569, fastenmaster.com), and flashing the arbor ledger into the siding. It’s important to fasten the arbor ledger to a band joist on the house. While it can be tempting to fasten it to studs, it’s too hard to be sure the lags have hit the studs in their centers. When the house’s band joist is not where it needs to be to support an arbor, I support the inside of the arbor on posts. I often fasten the arbor to the studs anyway for lateral stability — not for vertical loading.
As for bracing the outside posts, bolting them into the floor framing and incorporating them into the railing adds rigidity. Building the arbor in an octagon or hexagon shape also helps. I try to avoid angle braces, but occasionally they’re needed for lateral stability.
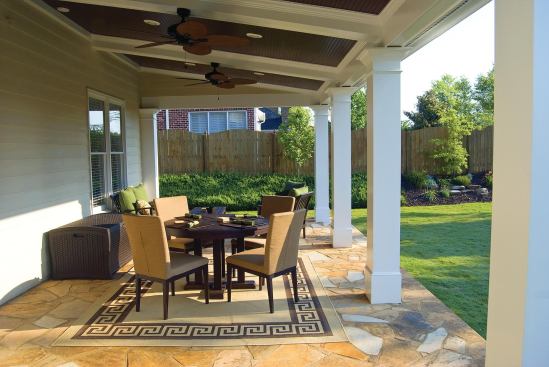
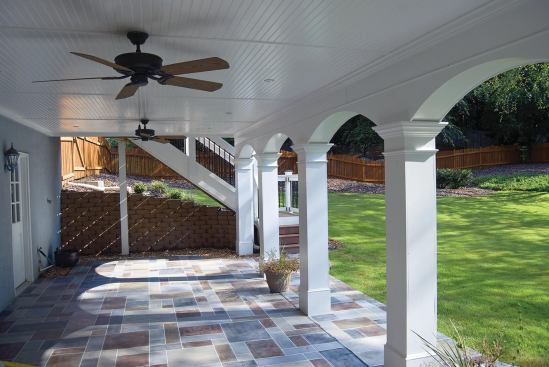
Porches and Under-Deck Spaces
In my southeastern market, the climate puts porches in high demand. If a higher-dollar budget is in the works, I tend to go with a full-blown porch roof instead of building an arbor (see “Build Strong and Stylish Porches,” May/June 2009). Although porches are more costly, they provide greater benefits, including full shade and protection from rain as well as sun. Because of the shelter offered by the roof, electrical and lighting options are more numerous, and of course, fans are standard. For customers who need full shelter from the sun and heat but aren’t worried about insects, I build open-air porches with no screens.
Sometimes the house’s elevation is too low to build a wood porch. In those cases, I work with a hardscape sub to create a floor and my carpentry sub to build the roof. Just because hardscape is involved, there’s no reason for a smart deck builder to miss out on the job.
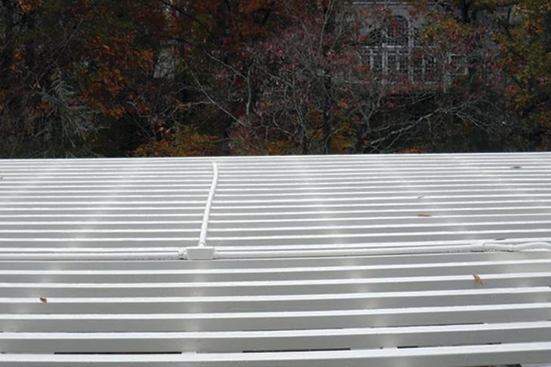
In a similar vein, I often include a patio below my decks, which average 9 feet to 12 feet in elevation. This is a great option for shade or weather protection for customers willing to make the investment. Although any area below a deck will be shaded, an exposed structure above isn’t very attractive. So, many of my customers choose to make the deck watertight and finish the ceiling, either by using a membrane system or a metal or aluminum under-deck system. I’ve used several products and don’t have a clear favorite — the ones I’ve used all seem to work well. With the deck above watertight, fans and lighting are also easily planned for and provide a nice, finished appearance.
Fan Installations
For an environment to be comfortable outdoors on hot days, there needs to be a breeze as well as shade. Whether you’re talking about using an arbor, a porch, or the underside of a deck for shade, you need a ceiling fan, or multiple ceiling fans, to provide a breeze. The basics involve framing for mounting an exterior fan box and using an outdoor-rated ceiling fan.
It’s rarely difficult to conceal wiring for a fan (or lights, for that matter) in a porch, or below a deck with an under-deck drainage system and a finished ceiling. Concealing the wiring in an arbor, however, can be a challenge. Conduit and wiring can be fed under the deck, up a column where they are least visible, and across the top of a joist or the lath. Sometimes the feed can come from higher on the house and run across the top of the arbor, but it depends on what the electrician has to work with. I avoid running the wire on the inside of a joist because it’s more visible there and needs to be covered with trim.
I do a number of things to accommodate a fan, particularly with arbors. I leave a space when laying out the joists so the fan can be centered on the arbor. I build a box from framing lumber to provide mounting for the rough electrical work and the fan. Once the electrician hooks up the fan, the box gets trimmed out with PVC.
Bobby Parks owns Peachtree Decks and Porches in Alpharetta, Ga.
Bobby Parks is a nationally recognized deck, porch, patio, and remodeling contractor who has over 27 years of experience in the industry and delivered over 40 million dollars of residential and commercial deck and porch projects. Bobby owns BP Consulting and Design LLC and is a contributing editor for Professional Deck Builder magazine. You can connect with him on Instagram: @bobbyparks007.