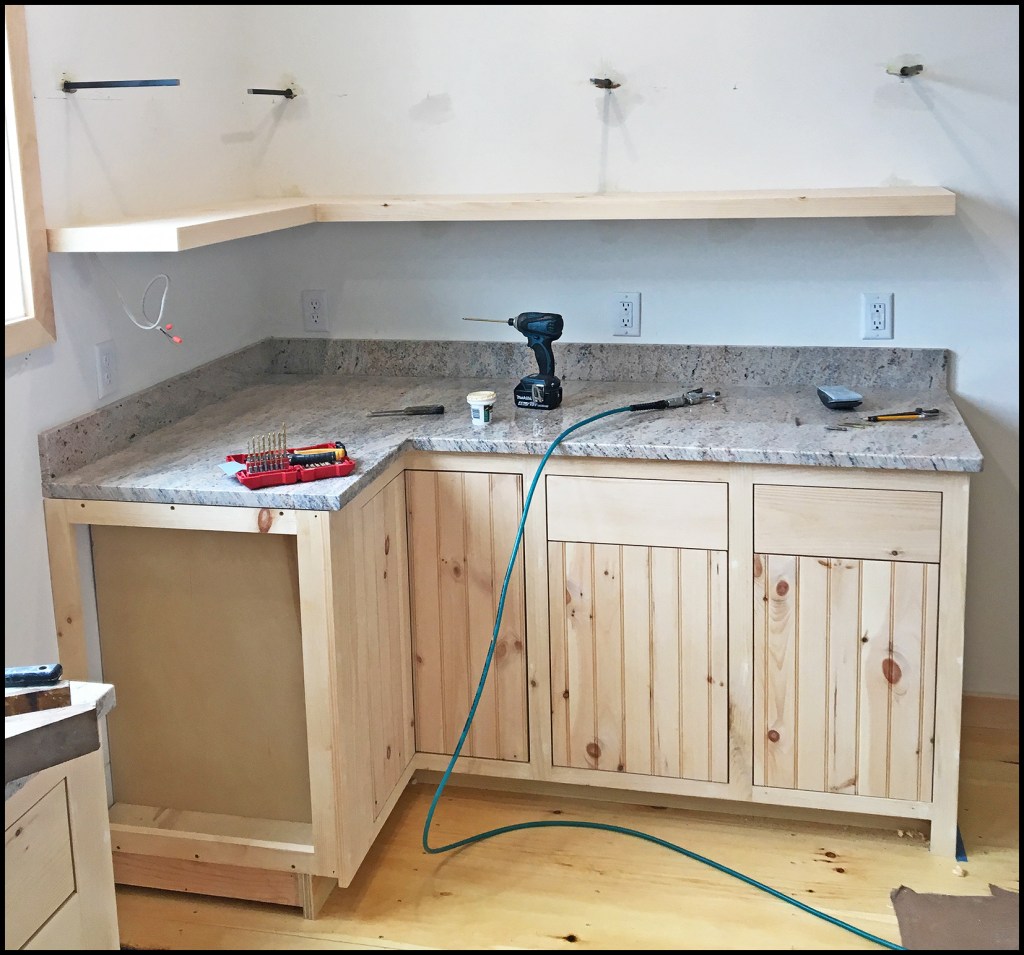
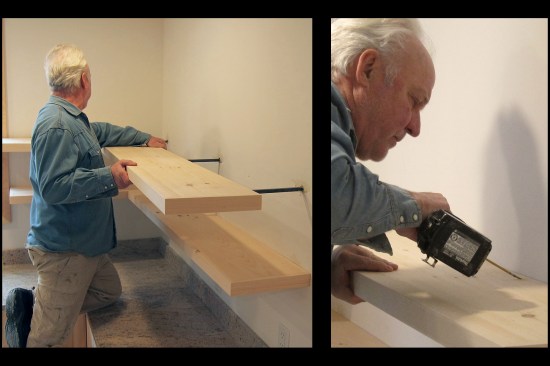
Instead of installing wall cabinets above the countertop in a small kitchen that I built this past winter, my client wanted a pair of open shelves made of 8/4 pine. He wanted them to float on the wall, with no visible means of support. This was a detail he’d done himself previously, by aligning holes drilled in the back edge of the planks with short steel support rods epoxied into the wall studs along a level line. That sounded OK to me, but too demanding for these shelves, which would be wrapping an inside corner in a 3-foot-by-6-foot L-shape. I wanted a clean, secure way to tie the legs together at the corner and didn’t like the idea or the logistics of doing that in place, using biscuits, dowels, or any number of other options.
‘Eight-Quarter-Thick’ Pine Shelves
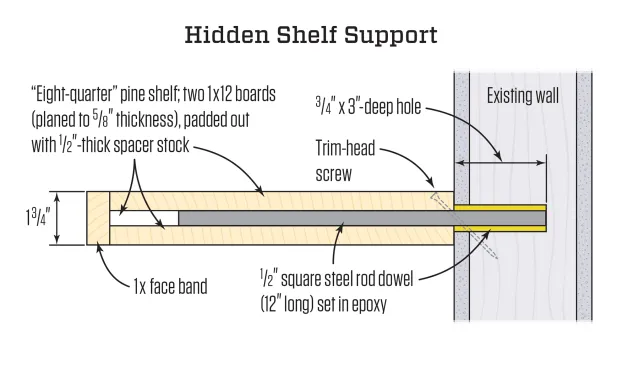
Instead, I decided to make the planks hollow, by gluing two 1×12 boards together over 1/2-inch spacers, capped at the front edge with a 1-by face band. The slot, rather than individual holes for the dowels, allowed me to prefab an L-shaped shelf and slip the shelves onto 1/2-inch square steel rod. The slot provided lateral flexibility for positioning and installing the shelves. This laminated approach would also help resist warping, which can be a problem with solid planks.


Eight 12-inch lengths of 1/2-inch square steel rod were used to …
Eight-quarter pine dresses out at 1 3/4 inches, and I wanted to keep that as the shelf thickness. Because I’d be using 1/2-inch square steel rod for the supports, I planed the 1×12 boards to 5/8 inch thick, along with spacer stock that I dressed to 1/2 inch thick and ripped to inch-wide strips. Then I cut the boards to rough length, added spacers just at the ends for the moment, and glued up my four sandwiched blanks, clamping them overnight.
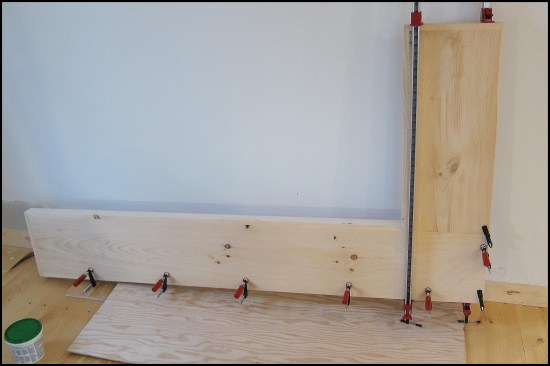
While I was careful to align the long edges, I still wanted flawless glue lines for the edge cap. I trimmed one edge with a track saw and then ran my sandwiches through the table saw to final width, about 11 inches. I squared the ends and then added the 1-by cap pieces, mitered at the outside ends. To avoid visible fasteners, I relied solely on yellow glue and clamps.
Tim Healey
Hidden Shelf Support
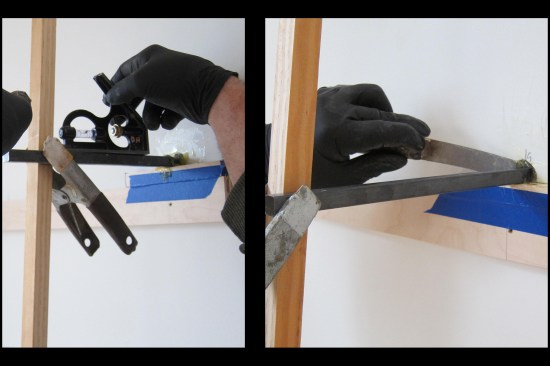
While the shelf glue was curing, I worked on planting the steel dowels in the wall studs. I cut eight 12-inch lengths of square rod. I planned to use three dowels for each 6-foot run, and only one for the 3-foot leg. Using wood spacers to spline internally across the joint, the short leg would be supported by the long run.
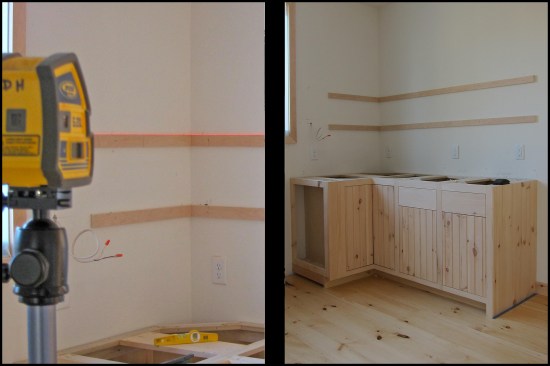
To align the steel dowels, I shot laser lines for the bottoms of both shelf locations. I accurately located all studs, edge-to-edge to ensure drilling into their centers, and screwed straight plywood rips along the horizontal lines. For the 1/2-inch rod, I drilled 3/4-inch holes, 3 inches deep, eyeballing level. The hole centers were 1/8-inch above the shelf bottom line, giving me just enough wiggle room to allow the rods to rest on 5/8-inch spacers (taped to the plywood strips) while the epoxy set up.
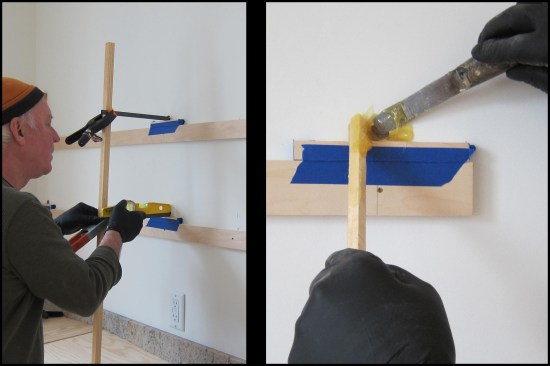
I did a dry run at all locations, to make sure the rods would install exactly level, strictly aligned to each other. I cut vertical support sticks that I leaned against the wall alongside each support location and pinned at their base with brads to keep them from wandering. I leveled each dowel and scribed its location on the support sticks.

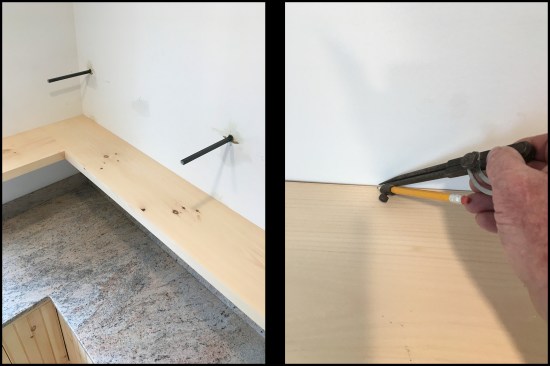
The steel dowels were aligned and leveled using plywood strips mounted horizontally on the wall and vertical support sticks. The steel dowels were set with two-part West System Six10 epoxy adhesive, spring-clamped to the support sticks, and obsessively rechecked for level.
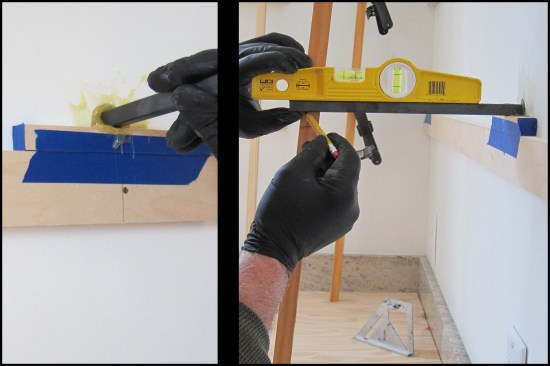
Once I had all four locations dress-rehearsed and triple-checked for level and true point-to-point sight lines, I committed to the epoxy. I used a West Systems product, a thickened, two-part pliable gunk that does not run and has a generous open time so you’re not rushed. I stuffed all holes, using a putty knife and a push-stick until the gunk mounded out, then inserted the steel rods, spring-clamped them to the support sticks, and re-checked level. I carefully cleaned away all the squeeze-out while it was still liquid so it wouldn’t interfere with shelf installation later, when it had hardened.
The next day, I stripped away the temporary supports and re-checked all for level. Happily, the epoxy was rock solid and nothing had moved, but it would still have been possible to get a lever on any wayward dowel and bend it back to true.
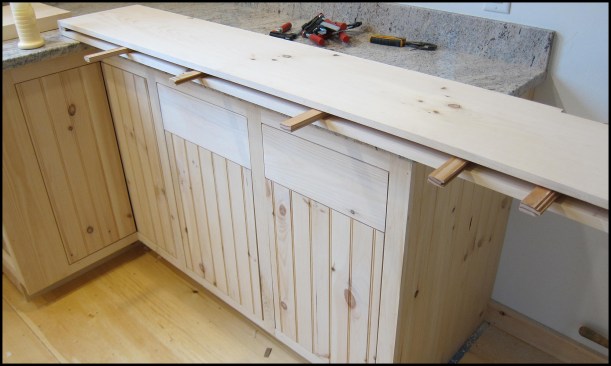
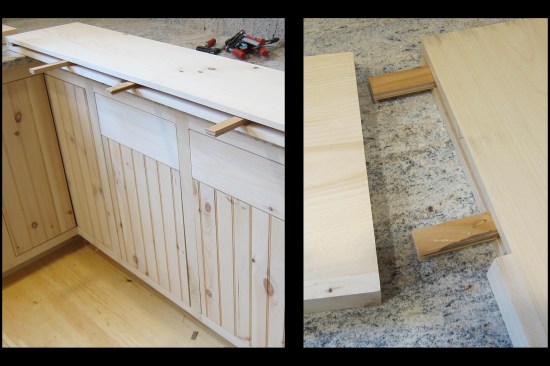
Additional 1/2-inch spacer strips were inserted into the shelves, located to allow for a “leftward slide” when the shelves were mounted on the wall.
Spacers and Splines
I rested my shelf sections on the dowels and scribed them true to their respective walls, first squaring them to each other at the corner joint. I marked the dowel locations on the shelves, then took them down and added more spacers. Since the action of shelf installation would be sliding leftward into place over the dowels, I kept the spacers well to the right of each dowel location. A pair of spacers splined the butted shelf joints. When all spacers were laid out to my satisfaction, I added yellow glue and clamps, completing the shelf assembly.
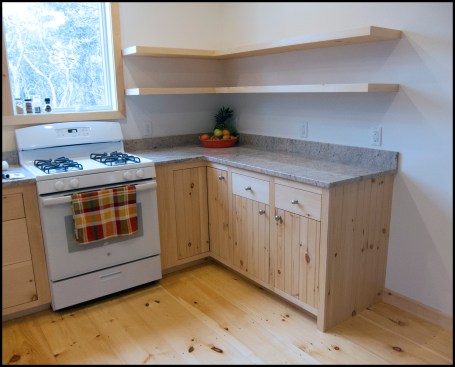
Once the glue had dried, I easily slipped the 6-foot leg over the three dowels on the long wall and then slid the L-shaped shelf unit leftward over the dowel on the short wall. With the shelves in place, I pinned them to the walls using just two trim-head screws per unit, toed in at the back edge and capped with wood dough.
Photos by Eve Aspinwall and Dave Holbrook


