The seeds for this project were planted in 2011, when we set up a booth at a local home show featuring the basic design idea of log rounds illuminated from below. Although intended to show a patio concept, our display was built on a frame, and everyone referred to it as a deck. For the next several years, I tried to develop the concept as a viable deck project, but at the time my company was focused on landscape and hardscape builds. It wasn’t until we began offering decks in 2018 that we felt confident in our ability to turn our Forest Floor deck concept into reality.
Foundation and Framing
This project started with demolition and the removal of an existing patio, landscape boulders, and a wood-burning fire pit. We set aside all the existing landscape boulders for future use, then excavated and poured 13 concrete footings, each 10 inches in diameter by 36 inches deep and reinforced with welded rebar cages. Even though the deck is relatively small, we needed all these footings to allow for proper beam placement and to angle the framing around the landscape boulder outcroppings that would protrude through the deck surface.
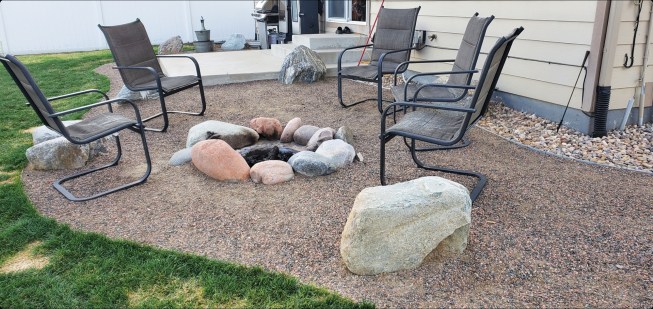
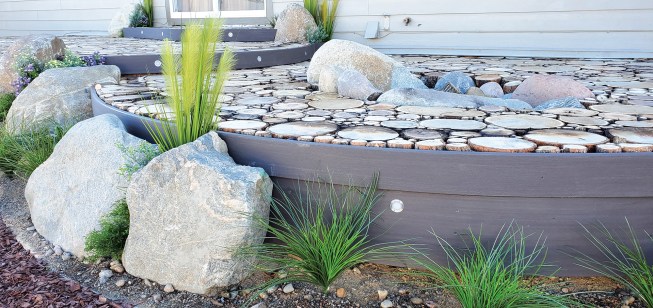
Before the project, the existing backyard had a small concrete patio, a fire ring, and a few boulders.
Before installing the short Alaskan cedar glulam beams (none were longer than 7 feet, and the average length was between 4 and 5 feet), we encapsulated the hardscaping with concrete to stabilize the structure. The framing consists of 2×8 #1 pressure treated southern yellow pine joists 12 inches on-center. We kept the elevation of the deck as low as possible to allow the boulder outcroppings to project a few more inches above the surface of the deck for more visual impact.
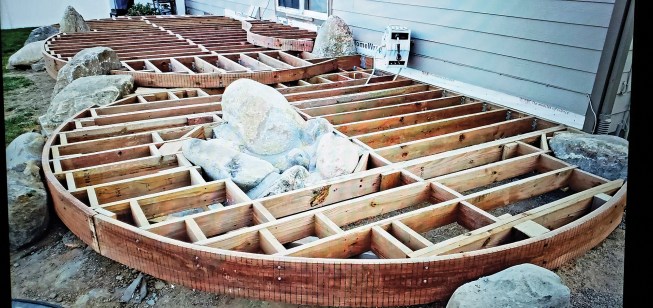
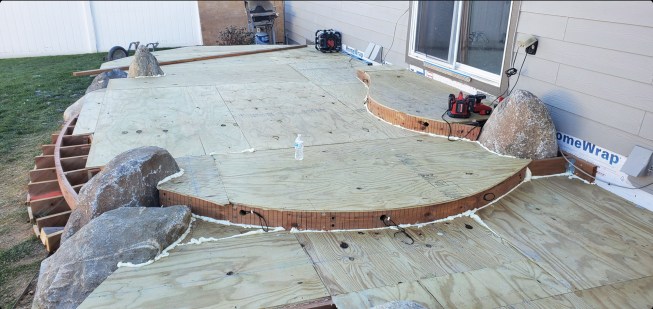
We kerfed the 2×10 rim joist that we used around the perimeter of the deck so that we could bend it to the desired radius. Normally, it’s the inner face of the board that is kerfed to allow it to bend while maintaining its appearance. In this case, we found we weren’t able to achieve the desired radius without splitting the board. Reversing direction so that the kerfs were on the outside face solved the problem. Plenty of blocking reinforced the rim joist, which in the end primarily serves as backing for a composite fascia.
We built the deck with a slope away from the house, like a patio, since we wouldn’t have any gaps between deck boards to allow for drainage. We sheathed the framing with 3/4-inch pressure treated sheathing rated for ground contact, fastening it to the joists with PL 400 construction adhesive (to avoid squeaks) and 3-inch-long GRK screws every 10 inches on-center.
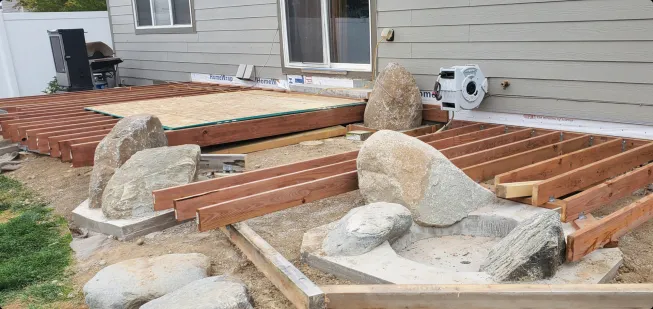
After removing the existing patio, the author repositioned the fire ring and landscape boulders and stabilized them with concrete.
The framing for the new deck was built around these hardscape features and supported by new footings.
Around the perimeter of the deck, we added a 12-inch-wide band of 1/2-inch pressure treated plywood to create containment sidewalls for the remaining internal areas on the deck. This had the added benefit of reducing the volume of costly resin needed to build the illuminated section of the deck, resulting in significant savings. In addition, the lighting scheme we planned had certain zones of illumination and we didn’t want any border to receive light.
After the deck was sheathed, we filled small gaps in the subfloor around boulders and plywood seams with spray foam, then scraped away the excess after the foam had cured to end up with a continuous and well-sealed substrate for the resin. Then we applied several coats of rubberized sealant to the entire assembly, creating a reasonably watertight seal to hold the epoxy while it cured.
Lighting
I had always wanted to light a deck from beneath the flooring, but this is difficult to do on a typical deck. On this project, the homeowner supplied us with suitable lighting cables with two LED bulbs per inch contained in a 1/2-inch-diameter shield. We used more than 1,000 feet of cable; rated at 100,000 hours, this seemed to be the longest-lasting product available. Should the lights ever fail, there isn’t a possible replacement scenario, so we had to trust the product as we secured it to the deck with steel clips. As soon as the circuits were all connected and tested, we were ready to encapsulate the lighting in epoxy.
The author then sheathed the deck frame with pressure treated plywood, filling gaps in the sheathing and around the boulders with spray foam.
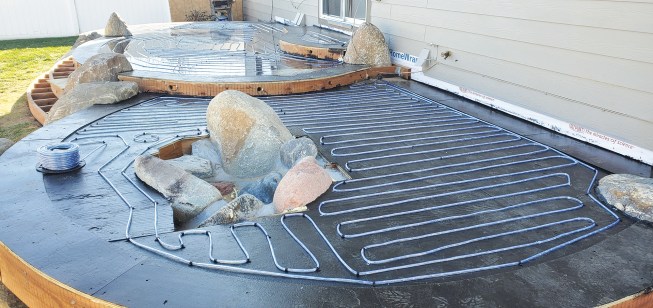
Next, he coated the plywood sheathing with a rubberized sealant and installed the lighting cable.
Epoxy
We began the first of 10 pours of epoxy by mixing up a batch of Colored Epoxies’ (coloredepoxies.com) industrial exterior-grade flexible resin and hardener. Because the deck was sloped, we began on its lower edge and built our way up, starting the next pour as each batch began to harden. For the final pour, we used the company’s UV-resistant overcoat over the cured epoxy, filling the entire 1/2-inch-deep bowl containing the lighting cable with a smooth and uniform surface.
After the epoxy cured, we were ready to install our innovative decking material. Meanwhile, it was a very cool feeling walking across a glass surface with all that light shining beneath our feet.
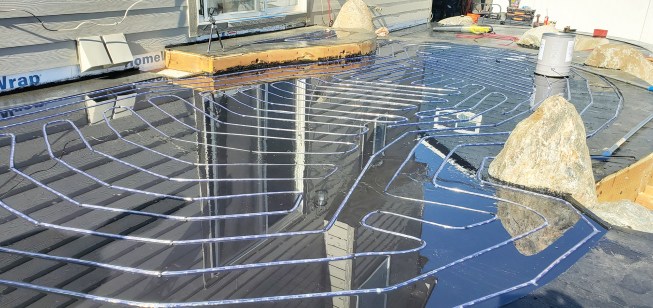
To encase the lighting cables and provide a substrate for the log-round decking, the author applied 10 coats of clear epoxy on top of the sheathing.
Wood for the Forest Floor
While I wanted to use hardwoods to cover the deck, I wanted to use material that you’d never see on a standard deck. Our material accumulation began with a project earlier in the year, where a new deck required the removal of an old, dead Russian olive tree. In my area, these trees are considered weeds, which is why the city requests (but doesn’t pay for) their removal, and paying for tree removal before the build could begin was above the client’s budget. I rarely offer work for free, but I knew this tree would be a key component later in the year so we offered to cut down and remove the tree in trade for accepting our deck proposal.
Russian olive is beautiful in cross section, brown in the center and retaining a vibrant golden edge before the darker outer bark. After harvest, I brought the wood home to begin sectioning the tree into 2 1/2-inch cross sections, but I had no plan on where to find the rest of the wood I would need. When I checked with local tree-removal companies and the city tree-limb collection facility, all they had was cottonwood, a soft wood that wouldn’t qualify for the project.
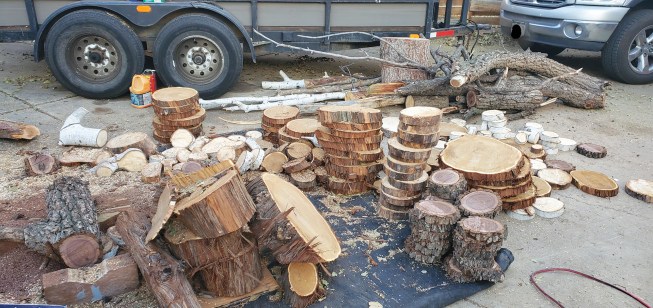
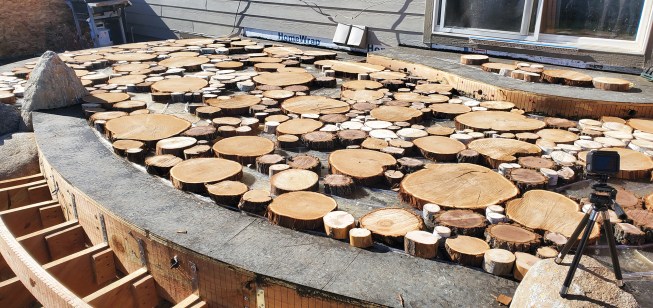
The author cut thousands of log rounds from a variety of sizes and species of wood that he had acquired from a number of different local sources for the decking.
Then, I stumbled across a couple of guys who were taking down a black walnut tree in my neighborhood, a tree that would fetch close to $20,000 at the local sawmill. They allowed me to harvest some of the tree’s 3-inch to 4-inch caliper limbs, and when I loaned them a climbing rope to replace one that they had snapped, they gave me a bigger branch as thanks, inviting me back to their yard and telling me I was welcome to snoop around. There I found larger birch and peach limbs, as well as more of the black walnut in smaller branches.
We were lucky to have made this connection, as now it looked like I would have more than enough wood to fulfill the order, with excellent browns from the olive, purples from the walnut, creams from the birch, and pinks and orange shades from the peach. For three days, we produced thousands of crosscuts, from 24-inch-diameter trunks all the way down to 1/2-inch-diameter branch tips, then stored every usable piece of wood for three months to dry.
Installation
We began the installation by fastening every log ring larger than 4 inches in diameter to the plywood deck with countersunk FastenMaster deck screws in a 6-inch grid pattern. We then filled the gaps with smaller pieces, which would be secured only by the future epoxy encapsulation. However, as we installed the decking, we soon realized that all the days of cutting still left us short on the quantity of material we needed, so my hunt for material resumed.
During the installation process, the author used screws to hold the larger rounds in place and filled between them with smaller pieces, which were held in place with epoxy.
At the city tree-limb division, I came across a beetle-kill ponderosa pine tree that had recently been dropped off. Although not a true hardwood, ponderosa pine exceeds the strength of redwood and was on my client’s wish list, so we altered our pattern to use the pine for the border. This was the perfect scenario, as the beetle-kill pine was already very dry, and we wanted the border to stand out from the rest of the inlay on the floor, anyway.
After everything was secured, we began pouring more epoxy resin to fill and seal any inconsistencies under the cross sections halfway up the 2 1/2-inch-thick rings. But it was impossible to determine the volume of epoxy needed to fill the voids, and we exhausted our entire supply; still, we had just enough to allow us to start sanding everything flat while we waited for additional epoxy to arrive.
All the work with power planers on our hands and knees turned into an even more labor intensive and time-consuming task than cutting the cross sections. Eventually, we were able to switch to a floor sander for the final leveling work, but inconsistencies from piece to piece had to be addressed first.
We originally planned to use plugs cut from each species of wood to fill the countersunk screw holes but found during floor sanding that all the holes had already filled with compacted sawdust. This saved us countless hours, and at the end of sanding, it was impossible to tell where the screws were.
After planing and sanding the surface smooth, the author continued to coat the assembly with more coats of epoxy.
To finish up the project, the author wrapped the edge of the deck with composite fascia material.
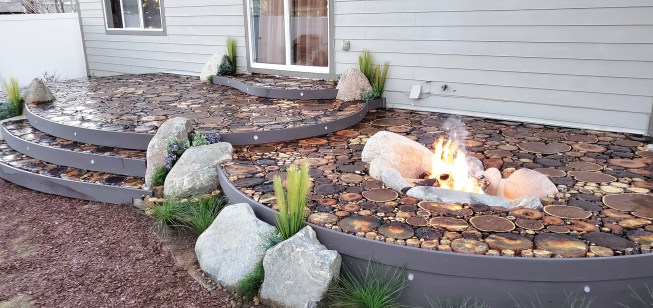
Before pouring the final layer of epoxy, we wrapped the fascia and edges with TimberTech Azek dark hickory decking and fascia material. At the last minute, I decided to use a plumbing torch that I had in my truck to burn the border with a gradient effect.
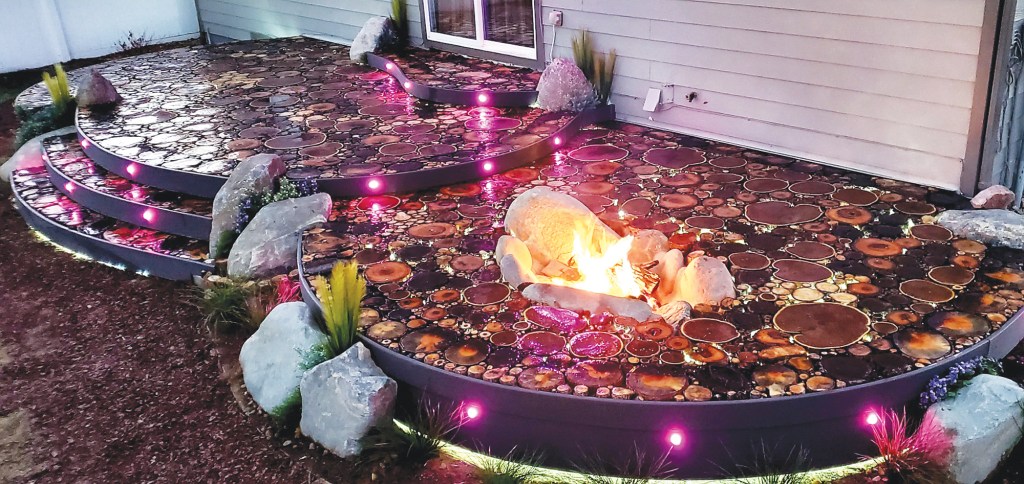
An estimated 10,000 lights, 10,000+ wood slices of different sizes from five tree species, and 135 gallons of epoxy later, the project was finished. ❖
Photos by Dave Settlemyer


