When I first met Molly and Andrew Peters, they had just purchased an urban row house in Hoboken, N.J., and had extensive plans to renovate the interior. Eventually, they also wanted to add a backyard patio, with a small deck off their kitchen above it, and transform the overgrown backyard into a play area for their kids, but there wasn’t enough money in their initial budget to check off all of the items on their wish list. The backyard would have to wait for phase 2.
During our phase 1 renovation of the interior, which included opening up the lower two stories of a four-story back wall and replacing the brick with a two-story window wall (see “Revitalizing an Urban Row House,” JLC, Mar/16), we did three things in preparation for the backyard work. First, we cut the 3-foot-high grass throughout the small yard down to grade. While doing the structural work for the window wall, we installed two LVLs supported by steel angles in the back masonry wall to receive a ledger for the new deck. Finally, we extended a patio drain line into the backyard that connected to the stormwater line that also serviced the roof gutter downspout. Over the next couple of years, until the clients were ready to begin phase 2 and address the backyard, we had a crew cut the grass down to grade each fall.
Optimizing a Small Lot
The backyard plan called for a bluestone patio with an ipe deck above, two bluestone steps up from the patio to a turf grass play area, and a planting bed at the very back end of the property. A cedar fence with lighting set in a block retaining wall with a bluestone cap would provide privacy on three sides of the yard.
In Hoboken, plan approval by both the zoning and building departments is required and includes a “Letter of Notification” sent to neighbors informing them of construction and assuring them that their property would be protected in accordance with Section 3307 (Protection of Adjacent Properties) of the International Building Code, New Jersey Edition. As part of our permit application, we had to submit certified mail receipts of the “Letters of Notification” that were sent out.
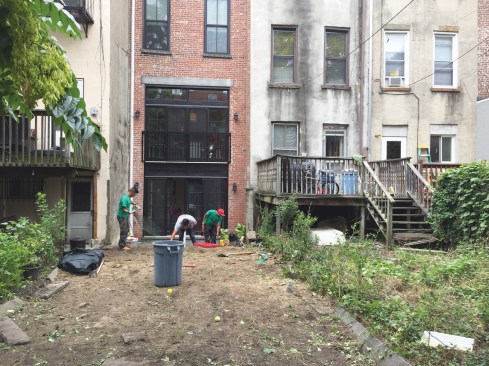
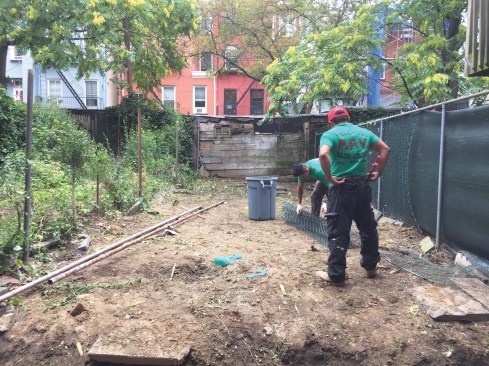
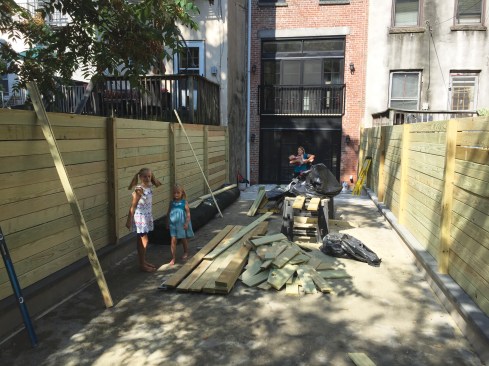
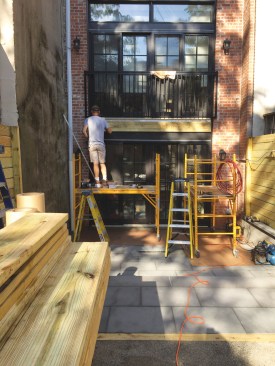
Measuring just 15 feet wide, the overgrown backyard was bordered on two sides by an old cyclone fence (top photos). After removing it, workers removed the sod and brought in materials to build a short CMU retaining wall around the yard and a perimeter fence (above). With no access for machinery, the trench for the perimeter fence was dug by hand (right).
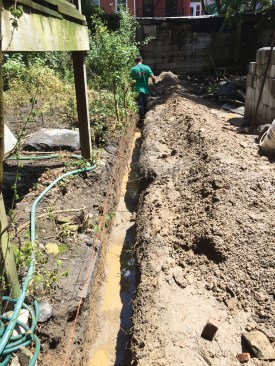
Once plans were approved and permits issued, our first order of business was to cut the grass down to grade. Because the neighbors had approved of our using the existing fence alignment for a new fence, we next marked out the location of the old cyclone fence on the north and south sides of the property and removed it. After the lot was cleared of all debris, we laid out the retaining walls and fence posts, running strings from the building’s back wall to the back neighbor’s fence from our marks.
While the landscaping sub dug the retaining-wall trench and post holes along the string line by hand, materials were brought in, also by hand. Without truck access, all materials needed to be manually carried in from the street side of the property. Deliveries were curbside, and then the landscapers entered the building through a door under the front stair and carried the materials through the house to the backyard by hand, in bags or in buckets.
To ensure we would have street parking for the delivery trucks, we purchased “no parking signs” from the town: $25 per spot per day, two signs minimum. (We pay about $5,000 a year to the city for parking signs, parking tickets and tire boots when caught parking illegally, and dumpster permits, as well as for police officers to monitor our street closures, usually for concrete deliveries and cranes lifting HVAC units onto roofs.)
Perimeter Fence
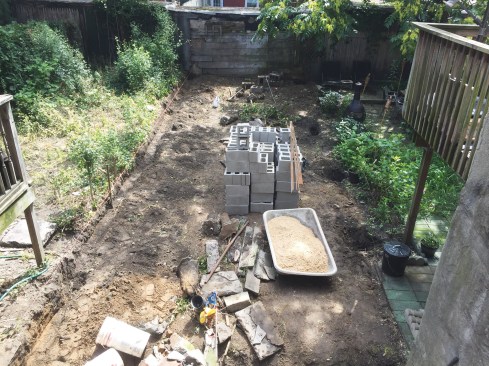
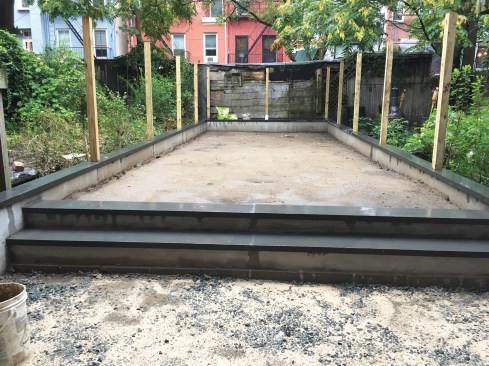
With trenches and footings dug and materials on site, pressure treated (PT) 4×4 fence posts were set along the string line in 3-foot-deep, 8-inch-diameter holes spaced 8 feet apart, which were then filled with concrete. Mason Victor Bezama and his crew from Unlimited Building Management set the CMU retaining walls three blocks (or 24 inches) high, with roughly 16 inches below grade and 8 inches above, on top of a gravel bed. Then they filled the blocks solid with mortar and applied a stucco finish to the sides of the perimeter wall. The wall was topped with bluestone capstones, which were notched to slip around the posts and set on a bed of mortar.
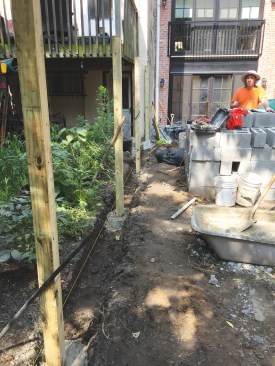
Workers set 4×4 posts for the perimeter fence in 3-foot-deep holes, then backfilled the posts with concrete.
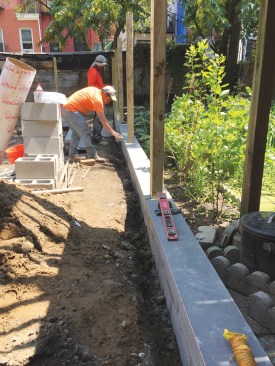
Over a compacted gravel base in the bottom of the trench, masons laid up a short CMU wall around the perimeter of the yard, which they then capped with bluestone.
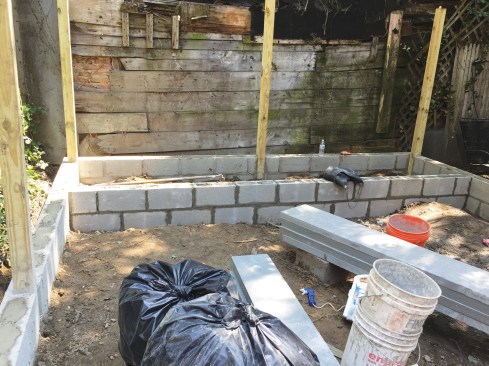
While laying up the CMU perimeter wall, masons also created a small planting bed at the back of the yard …
… and a set of steps with bluestone treads leading down to the lower level near the house.
On the neighbors’ side of the fence, we installed 5/4×6 PT decking, running the boards horizontally from the bluestone caps up to the 66-inch height of the fence. Before we installed the cedar fencing on our client’s side, the electrician ran the conduit and boxes for the fence lighting. Lights were spaced 8 feet apart and 55 inches high, just under the 5-foot maximum height allowed by code, to minimize their intrusion on neighbors. We waited until after deck construction to install the cedar interior fence boards and ipe fence cap (to match the decking).
Laying the Groundwork
Construction of the retaining wall included the installation of the CMU planting-bed walls and the two steps up from the patio area to the turf grass. The masons capped the planting-bed walls with bluestone and installed bluestone treads on top of the steps that divide and define the patio and the play area. Then it was time for both the patio and the play area to receive a 4-inch base of quarry process (QP). As with the dirt removal and material deliveries, the QP had to be brought in through the house by hand. We took care to protect the finished floors inside the house and installed walk boards spanning the patio area so that wheelbarrows could be used to deliver the QP up the steps to the play area.
Once the play-area base was compacted and level, we removed the walk boards so that QP could be deposited for the patio. First, though, we located the two deck post footings that had been poured during wall construction. The plan was to set the 6×6 posts in brackets on top of the patio bluestone above the footings. Once the footings were located and recorded, we dumped, spread, compacted, and pitched the QP to the patio drain.

All materials had to be transported by hand from the curb at the front of the house to the backyard through the brownstone townhouse.
Around the exterior of the perimeter fence, 5⁄4×6 pressure-treated decking was installed horizontally up to the maximum 66-inch height of the fence.
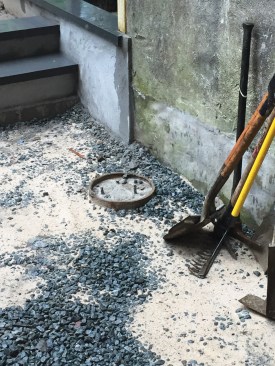
Footings for the deck’s two 6×6 support posts were poured (left) prior to the installation of the bluestone paver patio in the lower area (above).
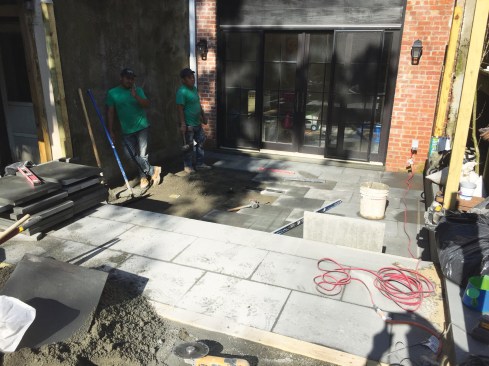
The bluestone patio went in next. Once again, the masons had to carry the load—this time, approximately 80 18-by-24‑inch pavers—in by hand (at about 60 pounds per paver and 100 pounds for each of the four 10-inch-wide by 8-foot-long stair treads, no gym workouts were needed during backyard construction). The challenge was creating a proper pitch from the four corners to the center drain using large and heavy pavers. A couple of buckets of loose QP to utilize during layout, and patience, did the trick. Joints were made tight, but afterward, we brushed in polymeric sand to fill voids and create a solid, stable surface.
Ipe Deck
Being that I was one of the carpenters, it was now my turn to carry materials in. Between the length of the ledger and joist stock and the tight turn to enter below the front stoop, we had to bring all the deck lumber in through the story above and lower it down into the backyard.
During the earlier renovation phase, we had situated an LVL exactly where we knew we would need to attach a future deck ledger. Now, we had to pad that LVL with solid 2×10 blocking beneath the second-story door to bring the face of the opening out flush with the brick wall on either side of the door, since the ledger would overlap the brickwork.
After cutting two PT 2x10s to length for the blocking, project manager Danny DoCouto wrapped their backs with Vycor Plus before fastening them to the LVL with HeadLok flat-head structural screws. Next, because there was still an uneven reveal from one side of the opening to the other, he applied PVC strips ripped to the width of the blocking as needed to pad the opening flush for the ledger installation. Finally, he cut the ledger to length and bolted it through the PVC strips and PT blocking into the LVL with long, staggered 1/2-inch-diameter lag bolts every 16 inches on-center. Where the ledger overlapped the solid three-wythe brick façade, he drilled pilot holes into the masonry and used expansion bolts and injection epoxy mortar.
Before the ledger for the new deck could be installed, the opening between the two solid brick walls was padded out with solid 2-by blocking and a PVC shim.
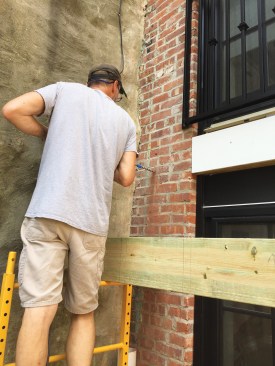
The ledger was fastened to the framing under the door opening with lag bolts and to the solid masonry wall with epoxied expansion bolts.
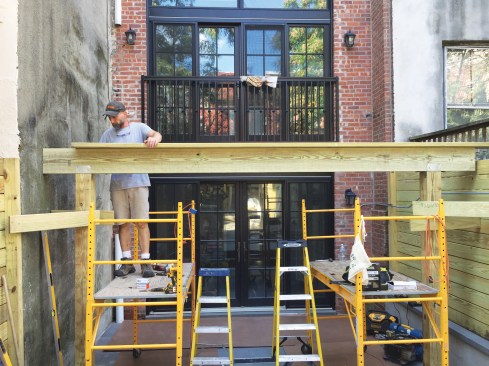
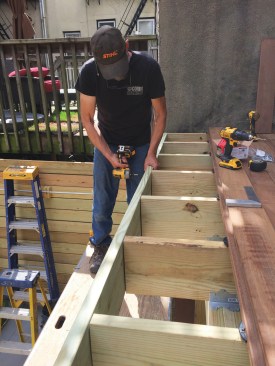
The rest of the rectangular 9-foot-by-12-foot deck was conventionally framed with PT 2x10s (above), which project manager Danny DoCouto cantilevered over a dropped triple 2×10 beam (right).
Next, we installed the 6×6 PT support posts, bracketing them directly to the bluestone pavers that bear on the concrete piers that had been poured earlier. After temporarily bracing the posts plumb, we used a laser level to mark their heights, allowing for the installation of a dropped triple 2×10 beam to carry the deck joists. To pitch the deck for drainage, we set the top of the beam 3/4 inch lower than the bottom of the ledger.
The 2×10 deck joists measured just over 9 feet long, including a 12-inch cantilever. We used joist hangers to mount them to the ledger, and angles to secure them to the beam. To strengthen and stiffen the deck a bit more and minimize the amount the joists would twist, we installed mid-span blocking between them. To ensure that the decking would end with a full-width deck board, we let the cantilevered joists run long, which allowed us to run the decking and accurately cut the joists to length later.
The plans specified 5/4×6 ipe material installed with hidden fasteners. It was a small, rectangular deck, about 12 feet wide and 9 feet deep, with a downspout in the southwestern corner as the only penetration to contend with, so running the decking material took little time. We conditioned the ipe with a penetrating oil, and we painted the posts and beam with black paint, so the completed deck blended nicely with the kitchen sliders when viewed from the backyard.
Finishes
We hired a subcontractor to install the deck’s iron railing, which matches the Juliet balcony rail we had installed during the renovation’s first phase (we had hoped to reuse it, but the fabricator was unable to incorporate it into the new railing).
After the fencing folks installed the red cedar boards that make up the interior wall of the fence, the electrician returned to install the light fixtures.
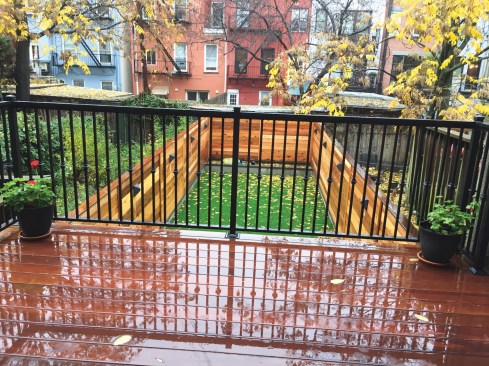
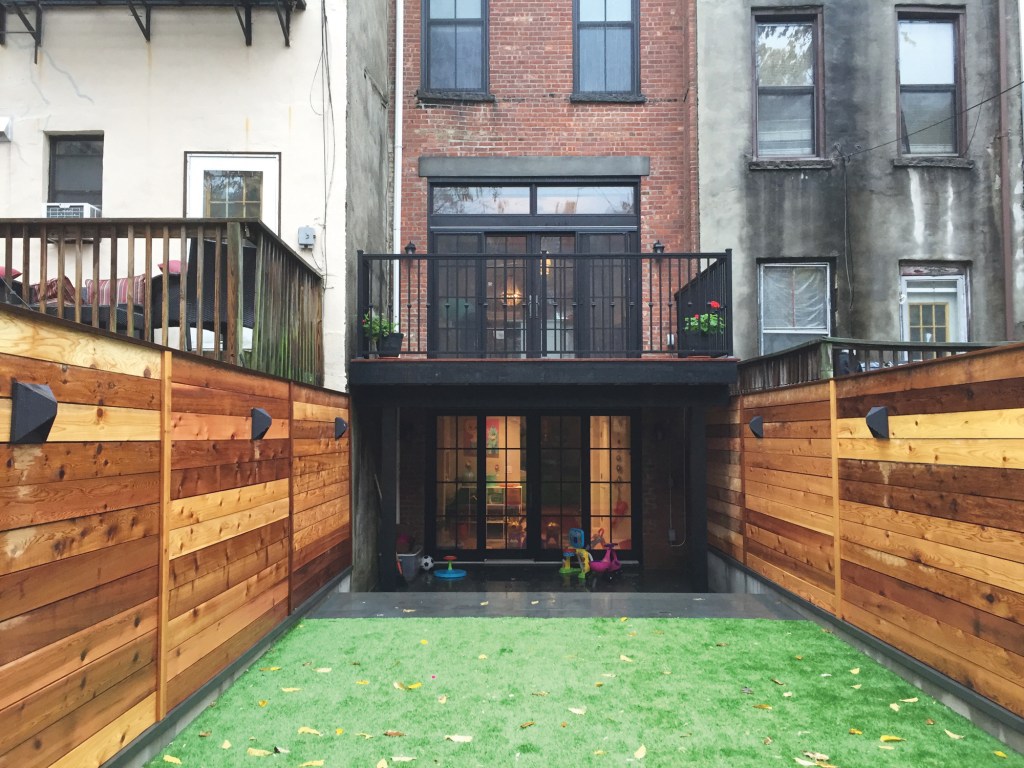
The ipe deck was finished with a custom-fabricated iron railing and looks out over the compact backyard, which serves as a low-maintenance play area for the young family.
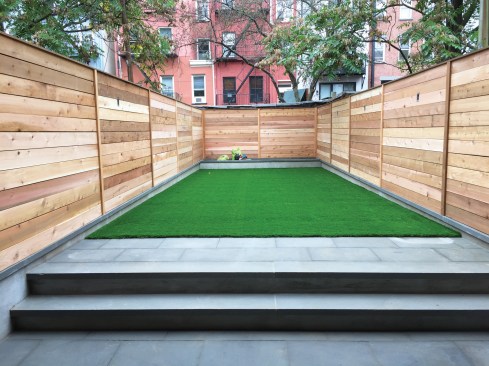
Surrounded by a fence composed of red cedar boards, the backyard is covered with artificial turf instead of grass.
The artificial turf grass was the final piece of the puzzle. We chose GardenMark’s Montana synthetic turf, whose multihued polyethylene monofilament yarns, stitched through polypropylene woven fabric and fiber net backings, have a realistic texture and coloring. It came in a roll 15 feet wide and 100 feet long, so we didn’t need to glue seams or worry about the orientation of the grass fibers (or blades) in multiple sections of turf. The main trick was stretching the turf as tightly as possible, after which Victor and his crew staked it into place every 6 inches around the perimeter. To the delight of the homeowner (and us), the grass will never need cutting again.
Photos by the author.❖


