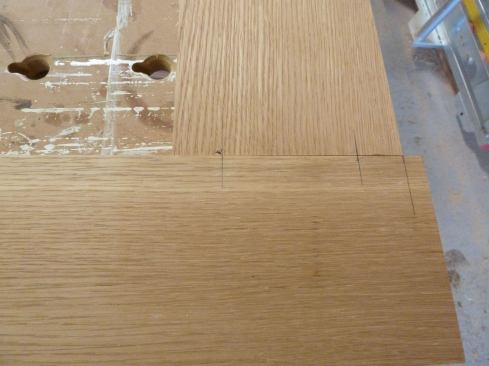
We laid the door parts flat on our bench and struck marks for th…
My company installs aluminum storm doors, but we also offer a more traditional alternative: fabricating and installing custom storm doors out of rot-resistant wood such as white oak or mahogany. A wooden storm door can add character to a newer home or restore character to a home that may originally have had a wooden door. Doors can be simple frames with rectangular screen panels, or they can have decorative grilles.
Build the door flat
I made this door out of rift-sawn and quarter-sawn white oak, a strong, stable, and decay-resistant wood that’s perfect for a door exposed to the weather. It also takes a finish well. I rough-cut the lengths I needed for the stiles and rails from rough-sawn stock and milled the stock down to a full inch thick. As I milled the lumber, I chose the best-looking faces for the exterior.
I cut the rails exactly to length using a miter saw set to 90°, but left the stiles long for the time being. I ripped a 15° bevel along the top edge of the bottom rail to help the rail shed water and to keep water from pooling in the joints between the stiles and the rails.
Doors must be constructed dead flat if they are going to fit and operate properly. This is particularly true for storm doors, which are usually made from thinner material than an exterior door and often have a simple rectangular frame that holds either a screen panel or a glazing panel. Without the structural elements of a typical door, careful joinery and assembly on a flat surface are essential for keeping everything in one plane.
My company does a lot of door work, so we designed a large, flat workbench specifically for building doors. If you don’t have a flat assembly table that’s big enough, you can make a torsion box for assembling the door. Many designs for one can found online—it’s basically a large, flat box with an internal wooden grid that keeps the box perfectly flat. It can be placed on a table or on sawhorses to help ensure a flat glue-up.
Mortise-&-tenon joints
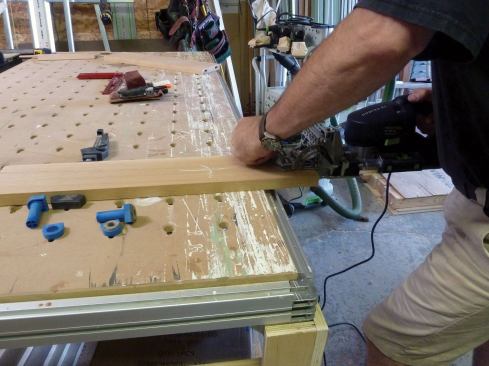
To reinforce the corners of the door where the stiles and rails joined, we used loose tenons that slipped into machined mortises. Mortises can be cut with a drill and chisel, a router, or a hollow-chisel mortiser, but we’ve found that using a Festool Domino Joiner is the fastest method. It’s easy to set up, is portable, and it’s simple to operate—perfect for this application.
The general rule of thumb for this type of joint is to make the tenon approximately one-third the thickness of the stock being joined. The 10mm Domino bit that I chose was slightly larger than that.
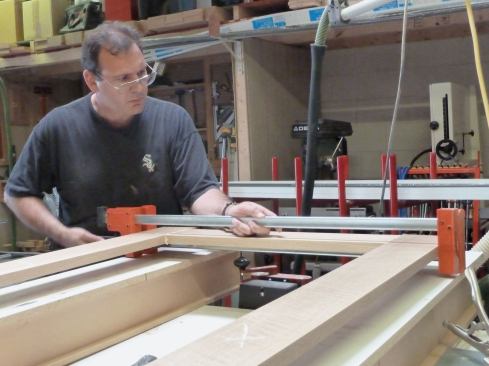
We laid the door parts flat on our bench and struck marks for the centerline of each tenon on the face of each intersecting stile and rail. The marks also registered the Domino’s fence to cut the mortise.
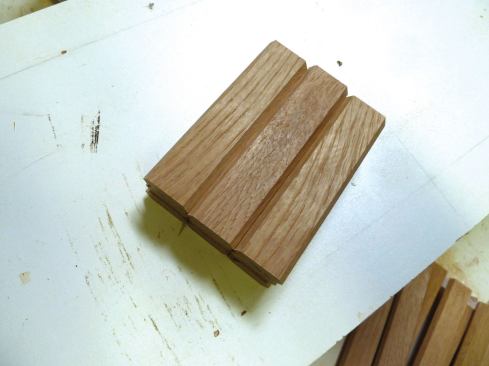
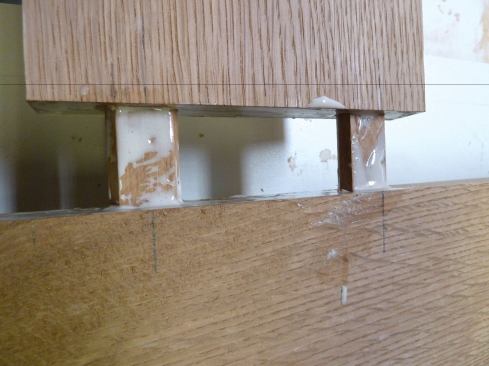
In the past we’ve had good success with Festool’s rot-resistant SIPO Domino tenons for exterior work, but it’s easy and less expensive to make our own. For this door, we used left-over white-oak scraps to make tenons 10mm thick by 100mm long. We used two tenons at each joint, which we’ve found to be strong enough for an average door. Machining the mortises using the Domino Joiner just took a few minutes, and then we quickly dry-fit the joints to make sure everything aligned properly.
The glue-up
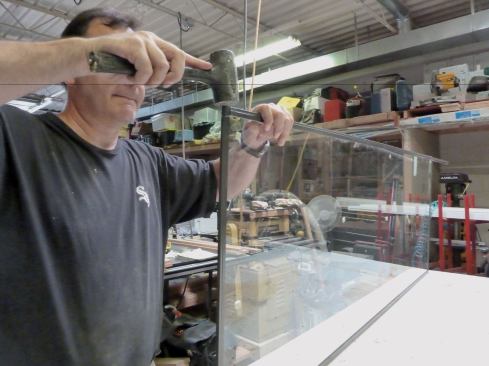
Because storm doors are exterior doors, always use a waterproof glue, such as Gorilla Glue or Titebond III. We spread glue on all mating surfaces, including the tenons, and placed the assembly on bar clamps at each end of the door. We tightened the clamps and added a second set of clamps on top of the door. Once those clamps were tight, we sighted down the length of the door to be sure that the top pair of clamps were dead parallel, which meant that the door was perfectly flat.
We kept pressure on the joints for at least two to three hours. When we removed the clamps, we scraped off the glue squeeze-out using a stiff putty knife, and followed that with a light sanding. (Avoid wiping off the excess glue when it’s still wet, which drives the glue into the wood pores and prevents that area from taking stain).
Finishing the door
After removing the clamps, we sanded all surfaces of the door, starting with 100 grit and working up to 180.
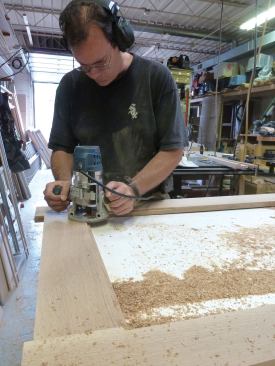
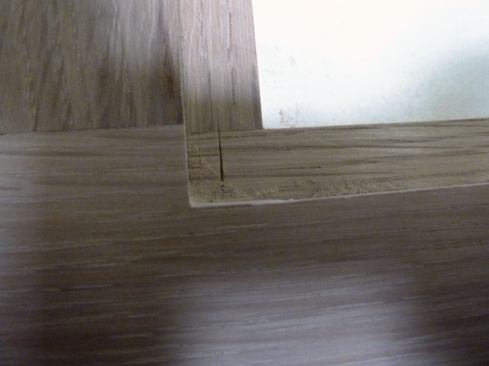
Then we routed a 1/2-inch–wide rabbet around the inside of the frame. This rabbet would receive the interchangeable screen and glazed panels, so its depth was dictated by the thickness of the aluminum channel that held the panels—about 3/8 inch in this case. To minimize chip-out along the rabbet’s edges, we made the cut in several passes, taking away a small amount of stock at a time until the rabbet was complete. At that point we squared the corners with a sharp chisel.
After a slight touch-up sanding, the frame was ready for finish. We stained the door and applied three coats of exterior varnish in the controlled environment of the shop. We made certain to seal all surfaces of the door, knowing that we still needed to cut the door to fit after we get to the jobsite.
Screen & glazing panels
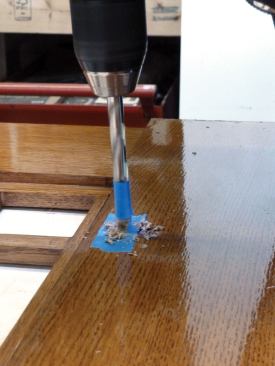
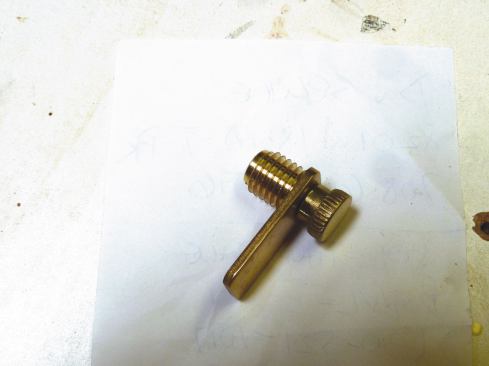
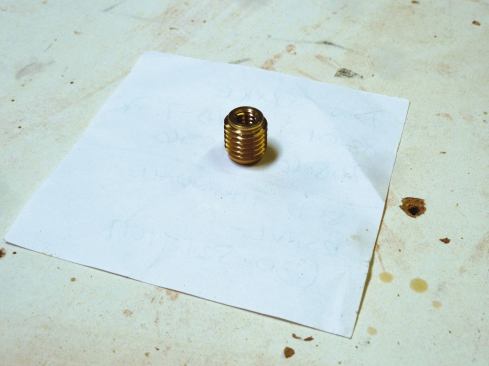
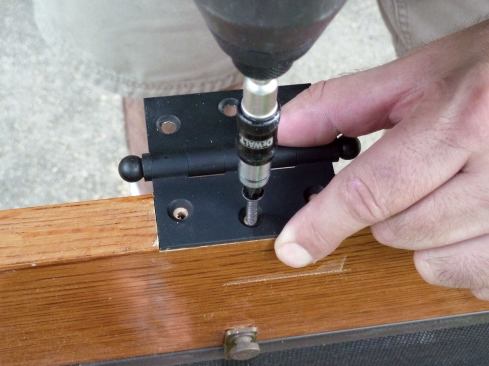
To facilitate easy installation and removal of the screen and storm panels, we used solid brass thumb screws and tabs to secure the panels in the rabbet. These thumb screws attached with a machined thread, so we first embedded solid brass threaded inserts in the door to accept the thumb screws.
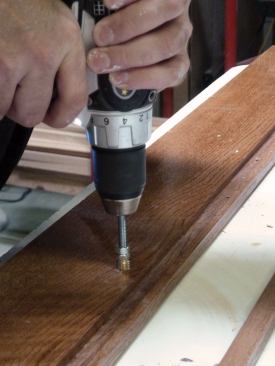
Holes for the inserts were laid out and drilled, using tape on the drill bit to gauge a hole that would be slightly deeper than the length of the insert. Threading the inserts into the hard white oak took a bit of patience and care, but we used a headless bolt chucked into a drill. The inserts were then threaded onto the bolt and held in place with hex nuts. With the drill on a low-speed setting, we carefully spun each insert into its hole, taking care to drive them in perpendicular to the face of the door.
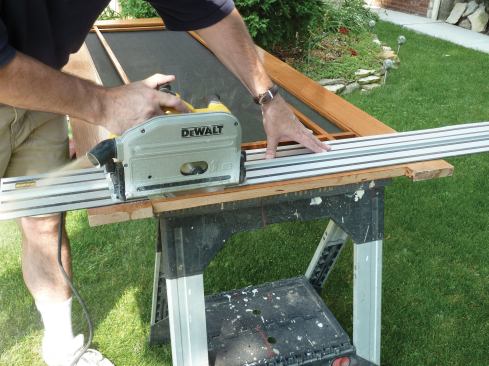
While this “combination” door was intended to mimic a traditional wood screen door, the screen and storm panels were interchangeable. The panels were made with extruded aluminum frames that hold either glass or screen. These extrusions are available from commercial glazing suppliers, as well as from some lumberyards and home centers (we used profiles from C.R. Laurence), and are easily cut using a hacksaw or miter saw fitted with a fine-tooth carbide blade. Friction-fit plastic corners from the manufacturer join the extrusions at a right angle to create the frame.
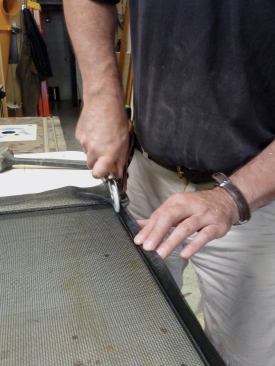
We measured and cut the lengths, then assembled the frame. The face of the screen extrusion has a groove that captures the screen with a spline that is pressed into the groove. Because the owners of this house had a large dog, we fitted the frame with a heavier than normal fiberglass screen sold as “pet screen.” The glazing extrusion is similar, except that a stepped rubber gasket inside the extrusion holds standard tempered glass securely.
Fitting & Hanging THE DOOR
Storm door installation is generally straightforward if the door opening is fairly true and square. We measured the opening and made sure that both the width and height were uniform, then we trimmed the door to size using a track saw. For an opening that is off, we would scribe the door to the opening and trim it to fit.
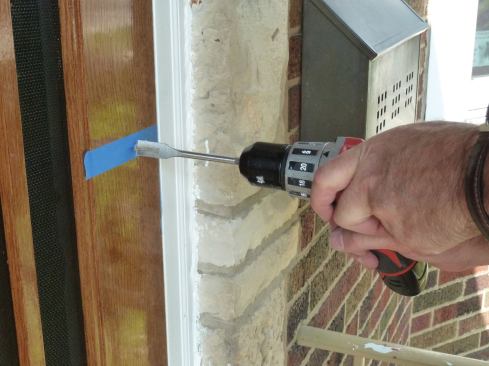
We hung the door on three butt hinges mortised into the edge of the slab and into the brick-mold door trim; extra hinges can be added for larger doors. Because of the oak’s density, we pre-drilled all screw holes. We drilled for and installed a traditional storm-door latch in the strike side of the door, along with a heavy-duty pneumatic closer mounted on the bottom rail. Finally, we stained and varnished any bare wood that was exposed during the fitting process and inserted the screen panel to complete the installation.


