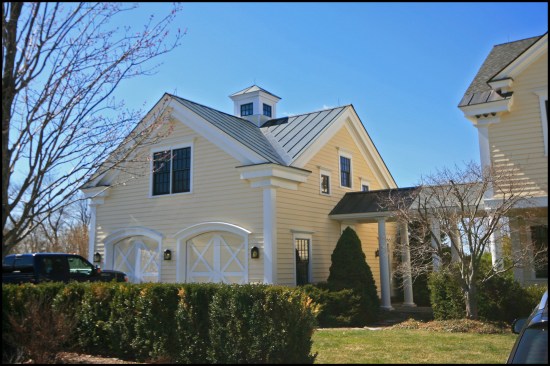
A few years ago, the company I work for, New Dimension Construction, was asked to repair a leaky cupola on a carriage-house garage (see “Fixing a Poorly Flashed Cupola,” Apr/16). The restoration of the cupola went well, and the clients called us back last fall to repair more of the home’s exterior problems. Though only 13 years old, this nicely trimmed-out house showed signs of premature trim and siding failure on both the main house and the attached garage—something we had pointed out to the clients while we were working on the cupola.
The cause of most of the problems was inappropriately installed drip-cap flashing. Some of the window and door heads were “flashed” with housewrap tape (the tape was adhered to the face of the WRB and run onto the exterior head trim). Over time, the tape lost its adhesion and failed, leading to repeated water intrusion into the home. Nowhere was this more apparent than with the garage doors on the carriage house.
Located on an attached carriage house, the two segmented-arch-top garage doors were shop-built and made out of mahogany.
Arch-Top Garage Doors
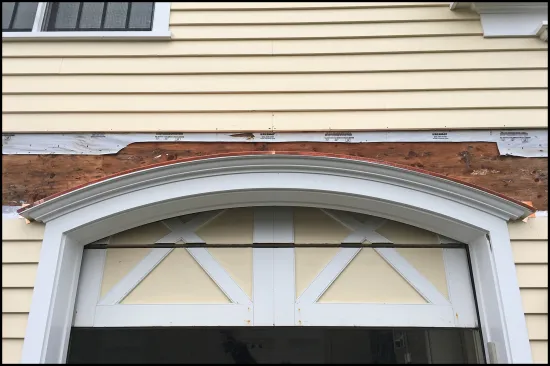
The home’s two segmented-arch-top garage doors were shop-built and made out of mahogany (the rest of the building had been trimmed out in pine). As I started in on the repairs, I noticed that the arch top’s wide cap molding was custom milled with an outward slope for drainage. Standard metal head flashing had not been installed, and loose tape was all that remained to bridge the gap between the existing WRB and curved cap molding (the original builders probably thought the sloped cap molding would be sufficient to shed water away from this critical juncture).
Though it appeared some water had been wicking behind the clapboards and the subpar tape “flashing” for some time (the siding was cut tight to the cap molding), the main problem was at the lower ends of the cap molding. Water had managed to collect at the bottom of the sloped mahogany cap and find its way in behind the siding and WRB.
Removing the rot. I opened up the garage wall to discover rotted sheathing and framing that looked charred from the effects of whatever type of mold or other fungus was present. The wall’s open-cell foam acted like a sponge, holding a reservoir of moisture from years of repeated wetting. I demolished the sheathing and removed about 1 1/2 to 2 inches of the wall’s 2×8 SPF framing (the carriage-house garage and living space above were heated and well insulated). I then cut slices in the exterior face of the framing and chiseled out the little blocks of rot down to good wood. The door’s header had some surface rot, which I cut out. I let the insulation dry out for a few days, then spliced new wood onto the front of the existing wood and skinned over the repaired framing with new plywood sheathing.
The door’s mahogany frame had some minor rot and its wide cap molding had just started to deteriorate at the lower ends. I restored these areas with small applications of Abatron Wood Epoxy.
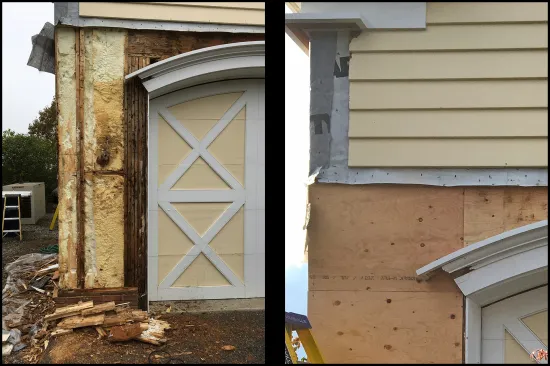
Water damage was due to a poorly flashed drip cap (housewrap tape was used to “flash” the wall-to-drip-cap transition). Though it was milled with an outward slope, water collected at the lower ends of the drip cap and found its way in behind the siding and WRB. The wall’s open-cell foam acted like a sponge, holding a reservoir of moisture from years of repeated wetting (above left). About 1 1/2 to 2 inches of the wall’s rotted, exterior-facing 2×8 SPF framing was chiseled out down to good wood. New wood was spliced onto the front of the existing, and new plywood sheathing was skinned over the repaired framing (above right).
A Learning Curve
I’ve made numerous site-fabricated curved head flashings for windows and doors (usually no more than 4 feet wide, covering 5/4-thick head trim stock). At more than 8 feet wide and with 5-inch curved cap trim, these doors were on the large side for me (I had to make the flashing in two pieces, lapping them at the center high point).
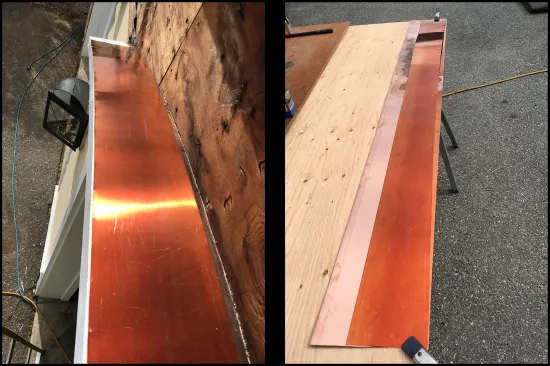
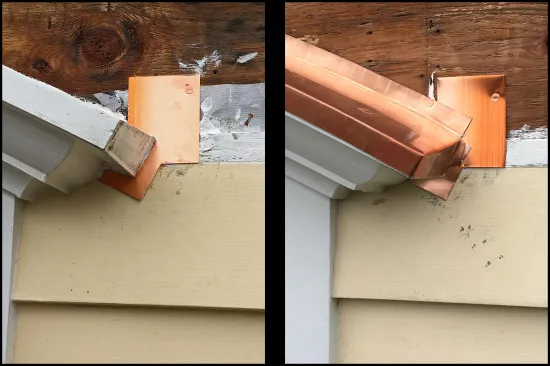
Starting out, I laid down a 6-foot-long strip of flat stock over half the arch. That’s when I noticed that making the flashing wasn’t going to be as easy as I thought—I hadn’t factored in how the outward slope of the curved cap would affect making the new flashing. The flat stock overhung the wood cap’s front edge by about 1 1/4 inches in the middle of the curve. A corresponding gap between the flat stock and the wall sheathing roughly mimicked the crescent-shaped overhang in the front. Not only would I have to make an arch-shaped flashing, but I’d also have to bend it along a slight crescent-shaped curve, upping the degree of difficulty.
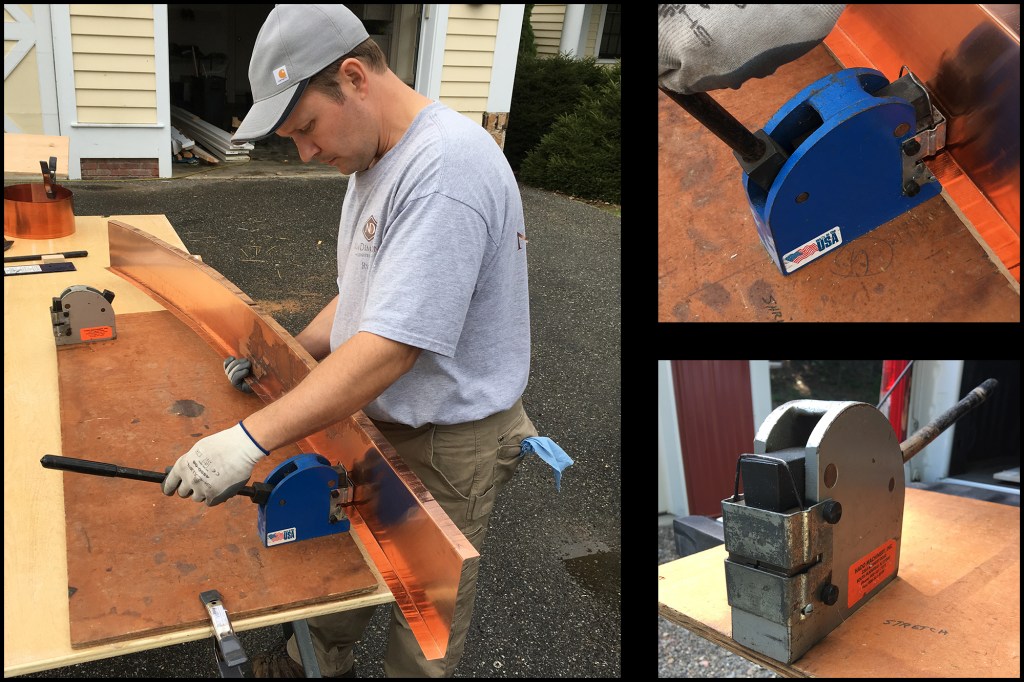
The sloped drip cap (inset) made a tricky flashing job even trickier. The length of the head flashing was already an issue for on-site fabrication (two pieces of roughly 6-foot-long flat stock, lapped in the center, were needed for each door). When laid in place, the copper flat stock overhung the cap in the center a little more than an inch (main photo). The slope changed the geometry enough to where the flat stock needed to be crescent-shaped to fit properly.
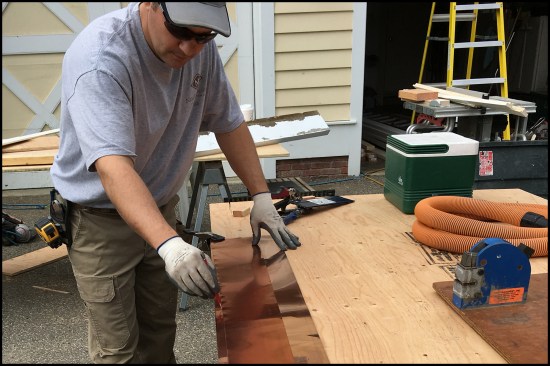
After a few minutes of head scratching, I laid the flat stock back down and marked a scribe line from underneath from the front edge of the cap. I set the scribed piece on my work table and cut out the crescent shape; this became my pattern (see illustration, below). I laid the pattern on some wider 16-gauge copper stock and traced out this crescent shape, then cut out the curve with a pair of tin snips (see slideshow, below). Next, I used a block as a scribe and marked a 1-inch fold line for what would be the downward vertical leg of the front of the head flashing, then bent the copper stock with a hand brake. I measured out 5 inches to match the width of the sloped cap, plus another inch for the vertical leg, which would run up the sheathing. I repeated the previous marking, cutting, and bending steps for the upturned leg of the head flashing.
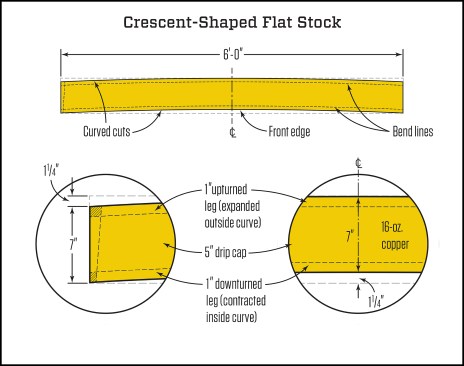
The author made the head flashing from 8 ¼-inch-wide 16-gauge-copper flat stock to accommodate the drip cap profile, 1-inch up- and down-turned legs, and “tailored” crescent-shape.
Shaping the Curve
On repair jobs where we’ve encountered metal flashing at arch tops, we’ve typically found butchered aluminum flashing with vertical legs repeatedly cut in order curve the flashing to its needed shape (they might as well have not installed anything). To avoid such practices, we use a couple of tools that allow us to make curved flashing on site fairly quickly and easily.
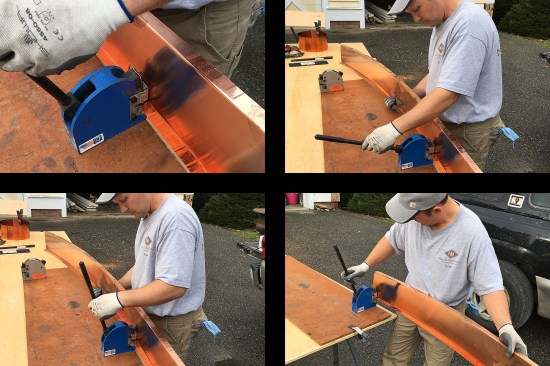
Years ago, our company purchased a set of Eastwood sheet-metal shrinker and stretcher tools (largely used in autobody repair work) after seeing a roofer using them on a jobsite. They operate on the same principle; both have little jaws that grab the metal and either contract it to form inside curves or expand it to form outside curves. When making curved flashing with both upturned (an expanded outside curve) and downturned (a contracted inside curve) vertical legs, you have to gradually form it into its final shape—you can’t shrink or expand one side all in one shot.


Starting out, a 6-foot-long strip of flat stock was laid over ha…
The first piece. With the vertical legs bent, I began to shape the curve. First, I transferred half of the arch’s profile onto a piece of plywood, then laid it on the table as a reference guide. Then, I started to curve the copper, alternating between the shrinker (blue) and the stretcher (gray) as needed. I lightly pulled the handle up to release the jaws, slid the flashing’s vertical leg forward into the jaws, and lightly pressed the handle down. I was careful to advance the metal about an inch at a time (the tools shrink or expand the copper over a small area). After repeatedly checking the flashing against the reference and going up and down the ladder a few times to lay it in place, I finished one side of one arch top’s flashing. Now that I knew what I was doing, I was able to form the second, third, and fourth pieces faster.
Installing the Head Flashing
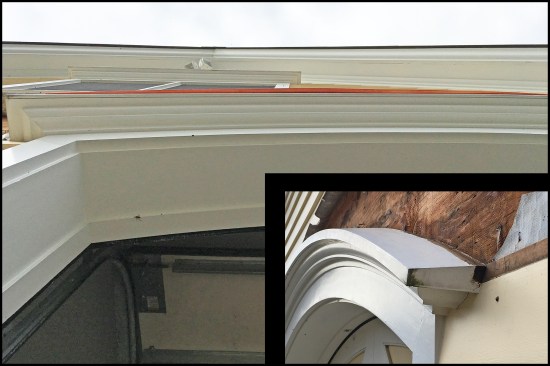
Before I installed my finished head-flashing pieces, I first slipped small pieces of copper flashing under the ends of the mahogany drip cap (the bottom of the flashing lapped onto the clapboard siding below). These small corner flashings help prevent water draining off the head flashing from finding its way behind the siding and housewrap.
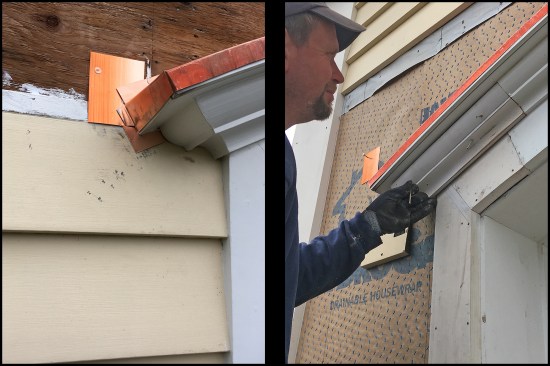
Small pieces of copper flashing were installed at each end before the curved head flashing was placed (above left). The small flashings prevent any water draining off the head flashing from finding its way behind the siding and housewrap. Though the door’s mahogany frame was largely unscathed (the rest of the building’s pine trim was worse off), some minor rot prompted some trim replacement and small applications of Abatron Wood Epoxy to restore the mahogany (above right).
With the small flashing in place, I installed the two head-flashing pieces, lapping them 2 inches at the center high point. The finished flashing fit snugly to the existing drip cap and I needed only a few fasteners to hold it in place—the fewer nails, the better. I nailed the flashing to the sheathing with three copper nails (one at each end and one at the center seam) and face-nailed the front edge with three more copper nails, similarly located. Finishing up, I soldered the center seam where the two pieces lapped. Then, I patched in some new drainable housewrap, placed peel-and-stick over the new housewrap and copper, and re-sided. The flashing fabrication process (learning curve and all) took about two days to complete.
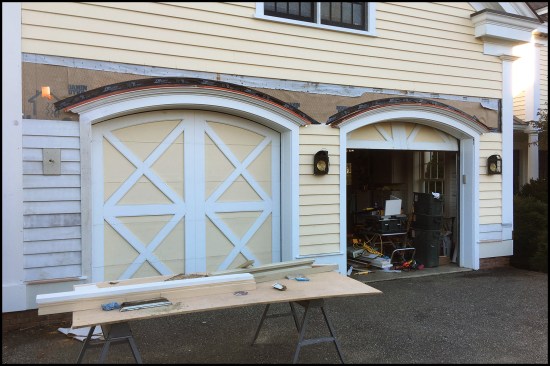
Repaired carriage house wall and archtop garage doors.
All photos by Ed Brady


