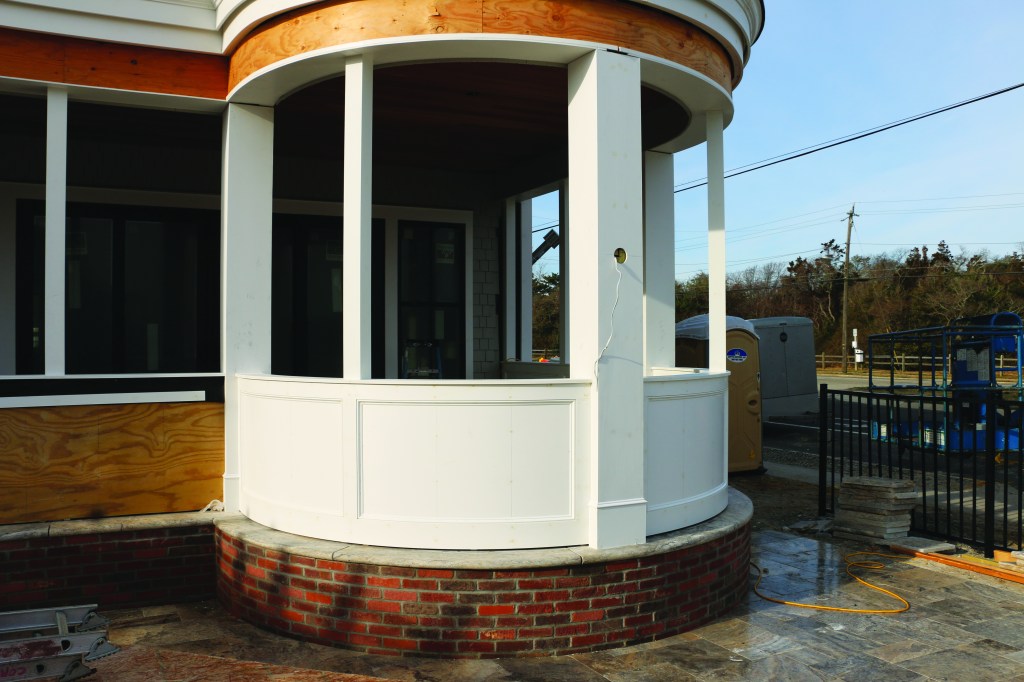
A new home that my company built this year included a two-story radiused porch, the framing of which I described in the article “Framing a Half-Round Porch” (Apr/19). This distinctive structure is attached to a corner of the home and is highly visible from a nearby street. The original elevations showed a railing between the posts, but the client requested that I use a recessed flat-panel knee-wall design that I have used on a few other homes. The design is relatively simple—in many regards, simpler than a railing system. The biggest challenge would be executing the design on a curve.
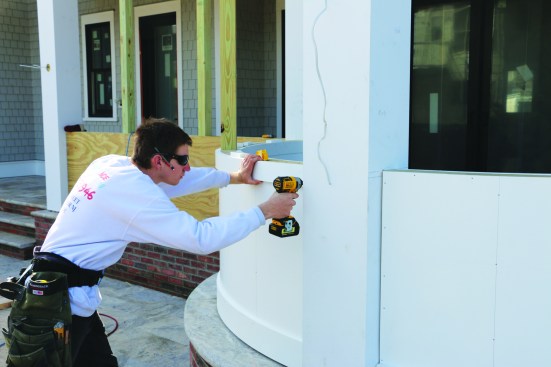
Before working out the details of the knee walls, we installed finished surrounds on the steel support columns with adequate blocking inside the surrounds for attaching knee-wall framing and screen panels. At the time of writing this article, we had already completed the curved panels on the second floor, which gave us a chance to work out the kinks in the process.
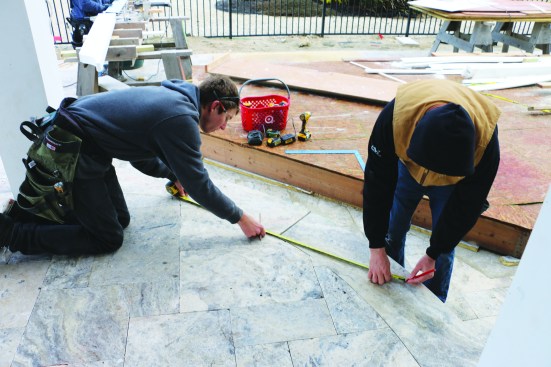
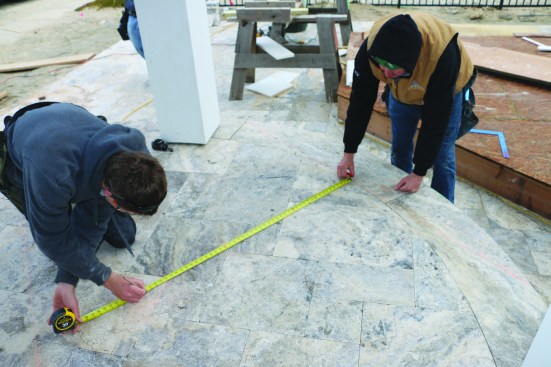
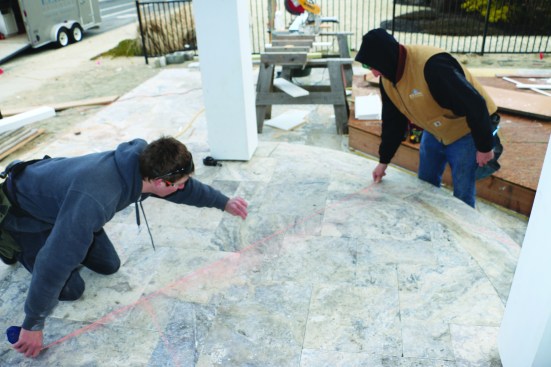
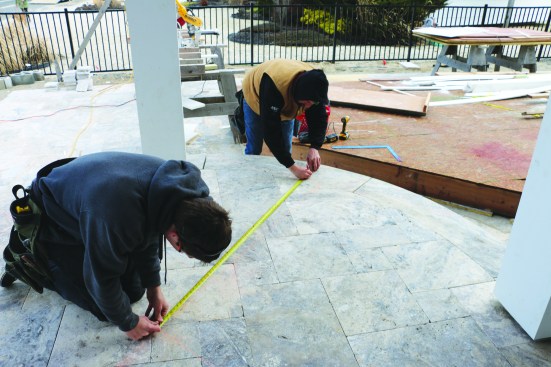
Every curved detail of the porches worked off one center point, which was key to the framing process as well as to laying out and cutting the travertine tile for the finished floor of the lower porch. But the mark was covered by the new floor, so we first had to draw on our high-school geometry to re-establish that point. Once we’d found the center of the circle, finishing the rest of the steps for this eye-catching curved detail was pretty straightforward.
1
of 31
The original center point that the crew had used for laying out …
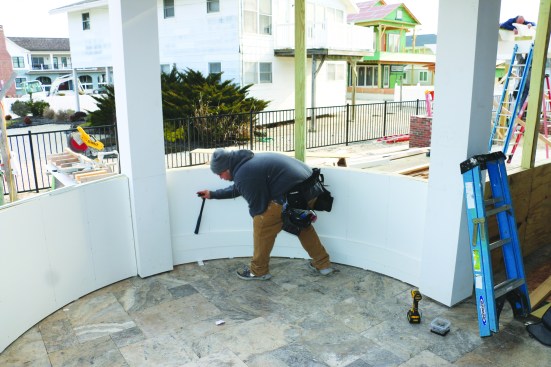
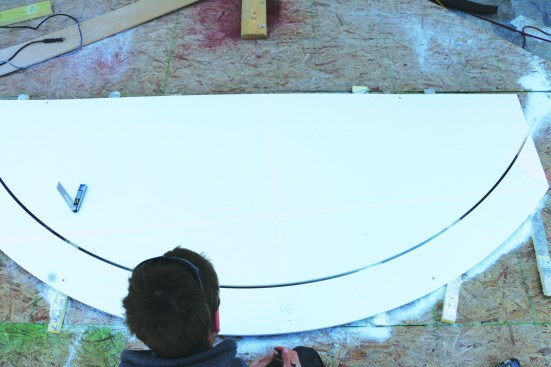
The original center point that the crew had used for laying out and framing the circular porch was covered by the new travertine tile on the porch floor. To re-establish that point, crew members mark a pair of chords, or straight lines, that connect two random points along the outside arc of the stone floor. Then they mark the center point of one chord.
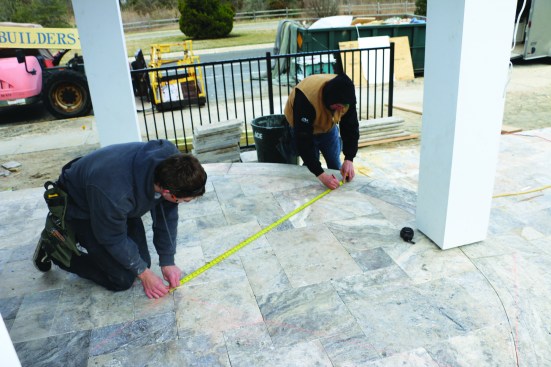
Plot a 3-4-5 triangle from that point
Snap a chalk line from the centerline along the triangle leg tha…
Snap a chalk line from the centerline along the triangle leg that is perpendicular to the chord. The process is repeated on the other chord, and the intersecting point of the two snapped lines is the center, or pivot, point of the circle.
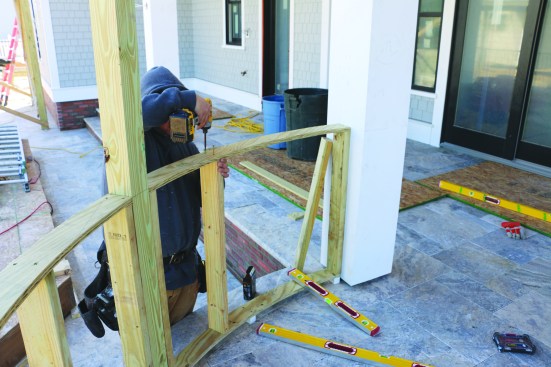
After laying out where the 2×4 framing meets the posts, the crew…
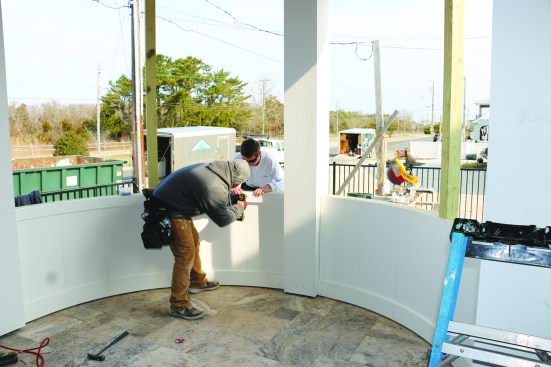
After laying out where the 2×4 framing meets the posts, the crew measures the distance from the pivot point to the layout. While one person holds the end of the tape at the pivot point, a second person scribes both the outside radius …
… and the inside radius for framing the railing.
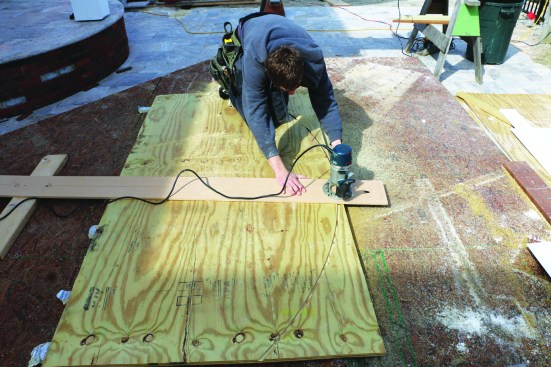
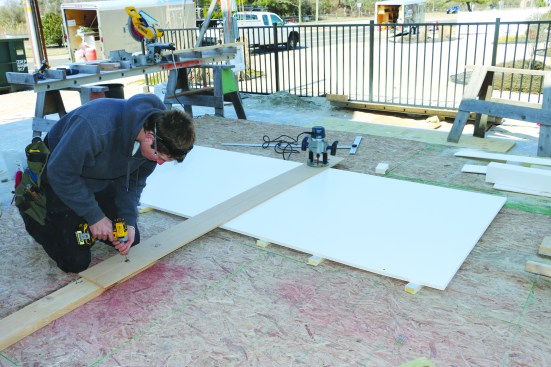
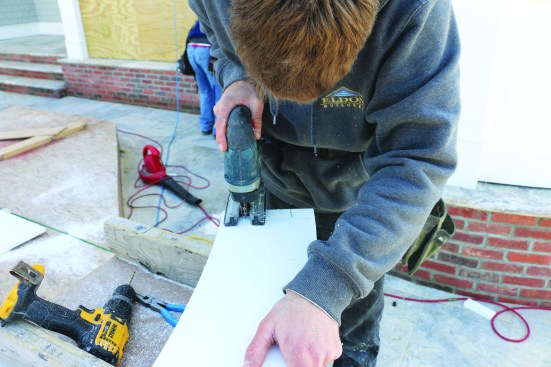
The crew cuts the curved plates from 3/4-inch treated plywood, u…
The crew cuts the curved plates from 3/4-inch treated plywood, using a router mounted on a strip of plywood to act as a trammel arm.
First, a crew member cuts the outside arc in two passes, and the…
First, a crew member cuts the outside arc in two passes, and then he resets the pivot point to cut the inside arc to complete one of the plates.
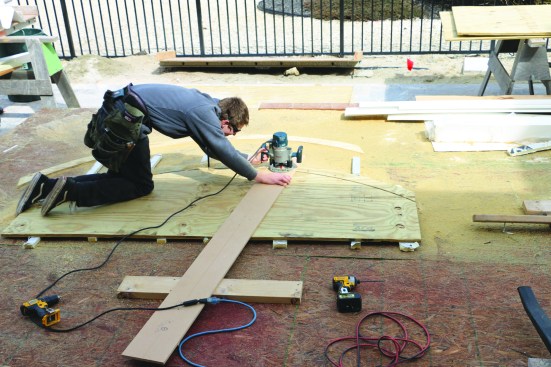
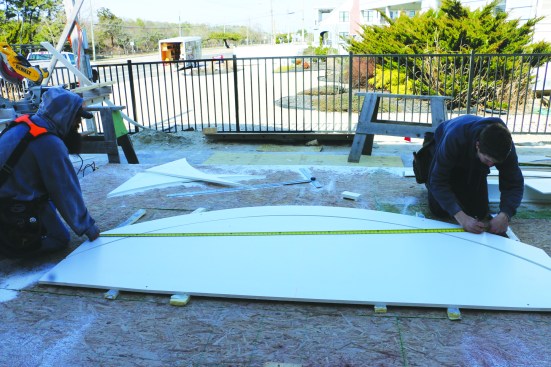
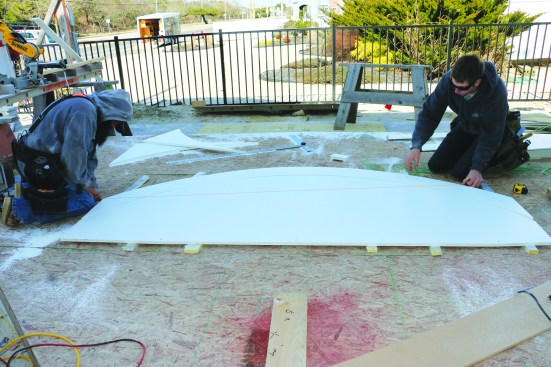
After measuring between the layout points on the primary posts a…
After measuring between the layout points on the primary posts and cutting the plates to length, he installs intermediate 4×4 posts on stainless steel post bases that have been attached to the travertine with concrete anchors. He then frames the knee wall on top of PVC blocks that allow space for drainage below the framing.
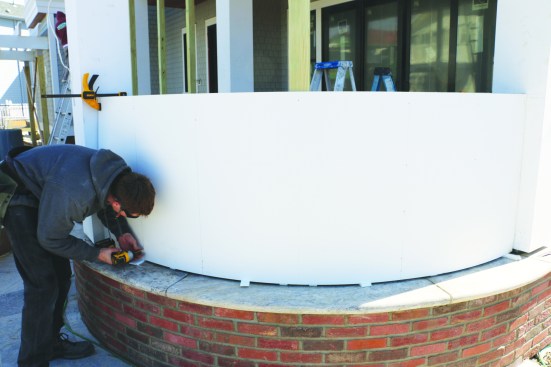
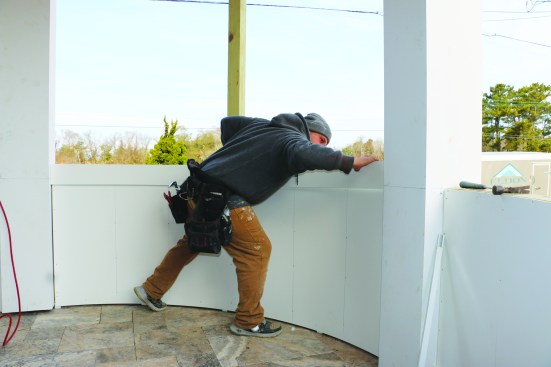
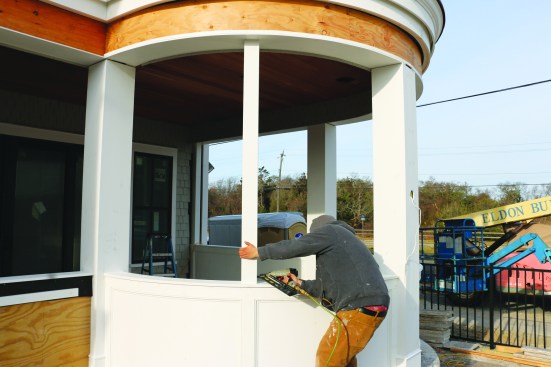
The base layer of the flat panels is 3/8-inch-thick PVC sheet st…
The base layer of the flat panels is 3/8-inch-thick PVC sheet stock. For the outside of the curve, the crew cuts the sheet to length and width and then clamps the sheet to the framing. After drawing vertical lines to mark the stud locations, a crew member attaches the sheet to the framing with stainless steel screws, working progressively from one end to the other while keeping the free end clamped in place.
For the inside panels, the crew cuts the sheet stock to length a…
For the inside panels, the crew cuts the sheet stock to length and then springs it into place between the posts. As with the outside panels, the crew marks the locations for the studs.
Then they drive stainless steel screws to anchor the sheet stock…
Then they drive stainless steel screws to anchor the sheet stock to the framing.
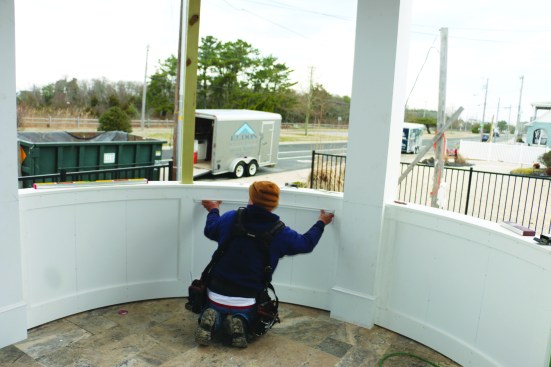
The rails for the flat panels are fashioned out of stock PVC boa…
The rails for the flat panels are fashioned out of stock PVC boards, 1×6 for the bottom rails and 1×4 for the top rails. The 1-by PVC stock is flexible enough to bend to the curve of the knee walls without breaking. For the rails on the inside, a crew member cuts the boards to length, then springs each one into place at the top of the paneled wall.
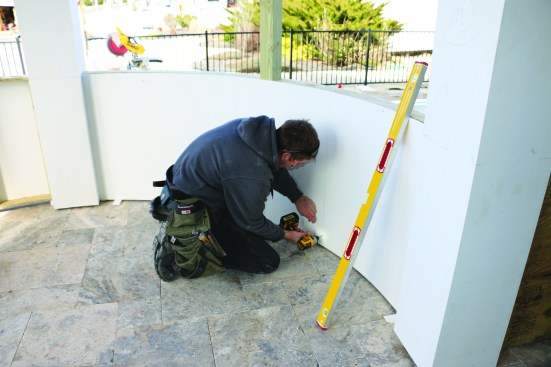
He taps the bottom rails down to the bottom of the panels using …
He taps the bottom rails down to the bottom of the panels using the rubber handle of a hammer before fastening them in place with stainless steel screws.
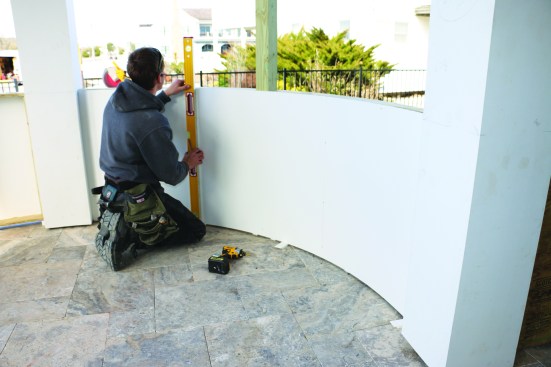
The top rails spring into place and the crew levels them using a…
The top rails spring into place and the crew levels them using a laser level. Stainless steel screws hold them in place as well.
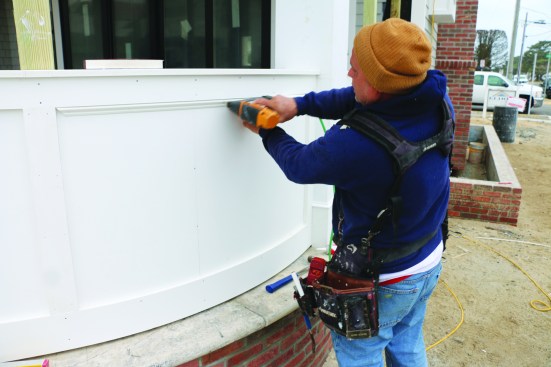
For the rails on the outside curve of the knee wall, the crew in…
For the rails on the outside curve of the knee wall, the crew installs the same dimension top and bottom rails as on the inside. After cutting the bottom rail to length, a crew member screws it through the flat panel and into the knee-wall framing, working from one side to the other.
As with the sheet stock, one end of the 1×4 top rail can be clam…
As with the sheet stock, one end of the 1×4 top rail can be clamped in place while a crew member secures the rail in place with stainless steel screws.
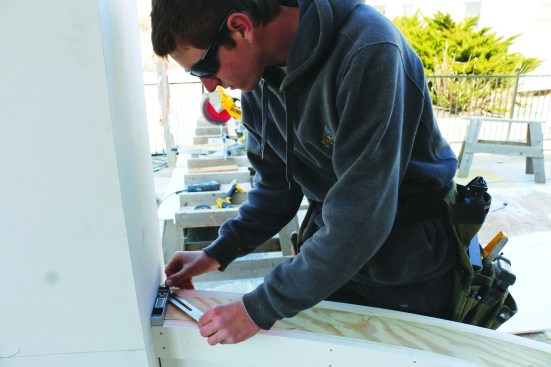
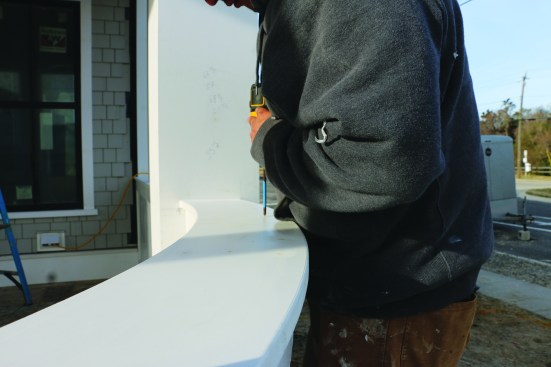
The cap for the curved panel walls is cut from 3/4-inch-thick PV…
The cap for the curved panel walls is cut from 3/4-inch-thick PVC sheet stock. With the router mounted on the same trammel arm that he used before, a crew member first sets the radius for the outside of the curved cap rail and drives a screw to secure the pivot point.
Making multiple progressively deeper passes, he cuts the outside…
Making multiple progressively deeper passes, he cuts the outside radius for the cap rail.
After resetting the pivot point, he makes the cut for the inside…
After resetting the pivot point, he makes the cut for the inside radius of the cap rail.
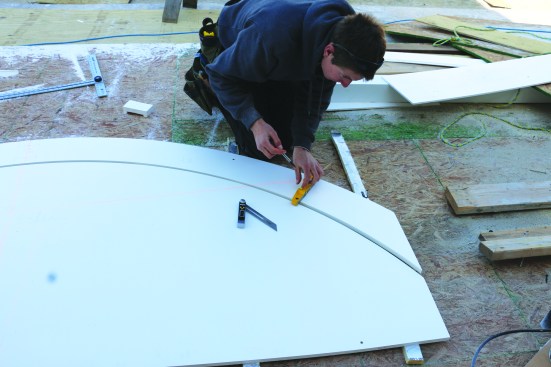
After measuring a straight line between the posts for each arc, …
After measuring a straight line between the posts for each arc, the crew transfers the measurement to the radiused cap.
Then they snap a chalk line between the end points.
Having snapped the same line on top of the knee wall, a crew mem…
Having snapped the same line on top of the knee wall, a crew member measures the angle between the snapped line and the post.
He then transfers the angle to the radiused stock and draws stra…
He then transfers the angle to the radiused stock and draws straight lines for the end cuts of the cap.
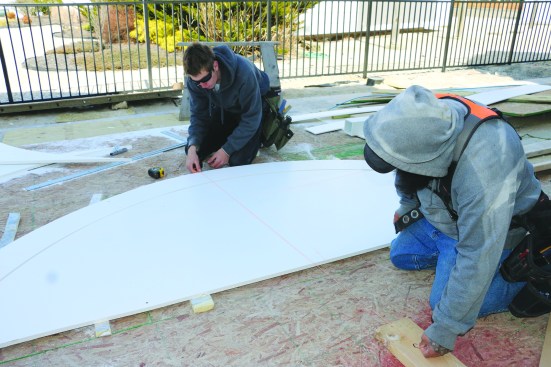
To lay out the location of the intermediate post, the crew snaps…
To lay out the location of the intermediate post, the crew snaps a line from the pivot point through the centerline of the arc.
They mark the post location.
After dividing the top cap into two pieces by cutting along the …
After dividing the top cap into two pieces by cutting along the centerline, a worker uses a jigsaw to cut out the post.
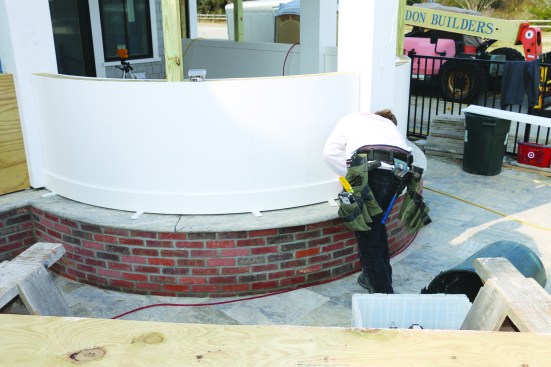
The cap is screwed to the knee wall.
PVC panel molding completes the paneling outside …
… and in.
The crew wraps the intermediate posts in PVC using the same meth…
The crew wraps the intermediate posts in PVC using the same method described in “PVC Miter-Fold Post Wraps” (Jul/16). The PVC wraps nail directly to the 4×4 posts.
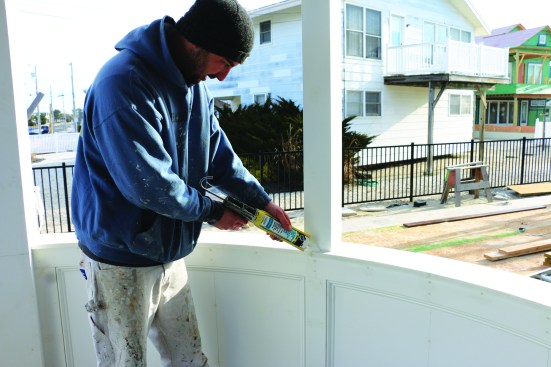
The final step is caulking all the joints, filling the fastener …
The final step is caulking all the joints, filling the fastener holes, and prepping for the painter.