I’ve been a siding installer since the 1970s and have had my own business since the 90s. In the early days of my career, we didn’t work on much new construction. Mostly, we installed aluminum—usually right over the existing siding. By the mid-80s, new developments were popping up, and most of the houses in those communities were sided in vinyl.
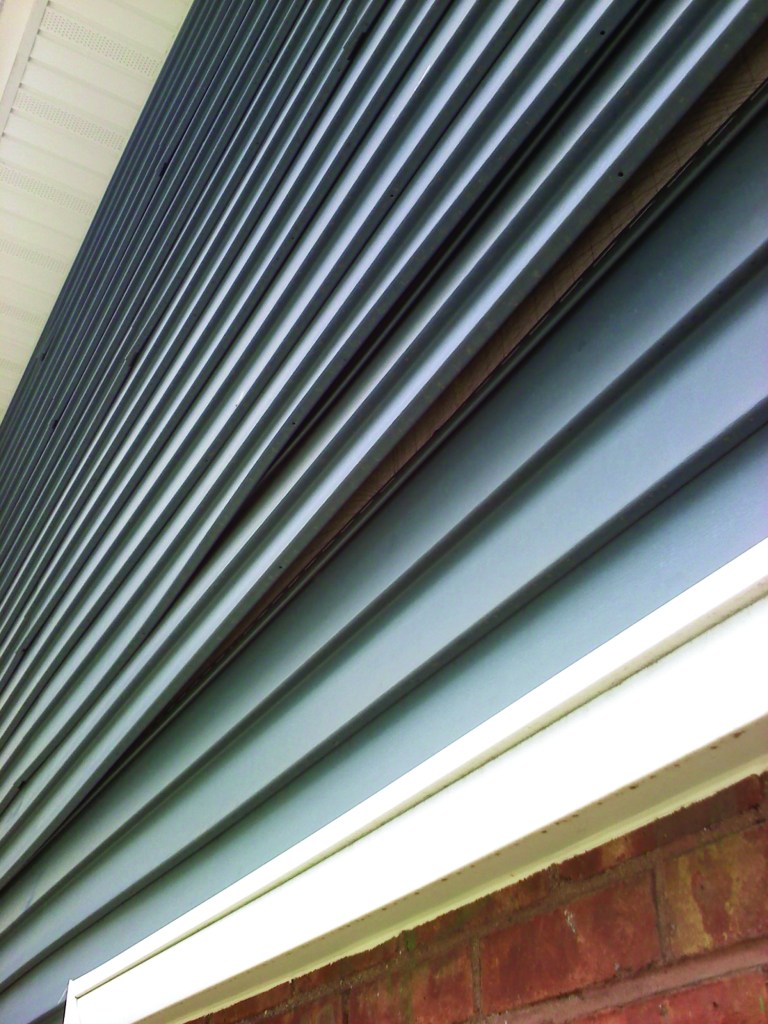
Now when I drive through those neighborhoods, I see many homes that still have their original cladding. And on just about every one that’s more than a single story, there’s at least one wall where the vinyl siding has unlocked somewhere between the first and second floors. In other words, the joint that snaps the sections of siding together has become unsnapped. While I see this problem most often on the gable ends, it is not limited to that area.
RIM JOISTS TO BLAME?
So what’s the culprit here? I can only speculate, but I’d put my money on shrinkage in the second-floor rim joist and wall plates. When this shrinking and settling occur, a siding panel attached to the second floor drops down, causing it to unlock from the panel below that’s attached to the first floor. Another possible cause can be improperly stacking heavy building materials, such as drywall, during construction. Leaving all that material in one place can cause the plates to compress, which can result in the siding panels becoming unlocked.
Regardless of how the panels become unlocked, the owners of these homes often call me to fix the problem. Some siding installers would recommend removing and reinstalling the siding from the problem area up, or even replacing all the siding, but neither option is cost effective.
Most of the vinyl siding installed on these homes is cheap, economy-grade material. After the siding has been exposed to sun and weather for 20 to 30 years, age-related issues such as brittleness make it very difficult to remove the siding without it breaking. And because the material has faded, finding siding with a color that matches is virtually impossible. In many cases, the homeowners are planning to add on to their home or are thinking about replacing the windows or siding in the foreseeable future. They don’t want to spend a lot of money on a repair to hold them over until they’re ready for that big upgrade.
THE FIX
So I’m left with repairing the siding and trying to make it look good, while spending a minimum amount of time and materials on the repair. After I get the go-ahead to repair the uncoupled sections, I set up the wall with ladders, scaffolding, and whatever else I need to work safely and comfortably at that height. As far as tools go, I just need ordinary hand tools and what I call a “sideswiper,” or unlocking tool, which is basically a flat hook with a handle that is used to lock panels together or unlock one panel from another. Unlocking tools are available at any siding distributor, and I’ve also seen them at big box stores.
Usually the gap between the panel locks is larger at the middle of the wall (as much as an inch), and then it tapers to a smaller gap near the sides of the building. The goal is to create a lower locking strip along the top of the lower panel so that it re-engages the lock strip on the bottom of the upper panel.
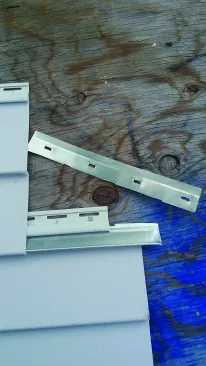
There are two different ways to reconnect separated panels. The first method is cutting a strip off a metal starter strip and inserting it into the lower locking strip to engage the separated panel at a lower level.
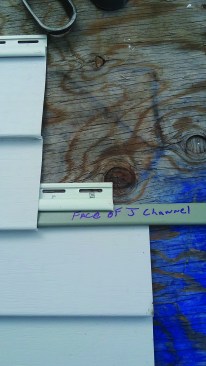
The second method is cutting the face off J-channel and inserting it into the locking strip of the lower panel.
Instead of physically lowering the lower panel, I add what amounts to a secondary lock strip below the existing lock strip. If the gap is large—an inch or more—I cut a metal siding starter strip to the width I need, which I determine simply by measuring the distance from the bottom of the upper panel to the bottom edge of the locking strip on the lower panel. When that width narrows from the middle of the wall to the edges, I taper the cut along the starter strip as needed.
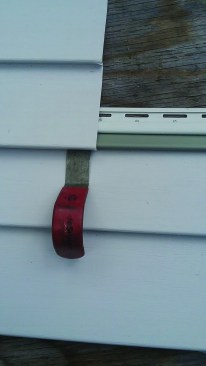
The unlocking tool hooks the top panel to engage it with the newly-added strips.
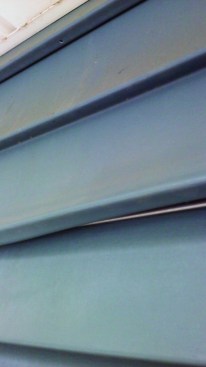
Here the separated panel is partially engaged with an added strip from a metal starter.
If the unlocked panels are closer together and I need a narrower profile strip to engage the top panel, I cut the face off a length of vinyl J-channel and use that instead. With either strategy, I insert the cut strip behind the lock on the lower panel, which holds it in place. Then I run my sideswiper tool down the locking strip of the top panel to lock it into the strip I’ve added. The lower course ends up slightly narrower than the rest when the new strip locks into the upper panel, but in most cases, the difference is barely noticeable from the ground.
Photos by Tom Struble


