A carpenter friend, Terry Breza, needed to replace eight shutters on an old brick home.
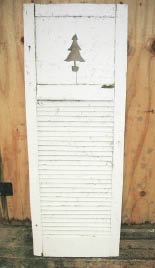
Fixed-louver wooden shutters are common on traditional homes in our area, but they’re often in bad shape (1). Making the numerous angled mortises in the stiles and assembling all the parts is a daunting task, so mostly the old shutters get patched with filler or just rot away. Since Terry didn’t have the budget for new custom shutters, he called me to see if I could figure out a cost-saving production method for making replacements. Always up for a challenge, I invited him over to the shop for some brainstorming.
The jig we came up with allowed us to crank out a pile of mortised stiles in just a few hours (2).
It uses a plunge router (3) and my Eurekazone router guide (eurekazone.com) mounted over a slot (basically a gap between two pieces of MDF) that holds the shutter stiles (4).
The aluminum rail is set parallel to the angled mortises, and the adjustable arm of the router attachment (5) is locked at the correct offset distance.
The sliding router base travels between two stops (6) that limit the length of the flat-bottom mortises.
The key to the jig is a strip of pegboard in the bottom of the slot and a matching index pin set into the outside edge of the stile, near the end (7). The pin slips into the pegboard holes, allowing me to quickly advance the workpiece in accurate 1-inch increments without any measuring or marking. After I rout the mortise, I lift the stile slightly and slide it down until the pin grabs the next hole in the pegboard, giving me automatic uniform spacing. Since the angled guide rail sits 3/4 inch above the top of the MDF surface (8), it’s easy to move the stile once the router is out of the way; the index pin protrudes just 3/8 inch.
I used a double layer of 1/4-inch pegboard to create a 1/2-inch hole for the pin. Reaming out the holes helped reduce any misalignment between the two pegboard strips, ensuring that the pin would drop into place without hanging up.
I found that it helped to make the pegboard strips slightly narrower than the slot, by about 1/8 inch. This allows some play so the index pin can register more easily if it happens to be slightly off-center in the stile. The pegboard strips need to be screwed down just at the ends so they can flex and float a little in the slot. Though this might seem counterintuitive for finish work – where tight tolerances are usually the norm – I found that the little bit of “slop” sped things up considerably.
I also set pins at the beginning and end of the stiles’ travel in the slot (9); if I were making shutters of other sizes I could simply reset the limit pins. I cut the stiles about 3 inches longer than they needed to be so that after they were mortised for the top and bottom rails, I could trim them to length and the indexing pin hole would get cut off – leaving no hole to fill.
I milled the louvers out of vertical-grain cedar, using a beading bit (10, 11, 12) and a router table setup.
I made the evergreen tree panels out of MDO (13) and cut the patterns by hand with a jigsaw. And I used traditional frame joinery for the rails and stiles.
Fortunately the louvers were thin enough to bend and pop into place after the frames were assembled (14, 15). This was great because getting all those pieces to line up perfectly at once would have been harder than dropping a top rail over balusters on a staircase.
After painting, Terry installed the shutters (16).
Even if you never make shutters, this concept could easily be applied to other tasks – boring shelf pin holes with a drill press, for example. You could use pegboard for any spacing on 1-inch centers (just tape over the holes you won’t use) or bore your own custom template.
The jig took about an hour to design, an hour to build, another hour to calibrate with practice pieces, and then 20 minutes to just stand back and say, “That works sweet!” Once we were set up, we could produce about eight mortises per minute – the kind of efficiency that’s critical when facing more than 500 mortises for the entire project.
Brian Campbell is a woodworker and carpenter in Minnesota City, Minn.


