

David Hanson
We cut saw kerfs into the edges of our soffit boards, and slip t…
When I began my apprenticeship with my father in the 1970s, clear 3/8-inch-thick tongue-and-groove cedar was widely available at a reasonable price, and we often used it for soffit material. For true economy projects, we switched to rough-sawn 1 1/32-inch plywood. If we needed venting, we installed continuous 2-inch aluminum soffit strip vents, which have a thin profile that works well with thinner stock.
As prices for cedar began to climb, we started finishing our soffits with less-expensive primed 4/4 stock, typically MiraTEC trim (miratectrim.com), a composite made from wood fibers and phenolic resins. It costs about 20 percent more than OSB exterior trim in our area, and it’s a little harder to nail — it seems almost as dense as maple — but holds up better and is reversible, with both a smooth and a wood-grained finish.
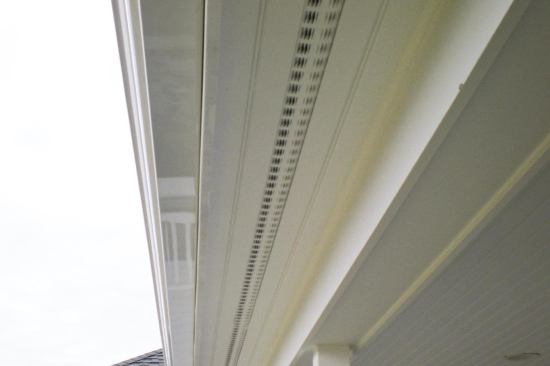
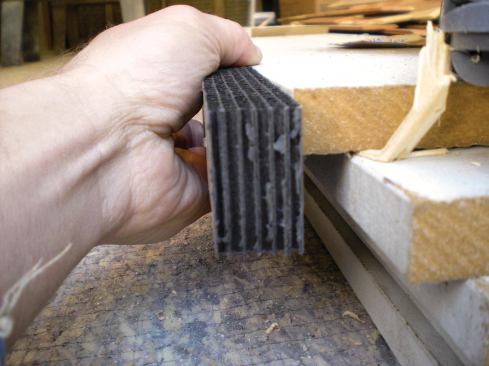
But there’s a problem with using 3/4-inch-thick soffit stock: The thin vent strips create deep — and prominent — channels between the boards used to finish the soffit. To avoid this unsightly detail, we cut saw kerfs into the edges of our soffit boards, and slip the flanges of the metal strip vents into these kerfs. This is a time-consuming step, but it allows us to mount the vents flush with the surface of the soffit.
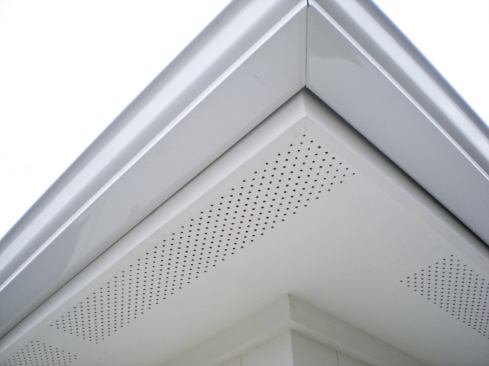
Over the years, we’ve noticed when we’ve revisited a few of our job sites that aluminum vents don’t hold paint particularly well. So to eliminate the need for aluminum vent strips, we now often finish our soffits with Hardie fiber-cement soffit panels (jameshardie.com), because they are available in both vented and nonvented configurations. (I’ve been told that the cone-shaped holes in the vented panels are specially designed to repel bugs.) While the panels don’t look as good — at least to my eye — as the T&G material from yesteryear, they install quickly and hold paint very well. The panels come in lengths up to 12 feet and in widths up to 4 feet, and are less expensive to install than metal vent strips held in place with wood trim. I do have concerns about the strength of the 1/4-inch-thick material, though; soffits normally do not take much abuse, but I think that an errant baseball hitting the panel might put a hole in it.
On a recent remodeling project, our clients wanted the vented eaves detail on their addition to mimic the look of their existing unvented eaves. Neither aluminum strip vents nor perforated fiber-cement panels would have looked quite right, so we tried a different approach, adding Cor-a-Vent S-400 (cor-a-vent.com) corrugated polypropylene strip vents to our soffit assembly. These 4-foot-long vents provide 10 square inches of net free vent area (NFVA) per linear foot of material, and come in three different colors — white, black, and tan. We found the vents easy to work with — they just tack in place with brad nails — though the jury is still out on how well they’ll hold paint.
To install the vent strips, we first added ripped 2x2s to the bottom of our framed eaves assembly. We used MiraTEC trim to finish the soffits and trim out the rest of the eaves, including the fascia, even though the original fascia detail featured a large crown molding. Gutters will conceal the fascia on the addition, so we simulated the look of the original work using flat stock and saved the cost of a custom molding that would never be seen. In the spring — when the weather warms up — the eaves will be painted a dark green and the vent strips should virtually disappear.
David Hanson is a partner in Hanson Carlen Construction in Spokane, Wash.


