The first article I wrote for JLC was about installing fiber-cement siding (see “Installing Fiber-Cement Siding,” Dec/03). We started using fiber cement in the late 1990s, after LP’s InnerSeal, the siding we had previously used, became the focus of a class-action lawsuit. At the time, fiber cement was really the only alternative to LP’s product, other than wood siding, which was more expensive and requires considerable maintenance on homes in the Pacific Northwest where we build.
We installed fiber cement on our homes until 2009, when we switched to LP SmartSide. There were many reasons we switched, but a primary one concerned the warranty. When we first started using fiber cement, the warranty was 50 years, but by 2009 that warranty had been downgraded to only 30 years. SmartSide offers a pro-rated 50-year warranty. While many will argue about the actual value of a “pro-rated” warranty, the strength of a warranty is mostly in what it says to our customers at the time of sale. We have never actually had to act on a warranty claim. What does matter is the customer’s perception of how a manufacturer stands behind a product.
There were a number of other reasons for switching away from fiber cement. The weight, shorter lengths, difficulty cutting the material, and the relative fragility of the material all led us to try LP SmartSide. Some performance issues also gave us pause. We were repairing fiber-cement siding frequently on houses we had built in golf-course communities because of damage from golf balls. In addition, we’d noticed that fiber cement seems to become brittle on the wall and is very easy (too easy it seems) to remove. I recently had to remove siding from one wall to fix a leak and no matter how careful I was, the siding broke and crumbled as I removed it.
By far the biggest drawback of all is what it takes to manage the dust from cutting fiber cement. As I wrote in 2008, we used both aftermarket vacuum attachments and circular saws with built-in attachments (see “Cutting the Dust From Fiber Cement,” Sep/08). We also used the Ridgid R3400 saw, which was designed specifically for cutting fiber cement, and it worked well for us for years before it was discontinued. In practice, all these solutions for cutting fiber cement were burdensome. Shears probably work best (no dust), but you can cut only one piece of siding at a time, which is slow. Now that OSHA’s silica rules, which apply to the installation of fiber-cement materials (see Toolbox), have gone into effect, we are unlikely to go back to using fiber cement anytime soon.
The only benefit of fiber-cement siding that LP SmartSide cannot match is how it performs in fires. This could be a concern for builders in rural settings far from emergency services or in areas where the risk of wildfire is high. For us, however, neither of those conditions apply.
What is SmartSide?
Before we decided to use this product, I did a lot of research to find out what made SmartSide different from InnerSeal, which had failed and resulted in lawsuits. I should note that in drier climates, InnerSeal did not have problems, and in fact, I just inspected a building in my region that was sided with InnerSeal in 1994, and it is in very good shape.
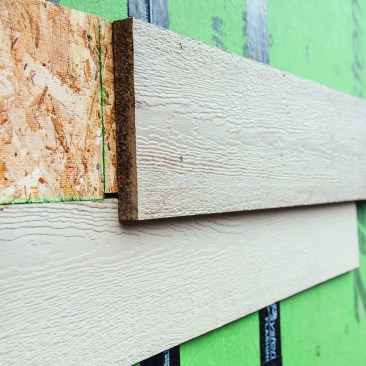
InnerSeal was a first-generation manufactured-wood siding product—more of a waferboard material than anything else. SmartSide is much more engineered; it’s not simply commodity OSB with a surface finish, either. SmartSide starts as fast-growing aspen logs that are turned into wood strands that are then coated with a mixture of resin (to bind the strands together), wax (to resist moisture), and zinc borate (to resist fungus growth that can lead to rot).
The strands are much smaller than in commodity OSB, so there is a proportionally higher resin content. These strands are placed in layers, with the top and bottom layers oriented for strength in the long direction. The thick mat of coated strands is covered with an overlay of resin-saturated paper, and the entire composition is pressed together at intense pressure (on the order of 2,200 psi) and temperature (425°F). The result is a wide, flat panel that is then ripped into either lap siding or trim boards.
Product line. In addition to lap siding, we regularly use the vented and unvented soffit material that comes in 16-foot lengths and 12-inch, 16-inch, and 24-inch widths. We have also used the 4×8, 4×9, and 4×10 sheets for board-and-batten applications and for soffits.
We recently tried the “fiber line” of trim for windows and corner boards, as well as Perfection Shingles. The shingles install quickly, as they come in panels 8 inches tall by 4 feet long. The “fiber” product has the same warranty as the strand product, but we have been paying more careful attention to priming the “fiber” product.
Product Questions
We did have some initial concerns with SmartSide. First and foremost, was this product going to have issues like InnerSeal did? Second, what would our customers think? And third, how would the installation costs compare with those of fiber cement?
After extensive research, I have yet to find an inherent problem with SmartSide. It seems to have a solid track record as reported by others since it came to market in 1997. Like all products, if it is not installed according to the instructions, problems will occur. We have been careful to follow all manufacturer instructions and have had no problems over the course of the nine years we have been using it.
As far as our customers or real-estate agents are concerned, we haven’t had any problems. We explain the reasons for the switch, the warranty, and our experience repairing it. The instructions for installing fiber cement have also changed quite a bit since we started using it. I know one sider who keeps every set of instructions and their dates in case of warranty claims. We have had two customers since 2009 insist we use fiber cement, so we went ahead and installed it for them.
Installation
Our installation costs have gone down because this product installs more quickly and is easier to handle than fiber cement. But like all products, the devil’s in the details. LP has done a good job of making its installation instructions “readable” using illustrations. It also has useful installation videos on its YouTube channel.
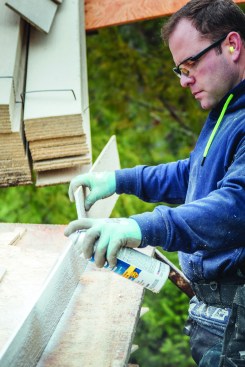
All cuts, rips, and end cuts need to be sealed. If the siding boards are acclimated, the author hits the edges with spray-on primer, such as Zinsser Bulls Eye 1-2-3 Plus.
If the wood needs to acclimate, or if the weather is wet, the author will install the siding first and caulk the gaps later.
All cut ends or rips need to be painted with 100% acrylic latex paint or sealed with caulk. If the siding is acclimated, we seal as we go, typically hitting ripped edges with a spray primer. Instructions call for an “ASTM-C920 minimum Class 25” sealant; we use OSI’s Quad Max. While it does take time to seal cuts, it isn’t a problem once you’re set up for it.
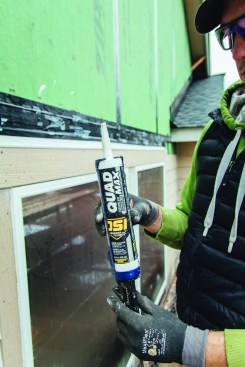
LP’s instructions call for an ASTM-C90 minimum Class 25 sealant; the author uses OSI’s Quad Max.
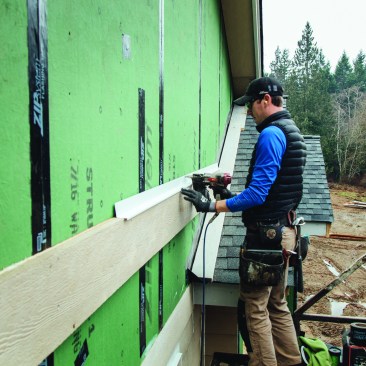
I was taught to keep a 1-inch clearance between any siding and step flashing along the roofline. While this is allowed with SmartSide, we have found it easier to use 2-by material to keep the siding 1 1/2 inches off the roofline. We define the angle using PacTool’s Gable Scribe and gang-cut six pieces (one bundle) at a time for the rake cut. We can the seal the cut ends of the entire bundle at once.
Our roofers always install large kickout flashings, which are somewhat annoying to side around. But the kickouts are important for directing water into the gutter and away from the wall.
A 3/16-inch gap must be maintained at all butt joints. Where we have found this to be critical is where lengths of lap siding butt together. This material ships with a very low moisture content and will move on the wall. I like to order the siding to be delivered when we start framing a job. That way it can acclimate for the three to six weeks we are framing. The siding moves much less on the wall when we order it early.
For butt joints, Diamond Kote H-Moldings can be inserted into the butt joint in lieu of sealant. Some people don’t like the look of these, but a caulked joint isn’t exactly a thing of beauty either. An 8-foot stick costs us $10.50 and we can get 13 pieces from it, so each piece costs about 80 cents before tax and shipping.
Ribbon boards serve as a visual element that helps define gable ends. Here, the author packs out a trim board with OSB ripped narrower than SmartSide Trim boards so the bottom edge of the ribbon overlaps and protects the siding board below it.
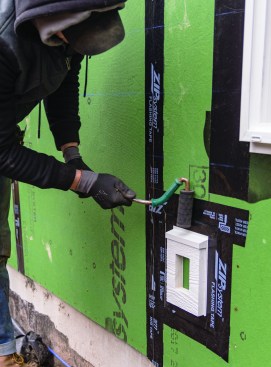
The top of the ribbon needs a Z-flashing, which must be integrated with the Zip System WRB, using Zip Tape.
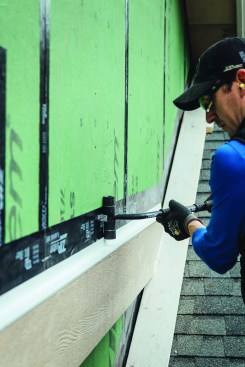
Like all adhesive flashings, this needs to be rolled to ensure a tight, lasting bond.
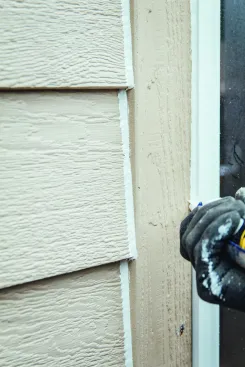
Over Z-flashings on window heads and ribbon boards, LP requires a 3/8-inch gap. We use a scrap piece of siding to keep the gap consistent. With SmartSide Trim, a 3/16-inch gap is required between the trim and window, as well, but boards can be butted tight to another piece of trim.
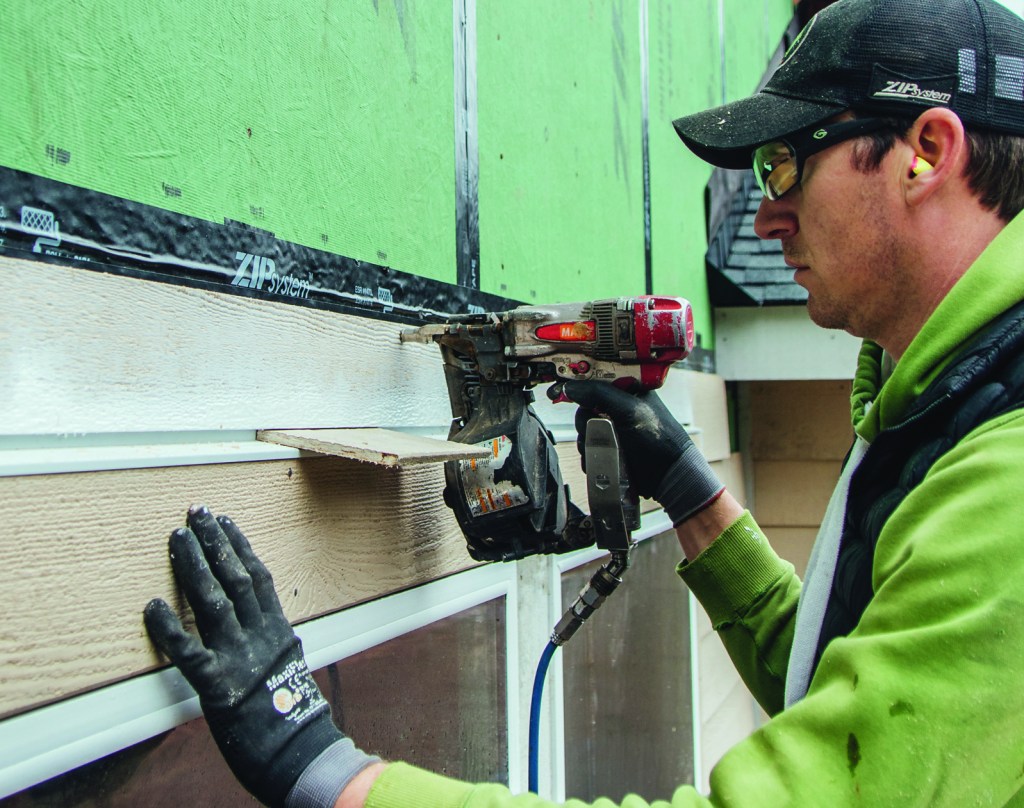
Tricks. We use Huber’s Zip System exclusively, so we know exactly where our framing is behind the sheathing; the nailing is not covered up by a housewrap. We snap top lines along the wall for any siding more than 10 feet long. This allows us to keep the siding straight, but one issue we’ve noticed with the 3/8-inch SmartSide is that it can have a “crown” to it. Sometimes this is 1 inch or so. We install 16-foot pieces by nailing one end, then the middle, then the other end, and then nailing off the field. This allows us to pull up or down at the other end, which straightens the board. I haven’t noticed this crown on the 7/16-inch series.
Another technique we use is to install “spider catchers,” our nickname for corner boards installed over the siding at outside corners. This method has some important advantages. For one, it protects the siding from the weather. It also reduces the time spent installing sealant. Good-quality sealants aren’t cheap, and they are not a place to try to save money. Spend the money on the sealant and save by reducing the number of places you have to apply it. The fewer places sealant is required also means less maintenance for the homeowner.
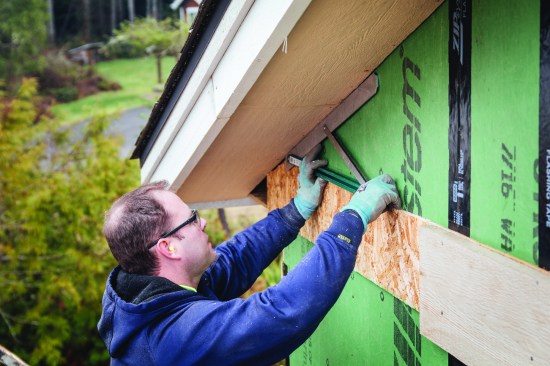
The author depends on two jigs made PacTool. The Gable Slide easily adjusts to the rake angle of the gable end.
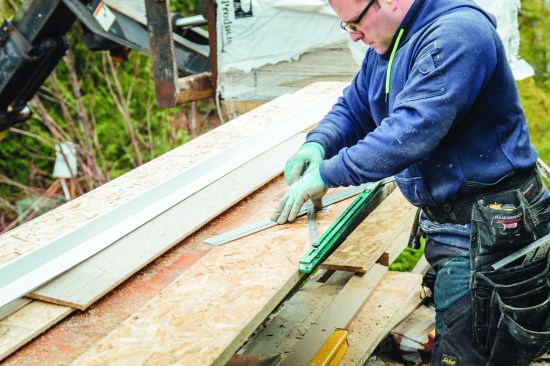
Here he’s using it to find the angle for the last piece of the ribbon board, but that same angle will be used for all the siding that fills in the gable end, as well.

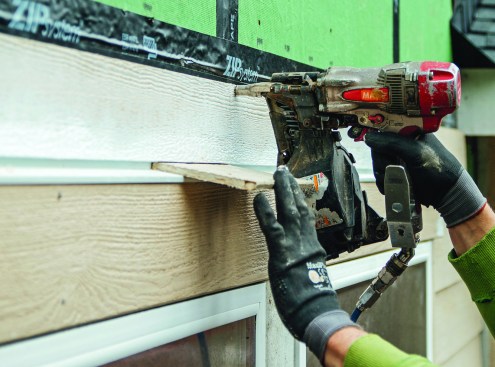
The Gecko Gauge, to the right of the author in the photo, holds a long run, making it easy for one person to install long lengths of siding.
With a PacTool Gecko Gauge, this siding is easy for one person to install. It doesn’t curl back at the installer as he puts it on the wall.
For outlets and hose bibs, we have used Diamond Kote’s premade blocks. These are nice and install quickly, but they are expensive (about $50 each for the larger size), so the budget doesn’t always allow for them. Then we have to fashion up mounting blocks from scraps of SmartSide Trim boards, which we can do inexpensively.
Without a housewrap to hide the nailing on studs, Huber’s Zip system makes it easy to nail siding into studs. Over window and door heads, the author uses a scrap piece of siding to keep an even 3/8-inch gap between the siding and Z-flashing.
Because SmartSide instructions call for sealing the cut ends, whenever we have a long rip, say at roof-to-wall metal flashing, we’ll stop the full-height piece at the edge of the roof, then cut our rip and flip it over so it is factory-edge down. This looks nicer than a long rip because of the eased edge. Even if a rip is cut with a track saw and is perfectly straight, it doesn’t look as good.
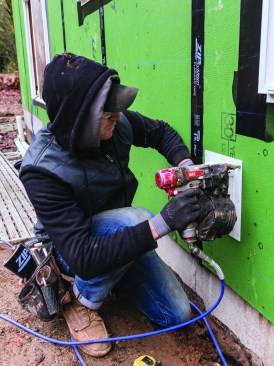
Diamond Kote mounting blocks make quick work of providing a weathertight penetration for exterior outlets.
These have a built-in flange that is nailed into place and then integrated with the Zip System WRB. The only disadvantage of these premade blocks is that they are expensive.
What We Like
The 16-foot lengths are a major time saver and with fewer butt joints, the installed product is more pleasing aesthetically. Frequently, we have walls on the front of the house that are longer than 12 feet and less than 16 feet, and in these cases, it works well to gang-cut full-length pieces.
This material is stiffer than fiber cement, so we don’t have to be as gentle with it. We’ve installed pieces around a window or door that required a 1-inch rip, and these narrow pieces installed without blowing apart or breaking as we walked them from the cut station to the wall. Of course, you can’t score with a utility knife and snap pieces off like you can with fiber cement. However, we see that as an indication of the performance advantages of SmartSide.
Because this material weighs less than fiber cement, we can easily carry bundles of nine lengths on our shoulders (two people). We have to work a lot in the rain and this material doesn’t become fragile when wet. Fiber cement is more easily scratched, especially when it’s wet, and in general, must be handled more delicately. We’ve never replaced a piece of SmartSide from golf-ball damage.
What We Don’t Like
The only issue we’ve had is with dimensional movement if we have to install the material in winter before the house has fully dried out. In those conditions, the material tends to move to the extent that all the caulking gets squeezed out at the butt joints. We have dealt with this in two ways. For one, we wait to caulk those joints until late in the spring. The other approach is to use H-Moldings and let the material move. We are careful to allow for a 1/4-inch gap if we use H-Moldings.
Painting the cut ends is a small inconvenience, but now that we are used to doing it, that doesn’t slow us down.
Photos by Tim Uhler.


