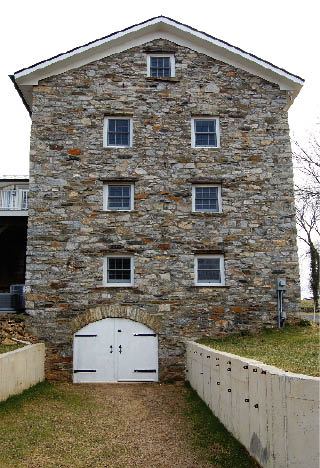
When we began the restoration of a historic stone granary in Northern Virginia, we knew that creating a dry basement was crucial to the success of the project. The four-story building dated from the early nineteenth century and its owners planned to use it as living space. When we began our work, the cellar was a mess, its dirt floor full of mud, with seasonal streams of water running across it. Most of the framing on this level was badly deteriorated and would have to be removed, including the first-story floor joists. The plans called for the basement to be conditioned and for the mechanical equipment to be located there, so we knew we had to deal with the moisture.
Surface Runoff
Our first approach to the problem was to build retaining walls on each side of the cellar door. We excavated downslope to facilitate runoff, and added fill upslope in several places to provide positive surface drainage around and away from the building. Even after these improvements were completed, there was still a lot of water moving through the building. We concluded that either the granary had been built above an underground spring or an underground water course had found its way into the basement over time. In either case, we needed to figure out how to allow the water to move through while keeping the basement reasonably dry.
We considered excavating around the outside, sealing the walls, and installing an exterior drain. However, this didn’t seem like a practical or affordable option, given the depth of the grade on the uphill side (nearly 20 feet) and the fact that one corner of the foundation was sitting on bedrock, leading us to believe we would probably encounter more bedrock during the digging.
So instead we decided to install drainage on the inside. From my experience with old stone foundations, I knew that carefully installing a poly vapor retarder does a great deal to take care of dampness coming from a dirt floor. You may still get condensation on the stone on hot, humid days, but some air flow and a little conditioning will usually keep moisture in check. With this building, we definitely had a bigger problem than basement dampness, but the fact that we had enough slope for a daylight drain on the downhill side of the site gave us confidence we could manage both the water and the humidity.
Working inside, our first order of business was to brace the original second-floor beams and remove the rotted first-floor framing. We left the original grain chute in place. Next, using 6×6 posts, we built three massive frames that allowed us to support the second-story floor joists. We were then able to trim the bottoms of the original timber posts and install the new girder — a triple LVL — for the first story, using the frames for temporary support.
Since we had to reframe the first floor anyway, we took the opportunity to lower the new joists and increase the ceiling height on the first floor. We dropped the floor level as much as we could, still leaving adequate headroom for a workable mechanical space.
Next we poured a concrete pad for one of the new 4-inch steel supports — the others rest on bedrock — then installed the new posts and removed the temporary shoring. We also poured a stepped footing in the back corner where the building sits on bedrock, to provide level support for the perimeter wall we would frame later.
We dug out the basement floor to create a slightly pitched sub-base, removing as much dirt as we could (depth was limited by an existing buried septic tank just outside the door, which had to stay). We then laid a network of 4-inch perforated drainpipe, wrapped in filter cloth, around the perimeter and through the center of the area. We connected it at the door to a couple of lengths of drainpipe that continue for a good 50 feet down the hill, with a slope of 1-in-12 or better, to daylight. I didn’t know the flow rate of the spring, but I wanted to make sure we had enough pipe diameter to handle it.
We covered the pipe with 6 inches of clean gravel followed by 6-mil poly and wire mesh. We then poured the slab, creating a nice work surface for framing the I-joist floor. The slab edge was isolated from the stone walls with wooden form boards, which we removed after the pour. This left a drainage gap so that water running down the walls during heavy rains can easily find its way into the sub-slab drainage pipes. Though we planned to frame a support wall on top of the slab, we decided not to thicken the slab edge, as this would have blocked the flow of water coming down the walls. Considering that only a quarter of the floor span above is supported at the edges, we set the walls directly on the slab and have had no problems.
The basement has now gone through both summer and winter — including some very wet spells — and has stayed reasonably dry, though you can sometimes hear water running in the drain pipes after a hard rain (maybe this is what is meant by a “floating slab”). It’s a clean, serviceable mechanical space, and upstairs the air is nice and dry.
Robert Lauten is president of Lauten Construction Co., a building and remodeling company in Purcellville, Va., that specializes in historic renovations.


