There’s an almost unbelievable amount of misinformation on the market about building wooden fencing. A visit to any bookstore or lumberyard that caters to the weekend handyman will turn up an abundance of how-to books containing the same plagiarized misinformation, all of them obviously put together by writers and editors with no real-world experience in the trades.
That’s bad news for a lot of amateur builders, but it does ensure a steady supply of work for me. My business, The Fence Doctor, specializes in building and repairing wooden fences. I’ve found this to be a very profitable market niche because few fencing contractors have any interest in doing repairs. The tools required are minimal: My basic kit consists of a pair of 5-foot iron wrecking bars, two fiberglass-handled shovels, a reciprocating saw, a nail gun, a posthole digger, and a 4-foot level. Many of my customers call me after seeing a classified ad I run in the “Fencing” section of a local weekly paper. I also get some business through referrals from local insurance adjusters.
In my area of suburban Minneapolis, I charge $100 per replacement post, assuming that the original fencing itself can be reused. There’s virtually no competition, and few customers balk at the price. With the right technique, the typical three-post repair job often takes no more than an hour or two, and sometimes less: A helper and I once completed a nine-post job in just three hours. There aren’t many areas of construction for the small contractor that pay so well.
Fence Construction
The vast majority of fences that I work on are 6-foot privacy fences consisting of 4×4 posts about 8 feet on-center with infill panels of vertical boards. In most cases, the boards are nailed to horizontal stringers that are toe-nailed to the posts.
The weak link with this system is the posts, which quickly rot out just below the soil line. Although this is often blamed on moisture, the real cause is a bacterial enzyme called cellulase, which is active in the first 6 inches or so of soil. (In nature, it’s what breaks down seed pods so that seeds can sprout.) I have replaced hundreds of fence posts, and every one shows the same characteristic damage (see Figure 1). Most of the rotted posts I encounter are made from untreated cedar or redwood, but this problem affects even pressure-treated posts. I estimate that a third or so of the posts I’ve replaced over the years were pressure-treated.
Figure 1.Fence posts that may be relatively solid well below grade typically rot through in the top 6 inches of soil, where enzyme-producing aerobic soil bacteria are most active.
Setting the base of the post in concrete doesn’t help at all, because the worst damage is always near the surface. The only thing I’ve found to work is setting pressure-treated replacement posts in concrete all the way to the soil line, which eliminates direct contact between post and soil. It’s also essential to fill the hole with concrete all the way to the bottom: Partially backfilling with dirt and pouring a concrete collar at the top saves some concrete but gives the frost a flat surface to push against and will quickly cause the post to heave.
Removing and Setting Posts
Whenever possible, we try to reuse the original fencing panels and replace only the posts. Unlike the posts, the fence panels aren’t in contact with the soil, so they’re much less prone to decay, making reuse a practical option in most cases. But because the wood is typically dry and brittle, it’s likely to split if you attempt to pull out the toe-nails that hold the horizontal stringers to the posts. To avoid that frustration, we simply cut through the nails with a bimetal demolition blade in a reciprocating saw (Figure 2).
Figure 2.The crew first cuts through the toe-nails that secure fence panels to rotted posts (top). This allows intact fence sections to be removed and set aside for reuse as replacement posts are installed (bottom).
Once we’ve set the fence sections aside for reuse, we dig around the post to the depth of one shovel blade. If the post isn’t set in concrete, I then take the pointed end of my wrecking bar and stab it into the side of the post a few inches below ground level while my helper does the same on the opposite side. We lever the post upward in unison, taking a fresh bite with the bars as needed. If the ground is soft, we use scraps of 4×4 as fulcrums between the bars and the edge of the hole. If the base of the original post was set in concrete, I sometimes rent an electric jackhammer to break the concrete ball into manageable chunks (Figure 3).
Figure 3.When the original posts are set in concrete, removing them takes time and may leave an oversized hole that requires extra concrete to fill. Breaking up the old base with a rented electric jackhammer saves time and trouble.
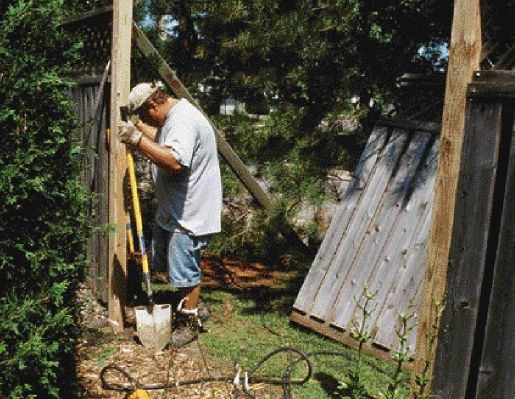
The local frost line is at about 42 inches, but I’ve found that setting post bases at a depth of 24 inches reliably prevents any heaving. After cleaning up the hole with a posthole digger and making it deeper if necessary, I drop in an 8-foot pressure-treated 4×4, renail the stringers, and fill around the post with bagged concrete mixed by hand in a wheelbarrow (Figure 4).
Figure 4.A replacement post is nailed to an adjacent fence section and plumbed with temporary bracing as site-mixed concrete is poured around the base (top). Bringing the concrete up to grade protects the post from rot where it is most vulnerable (bottom).
Other Repairs
If necessary, we’ll also build new sections of fence to replace any that are too damaged to reuse. Depending on the pattern of the fence, I charge from $20 to $35 per linear foot for this work. Instead of using prefabricated fencing panels, I build replacement sections stick by stick, because that makes it possible to follow the slope of the finish grade. Prefab panels, by contrast, have to be “stepped down” to follow the slope, which results in a much less attractive installation.
John Wilder repairs fences in Rosemount, Minn.


