On a recent job, I needed to demolish and rebuild the failing structure holding up a family-room addition. The support beams were rotten and the columns were in bad shape. Before I could proceed, I had to lift and support everything with house jacks and temporary beams. Then I took out all the old columns and dug out the seven original footings, which were much too shallow to offer adequate support for the structure above. At that point, I was almost ready to dig new footing holes. But first I needed to figure out how to handle the site’s high water table.
Rising Waters
To find the best solution, I arranged a jobsite meeting with my local building inspector, who had also run a successful foundation company in the past and was familiar with the local soil conditions. He told me to dig a few test holes the day before the meeting so we could see how much water seeped into each hole. As I dug them, I hit water about 3 feet down, and with the help of a pump, I finished digging to 4 feet, the required depth for footings in the area.
I protected the holes with plywood overnight, and when we met the next day, there was close to 16 inches of water in each hole. Drawing on his experience as a foundation contractor, he suggested a strategy for installing the footings: Use wide-base forms, and before setting the forms in place, pump out the water and add a few inches of crushed stone to the bottom of each hole. Then drop in the form and continue pumping water from the hole while filling the forms with a stiff concrete mix to a level above the water table. With the pump keeping the water out of the hole, the bottom of the footing could set properly without being weakened by the excess water. Then it would just be a matter of filling the forms the rest of the way, backfilling the holes as I went.
Layout for the Footings
Before I started laying out the footings, I gathered the materials that I’d need for them. For each one, I used a 28-inch-diameter Bigfoot base with a 12-inch-diameter Sonotube form secured to it. Each form required nine 80-pound bags of concrete, and I cut three 3-foot lengths of 1/2-inch rebar to reinforce each footing.
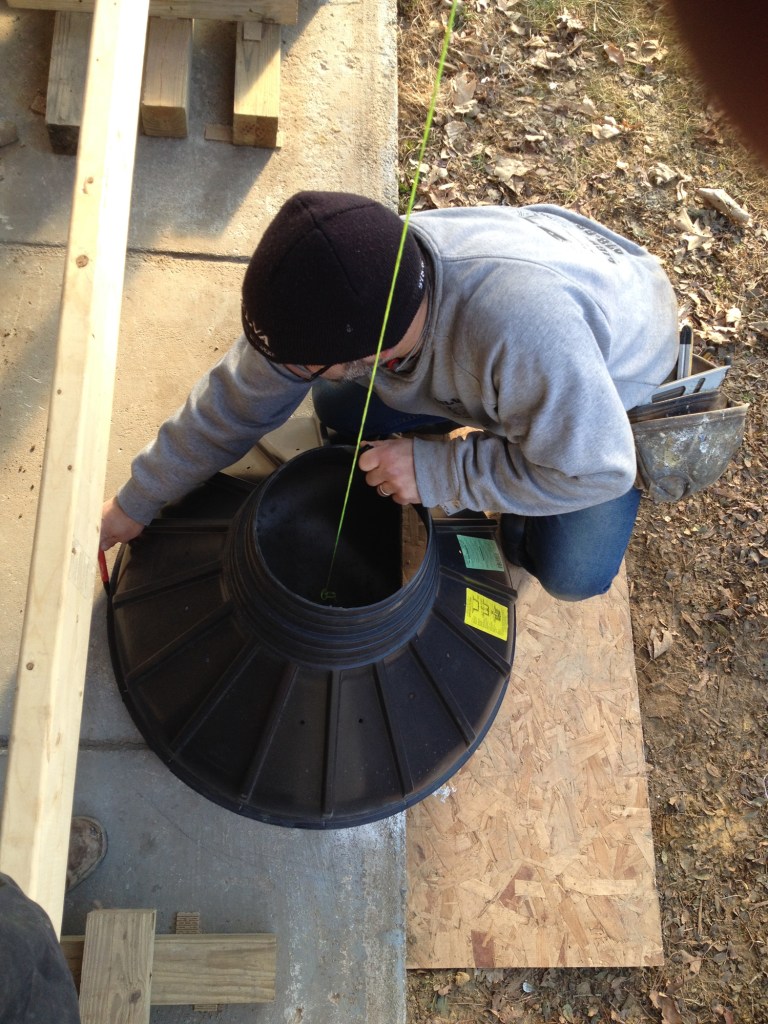
I started with the center footing of the seven that I needed to install. To locate the footing exactly, I first found the center point both in length and width of the beam overhead, and then drove a screw at that point. To the screw, I attached a length of masonry twine with a washer tied to the lower end to act as a plumb line. The washer added weight to the string to keep it from wandering back and forth.
I positioned the Bigfoot form below the center point with the twine hanging inside the form. To center the form, I measured the distance from the rim of the footing to the string and moved the footing until the measurements were the same in every direction. Then I traced the circumference of the form on the original concrete slab to give me an exact location for the hole.
The Big Dig
Having some of the hole locations straddle the existing slab complicated the digging process. I started the holes by digging next to the slab and undermining the soil below it. Once I’d removed the soil to about a foot below the slab, I scored the outline of the base with a jackhammer, and then broke through it a little at a time, alternating between the jackhammer and a sledge.
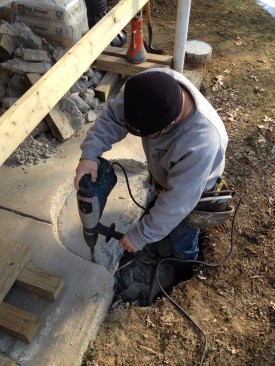
Working with an impact hammer, the author chips away the concrete slab where the footing will be located.
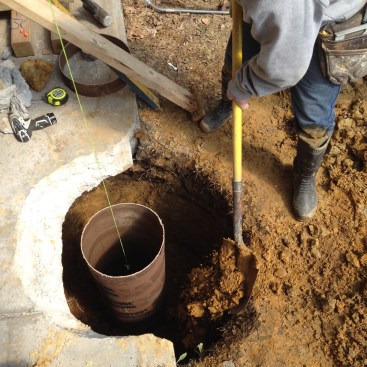
After breaking through the slab, I continued digging down into the clay and sandy soil. The digging was pretty painless, but once I got down about 3 feet, water began to seep into the hole, making it tougher to dig. I dug down few inches, pumped out the water, dug a little deeper and pumped again. I continued alternately digging and pumping until I reached the required depth of 4 feet.
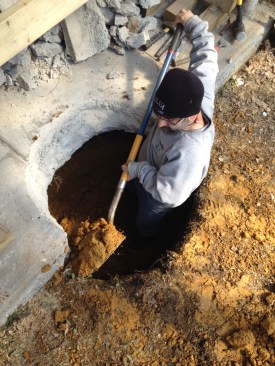
The author dug down for the footing but hit water three-quarters of the way down. The rest had do be dug working in conjunction with a pump.
The bottom of the hole was tightly compacted clay and sand, but with all that water, the soil wasn’t stable enough to support the footings. To remedy the problem, I added a layer of crushed stone to set the form on, as recommended by the inspector. The stone would also elevate the pump, helping to keep it from sucking up loose soil and getting clogged.
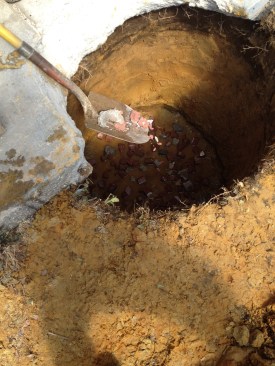
A layer of crushed stone was added to the bottom of the hole to support the footing and to keep the pump clear of the bottom of the hole.
With the excavation requiring so much attention, I realized that I’d have to dig and pour the footings one at a time to make sure the footings were installed properly. This took a lot longer than if I’d dug them all first and poured them in one shot.
Building and Positioning the Forms
Before digging each hole, I prepared the wide-base form along with the tube for the column above the base. Bigfoot forms come with graduated ring sizes to fit different diameters of tubes. After cutting the form down to the required ring size for the 12-inch tube, I fastened a section of tube to the base with screws and set the assembly into the hole.
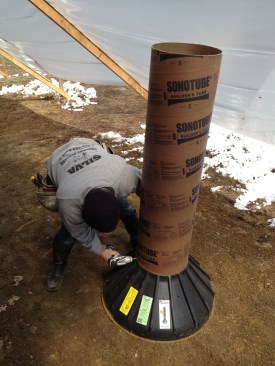
After the wide base form is cut to the proper diameter, a concrete tube form is screwed to it.
To keep all the footings at a uniform height, I had established a set distance from the bottom of the beam overhead to the top of the footing. I measured down and marked the height of the footing on the side of the tube. I measured from the top of the tube and marked that distance at several other places around the tube. Then using a length of flashing tape, I drew a line to connect the marks and carefully cut the tube with a razor knife.
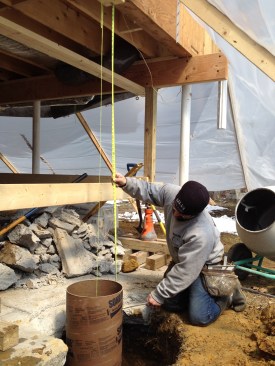
The height of the form is measured from the underside of the structure and marked on the concrete tube.
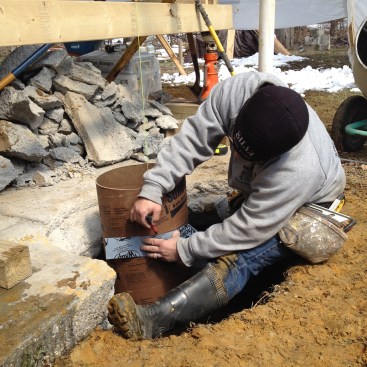
A length of flashing tape stretched around the form works as a guide for drawing the line for the height of the form.
Pour and Backfill
The next step was repositioning the footing before the pour. I adjusted the location, using a level to plumb the tube. As before, I measured to make sure the masonry twine was in the exact center of the tube. I also double-checked that the top of the tube was at the correct distance from the beam above.
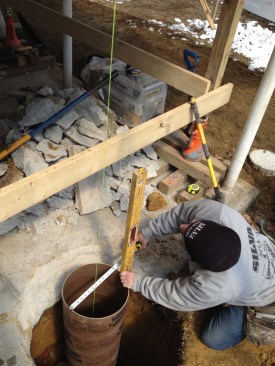
With the form sitting in the hole, the author centers it and plumbs it for the pour.
On some of the holes, the water didn’t seem to seep in as fast, so I was able to drop the pump inside the form to pump out the water while I mixed the batches of concrete. Following the inspector’s advice, I mixed a stiffer concrete batch for the bottom section of the footing that would be in contact with the crushed stone and wet soil. Before shoveling in the first batch of concrete, I backfilled around the form to keep it in position while I filled the form with concrete. As the pour progressed, I added about a foot of soil at a time, tamping it down with a length of 2-by as I went.
Adding backfill around the form locks it into position for the pour. A pump keeps water out of the footing until the concrete can be poured.
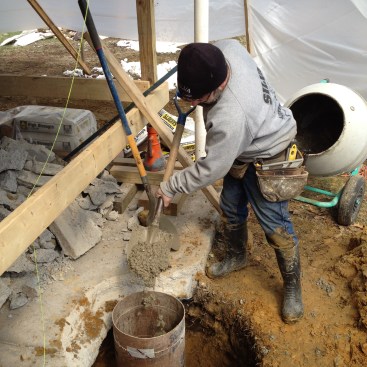
Concrete for the footing is mixed and shoveled into each form. The bottom of the footing where it was wet received a stiffer batch of concrete.
Once the level of concrete reached above the water table, I used a looser mix, pouring the rest of the footing as I backfilled around the form. Before adding each new layer of concrete and fill, I checked my reference marks to make sure the form had not shifted.
As the concrete neared the top of the form, I realized that the top of the footing would end up being much lower than the existing slab, creating a place for water and debris to collect and shortening the life of the wooden posts I planned to install to replace the original columns. The owner was eventually going to replace the slab, but I wasn’t sure when that would happen, so I decided to raise the height of the footings by adding on a short extension of tube. Lengthening the form would put the top of the footing high enough to avoid any problems.
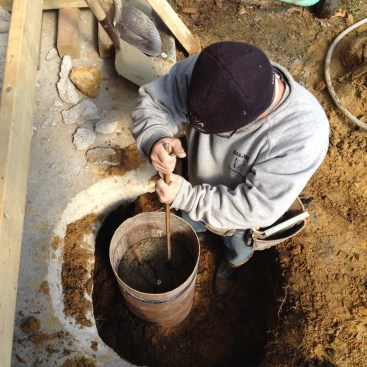
When the level was nearing the top of the form, the author pushed pieces of rebar into the wet concrete for reinforcement.
Before pouring in the final lift of concrete, I sank three pieces of 1/2-inch rebar into the wet concrete to help strengthen the footing. I kept the rebar 6 inches from the top of the footing so that it wouldn’t interfere with the anchors for attaching the metal post bases.
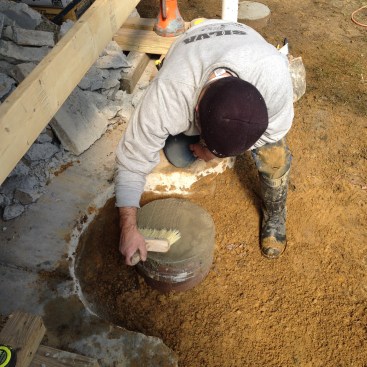
When the form was filled, the rest of the hole was backfilled and a broom finish was put on the top of the concrete.
I continued to fill the footing form to the top, letting the concrete overflow the edges a bit. I screeded the excess concrete even with the top of the form and let the water rise to the top of the footing. While the concrete was still wet, I brushed the top of the footing with a masonry brush, smoothing it and giving it a broom texture. Then I let the concrete in all seven footings cure for seven days before asking them to support the weight of the porch.
All photos by John Simmons


