Mike Rockwell
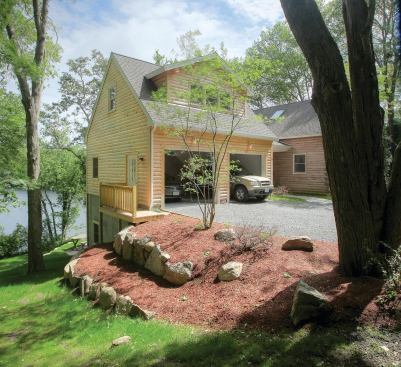
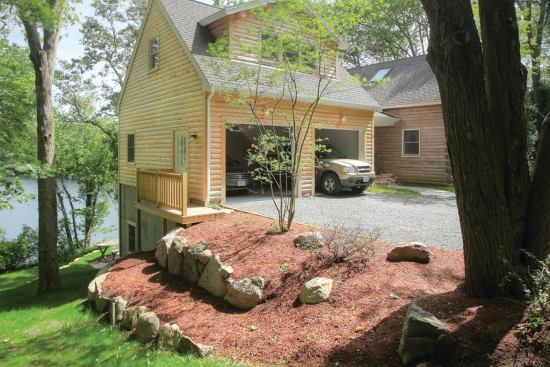
As a project manager and partner in a contracting business, I always enjoy a challenge. So when a client called us about adding a garage to his lakeside log cabin, I figured it would be a fun project, since we would be integrating a stick-built addition with the log home. But when we went to the site for our first meeting, the steeply sloping driveway was a clue that dealing with logs would be the least of our concerns.
The customer wanted a two-car garage with living space above, something we’d done many times before. Though the entrance to the garage would be level, the severe slope meant that the back of the garage floor would sit a whopping 12 feet above grade! Pouring the foundation and filling it to the slab was one solution, but the customer wanted to use the space under the garage floor for storage. In other words, we would need to build a ceiling that could support the weight of two vehicles.
Design Strategies
This ceiling — the garage floor — also had to provide fire protection. After researching the issue, we came up with three possible strategies. The first was to build a heavy-duty wood frame with a lightweight concrete layer on top for fire protection. Engineering this floor would not be a problem, but we were concerned about meltwater from those crusty chunks of snow that fall out of a vehicle’s wheel wells in the winter, and about the flex, shrinkage, and resultant cracks you typically get with a wood frame. Our second idea was to use precast concrete floor panels, but — again — the possibility of leakage or seepage along the seams between the panels was a red flag. Plus it might be tough to get a large enough crane on site to set the heavy panels.
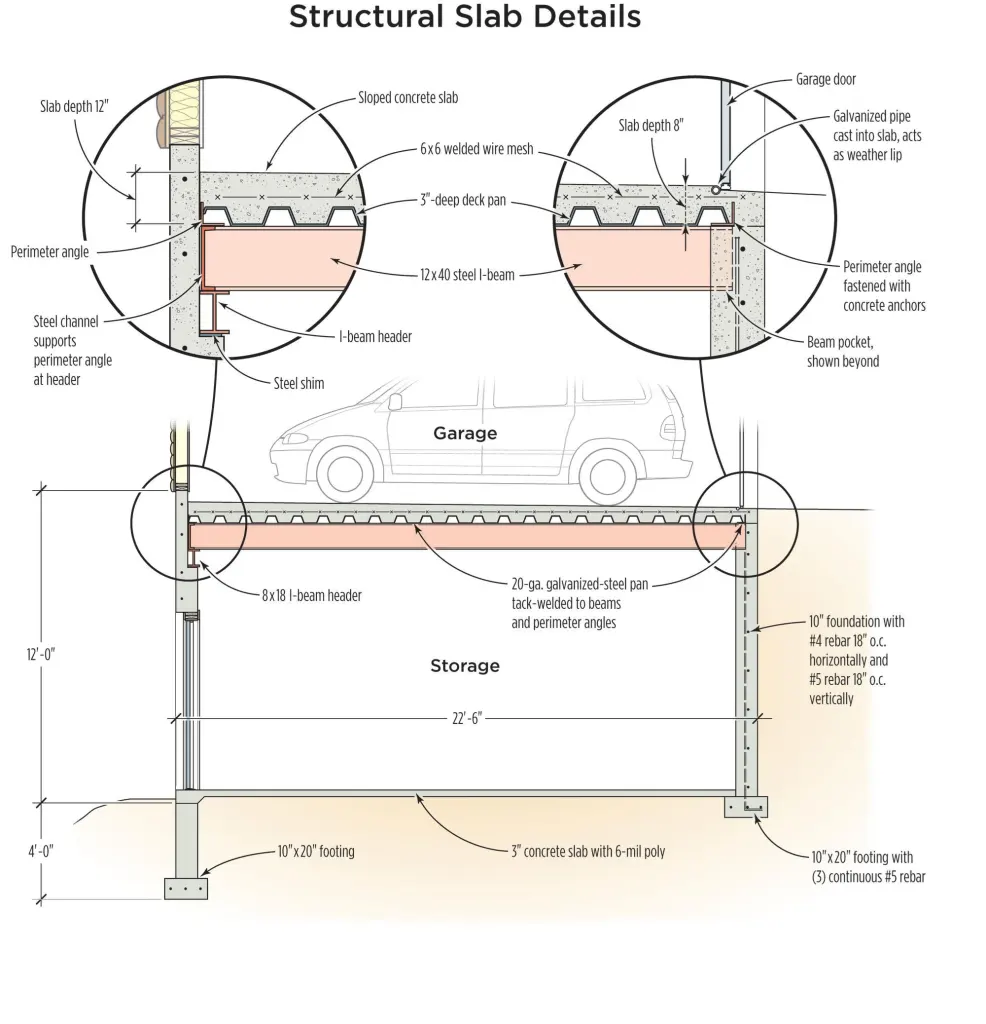
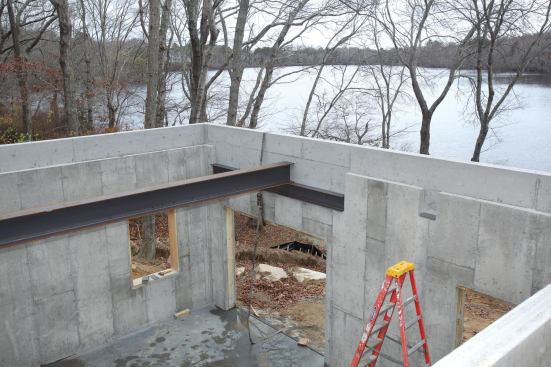
The third approach was to pour a concrete slab on top of metal deck pans supported from below by steel I-beams. Luckily both our foundation contractor and our engineer had experience with this type of construction, and they convinced us it was the best way to go. The engineer and I worked together to come up with a design that called for 10-inch-thick reinforced foundation walls, formed with beam pockets and a perimeter shelf to support the steel pans. Two W12x40 I-beams would span front-to-back below the deck pans to support the reinforced slab (see illustration).
Tall Foundation Wall
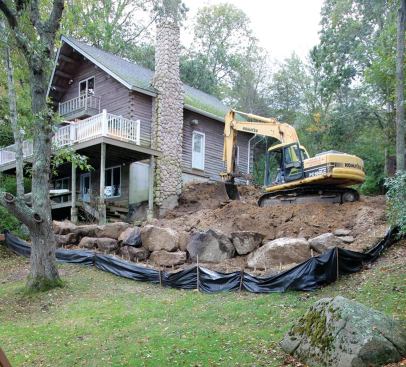
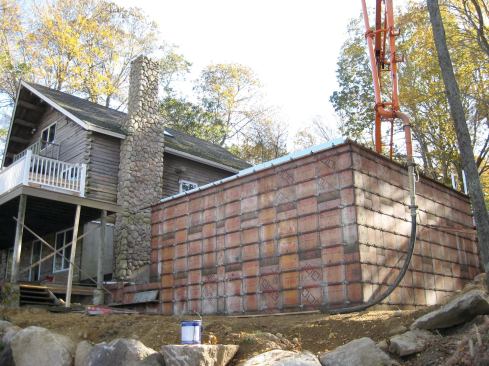
We prepped the site by removing a dozen or more trees and staking in hay bales and a silt fence before bringing in the excavator. Cape Cod is known for its deep sandy soil, which usually makes digging as easy as building a sand castle. But this particular lot happened to be one of those pockets of glacial till. As the excavator hollowed out the grade for the garage foundation, he encountered scores of glacial erratics — giant boulders deposited during the ice age ( see slideshow). The excavated soil was piled at one end of the driveway, and most of the boulders ended up being reused on site for retaining walls. Footings for the foundation had to sit 4 feet below grade to meet local frost requirements, meaning the back wall of the foundation was a total of 16 feet high. To prevent the exposed 12-foot section from looking like a bunker, the homeowner requested an 8-foot-wide access door into the storage area, along with a regular entry door next to it. To form the entry door opening, as well as a couple of window knockouts along the sides, our foundation contractor, Bruce Kelly, built 2-by bucks; the reinforced concrete wall section above the openings would be strong enough without any additional headers. However, the 8-foot-wide access door needed a steel I-beam header to span the opening and also to support the main I-beam that landed on top.

Mike Rockwell
Working with an engineer, I decided to pour a concrete slab on t…
Forming Beam Pockets
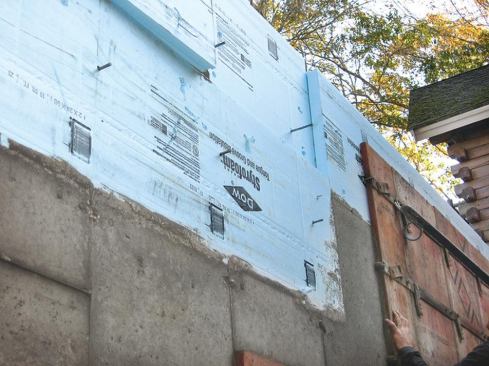
After determining the elevation of the header beam, Bruce attached a double thickness of 2-inch-thick rigid foam to the inside of the concrete forms to create a 4-inch shelf for the header beam. He also used foam board to form the beam pockets and the perimeter shelf along the top of the walls (which would support the edges of the steel deck pans). After the rebar was placed, we were ready for concrete.
Thanks to all the prep work, the pour itself was uneventful. We had the mix pumped in for convenience and to keep the trucks safely away from the hole. Once the forms were stripped, the blocks of foam came out easily, with only a little minor cleanup needed in the corners of the shelves and beam pockets where the concrete had oozed in. Before starting on the garage floor, we also had the storage floor slab placed, so that we’d have a solid, even surface to work from.
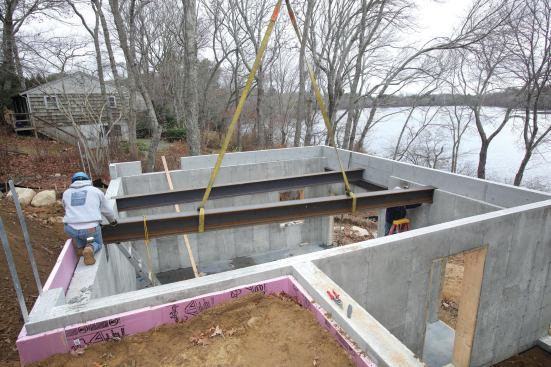
Setting the Steel Beams
With the forms gone, the next step was setting the steel beams. I’d had an assortment of steel shims of various thicknesses shipped along with the steel beams, so that we could make sure the tops of the beams were even with the deck-pan shelf. I got the shims in place before the crane arrived, and we got all the heavy support steel in place in about an hour — without even breaking a sweat.
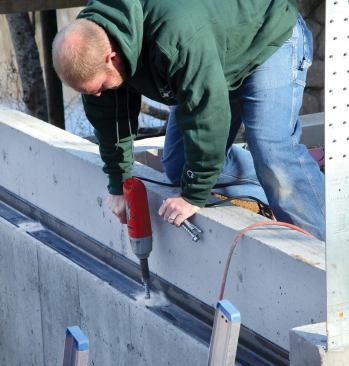
Next came the steel angle that went around the perimeter shelf. Each length came with holes drilled every 2 feet, and two of us easily set them in place and anchored them with 6-inch-by-1/2-inch Simpson Titen anchor screws (strongtie.com). We also placed lengths of steel channel on top of the header beam on both sides of the I-beam, to support the angle in that area.
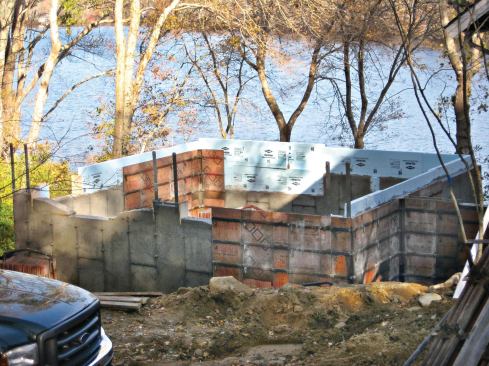
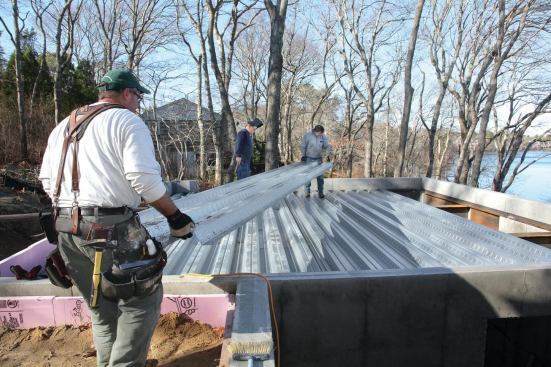
Positioning the Deck Pans
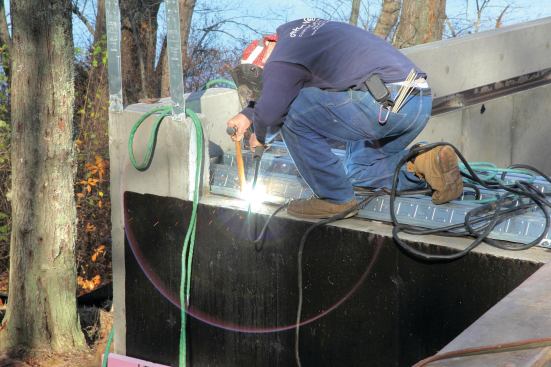
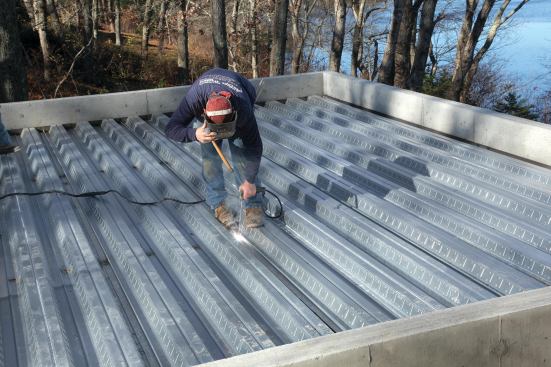
We cut the 20-gauge galvanized pans to length using a recip saw fitted with a metal-cutting blade. The sections were fairly light and we had no problem placing them by hand. Each length has a ridge along one side and a channel along the other so that the adjoining pans align and interlock.
After we put the first section in, the welder went to work. First he cut holes around the heads of the anchor screws so the decking would lie flat on top of the perimeter steel angle, then he spot-welded the edge of the decking to the angle. Finally, he tacked the pans to the I-beams below.
When I walked on the decking before it was welded, I was concerned about the amount of flex. But by the time the welder had finished, the give had all but disappeared.
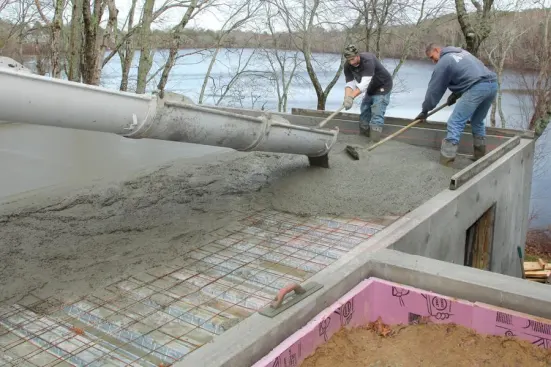
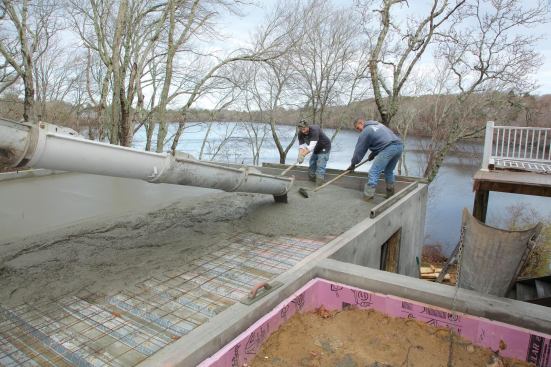
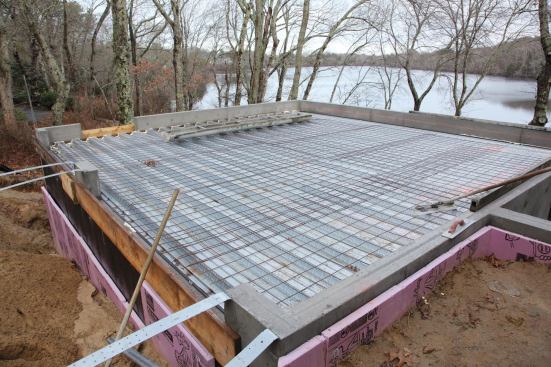
Bring on the Concrete
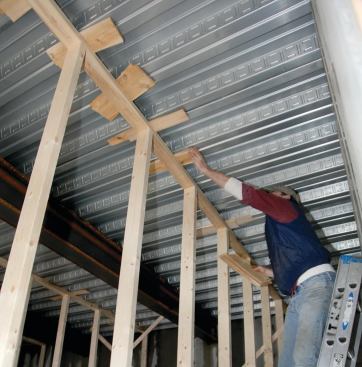
Before the concrete arrived, I framed some “just-in-case” walls below the pans. My engineer had assured me they weren’t necessary, but I figured they were cheap insurance, and anyway we would use the studs later for framing the garage. Up top, we prepared for the pour by placing 2-by dams across the garage door openings and snapping lines for the slab elevation, giving it almost a 4-inch slope from front to back. We also laid out 6×6 wire mesh on top of the pans, and for good measure I spray-foamed gaps at the ends of the pans to minimize seepage during the pour.
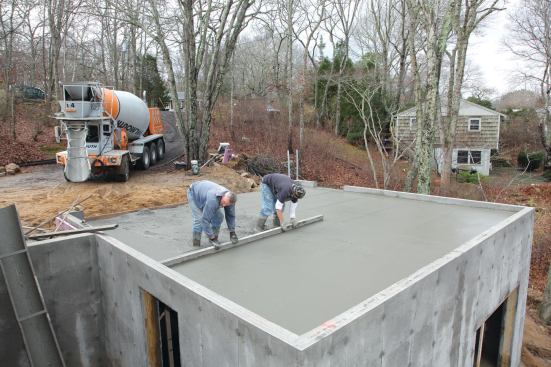
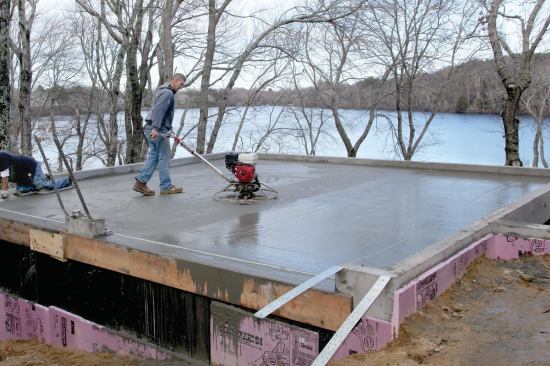
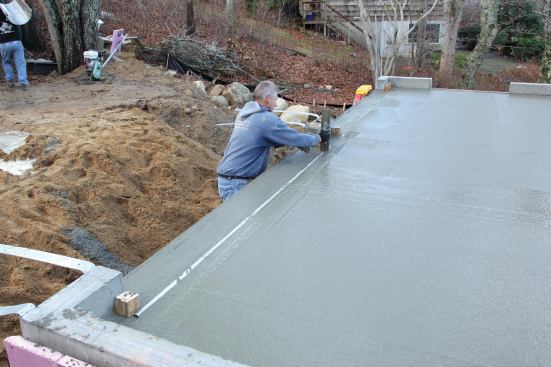
Slab placement was pretty standard. The concrete contractor and crew poured one side at a time, screeding the slope down one side, then the other. The first section was bull-floated before the second batch of concrete arrived, then the process was repeated on the other side. When the slab had set up sufficiently, the surface was finished in the usual way, ending with a power trowel. The concrete mix used was 4,500 psi, but the slumps of the two batches were different, which just meant that the second, lower slump batch took a little longer to set up.

Mike Rockwell
I-beams provide midspan support for the garage floor. A header b…
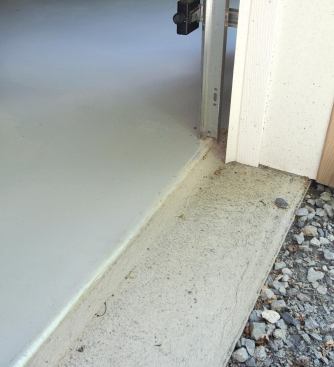
A Weather Edge at the Threshold
Garage thresholds are a tricky spot. Without a raised weather lip, wind-driven rain and debris will blow in. But a weather lip positioned improperly can interfere with the garage door, which can be just as bad. Many concrete contractors drop the slab 3/4 inch or so just inside the door and leave a lip where the concrete steps down. But that exposed edge can be fragile and chip off as things are dragged across it.
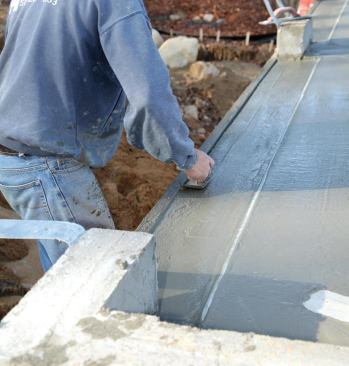
Instead, we used a detail that Joel Bess, our concrete contractor, has used successfully. He sank a length of 11/2-inch-diameter galvanized pipe into the wet concrete, spacing it inside the foundation with 2×4 blocks attached to the stem walls. He tapped the pipe down until the surface of the slab was even with the top of the pipe, then removed the concrete in front of the pipe about halfway down its diameter and sloped it out to the edge of the threshold. After the dropped area was roughed out, he removed the blocks and filled in the voids, then floated the surface smooth and finished the outer edge with an edging trowel. The result is a weather lip with a durable rounded edge that won’t chip away over time and that’s easy for car tires and lawn-mower wheels to roll over.
After the concrete cured, building the rest of the garage was mostly straightforward, though working with log veneer siding was an experience of its own. We also furred out the back wall of the foundation (which faces the pond), so that we could side it to conceal the tall expanse of raw concrete.
Final Cost
In the end, the addition cost approximately $55,000 more than if we’d simply backfilled the foundation with compacted stone and poured the slab on top. But the owner ended up with a roomy garage plus a big storage area below. And at 200 to 250 pounds per-square-foot design load, the slab is strong enough for just about any vehicle that will fit through the doors.
Mike Rockwell is part owner and production manager of The House Company in Barnstable, Mass.


