Tim Uhler
Tim Uhler
The company I work for has had no major accidents (beyond a few stitches here and there), and we are proud of that. That said, we didn’t exactly go out of our way to use ropes and harnesses when they first became required.
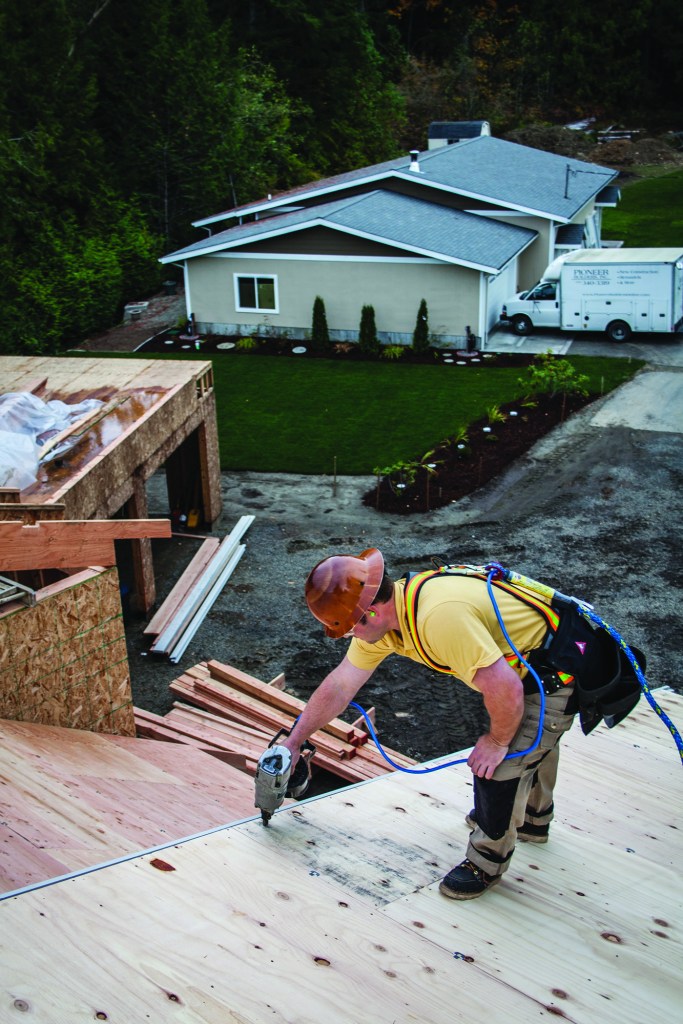
Like other contractors who comply with OSHA fall protection standards, I’ve had to ask myself: How am I supposed to compete with crews that don’t use fall protection? It’s expensive to set up staging and time-consuming to rig nets, so we usually opt for lifelines and harnesses. Still, compliance has taken a lot of adjustment.
Over the last few years, I’ve read many articles about OSHA fall protection requirements, and I’ve taken an OSHA 10 class. I also work regularly as a volunteer on construction projects where many of the other volunteers do not work in the trades and have very little or no experience in construction. This has given me a fresh perspective on safety. And I find that as I’m getting older, I appreciate how quickly life can change for the worse.
All of this experience has done a lot to break down our resistance to fall protection requirements. But in addition, what’s been key was finding comfortable equipment that works. To aid that endeavor, I contacted a few manufacturers to review some of their latest fall-protection products. Here’s what I learned.
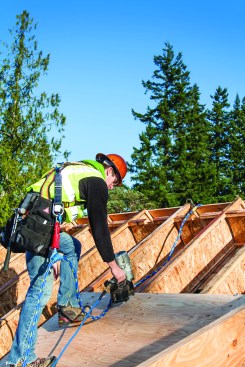
Fall-Arrest Harnesses
There are a ton of choices, at many different price points. Here I’ll review a few basic harnesses, as well as some of the more “deluxe” gear that works for us as framers. But I encourage everyone to scout out the market to find what works for his or her particular trade.
Super Anchor Deluxe. This harness has been designed to be comfortable and functional. It sports attached nail bags, which is nice, but the bags are pretty typical and not necessarily “framer specific.” (I found them to be too deep, and it was difficult to put my tape back into its pouch, which slowed me down considerably.)
The shoulder and the back straps are extremely comfortable. They are padded, and the straps don’t have any edges, as they do on the basic harnesses. In addition, the straps are designed not to absorb too much moisture—a big advantage in wet climates like ours or in hot climates where the harness could absorb sweat and begin to stink. All the connections are quick-connect, and replaceable webbing keepers hold the extra length of strap against the frame of the harness.
This harness has nice features to aid in inspection. It has tags that show where to inspect for wear and also a tag behind one of the straps where you can keep a record of the inspections.
I enjoyed wearing this harness. The only complaint I have (besides the nail bags) is that the chest strap can be adjusted only narrower or wider; it can’t be adjusted up or down. After a couple of hours, I found that my nipples were sore (and as I complained, my crew laughed at me). If I could adjust the chest strap, I would use this rig and just replace the bags with the style of Occidental bags that I like.
Online, this rig sells for $360. This is a lot to spend, but look at it this way: It keeps you safe and doesn’t wear out as fast as boots, so you will get quite a few years out of this rig. You can buy the ultra hi-vis version without the bags for $274.
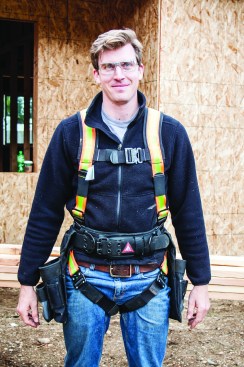
Werner series. Werner is known for making ladders and scaffolding, but entered the fall-arrest-harness market a few years ago. They offer a whole line; at the lowest price point is the LiteFit harness, which can be purchased as part of a kit for about $120 or alone for about $50. The buckles are a slotted pass-through style that is virtually idiot-proof, and the harness has five adjustment points. I found this to be a very comfortable, light harness. Putting my own nail bags over this harness didn’t cause me any problems.
A step up is the Blue Armor 1000, which has five-point adjustment, slotted pass-through buckles, and a pad under the back D-ring. The harness alone sells for about $70. This model also has what Werner calls “Web Alert” webbing. As it wears, it will reveal red fabric under the blue that indicates the level of wear or damage—a nice feature that makes the webbing easy to inspect. I enjoyed wearing this harness, too. It’s easy to take on and off, and easy to adjust. I got used to wearing it pretty quickly.
The top of the line is the Blue Armor 2000. Like the 1000, this harness features the Web Alert webbing. It has a quick-connect chest strap and slotted-tongue connections at the leg straps. In addition, it has a back belt with two D-rings and a removable work belt that you can add nail bags to. The shoulder straps are padded, as well. The harness alone retails for $145. This rig is comfortable enough, but I didn’t like the feel of the back belt because it is too tall for me.
Exofit Nex. This is the most feature-rich of all the harnesses we tried. The shoulder and leg straps are extremely well-padded. The shoulder pads have a protective covering, so the straps don’t wear if you carry things on your shoulders. The leg straps are adjusted using quick-connect buckles that can be locked. The same style buckle connects the chest strap too.
The rear D-ring is spring-loaded so that it points “up” toward the head. This makes it easier to click in your lifeline, especially if you aren’t very flexible, like me. The torso straps have “revolver”-style adjusters, where you twist a knurled knob to lengthen or shorten the strap, and then the adjuster locks the strap in place.
The webbing is water repellent and the shoulder pad has straps for storing the hook on certain styles of lanyards. This rig also has “trauma straps.” If you do fall, you can put your foot into these straps and lift yourself up to relieve the pressure. This helps relieve circulation problems caused by dangling until help arrives.
To help keep track of inspections, this rig is fitted with an RFID device so that inspections, assignments (who has what harness), and inventory can be done on a computer.
With all of these features—and a hefty price tag ($360)—is this a harness worth buying? One guy on my crew really liked this rig and felt it was very comfortable. I loaned one out to a female friend of my mine who wore it roofing, but she had the same complaints I did: We both found that the fit was comfortable, but the trauma strap interfered with the nail bags. I didn’t like the extra pockets on the shoulder straps. Overall, this rig felt big and obtrusive.
In my opinion, in order for a harness to be worn, it needs to be nearly invisible in use, or guys will just get bugged and not want to wear them.
DBI Sala Delta. This rig looks pretty basic, but it has a lot of features packed into it. The rear D-ring is spring-loaded—to make it point up and make it easier to clip a lanyard to—and the webbing is water-repellent with rig stitch indicators and DBI Sala’s I-Safe identification tag (RFID). I like the tongue-buckle leg straps because they make it easy to put the harness on and take it off—even when I’m wearing gloves.
What I don’t like about this rig are the vertical torso straps, which adjust by using a “Revolver” mechanism. Twist one way to tighten the straps and the other to loosen them. They work fine, but are a problem for me because I need to wear nail bags over the harness—and the bags make the Revolvers rub. I like everything else about this harness, and if I did not need to wear nail bags, I’d be happy to wear it every day. The Vest Style Harness is available in sizes from extra small to 3X-large and retails for about $100.
Protecta Pro. I have come to love simple harnesses and this is a very simple harness. All of the buckles are pass-through, so it is easy to use, and it is low profile. This is also a lightweight harness, because there are no bells and whistles. I found it online for about $50.
What Do I Buy?
While I loved the Super Anchor Deluxe harness rig (with tool bags—like Occidental pouches—that are more to my liking), the chest strap couldn’t be adjusted to fit my stature. Still, of all the harnesses, it is perhaps the most comfortable and simple to use. In addition to that rig, I recommend the Werner Blue Armor 1000. That harness was easy to put on and take off, comfortable, and brightly colored; in addition, wearing my Occidental framing bags over the harness gave me no problems at all.
Key Elements
Complying with fall-protection rules can be difficult if you can’t find a safe anchor point. In some situations, it’s nearly impossible to properly rig a lifeline. This is particularly true for us when we’re rolling trusses. Fortunately, I recently discovered a solution—Super Anchor’s Safety Bar.
The Safety Bar is very easy to set up: Just slip it over the top chords of three trusses, pop in the detent pins, and then put a couple of nails through the 1/8-inch holes in the bar to keep it from sliding. As long as the trusses are braced, you now have a legal tie-off point for two workers (provided neither weighs more than 310 pounds). As a bonus, the bar holds trusses on layout, too. For our crew, I think we’ll buy another bar or two the next time we frame a big house. I looked online and found them for sale for between $280 and $380. That’s not cheap, but it’s a whole lot less than the fine we face for framing without proper fall protection.
One final suggestion: Wear your harness over Duluth stretch work pants. They’re comfortable and don’t bind at all. Trust me, a harness is much more bearable with these pants.


