When “On the Waterfront” was filmed in Hoboken in 1956, the town was still a viable New Jersey manufacturing center and port filled with attached, turn-of-the-century single-family brick and brownstone homes. During the ’60s, the factories moved out of town, the port became obsolete, and many of these homes were converted into boarding houses.
Thanks to its proximity to New York, though, Hoboken has been transformed over the past 35 years, and most of those shabby apartments have been reconverted into single-family residences. During the recent recession, building activity in Hoboken barely missed a beat – a good thing for our remodeling company, since that’s where we do a lot of our work.
Rob Corbo
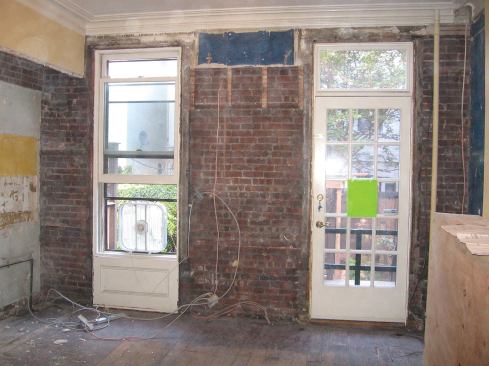
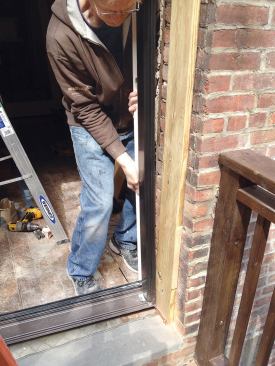
Plans called for replacing the window and the door in a rowhouse…
Window and Door Replacement
Urban remodeling presents its own set of hurdles, from complex permitting to narrow streets with limited parking. But the biggest challenge – especially for carpenters mainly familiar with wood-frame construction – is the buildings themselves. Most have structural brick walls and are separated from one another with windowless common walls. Some rowhouses have a brownstone veneer or stucco finish, particularly on the front facade, but usually the brickwork is exposed.
Hoboken rowhouses are typically long and narrow, with widths varying between 15 and 22 feet. To bring more light into the interior and improve backyard access, a popular renovation project here – especially during kitchen remodels – is to blow out the back wall on the ground floor and replace the standard door and window configuration with a wider three-panel door unit.
Wall construction. The brick pattern we encounter most often in Hoboken is American bond, where the stretchers (bricks laid flat with their long edges exposed) are interrupted every five courses or so by a row of headers (bricks laid flat with their short ends exposed). Stretcher courses are two layers (or wythes) thick, and the perpendicular header courses tie the inner and outer wythes together, reinforcing the wall assembly.
Floor framing and roof loads are typically supported by the brick common walls, which are often as much as 12 inches thick.
Robust as this type of construction is, you still need to take great care when you’re widening a window or door opening, to prevent the two or three stories of brick above from collapsing. If we have any reservations about our ability to do the job safely, we consult with an engineer, who analyzes the loads and develops a shoring plan for the project (see “Installing a Wide Door in a Tall Brick Wall,” 6/05).
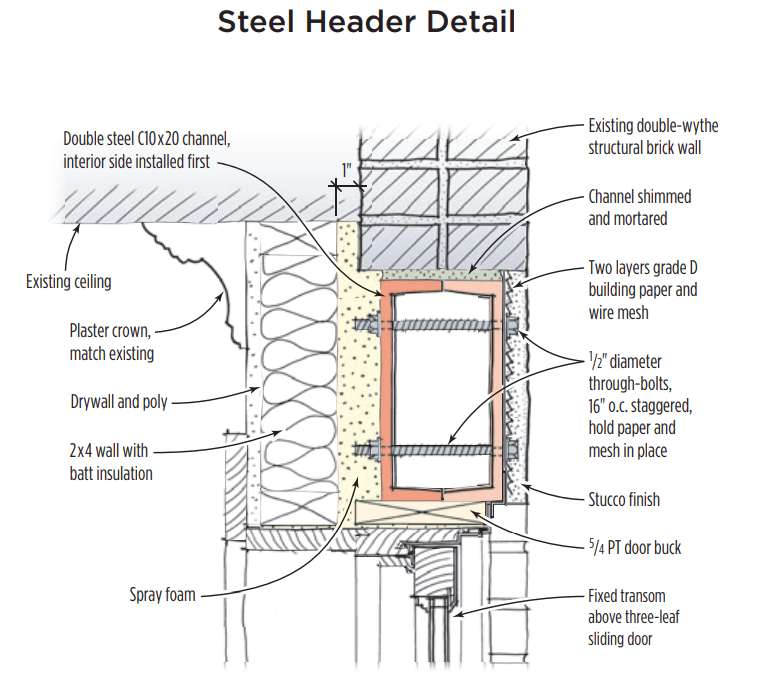
Split header. When we’re working with a double-wythe structural brick wall and have complete access to the brickwork from both the interior and the exterior, we’re usually comfortable removing the brickwork and installing the steel header specified by the architect without consulting an engineer or installing extra bracing. We do this by building up the header using two (or more) pieces of channel steel rather than a single I-beam.
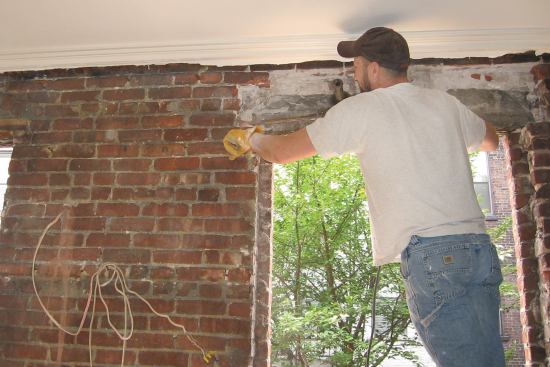
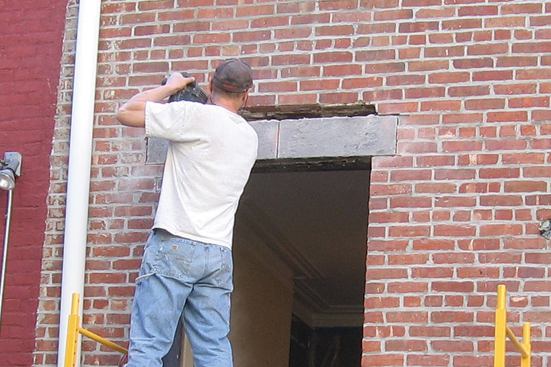
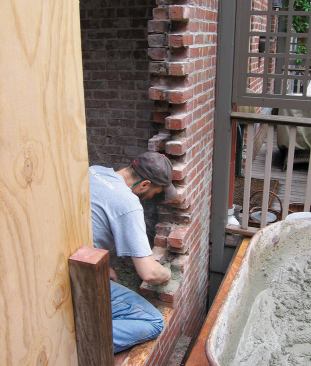
On the job shown in this article, for example, we started by gutting the finished wall and exposing the brickwork. After removing the door and window, we began chipping away at the inner wythe of brick with a rotary hammer and an angle grinder equipped with a masonry blade, dismantling just enough brick to install the first header section.
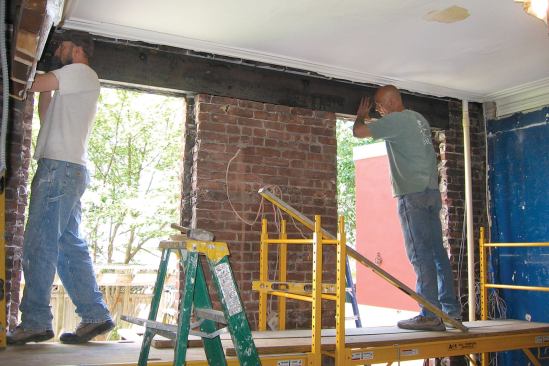
One advantage of this method is that it leaves the outer wythe of brick supported. Another big plus is that C10x20 steel channel – the steel we used for the two header sections – weighs only 20 pounds per lineal foot, considerably less than the single I-beam we otherwise would have needed. We could safely lift each header section into place by hand without any mechanical help.
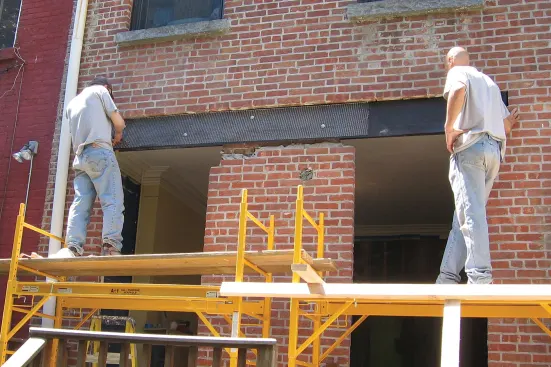
Once the first header section was in position, we used wood shims to lock the steel and brickwork together before moving on to the exterior. We removed the stone lintels over each opening and wedged in some temporary framing to support the brickwork above. Then we removed just enough of the remaining exterior brick to install the second header.
The headers were predrilled with 9/16-inch-diameter holes, so we had to spend some time tweaking and shimming the two sections of steel to align the holes.
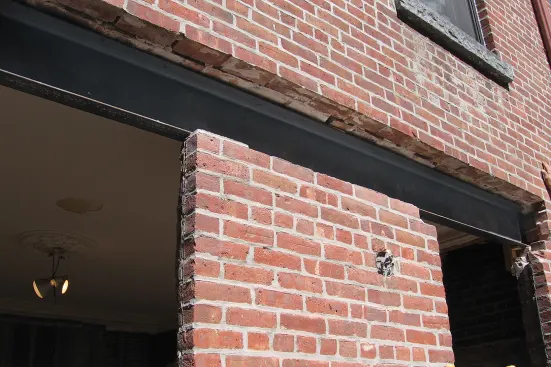
On some projects the steel is left exposed and flush with the exterior wall. But on this one, the homeowners wanted the new steel header to be finished with stucco to match the granite lintels on the house’s back wall. To prepare it for our mason’s finishing touches, we primed the steel, flashed it with two layers of 30-pound felt paper, and installed wire mesh before bolting the two sections together with 1/2-inch-diameter bolts.
When we packed the gap above the header with Type S mortar, we temporarily left the shims in place. Later, when we started repairing the brickwork, we removed them and filled in the cavities with additional mortar. We also gave the header a mortar scratch coat to prep it for its stucco finish.

Rob Corbo
With the interior wythe of brick supported by the first steel ch…
Finishing the Opening
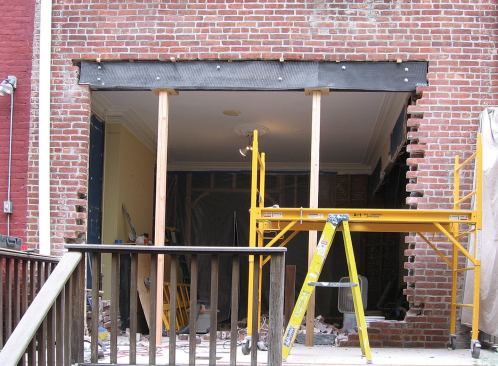
Once the steel is installed, the wall finish dictates how we complete the opening. On this project, the brickwork would remain exposed, so we removed it carefully to leave a toothlike edge, using brick chisels and our angle grinder. We rebuilt the opening by toothing in bricks we’d salvaged from the original wall and cleaned up. To help the new work blend with the old, we cut the mortar joints back so that our mason could touch them up later with color-matched mortar.
On projects where the wall has a stucco or brownstone veneer finish, toothing isn’t necessary. When a wall has to be built out only a few inches, we simply form around the wall edge and fill the form with mortar. To build the wall out farther, we use concrete block reinforced with rebar.
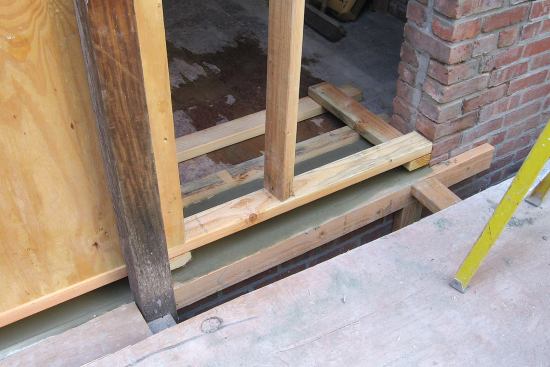
To make sure our windows and doors are sitting on a smooth and level base, we always cap the bottom of our rough openings with concrete sills that we form and pour in place. Once the rough opening is complete, we usually turn the job over to the millwork supplier, who fastens treated 5/4 bucks to the masonry, flashes the opening, and proceeds with the door or window installation.
Project Costs
Toothing in brick is tedious, so it usually takes us more time to install a door in a wall where the brickwork is exposed than in a wall with a stucco finish. On the project shown here, it took about 140 man-hours to remove the brick, install the steel, and rebuild the opening for the three-panel slider. The steel alone cost about $725, and materials and dumping fees added another $290. Project costs don’t include the cost of the door itself.


