Sheathing is the covering applied over a wood-framed building before the siding goes on. Sheathing helps the frame to resist racking, and when applied according to strict engineering specifications, sheathing can be a major component in shear-wall construction to resist seismic activity or excessive wind. It has also become an integral part of making today’s homes airtight and weather-resistant.
Objective:
Demonstrate the process of installing wall sheathing
Prerequisite Skills:
Basic understanding of framing and wall construction
Basic skills with using circular saws, routers and nailers
Tools and Materials:
Tape measure
Chalk line
Pneumatic nailer
Circular saw
Router
Sheathing Vocabulary:
CDX plywood: Plywood used for sheathing with exterior glue
OSB: Oriented Strand Board, an engineered sheathing product made from wood chips and glue
WRB: Weather Resistant Barrier, an outer layer such as housewrap that helps to keep moisture away from the sheathing and the wall assembly.
Shear Wall: A framed wall usually sheathed on both sides that helps a building resist lateral forces, such as wind or seismic.
SHEATHING MATERIALS
For most of this country’s history, sawn softwood boards—usually pine—were used to sheathe framed walls. As a carpenter, I did a lot of remodeling work in older homes, and most of the houses built before World War II had board sheathing. Here in New England, it’s common to see pine boards with beaded edges nailed to the studs.
Then, during the post–World War II building boom, plywood was introduced as a way to speed up the pace of production. Instead of laying down individual boards, builders could cover the framing much more quickly with large sheets of plywood. Plywood sheathing almost invariably is CDX, meaning that the face side has a C rating (some splits, tight knots up to 1 1/2 inches and knot holes up to 1 inch), and the reverse side has a D rating (some splits with knots and knot holes up to 2 1/2 inches). But the most important part of this equation is the “X,” meaning that plywood is intended for exterior use and can withstand some exposure to moisture.
Oriented strand board (OSB) sheathing is a less expensive alternative to plywood and first started gaining popularity in the 1970s and 1980s. Early renditions of OSB were notorious for swelling and disintegrating when the material came in contact with moisture. However, improvements in adhesives and manufacturing have resulted in engineered OSB products that are stronger and more stable—even when exposed to moisture.
And in this millennium, some manufacturers such as Huber are producing OSB sheathing with integrated water-resistive barriers (WRBs) and insulation.
SHEATHING ORIENTATION: HORIZONTAL OR VERTICAL?
One aspect of wall sheathing that is part regional, part personal preference, and part engineering specified is the orientation of the sheathing on the building frame. I queried framers from many parts of the country and each seemed to have strongly held views on the subject, and each offered logical explanations as to why one method was better than the other. Some of those opinions, from respected framers and JLC authors, are included here.
When I was a carpenter in Rhode Island in the 1980s and 1990s, the sheathing we used the vast majority of the time was 1/2-inch CDX plywood, and I recall that we never installed plywood vertically. Since I moved to Cape Cod about 15 years ago, however, the wall sheathing on all of the houses I see being built is installed vertically. Much of that practice has to do with engineering for the updated high-wind code. To meet those code requirements prescriptively, engineers place vertical sheets in strategic locations to help homes resist wind forces. But they are not necessarily creating shear walls.
I asked Tim Uhler, a lead carpenter for Pioneer Builders in Port Orchard, Wash., about the orientation he preferred. He said that his crews always install sheathing vertically unless it doesn’t work for the wall sizing. For example, to sheathe a 12-foot wall, they would use 8-foot vertical panels and 4-foot horizontal. Uhler builds in an active seismic zone, and he said that engineers in his area always specify shear panels to be installed vertically.
When I put the same questions to John Spier, who owns Spier Construction, on Block Island, R.I., he said that, with only rare exception, he runs his sheathing horizontally. Spier said that for the complex houses he usually frames, horizontal sheathing produces a lot less waste. He also finds horizontal orientation a lot easier for gapping the courses to allow for settling, compression, and the shrinkage of the framing. Block Island is in a high-wind zone and Spier said that the sheathing usually serves as his floor-to-floor uplift resistance, and horizontal sheathing is easier to lay out for that. Finally, he said that it’s just plain stronger and stiffer.
Nate Eldon, who owns Eldon Builders, in Cape May, N.J., also builds in a high-wind area. He thinks that the move to install sheathing vertically was driven by OSB not having a defined strength axis like plywood. He also said OSB now comes in longer sheets—10 and 12 footers—that let you sheathe the wall and the rim joist at once. Eldon said that they’ve even tested sheathing in some configurations that allow builders to eliminate some hold-down straps.
I also posed the orientation question to Nick Robertson, a product application specialist at Huber Engineered Woods, manufacturer of Zip System sheathing. He offered a unique perspective, saying that Huber is OK with installing Zip sheathing vertically or horizontally, unless one way or the other is specified by an engineer. When the courses are installed horizontally, Huber is also OK with having the end seams staggered or aligned between courses. Another thing that Robertson pointed out was that vertical orientation can be problematic when the framing is 2 feet on-center. In that configuration, the sheets are supported by only three studs, which can cause problems if more stiffness is required—especially when the cladding is a coating such as stucco.
These differences in opinion were not surprising, and the expert builders I interviewed seemed equally adamant about their preferred strategy. My advice is to look at both strategies and figure out which one works best for you and your crew. If the orientation is not specified, it’s also a good idea to speak with your local building officials to see which orientation they prefer to see. With that in mind, the photos in this article cover the basics of both vertical and horizontal installations, but a lot of the same installation rules apply regardless of the orientation and regardless of the sheathing material.
Equal diagonal measurements between opposing corners ensure that the wall is square.
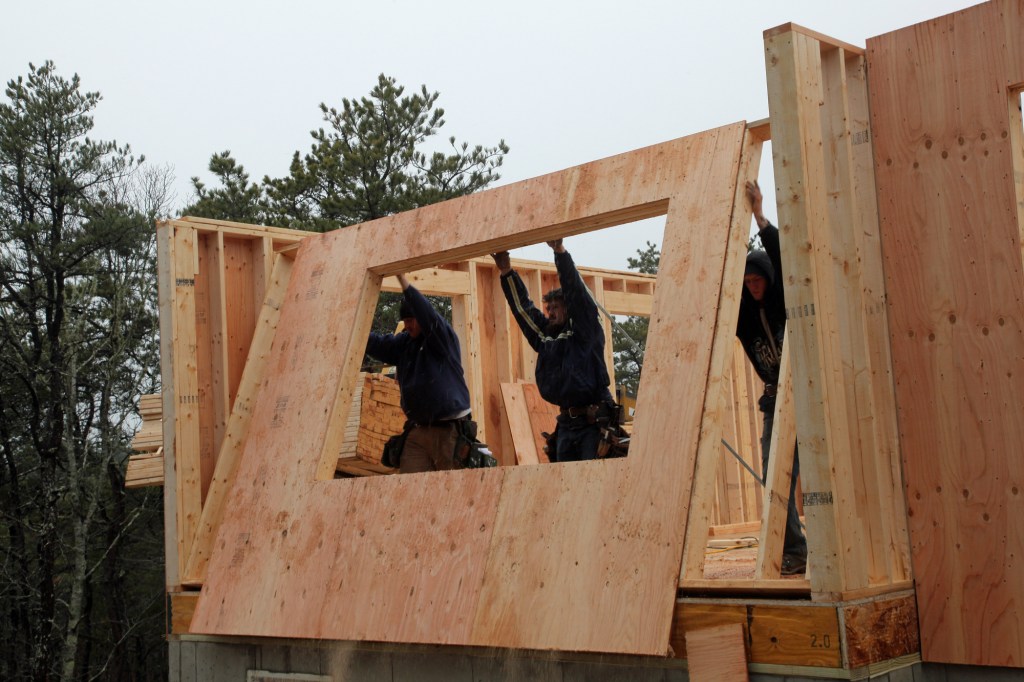
VERTICAL ORIENTATION
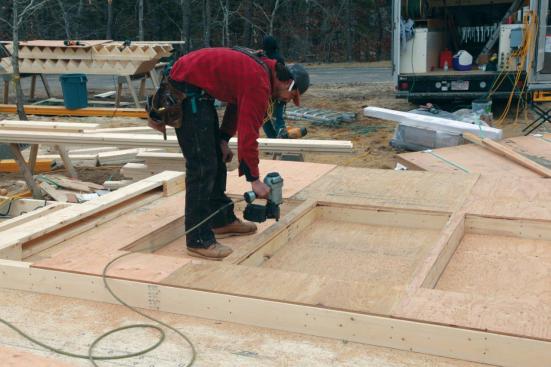
The Cape Cod-based framing crew in these first photos installed the CDX sheathing vertically and in a side-to-side layout specified by an engineer to maximize racking strength and wind resistance in the wall. As is usually the case, this crew attached the sheathing to the frame before standing it up.
TACK THE SHEATHING IN PLACE
The crew then tacks the sheathing to the studs, using a tape measure to follow the layout.

On this home, the sheets are flush with the top plate and they split a stud.
With the framing complete, the crew takes diagonal measurements between the opposing corners of the wall. The top plate of the wall is tapped over until the measurements match exactly, which ensures that the wall is square. The crew then tacks the sheathing to the studs, measuring from one end with a tape measure to follow the layout with the nails. They make the sheathing sheets flush with the top plate and set the sheathing so the edge runs down the middle of a stud.
CUT OUT OPENINGS
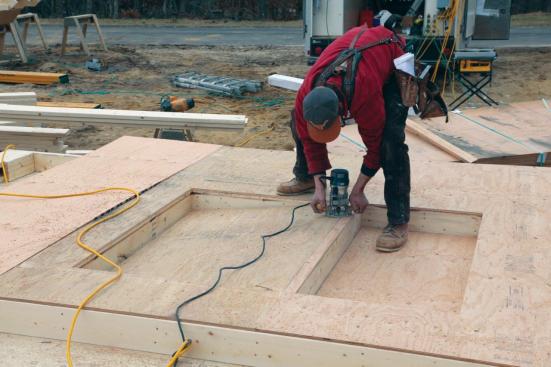
A worker using a router equipped with a bearing-guided bit cuts out a window opening. Openings can also be cut out with a circular saw or a recip saw.
The sheathing is typically nailed to the framing at edges and around openings with 6d ring-shank nails or 8d common nails (or their pneumatic equivalents) 4 inches on-center, while nails along the studs are driven every 6 inches o.c.
With the sheathing sheets tacked in place, a crew member uses a router equipped with a bearing-guided bit to cut out window openings. Once the router bit plunges through the sheathing, the bearing follows the rough-framed opening of the window. Some framers prefer to cut out openings by snapping chalk lines and then sawing along those lines. Once the openings are cut out, the crew has easy access for nailing off the perimeter opening. They can then complete nailing off the field of the sheathing. Typically, the edges of the sheets and the opening perimeters are nailed 4 inches on-center, while nails along the studs are driven every 6 inches. Most jurisdictions require 6d ring-shank nails or 8d common nails for attaching sheathing.
DEALING WITH THE RIMS
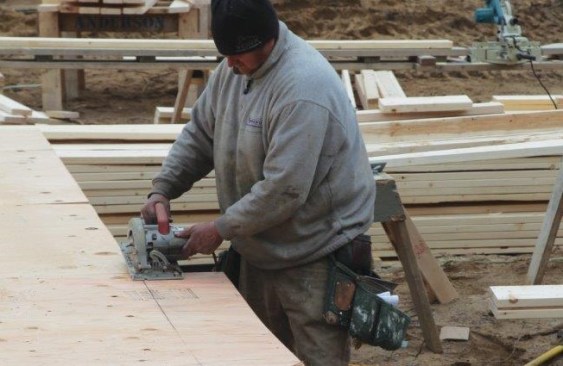
The sheathing is installed and trimmed to length so that the panels overlap the bottom plates, rim joist, and mudsill.
When the crew raises the wall, the sheathing at the bottom of the wall covers the rim joist.
The crew installs the sheathing so that the panels overlap and extend beyond the bottom plates, rim joist, and mudsill. After measuring to determine how much of that length is needed to cover the rim joist and mudsill, a worker snaps a chalk line and cuts off the excess sheathing with a circular saw. When the crew raises the wall, the sheathing at the bottom of the wall covers the rim joist. Once all the walls are in place, the crew nails the sheathing to the mudsills and rim joist to tie the wall framing to the floor framing.
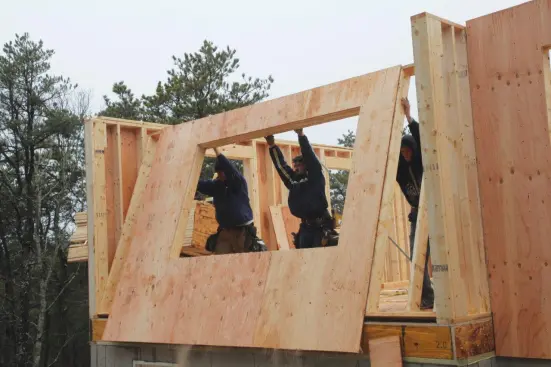
FILLING IN
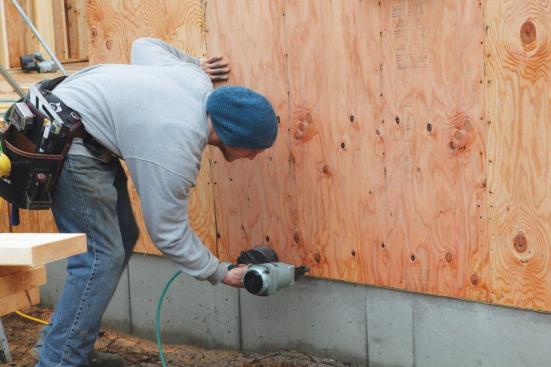
After raising a wall, make sure the sheathing has been nailed off at the mudsills and rim joist.
Certain wall sections on this house were engineered to increase racking strength with the sheathing sheets placed at designated stud positions. This sheet placement meant that small strips needed to be filled in after the walls were raised. Additionally, short jogs in the exterior wall were raised without sheathing and those areas were filled in afterwards. These sections overlap onto the corner studs to help tie adjacent walls together.
When all the sheathing has been nailed to the studs, a crew member goes around the perimeter of the house to make sure the sheathing is nailed to the mudsills and to the rim joist. Because of the infill sheathing sections, the crew installed housewrap after the walls were raised.
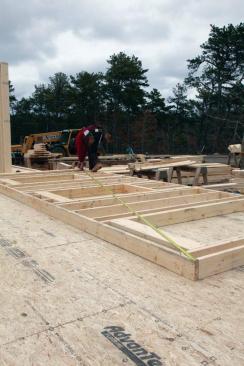
HORIZONTAL ORIENTATION
As with vertical orientation, the crew squares the wall frame first, then snaps a chalk line to guide the horizontal sheathing placement. With the studs visible beyond the edge of the first course, the crew can adjust the stud spacing to hold the studs straight as the sheathing is tacked in place.
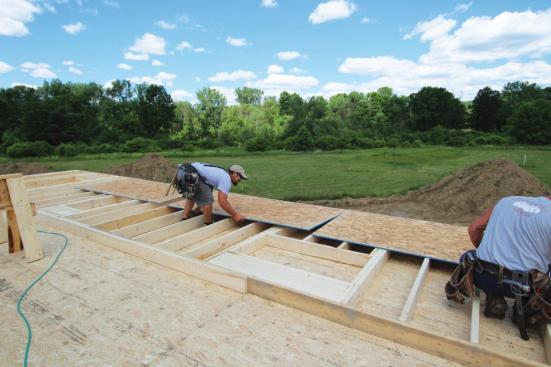
After squaring the wall, the crew snaps a chalk line across the studs to guide sheathing placement.

With the layout marked on the sheathing, stud spacing can be tweaked to keep the studs straight.
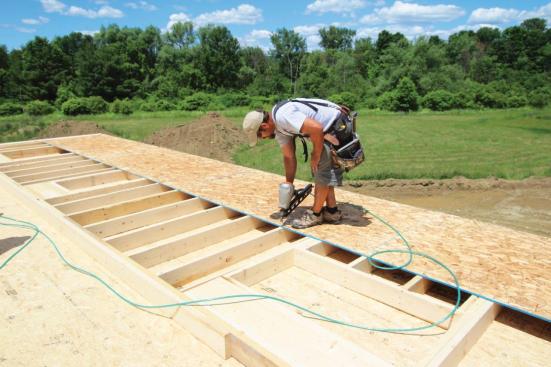
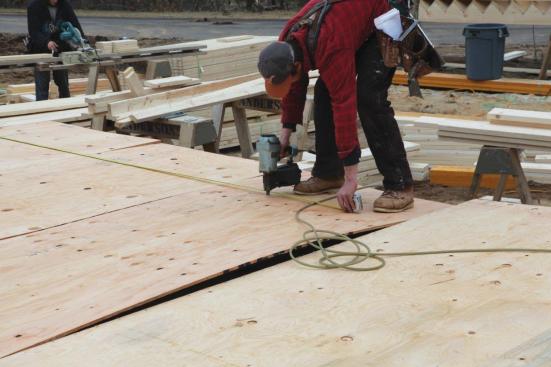
When nailing off the sheathing, avoid driving "shiners" (nails that miss the framing) or overdriving the fasteners.
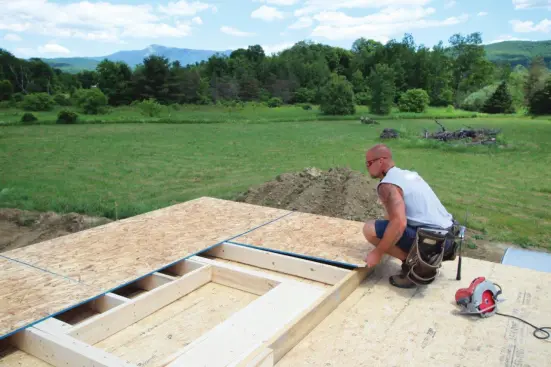
To stagger the joints, begin the second course with a half sheet of sheathing.
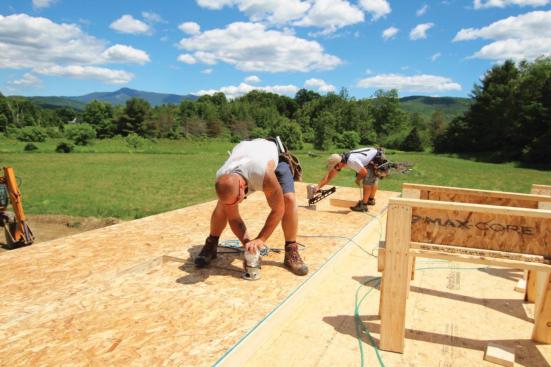
As one worker cuts out window openings, another can nail off the sheathing.
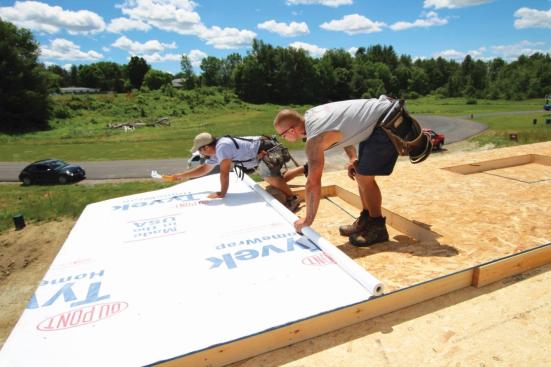
It's much easier to staple housewrap to the sheathing before raising the wall than afterward.
The second course begins with a half sheet so that the end seams are staggered between courses. One person cuts out the window openings with a router, as before, while another nails off the sheathing. The final step before raising the wall is stapling housewrap to the sheathing.
Photos by Roe Osborn


