Over a 28-year career in the home-performance industry, I’ve been involved in the insulation of thousands of unvented cathedral roofs using dense-pack cellulose. Since I started working in the industry, codes have changed to the point that the prescriptive code for new construction no longer includes the methods I use. It’s too bad, because those methods are simple, reliable, effective, and safe when done properly. In any case, dense-packing unvented roofs is still allowable as an alternative method with permission of local authorities having jurisdiction, and it’s still widely practiced on existing homes by home-performance contractors and weatherization professionals. [Editor’s note: for a thorough discussion of roof insulation and venting codes, see “Avoiding Wet Roofs Part II” by Peter Yost, Jul/18.]
I began my career in 1992 working with a local weatherization company in Albany, N.Y. We started dense-packing roofs at that time, and we continued to use the technique on multifamily buildings across New York state until the mid-1990s. We dense-packed a couple of hundred roofs during that period.
Then, during my nine years of running the Weatherization Assistance Program in central Vermont, we dense-packed more than 1,500 roofs just in our territory alone. Four other agencies in the state were doing the same thing, so you could multiply that number by five to come up with a reasonable statewide estimate.
After that, I worked for National Fiber, a cellulose manufacturer, for 11 years. I was the technical manager for the company, supplying training and technical support to installers, architects, builders, homeowners, and code officials. During that time, the firm provided material for dense-packing thousands of roofs in the Northeast. One of my roles was to train installers in the correct techniques for that application.
I know from personal experience that there are tens of thousands of dense-packed, unvented cathedral roofs in existence in the northeastern United States. And in my time working in the industry, I have become acquainted with only a handful of failures in that type of roof assembly. Each problem I have investigated was associated with either a roof leak or a failure to pack in the material to the recommended “self-supporting” density that won’t settle.
Techniques
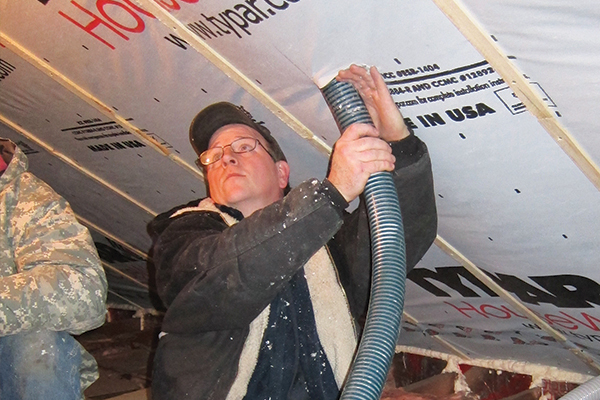
There are a variety of situations where dense-packing an unvented roof is an attractive solution. One classic example is when a contractor is weatherizing an existing story-and-a-half house. Typically, the knee wall under the roof is poorly insulated and even more poorly air-sealed. Often, there are built-in cabinets or other elements that make insulating and air-sealing the knee wall difficult. In my experience—no matter how perfect a job we thought we were doing—after a snowfall, the roof over that area behind the knee wall was always the first to melt off. If we insulated the slope above the space, however, there would be no thermal issues with that area—it would perform as well as the rest of the roof. To accomplish this, you have to gain access to the area behind the knee wall. Then, the method is to apply Typar housewrap and strapping to the underside of the exposed roof rafters, and dense-pack the roof through holes in the Typar. (For more on this, see “Home Performance Contracting” by Mike Rogers, Sep/09.)
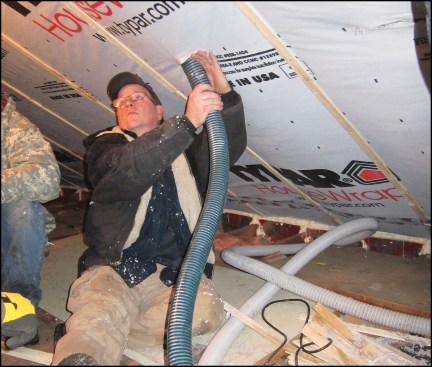
In existing construction, weatherizers typically dense-pack cellulose behind strapped housewrap.
Often, weatherizers encounter an existing drywall ceiling on a sloped roof. In that case, there may be existing fiberglass batts in the cavities. You can often hook those batts out—take a painter’s pole, take off the roller, bend a hook, feed it down the roof slope, and then turn it to hook the fiberglass batt and pull it out. This is harder to do if the batts are paper-faced and stapled to the rafters.
If the batts are thin and don’t fill the cavity, you can inject cellulose between the batts and the roof deck and compress the batts down against the drywall ceiling. But you don’t want to inject cellulose that way if the batt fills the entire cavity: In that case, the batt may prevent the cellulose from coming into full contact with the underside of the roof sheathing, which is critical for the durability of the roof sheathing, as discussed below.
In this type of job, the rafters are typically smaller—2x10s, or even 2x8s. It’s relatively easy to get a good dense-pack in the small volume of those cavities; it’s not much different from insulating a wall. In new construction, however, the situation is different. In particular, it’s more challenging to install cellulose to the proper density in a very deep cavity, such as you might see in the roof system of a high-performance house.
In contemporary super-insulated designs, builders have achieved deep cavity depths by building down rafters. In the classic example, the rafter is sized to the roof loads, then an assembly similar to a Larsen truss is constructed: A 2×4 is hung off the bottom of the rafter using scabs ripped from plywood. The deeper the rafter cavity, the more densely the cellulose must be installed for the material to remain self-supporting. Typical density for a 2×6-rafter cavity would be 3.5 pounds per cubic foot. For a 2×12 rafter, we want 3.8 lb./cu.ft., and for an 18-inch-deep cavity, 4.1 lb./cu.ft.
In the case of a very deep cavity, you have to build the density from the inside drywall all the way up to the roof deck, not only horizontally but vertically as well. One way to go about this is to use a 3-inch hose to fill the space, then go back in with a smaller, 1 1/2-inch hose to pack the material in tightly. This requires training and experience, and I would recommend that only skilled contractors attempt it.
The way to verify the correct density is with a bag count. Each bag of cellulose weighs 25 pounds; you can measure the area that you need to insulate and multiply it by the rafter depth to find out how many cubic feet you have to fill. Simple math lets you calculate the number of bags you need for the job, or for one rafter bay. Then you can keep track of how much material you’re using and be sure that you’re installing it densely enough.
In new construction, I recommend using Insulweb, a tough air-permeable polypropylene fabric, to hold the cellulose in place. Insulweb has several advantages. For one thing, it gives you unlimited air relief. We have difficulties sometimes when we’re blowing behind an air-barrier membrane such as Intello, because it doesn’t let the air out. So we end up cutting air-relief slits in the membrane, and then taping back over the slits afterwards. Insulweb eliminates this extra step.
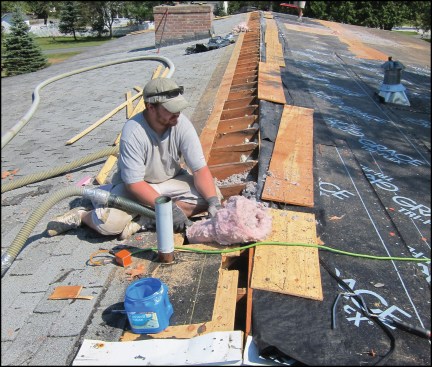
Where access from below is impractical, cellulose can be dense-packed into existing rafter bays from the roof ridge.
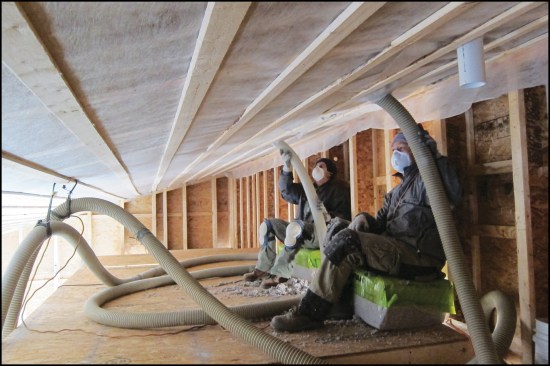
In new construction, the author recommends packing the material behind strapped Insulweb fabric.
In addition, Insulweb allows you to feel the density of the cellulose as you install it. At 3.5 lb./cu.ft., the cellulose has the feel of a firm mattress, while at 4 lb./cu.ft., the cellulose starts to feel hard to the touch. The translucent properties of Insulweb allow you to visually keep track of your progress as you work. In the density range that we’re talking about, if the material is too loose in the cavity, you’ll see layering lines in the cellulose—an indication that the density is not sufficient. Again, this is a situation where training and experience are necessary to ensure a good installation.
Troubleshooting
As I mentioned, I’ve had the opportunity to investigate problems with this kind of installation. The first example comes from when I was working in weatherization. A homeowner whose roof we had dense-packed called us, saying that his ceiling was falling down. In that case, a fallen tree branch had punched a hole in his roof, and rainwater was leaking in.
Later, when I was working for National Fiber, I was called in on about four complaints. In every case, the cellulose in the rafter cavities was insufficiently dense and had settled away from contact with the roof sheathing. Moisture infiltrated the cavity during winter, passing through the cellulose to the air space and condensing on the underside of the roof sheathing. In a couple of cases, we caught the problem early enough that there was no damage to the roof sheathing, and we could simply re-tube the cavities and pack the material to its proper self-supporting density. In the other cases, there was damage, and the sheathing needed to be replaced.
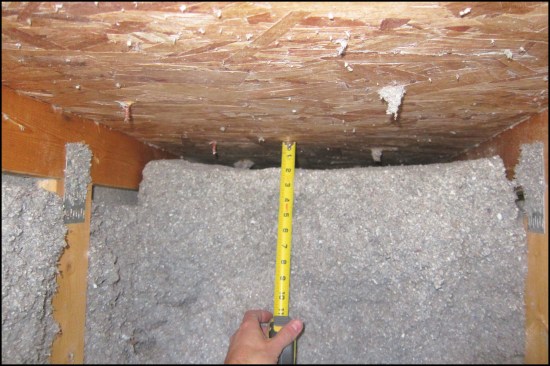
Here, cellulose that was installed at an insufficient density to be self-supporting has settled away from the roof sheathing. According to the author, this allows moisture migrating through the material to condense on the underside of roof sheathing. The sheathing shown above was not damaged, but …
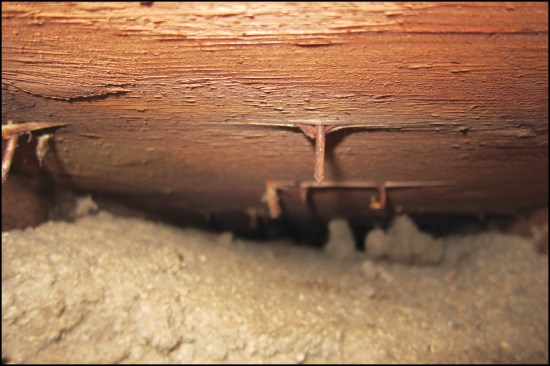
… this sheathing had to be replaced.
Here’s what’s happening: In a correctly installed dense-pack, the cellulose stays in contact with the roof sheathing. This allows the material’s hygroscopic properties to come into play. Moisture migrating through the material that approaches the sheathing is reabsorbed into the drier cellulose and diffused away from the surface. In addition, the borate fire retardant in the cellulose inhibits fungal growth, protecting the sheathing.
In recent years, I’ve been inspecting existing unvented roofs and thick double stud walls using long moisture probes in early March, when the moisture-modeling tool Wufi predicts problems. The moisture readings I’ve taken are consistently low (that is, safe) from the inside all the way to the outside with a slight uptick as we hit the exterior sheathing, showing that the cellulose is redistributing moisture inward faster than the moisture is flowing outward.
Keys to Success
When you dense-pack an unvented roof, here are factors to control for quality and performance:
- Do not install cellulose below active roof leaks.
- Address wet basements or crawlspaces before insulating your roof.
- Pull out any existing fiberglass, or make sure that you can dense-pack the cellulose to the outside.
- Dense-pack behind containment fabric when possible, since this allows good quality control.
- Strap the ceiling perpendicular to the rafters, either before or after the fabric is installed; this increases support and reduces bulging.
- Dense-pack the ceiling to the correct self-supporting density for the cavity depth (at least 3.5 lb./cu.ft. for 2×6, more for deeper cavities, per guidelines stated earlier).
- Calculate the number of bags required for the ceiling. For cavities 18 inches deep or deeper, calculate the number of bags per rafter bay.
- To reach required density, re-fill rafter cavities with a large hose (2 inches or 3 inches), then re-tube across the rafter cavity with a smaller (1 1/4-inch or 1 1/2-inch) hose.
Photos by Bill Hustrunk


