

In North Carolina, where I live and work, enclosed crawlspace foundations with small vent openings are very common. Most of those crawlspaces experience high humidity, and many have problems with mold and rot.
My contracting firm, The Healthy Building Company, specializes in sealed and insulated crawlspaces, which the newest version of the International Residential Code now allows. Instead of vents, a sealed crawlspace has a continuous vapor barrier to keep ground moisture out of the space.
Part of my company’s business is detailing crawlspaces for new homes, as I described in a JLC article last year (Building a Sealed Crawlspace, 10/03). The rest consists of fixing crawlspace problems in existing homes. In this article, I’ll show how we recently cured severe moisture problems in the crawlspace under a house in the Blue Ridge Mountains.
This job came our way when we got a call from the retired lady who had recently purchased the home. She was happy with the house in general, but a tradesman working on her deck had looked under the house and advised her to have the crawlspace checked out. Once on site, it didn’t take long to see that this crawlspace was in bad shape — about a nine on a scale of ten.
The house is just three or four years old, and when I went there to inspect it, I expected to find a typical mild case: small amounts of moist dirt, poly over most of the floor area, and a few fuzzy spots of early fungal growth on the wood. What I found was a disaster — a dank, dripping, moldy space, totally infested with bugs.
As bad as it was, we were able to fix this space in spite of the owner’s limited budget, by cleaning up and and sanitizing the mold-covered materials, installing a vapor barrier, sealing up the two small vents, and dehumidifying the newly enclosed space until the structure was well dried out. I also advised the homeowner that some other changes should be made: Some wood infill walls at the crawlspace perimeter should be replaced with a better system, or they may eventually rot. But that’s the nice thing about the way we seal up crawlspaces — when the owner is ready, all someone has to do is cut the poly back, do the work, then install new poly, sealing it to the old with the same kind of mastic and tape that we used.
Bugs, Mold, and Rot
The sources of moisture around this cabin were plentiful and obvious. A nearby creek and pond had saturated the air and soil. In a location like this, any crawlspace needs to have a fully effective vapor barrier or there will be problems.
Those problems were evident as soon as I looked under the house.
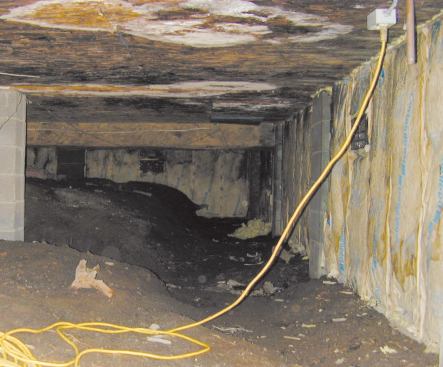
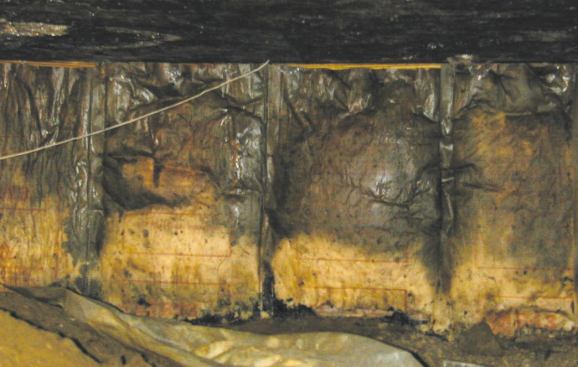
The mold and wood rot were everywhere. With water dripping from every surface, it was obvious that the crawlspace was at the dew-point temperature more or less continuously.
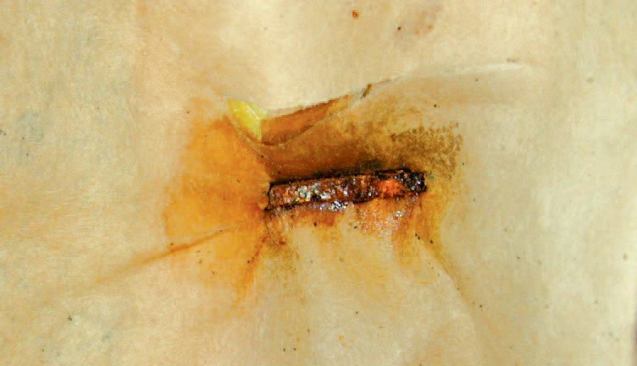
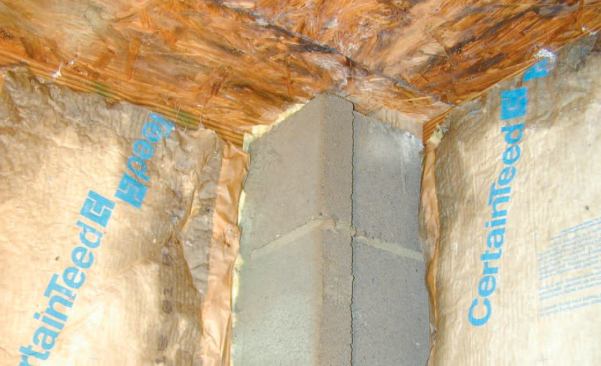
The concrete block columns supporting the house at the perimeter were exposed to the outside temperature, so their inside faces in the saturated crawlspace stayed constantly wet with condensation. Moisture from the block was wicking into the adjacent wood-frame, batt-insulated infill walls, built to close up the space and trap warmth during the winter. The pressure-treated wall plate was set directly on the damp earth, where it also wicked moisture into the air and into the wall framing above it.
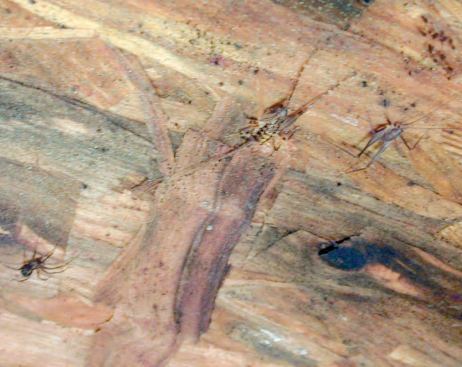
When you assess a crawlspace, one thing to check out is what kind of bug life it supports. Certain critters are comfortable in a moist environment, and if they’ve set up shop there, you know that the conditions they prefer are present. In my experience, a sealed, dry crawlspace will only support spiders — they are the only ones that don’t seem to care whether the moisture is there or not. But millipedes, ladybugs, and potato beetles, for example, aren’t found in a correctly detailed sealed crawlspace.
The crawlspace under this house was packed with mole crickets, a species that thrives in damp conditions. That told me that this crawlspace had been wet all the time, for a long time. In a sealed crawlspace, you’ll never see a mole cricket.
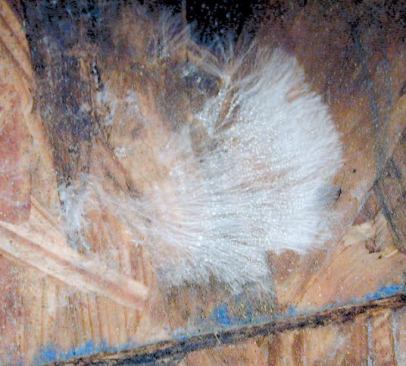
It was interesting to see that the spiderwebs under this house, as well as the electrical outlets and even the filaments of fungus, were beaded with moisture condensation. The spiders were nowhere to be seen — apparently they weren’t happy with the conditions.
At the back of the crawlspace, things looked really bad. The OSB on the ceiling and the paper face of the insulation are both glistening with moisture and coated with black, slimy mold. If left unattended, these materials would have completely decomposed within a very short time.
A Beach House in the Mountains
To cure this crawlspace’s problems, we had to understand why they had gotten so bad. Generally, these wet conditions mean that there’s a lot of moisture getting into the home, and no way to remove it. In this case, the source was the ground, and the crawlspace details were trapping the incoming ground moisture. The two small vents in the crawlspace walls were totally ineffective at taking moisture out; that’s not surprising considering that the air outside the crawlspace was also nearly saturated most of the time.
This house was built by a builder for himself, and he put great effort into the foundation details. As I worked on the house, I was struck over and over by how much this builder cared, and how hard he had tried to do a good job. But each new thing he chose to do made things worse instead of better. The builder has since passed away, and so we can only guess at why he chose the methods he did. But he clearly didn’t understand what he was dealing with. Given some guidance, I’m sure he would have built an outstanding house.
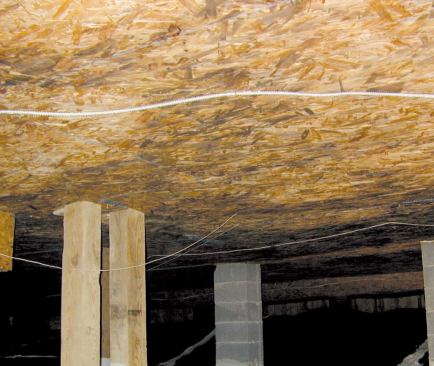
The difficulties started when he built a beach house in the mountains. The home sits on columns, with insulation between the floor joists and OSB nailed up underneath the whole house. But in the mountain climate, the floors were too cold in the wintertime, so he went back and closed up the under-floor space with framed wood walls between the columns. I guess he thought this was a good way to trap heat in wintertime — which it is, in principle. But the enclosure also trapped moisture, because he didn’t put down a poly ground cover.
In a few places, we could see that the builder stuffed cracks in his cripple walls with fiberglass. It’s another piece of thorough work, based on complete misunderstanding: Why would someone go to the trouble of air-sealing a space that they’re venting?
What saved this house was the OSB under the floor joists, and the Tyvek under it (there is also insulation between the joists). Those details kept air infiltration from bringing the moisture right into the floor assembly and destroying the joists. The Tyvek didn’t make sense at all as a vapor barrier in this application, of course — it’s designed to let moisture through. But with the OSB on top of it, the assembly seems to have blocked both diffusion and air transport of moisture. The OSB was heavily attacked by mold and rot, but the joists don’t seem to have been significantly damaged.
The Remedy
This job was as bad a case as you would ever want to see. But the solution is pretty much standard: Clean it up, dry it out, and seal it.
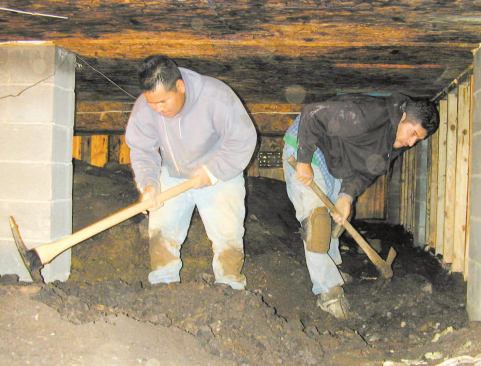
We first removed the insulation from the cripple walls, bagging it for disposal. We also had to excavate the crawlspace floor in places to gain access to back portions of the space. The builder had never scraped the organic soil from the site, he just dug trenches for a few center post footings.
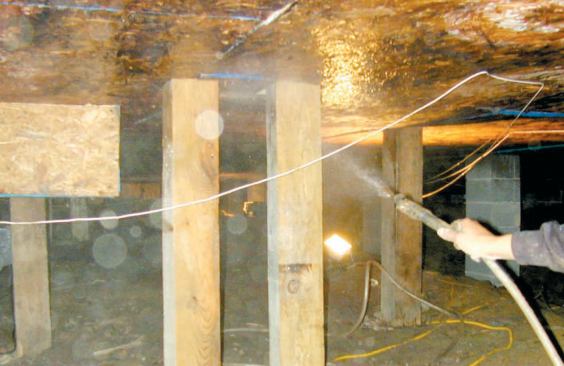
I decided to leave the OSB in place, though. Structurally, it was garbage after being chewed on by rot for several years. But it was there as an air barrier, not for structural reinforcement. However, the mold and rot needed to be cleaned up. So we brought in a sprayer and saturated the OSB with a solution of borate. We use either Tim-bor or Bora-Care products (Nisus Corporation, 800/264-0870, www.nisuscorp.com); they are familiar to our clients (Grandma used borate), they don’t harm people, and they are about the most effect thing available for killing mold and rot. Borates also kill insects, so we’re getting rid of the bugs at the same time as we clean up the mold. In this case, we used Tim-bor, because it comes as a powder that is convenient to mix up and put in our small sprayer.
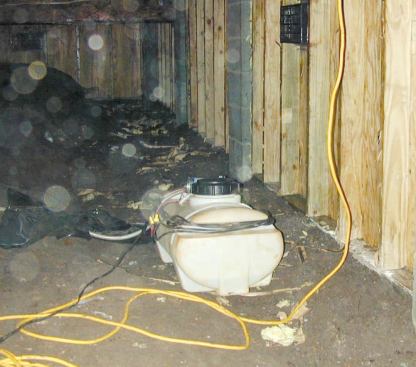
Any small sprayer or power-washer can handle this work. Mine is an old one that runs off a 12-volt car battery. Its portability helps when we need to access crawlspaces through rear or side doors in houses that are far back from the road.
We saturated the OSB thoroughly with the borate solution — I wanted it completely soaked — and scrubbed the surface with stiff bristle brushes. Then we laid down temporary construction poly and set up our dehumidifier. It took a week of constant operation for the dehumidifier to dry out the OSB.
On a less severe case — the typical crawlspace with just a few spots of mold and wood moisture content of 14 to 18% — I would just put down the permanent sealed poly, then dehumidify. But the 25 gallons of water I added to the OSB is my responsibility, and I needed to pull that out before I sealed anything for real. If I don’t, it will come out by itself and end up causing mold.
In the week it took for the OSB to dry, all the bugs and flakes of fungus rained down onto the construction poly. When we pulled out the poly, all that debris came with it.
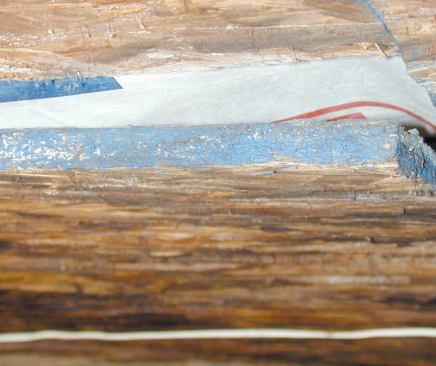
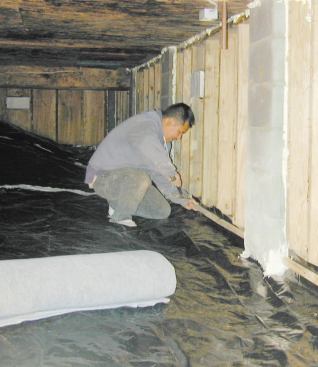
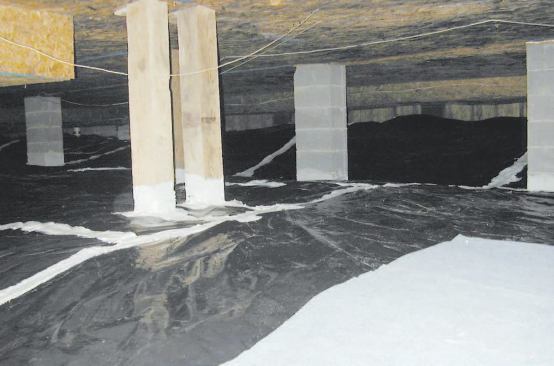
Next we installed our final poly. We used the same methods as in our new crawlspaces: Lay down 6-mil black poly, overlap it a foot, duct tape the seams, and apply non-toxic duct mastic over that. In this case, we used PS-1 mastic from RCD Corporation (800/854-7494; www.rcdcorp.com), our usual preferred product. We sealed up the vents with duct tape and mastic.
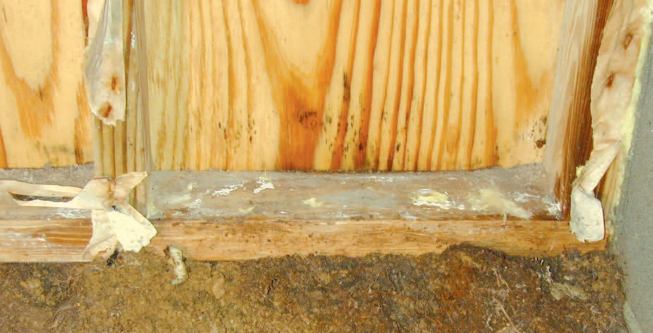
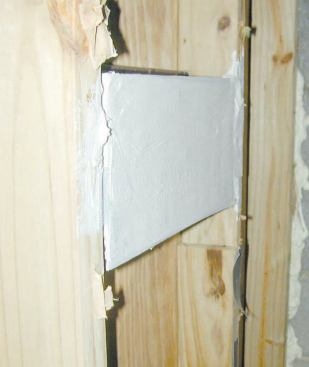
Unfortunately, I couldn’t run my poly up the crawlspace walls like I usually do. That would be like putting the wood wall in contact with the moisture conditions under the poly, and it would have quickly rotted out the untreated framing. So we ran the poly up onto the side of the treated-wood plate, adhered it with mastic, and nailed a 1×2 batten over it for protection.
We install the final poly in our sock feet because we don’t want to scuff up the poly even a little bit. When I give the crawlspace back to the homeowner, I want it to have that new-car shine and smell. In fact, some of what we do is just to influence the perception of anyone who looks in. That’s part of the idea behind the carpet runners we install before we leave, for instance. We could use super-heavy-duty poly instead of 6-mil material, and not need to protect it with carpet. But I want the people who come down there to see the carpet and recognize that this is a conditioned space, not your average crawlspace.
When we left this job, we hadn’t exactly created a formal living room, but we did accomplish our goal: We got rid of a mold and rot problem that could have destroyed the whole floor, we provided a boundary between the home and the soil that will improve energy efficiency and maintain good air quality in the home, and we created an underfloor space that people can enter and work in as needed without risking their health and safety.


