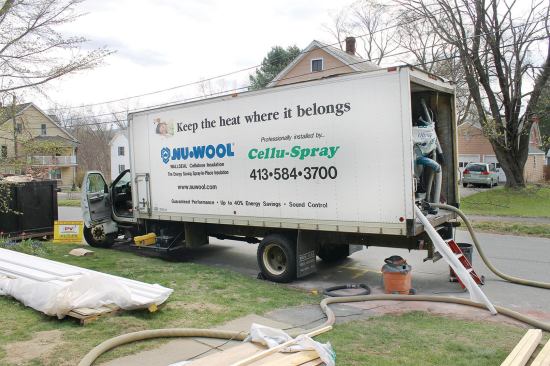


This truck is equipped to install either damp-spray or dense-pac…
I’m an insulation contractor in western Massachusetts. I specialize in loose-fill, damp-spray, and dense-pack cellulose. I also own a spray-foam truck that I bought a couple of years ago; I was hoping it would increase my efficiency if I no longer had to sub out the limited areas of spray foam that some cellulose projects called for. While I’ve sprayed quite a bit of foam, I’m now in the process of selling the foam rig. So many variables can affect the quality of the finished product — everything from how the equipment is calibrated to outdoor temperatures — that it’s challenging stuff to get right. My crew and I also didn’t like dealing with cleanup and were concerned about the possible health effects of working with the chemicals. But I’ve also found that with the right approach, many problem areas that are commonly spray-foamed — around band joists, for instance — can be effectively insulated and air-sealed with dense-pack cellulose alone.
Cellulose has a lot of other things going for it. In dollars per unit of R-value, it’s hands-down the most efficient insulating material there is. It’s also highly fire-resistant and environmentally benign. It doesn’t provide the sort of hermetically sealed air barrier you get with foam, but at atmospheric pressure it does stop the movement of air and moisture. We use it wherever we can. For those areas where only spray foam will do, we either use canned one-part foam or call in a local foam sub to spray it for us.
Loose-Fill vs. Damp-Spray
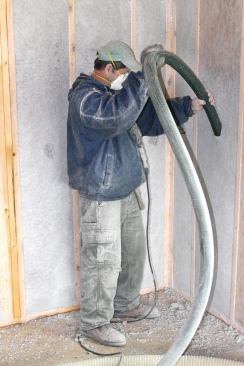
The key piece of equipment needed to install cellulose is a box truck equipped with a powerful blower that mixes the fiber with air and distributes it through a hose that’s typically 3 inches in diameter where it exits the truck. My company has two trucks, one of which is equipped with a large vacuum cleaner and a water tank for working with spray cellulose. We also have a van we use for doing prep work. Between the two trucks, we can blow more than 500 bags of insulation a day when everything is going well.
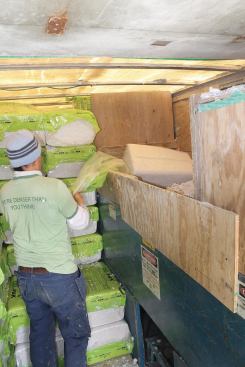
Cellulose comes in compact 30-pound bags. To prepare it for use, the material is unwrapped and tossed into a hopper in the back of the truck, where rotating paddles break it up from beneath. An auger feeds the finely shredded material to the blower.
Loose-fill. Attics are most often insulated with loose-fill cellulose, which is blown directly onto the horizontal surface and built up evenly to the specified depth. This is about as straightforward as it gets, but there are a couple of points to keep in mind. First, depending on how it’s blown, loose-fill cellulose can settle 10 percent or more, so it’s important to compensate by applying a little extra material to begin with. We install attic depth markers every few feet so the building inspector and client can easily see the depth of the settled material. Loose-fill will finish settling within the first few days of installation.
While loose-fill has an R-value of about 3.5 per inch, it has less air-sealing ability than dense-pack does. A common mistake in retrofit applications is to blow cellulose directly onto a ceiling that’s riddled with existing air leaks; afterward, it’s very unlikely that anyone will go to the effort of finding and sealing those leaks. In retrofit applications, we make sure to air-seal the thermal envelope at the attic floor before applying more insulation. We look for any penetrations like chimneys, bath fans, and vent pipes, as well as interior partitions or plumbing chases. It’s easy to find air leaks when there’s existing fiberglass in the attic, because the fiberglass will be stained with dirt filtered from the air that’s passed through it over the years. To block larger openings, we use a one-part foam in an applicator gun, along with caulking, flashing, and scrap lumber or drywall. We cover can lights with Tenmat fire-rated light covers, which are easily air-sealed directly to the ceiling (tenmat-us.com). In new construction I always provide a separate line item in the estimate to cover any air-sealing work around rough openings or basement and attic penetrations.
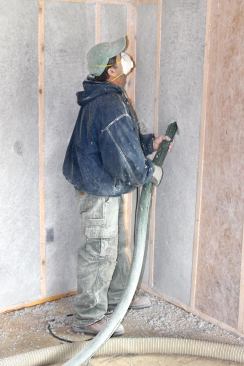
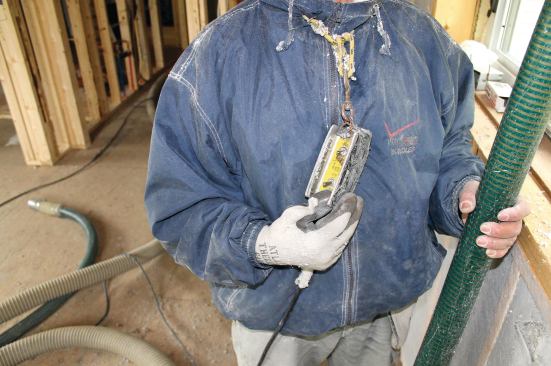
Spray cellulose. Another application method, often called damp-spray, makes use of a fine mist of pressurized water to moisten the dry cellulose as it emerges from the hose. The surface on which it’s sprayed is moistened at the same time, and the water causes the cellulose fibers to interlock, creating a bond that’s strong enough to permit spraying onto vertical surfaces.
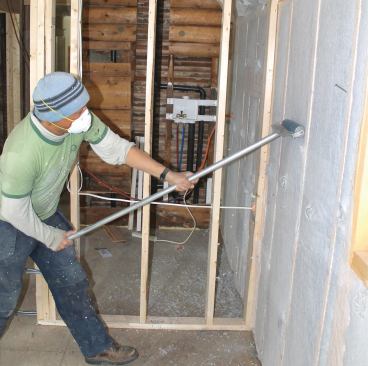
The damp cellulose is ordinarily sprayed to slightly beyond the full depth of the framing; because the material becomes even more strongly bonded as it dries, the excess is shaved off with rotary scrubbers soon after it’s applied. As the scrubbed-off cellulose accumulates on the floor, it’s vacuumed back into the truck and combined with fresh material for reuse. The adoption of high-pressure pumps has reduced the volume of water used and dramatically speeded drying time. Cellulose manufacturer National Fiber, for example, now provides a 24-hour drying-time warranty.
Like dense-pack, correctly applied spray cellulose is immune to settling. It’s also easy to inspect, since any defects or missed areas are easily seen and repaired. It lets you get right down to spraying without a lot of prep work — you just tape plastic over the doors and windows, mask the electrical boxes, and you’re ready to go.
The downside of spray cellulose is that it’s messy. This isn’t a big problem in commercial buildings with wide-open spaces, but on residential jobs you can easily lose more time to cleanup on the back end than you gain in reduced setup at the front end. Scrubbers can be difficult to use effectively in closets and other confined spaces. Areas that can’t be scrubbed have to be scraped by hand, and with one person spraying, another scrubbing the overspray, and a third running the vacuum, just staying out of each other’s way can be a challenge.
Finally, because the material that gets vacuumed off the floor goes right back on the walls, the site also has to be perfectly clean before you start and stay that way until you’re done — no sawdust, wood scraps, bent nails, or other debris allowed.
Dense-Pack Basics
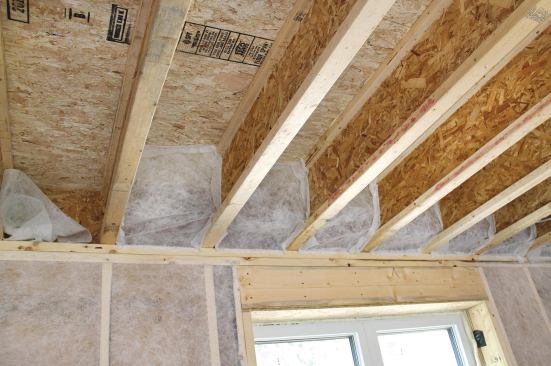
If you force enough loose-fill cellulose into a confined space under enough pressure, you end up with dense-pack — a firm, compact material that can’t settle and is very resistant to air infiltration. It can be blown into closed framing cavities — the approach most often used in retrofits — or open ones that have been closed on one side with netting.
The obvious benefit to the closed-cavity method is that you can insulate an existing structure without gutting it first. On the other hand, progress is slowed by the need to seek out and fill every framing cavity, including oddly shaped or unexpected ones tucked behind blocking or diagonal braces. And because cellulose can’t be packed into a space any faster than the air can escape, trying to force in too much material in too little time can yield a product that falls short of the required density of 3.5 to 4 pounds per cubic foot, or that bows out existing drywall or plaster.
Some installers will tell you they can dense-pack cavities that contain existing fiberglass, but I find that trying to do this always leaves some voids. When we have to deal with a previously insulated wall, we’ll remove a 2-foot strip of drywall at the bottom or a strip of sheathing on the outside, pull out and discard the batts, then net the opening before blowing the empty cavities.
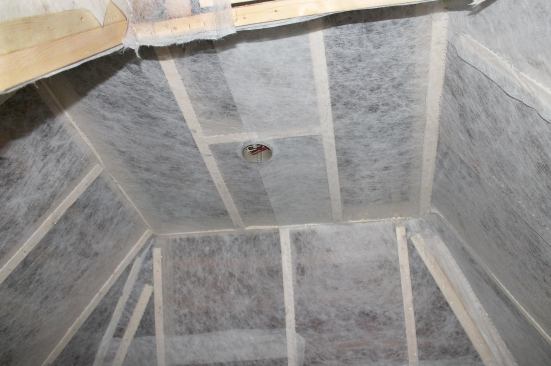
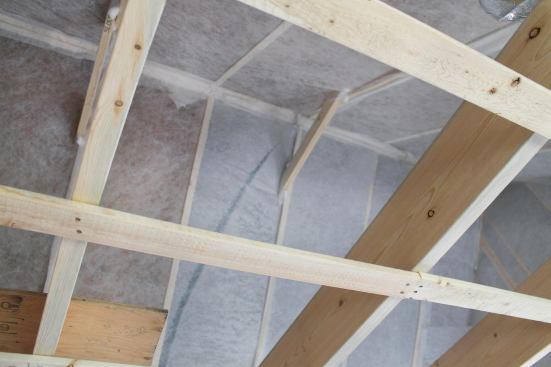
In new construction and gut retrofits, our preferred approach is to fasten netting over the entire frame and blow the cellulose behind the netting. Like damp-spray, this offers complete quality control, since the packed material can easily be seen and felt after installation. The permeable netting gives the air in the cavities an easy route of escape, making it possible to fill the cavities quickly.
Netting the Frame
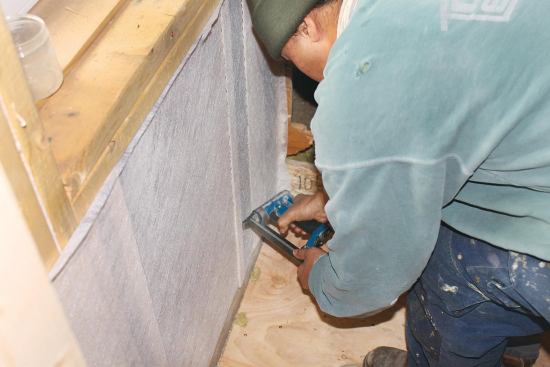
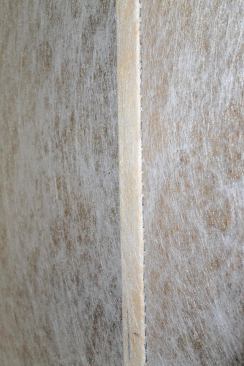
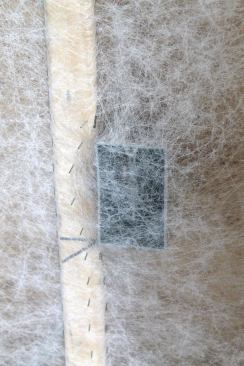
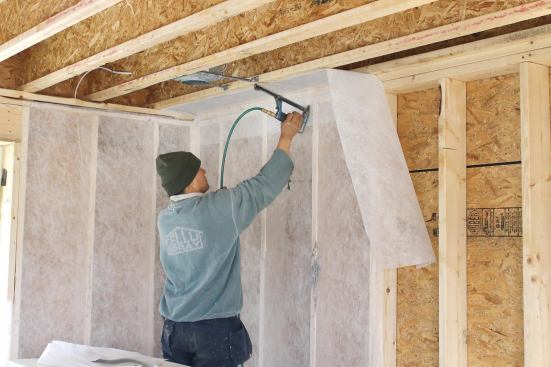
Cellulose netting is a tough, lightweight, nonwoven fabric. It comes in long rolls of varying widths, and is fastened to the framing with staples. We use pneumatic upholstery staplers for this, which fire off staples at high speed for as long as the trigger is depressed.
After cutting a sheet of netting, stretching it tight, and tacking it in place, we “stitch” a continuous line of staples along each side of the framing members to prevent the insulation from forcing its way between the netting and the face of the framing and interfering with the drywall. This takes practice, because the spacing of the fasteners depends on how quickly the operator moves the stapler — too slow, and they’ll be so close together that they’ll create a line of weakness in the netting; too fast, and the spacing may be wide enough to allow some cellulose to leak between staples onto the face of the stud.
Open expanses of wall can be netted fairly quickly, but the work slows down when cathedral ceilings, collar ties, dormers, and other irregular areas are involved. On most jobs, it will take about twice as many man-hours to install the netting as it will to blow the cavities.


