When it comes to constructing an architecturally complicated roof design, many builders are highly skilled in the framing that’s involved, without being quite as well versed in the building science required to make the roof perform properly. While builders always think about how to fit the lumber in and make the cuts and joints to assemble the hips and valleys and create the elevations, they don’t always fully understand things from the standpoint of thermal insulation, air-sealing, and moisture.
That can be a problem. If we don’t correctly address those building performance concerns—if we don’t couple our good structural framing with good building-science details—the framing and sheathing may be fine on the day the roof is built. But that might be the roof’s best day, and the structure and envelope might deteriorate from that day on, degraded by mold, rot, insects, and vermin.
The house I write about in this story is a case in point. It was well framed to achieve structural strength and a pleasing appearance. But over the years, the roof was damaged by moisture and mold. When my company encountered the roof, its sheathing was softened by condensation and decay, shingles had worn out prematurely, and it was leaking. The homeowner also told us that some rooms inside were uncomfortable, in both summer and winter.
Originally this home was a simple ranch.
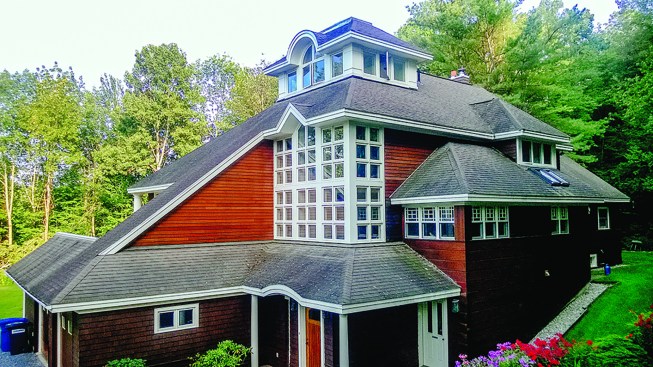
The house had been remodeled with complex architectural details, which made adding to the roof’s thickness impractical.
WET BASEMENT, WET ROOF
When we first arrived at this house in 2016, it wasn’t to fix the roof. It was to fix the basement, where, many years earlier, the homeowner had installed a finished wood floor. He had followed an accepted and typical practice for that time: He coated the floor with a bituminous tar, applied 2×4 sleepers using concrete nails, and then put down subflooring, underlayment, and linoleum. But over the years, water leaking near the brick chimney and through the foundation wall on the uphill side of the home seeped in and spread along the slab. By the time we were called in, the sleepers, subflooring, and underlayment were all damaged by rot.
After pulling out the ruined floor, we installed our fix. We applied a 20-mil rubberized fiber-reinforced membrane to the floor (lapping up and sealed to the wall), attached new sleepers with Tapcon fasteners, and laid down a new subfloor and underlayment.
To address the problem of roof runoff soaking the soil near the foundation, we also decided to put large commercial gutters on the roof. When the gutter contractor leaned his ladder against the roof, however, we saw that the sheathing at the roof edge was soft, indicating rot in the roof system. On further inspection, we found more soft spots on the roof. The more we learned, the more the homeowners came to see that their roof needed repair.
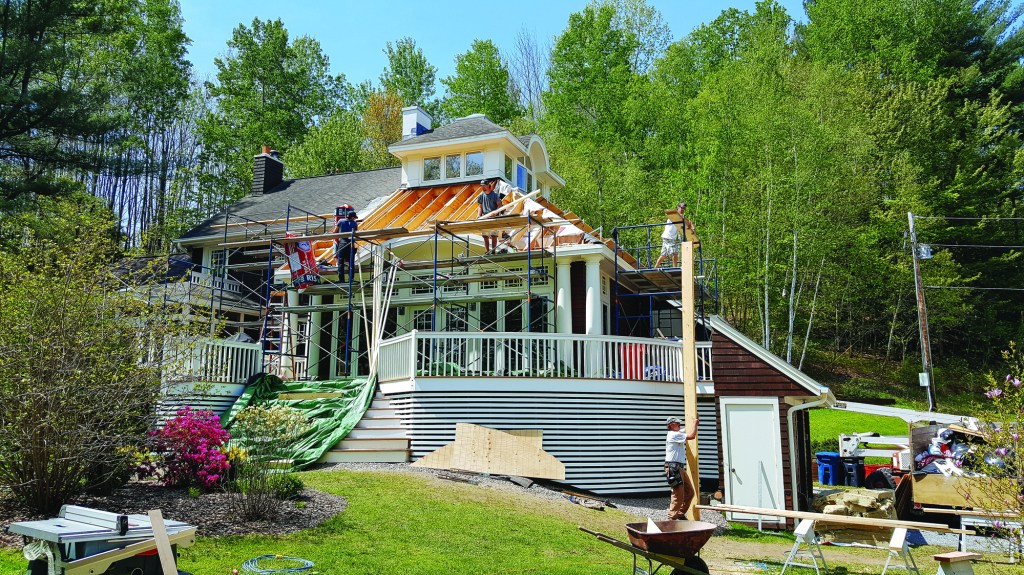
Most of the home’s interior was in pretty good condition, and the owners didn’t want the additional expense or the disruption that it would cause for us to approach this problem from inside. Also, the shingle roof had deteriorated prematurely and was due to be completely replaced. So the owners elected to have us open up the roof from above, and accomplish the proper air-sealing, thorough insulation, and effective venting that the roof should have gotten when it was first built. That’s the work we’re showing here.
The shingle roof needed replacement.
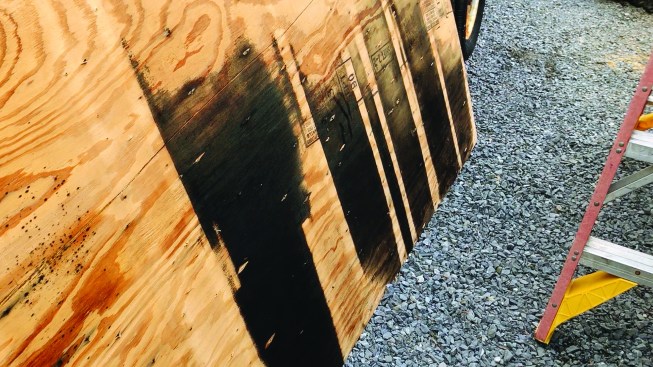
There was mold and rot in some areas of roof sheathing.
A PRACTICAL REPAIR
Our first idea for making this roof system work was to create a built-up ventilated assembly above the existing roof plane. In an ideal world, we might have applied a method we’ve used in other cases with good results. That is, we could completely fill the 2×10 rafter cavities with insulation, install a few inches of rigid Roxul mineral-wool insulation over the top of the rafters, install a vapor-open, watertight weather-resistive barrier membrane as a drainage plane above the rigid insulation, strap over the membrane with 2-by strapping, and finally sheathe over the strapping with plywood, leaving an ample, 1.5-inch airflow space for venting. This solution would have increased the R-value of the existing roof, while also creating a vapor-open system that could dry readily to the outside.
But that full-on treatment would have been costly, and not just because of the materials cost. If we raised the roof plane in that way, we would have to rework the roof intersections at the hips and the valley, not to mention the joints where the belvedere connected to the roof.
In addition, the existing window-sill height for the belvedere windows, as well as for the windows above several other roof-to-wall intersections, was too low to accommodate the added height of the rigid insulation and strapping. If we had rebuilt the roof that way, we would have had to modify the windows also (a complicated, disruptive, and costly process).
Instead, the owners opted for a more workable solution. We would open up the roof, insulate it with Roxul mineral-wool batts, and then create a venting air space within the rafter bays using lauan plywood. We would resheathe the roof with new plywood, then apply underlayment and roofing in the conventional way.

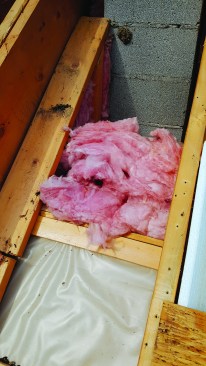
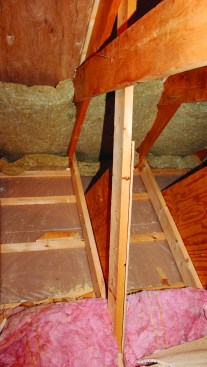
Existing fiberglass insulation was compromised by installation gaps and voids, as well as mouse tunnels.

Existing fiberglass batts in the rafter bays were exposed to wind-washing at the eaves.
AIR CONTROL LAYER
When we assessed this roof system, we found a wide variety of deficiencies in the assembly’s air control layer. Some of the air leaks were relatively minor, but many were large, and some were huge. There were small holes in the drywall (made by the owners, who had installed drywall anchors in several places). There were recessed lights in some of the ceilings, which leaked into the roof cavities. Unsealed bath fans also penetrated the ceiling, allowing air leaks.
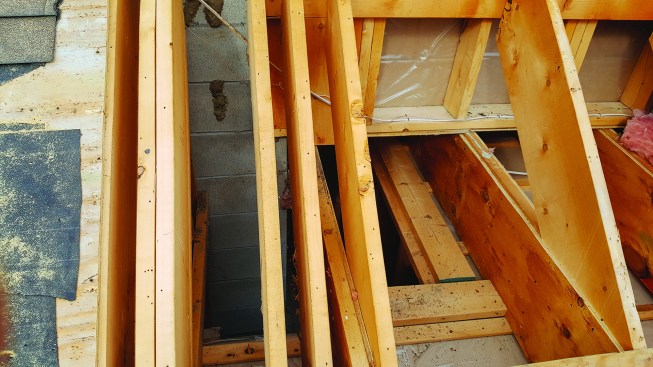
There was complicated existing framing around the chimney.
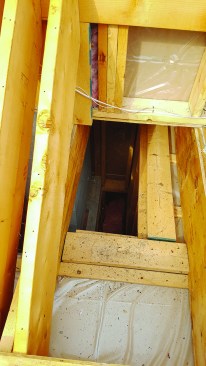
An older original roof had been left in place.
And the later belvedere addition had created a maze of interconnected air bypasses.
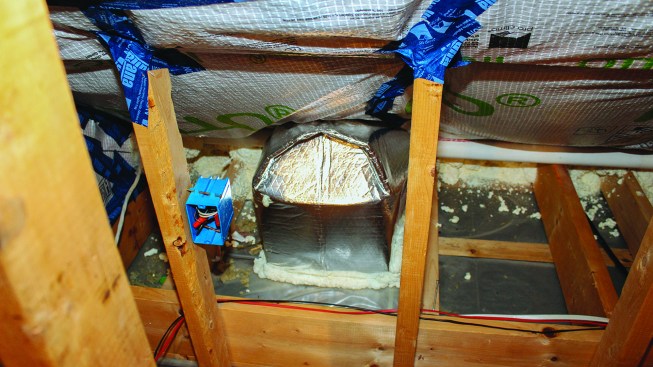
The really big air bypasses were things like the framed chase around the home’s masonry chimney. Big enough for a person to crawl through, that chase extended all the way from an unconditioned attic down to lower floors and allowed heat and moisture to flow up into the upper parts of the roof. Also, the floor of the belvedere was unblocked and uninsulated, allowing drafts, and an uninsulated storage attic was built into the new roof system over part of the house, without an effective air barrier between that space and the occupied space below.
ATTIC UPGRADE
We approached the problem of the cold, leaky attic by defining the home’s air control layer at the underside of the roof rafters rather than at the attic floor—the same condition that already prevailed in the cathedral-roof portion of the house. In the cathedral-roof areas, however, we could access the insulated cavities only from above, whereas for the small attic portion, we were able to approach from the inside of the house as well. That access allowed us to apply a more sophisticated air and vapor control layer from underneath, using Intello membrane with Tescon tape at the seams, a big improvement over poly.
For this rehab, the existing ceiling was left in place, and the roof upgraded from above.
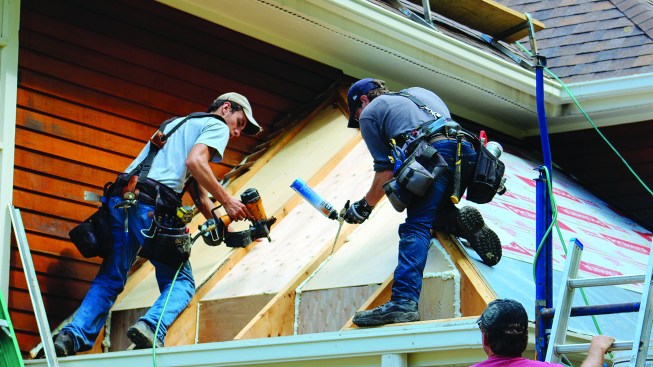
REBUILDING FROM ABOVE
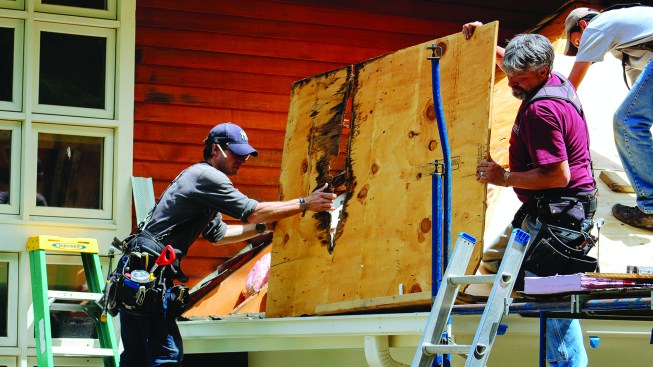
We took apart and reconstructed most of the roof system from the top side. In the photos above, you can see our crew working on one portion of the cathedral roof. Starting at the bottom, they began by removing the existing plywood and stripping out the existing fiberglass insulation. The condition of the insulation varied from place to place—some portions were OK, but in many places, the insulation was dirty and full of mice and bats. The plywood also was in mixed condition; some pieces were sound, but in some rafter bays, there was blackening and deterioration all the way from the eaves to the ridge.
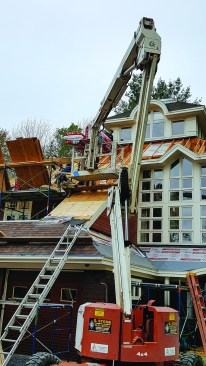
Because the home needed new roofing shingles, and because some sheathing was damaged and needed replacing, the owners decided to repair the system from outside.
But some spaces were also accessible from inside. A small attic space was insulated from inside.
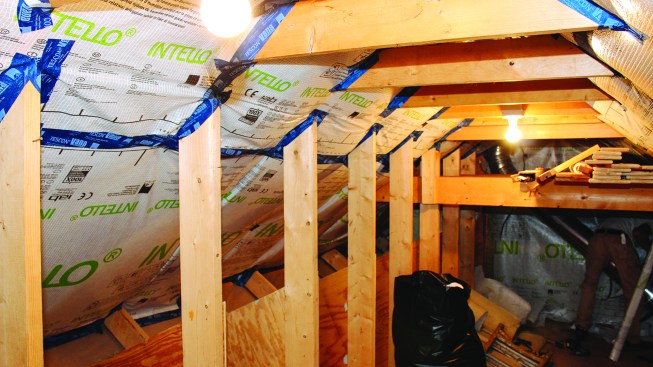
That ceiling got a smart vapor-control membrane.
The crew sealed a bath fan.
Next, the carpenters filled the gaps between the rafters and the existing ceiling drywall, using one-component gun foam. This eliminated a convective pathway between the rafters, tightening up the system by isolating the framing cavities from each other.
The crew then applied cleats to the sides of the rafters, to support the lauan-plywood vent channel material they planned to install. Then they insulated the rafter cavities using Roxul mineral wool batts, cutting and fitting the batts carefully to the framing.
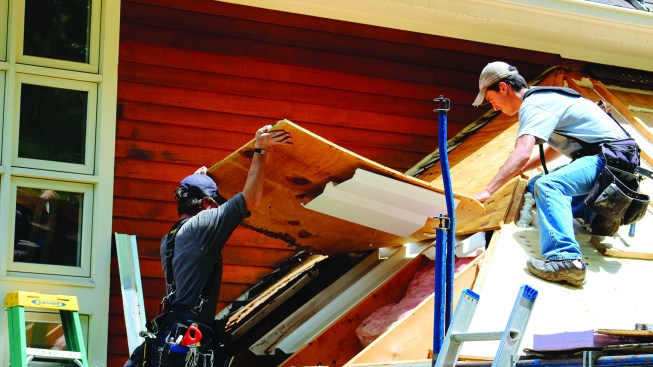
Working from outside, the crew removed the existing sheathing.
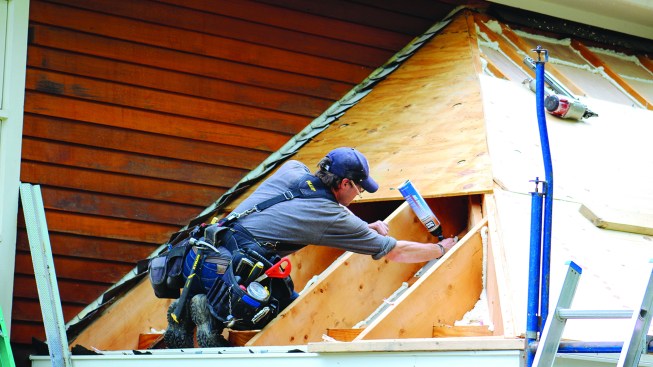
They filled gaps between the ceiling and the rafters …
The choice of Roxul was driven by several practical considerations. At R-4 per inch, it doesn’t have quite the insulating value of high-density spray foam; but our clients had environmental and health reservations about spray foam. Installing the Roxul ourselves let us open up, insulate, and seal just a portion of the roof at a time, rather than open the whole area up and schedule a spray-foam contractor. That was a safer way to work in our unpredictable, typically stormy summer weather. We also considered using dense-blown cellulose, but that would have introduced the risk of blowing drywall off the ceiling from the pressure of the insulation (a chance I didn’t want to take). The Roxul is a reasonable compromise; it provides a well-insulated assembly, especially considering the careful air-sealing details we implemented, and it’s practical for our crew to install on our own schedule.
… nailed cleats to the sides of the rafters …
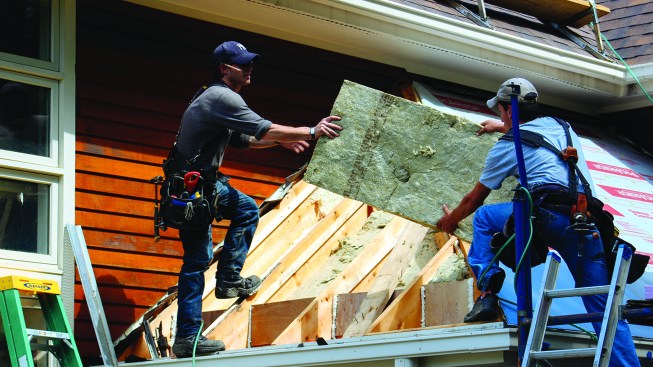
… and insulated the cavities with Roxul mineral wool.
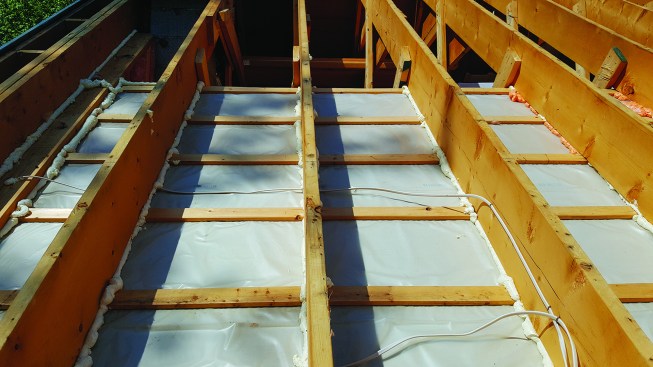
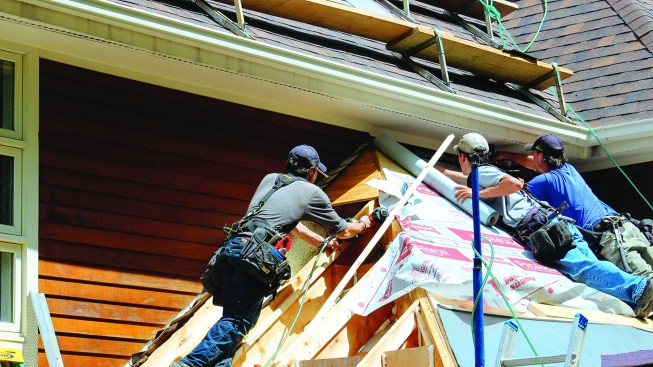
Ventilation is just as important as insulation and air-sealing. Over the Roxul, the crew constructed vent channels by nailing cleats into the rafter sides, cutting sheets of lauan plywood to fit between the rafters, and fastening the lauan onto the cleats over a bead of caulk. We preferred lauan to synthetic manufactured vent channel products for several reasons. It’s stiff enough not to flex or collapse from the pressure of insulation; we can readily cut it to the required width for various sizes of rafter cavity; and it’s somewhat vapor-permeable, so that it allows some degree of drying to the outside in case the insulation somehow gets damp.
They protected the insulation with lauan plywood, also creating an air space to help cool and dry the roof system.
The layer of lauan effectively sealed the Roxul into an airtight cavity, keeping it safe from wind-washing and providing some deterrence to rodents and bats. We installed ridge vents, where feasible, and roof-to-wall vents at the top of the rafter runs to allow airflow through the cavities.
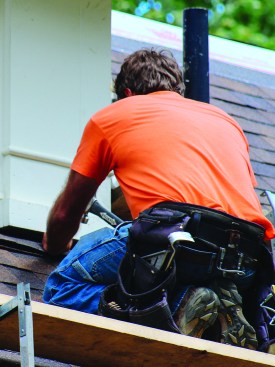
Where roofs abutted walls, the crew installed Cor-A-Vent Roof-2-Wall vent to allow air in the rafter vent channels to exit the system.
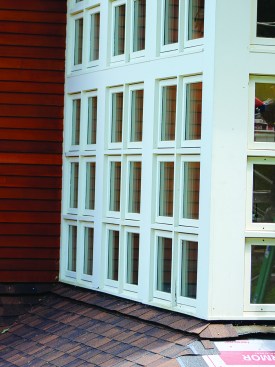
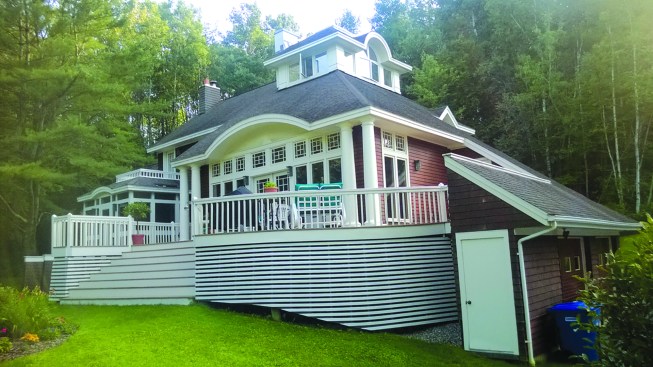
Ridge vents (using Owens Corning VentSure; not shown) were also installed where feasible. The solution chosen allowed the repair to take place without any disruption to the existing windows.
A PRACTICAL CHOICE
This repair was a building-performance project. It wasn’t designed primarily for energy efficiency; it was intended mainly to correct moisture, durability, and comfort concerns. Our clients plan on selling the house at some point. So they made the responsible choice to correct the home’s known problems, rather than to pass them on to the next owner. We were happy to be able to help them implement that wise decision.


