Several years ago, when I first became interested in the benefits of air-sealing, I enrolled in a Building Performance Institute (BPI) training program that taught me the basics. I later learned a lot more while working on a Passive House project, which called for air-sealing to a very high standard (see “Building a Simple Passive House,” 8/11). I now consider air-sealing to be a routine part of every remodeling and new-construction project, and I have a good-sized bag of tricks at my disposal that allows me to deal with a wide range of situations.
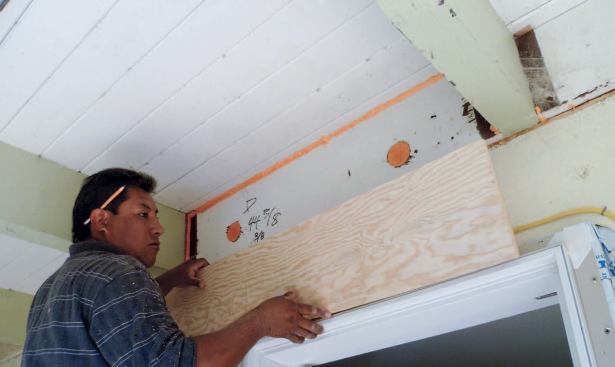
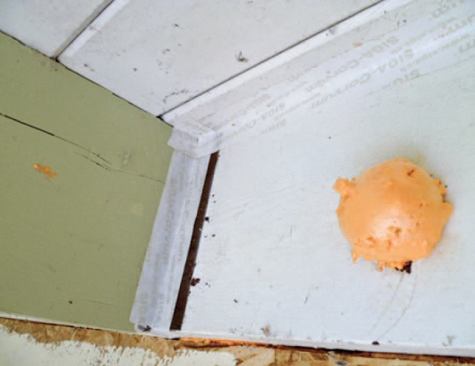
Drywall corners can be sealed with caulk before application of c…
Air-sealing isn’t a glamorous or sexy job. No one is going to drive by the house you just completed and say, “Wow, they did a beautiful job air-sealing that envelope.” But it has an enormous bearing on both a home’s energy efficiency and the comfort of its occupants. If you are trying to sell green building, energy reduction is about as green as it gets.
Someone has to do it. Perhaps the single most important lesson I’ve learned in the past few years is that you can’t count on crew members or subs to do their own air-sealing as the job moves along. There has to be someone on the job who oversees all of the trades to make sure the air-sealing gets done, and who is willing to give this role the focus and attention to detail it requires.
On my projects, that person – known to my crew as the air-seal specialist, or ASS – is me. I do as much of the air-sealing myself as I can, working just ahead of or behind others on the site as the situation demands. Doing the job correctly calls for an unbending attitude: I recently had to make one member of my crew – an experienced guy who’s been with me for years and should have known better – remove a just-installed kitchen cabinet when he admitted that he hadn’t sealed the pipe penetrations behind it. Neither of us was happy about it, but the result was a tighter, better house.
Testing and Retesting
I don’t think it will be long before a blower door is as much a fixture in the back of every good builder’s truck as a circular saw and laser level. Unless you know how much a building leaks before you start, you’ll never know how much progress you made when you are done. Solid before-and-after figures mean more to clients than a generalized assurance that the building has been air-sealed.
I perform a blower-door test on all remodeling projects before any work has been done. Once the house reaches 50 pascals, I might occasionally use a smoke pencil to home in on air leaks, although the smoker becomes less and less necessary as you gain experience. (From the standpoint of finding leaks, it doesn’t matter whether the pressure is positive or negative, although positive pressure is a better choice if you’re concerned about sucking mold, dust, or fumes into the living space.)
But the smoke pencil has another use. I like to hand one to the homeowners at the beginning of a remodeling project and go through the house with them looking for leaks. It’s easier to sell the job once the client understands just how much expensively heated or cooled air is escaping out the holes. In many cases you can actually hear or feel the air whistling through outlets, baseboards, windows, light cans, plumbing penetrations, and other common problem areas.
I do a second test after rough-in of wires, vents, and plumbing but just before insulation. That way, I can still access most of the leaks if additional work is needed. At this stage, a smoke pencil is very useful to find small remaining leaks. I perform a final test upon completion of the job.
In new construction, I ordinarily perform four separate blower-door tests: after the shell is closed in and the windows are installed; after rough-in and initial air-sealing of the plumbing, electrical, and other mechanicals; after the drywall has been hung and taped; and, finally, when the job is done.
The Right Stuff
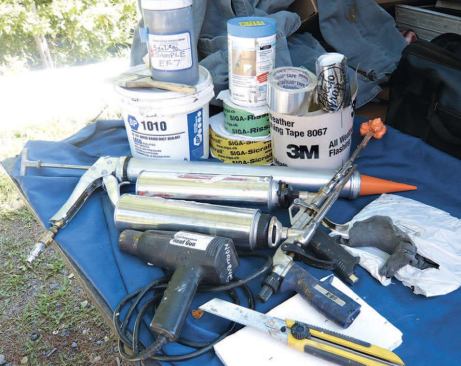
Another key to effective air-sealing is to have a well-selected assortment of sealing materials available on the job at all times (see slideshow). My usual arsenal includes the following:
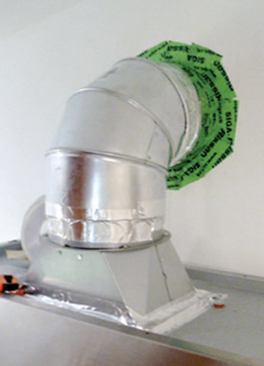
Tapes. One benefit of tapes is that they – unlike foam, which is dry and relatively brittle – will flex and move as the building shifts position over time. In the past I used a lot of 3M 8067 Weather Flashing tape, but recently I switched to Swiss-made SIGA tapes, which are specifically designed for air-sealing buildings (siga.ch). The company provides excellent information and product support. At $0.30 to $0.40 per linear foot, these tapes are expensive up front, but I like knowing that the work I leave behind will continue to perform well far into the future.
Siga makes many varieties of tape, but I rely mostly on just two: a product called Rissan for interior use, and one called Wigluv for general exterior use. Both stick firmly to most dust-free surfaces, though some materials – like concrete or masonry – should be treated with a primer called Dockskin first.
Both Rissan and Wigluv have easily-removed paper backing strips. The company also manufactures a plastic belt dispenser that is very easy to use and helps minimize waste.
Another useful product is Nashua foil tape, which is flexible foil that works well for sealing can lights and electrical boxes.
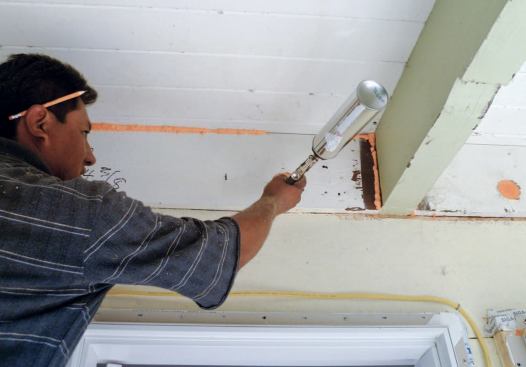
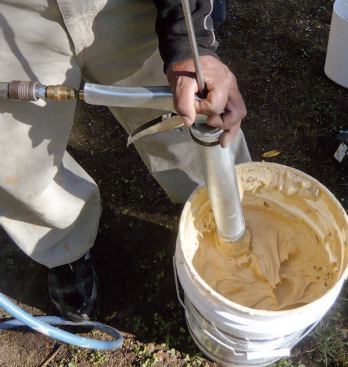
Mastics and caulks. Never rely on cheap caulk for air-sealing! I like Perma-Chink’s Energy Seal Caulk because it stays flexible after it sets up and accommodates quite a bit of movement (permachink.com). We buy it in 5-gallon buckets, each of which contains the equivalent of about 55 tubes of caulk. We use it with air-powered caulking guns (Albion Engineering, albioneng.com), which makes it easy to put down a uniform bead and minimizes strain on your hand and forearm. A variety of nozzles are available, including one that lets you lay down four parallel beads in a single pass. This system is a good alternative to canned foam for many applications.
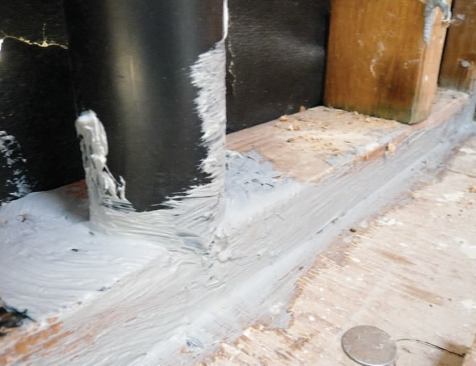
Water-based duct mastic is handy for sealing small cracks and joints that are too tight to accept caulk or foam and too irregular to seal with tape. Nonhardening duct putty will conform to almost any shape and comes in handy for plugging larger gaps and holes. I like Gardner-Bender Duct Seal (gardnerbender.com), which is available from most hvac suppliers.
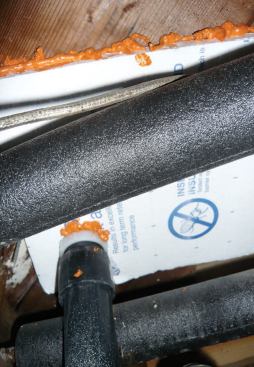
Polyurethane foam. Although spray foam is still one of the most versatile air-sealing materials out there, I now use more tape and caulk and less foam than I used to. A big problem with foam is that its expansiveness can make it hard to tell what’s going on. The presence of a pillow of foam outside the hole you set out to fill doesn’t necessarily mean that you’ve completely filled the hole itself. I use high-expansion foam for most applications, and buy it a case at a time.
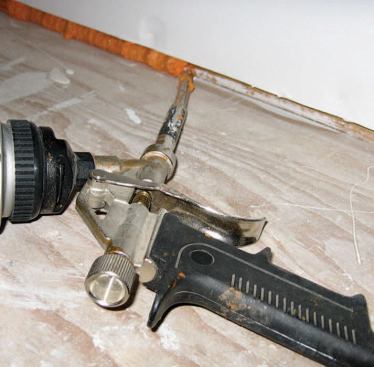
I find that all foam guns fail sooner or later, so I buy the cheap $50 guns and just replace them as needed. I always have two on the site – one for regular use and one for backup.
But any gun will last longer if you follow a few simple rules: First, never allow it to sit around unattached to a can, since that will allow the inner chambers to harden. I also make it a point to flush my guns periodically with gun cleaner. If I’m not going to use a gun for more than a month or so, I flush it with cleaner and store it in a Ziploc bag. Foam works best at around 80°F, so I keep a heat gun handy to carefully warm it up when required. Remember to shake the can before use.
Rigid foam and plywood. For very large holes or problem areas that are difficult to seal otherwise, we’ll cut and fit a sheet of 1-inch foam or 1/4-inch plywood and use one of the above materials – most often caulk or spray foam – as the actual air-sealant. When I show up on the job site, I always have an assortment of scrap plywood, OSB, and polystyrene or polyiso board in my truck.
Pipe Penetrations
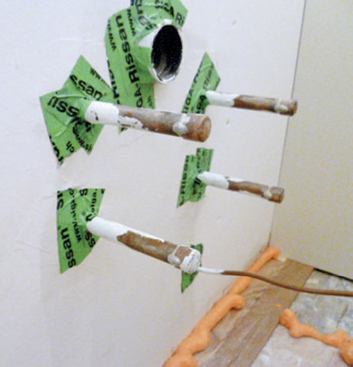
I like to use tape to seal pipe penetrations through drywall, because it can withstand the inevitable wiggling, pushing, and pulling when the plumber installs the fixtures. A more brittle sealant like foam is too likely to crack and leak air in this situation.
I like flexible Rissan tape for this application, though I’ll sometimes use another tape if that’s what I already have in my dispenser. For a half-inch supply pipe, I cut two short pieces of tape and wrap them around so that they extend well up the pipe and overlap one another. Larger DWV pipes may require a half-dozen pieces or more to get a good seal all the way around.
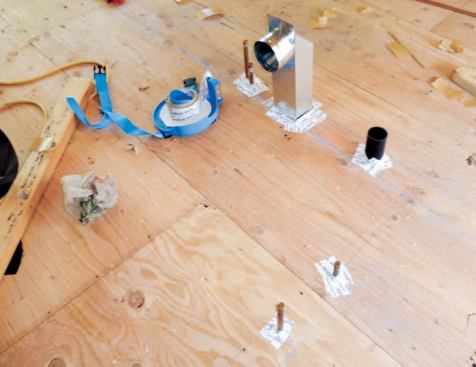
Tape is also my first choice for sealing pipes that penetrate the floor, especially when the plumbing will be enclosed in a partition wall. This requires roughing in the pipes before the partitions have been built, but it prevents the air leaks between the plate and subflooring that result when pipes are sealed where they emerge from the plate. If there’s not enough room overhead to drill the plate of a preassembled partition and lift it over the pipes, I’ll notch the plate instead. To accommodate a larger DWV pipe, it’s sometimes easiest to leave out a short section of plate altogether.
If the partitions are already in place, it’s often possible to seal them from the basement or crawlspace. Another alternative – not ideal but better than nothing – is to paint the crack between the subfloor and partition plate with duct mastic or cover it with tape.
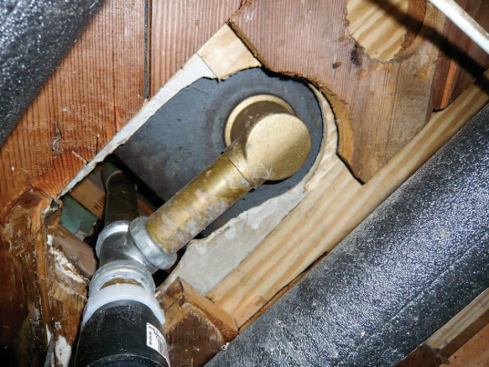
Larger subfloor openings – like the 6-by-12-inch hole that plumbers leave behind after installing a bathtub P-trap – are best sealed with rigid foam and caulk. I first cut the rigid foam to fit, then bed it in a continuous bead of spray foam applied to the underside of the subfloor. Finally, I apply more foam where the pipes pass through the sheet material.
Wires, Electrical Boxes, and Fixtures
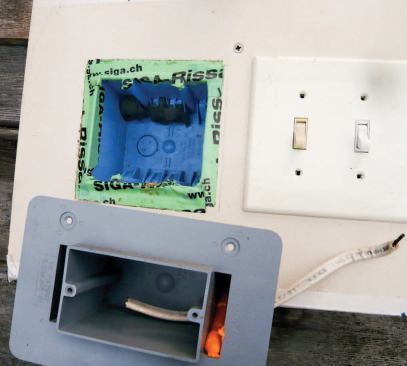
My favorite electrical box for new construction is made by Airfoil (airfoilinc.com). It has a wide flange around the outside that can be caulked before the drywall is hung to provide a positive seal around its perimeter. The wires leading into the box pass through two narrow chambers that are open to the front. After the drywall is hung and the receptacles have been wired, the open chambers are filled with foam to completely seal the box. The only drawback to Airfoil boxes is that they’re expensive, so I use them mostly on outside walls, where air leaks are most prevalent.
The edges of a conventional plastic box can be sealed to the drywall by running a few strips of tape around the inside of the box, leaving a narrow strip extending beyond it. The resulting flanges are then folded over and adhered to the drywall. With a little practice, it’s possible to get a good seal without extending the tape beyond the edges of the cover plate. I like to use oversized cover plates because they allow for better tape coverage at the drywall.
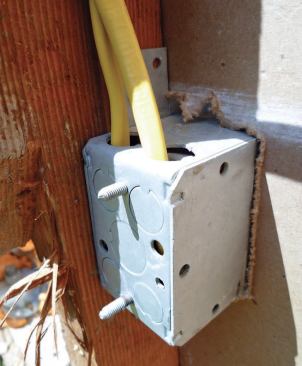
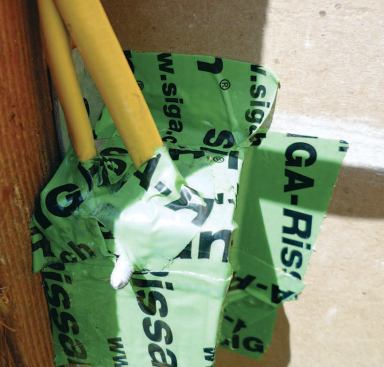
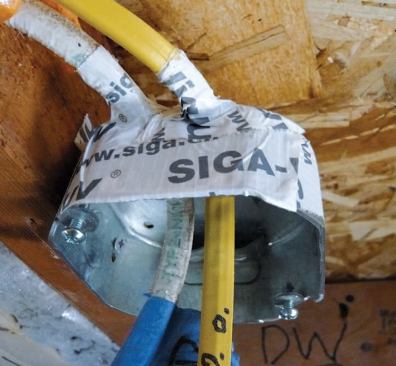
Metal boxes are problematic because they often contain open seams and always have holes. If they’re already installed and wired in a retrofit project, there’s usually not much you can do unless you have access to the back, in which case they can be taped. If I have to install a new metal box (I recently worked on a project where the homeowner insisted on metal boxes throughout the house), I’ll tape around the wire penetrations and seal the box to the drywall with more tape.
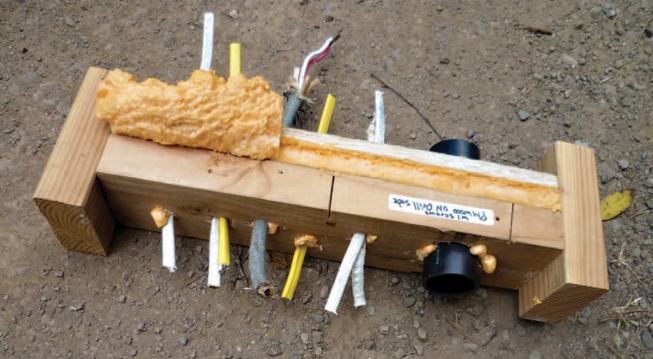
Individual wire penetrations through a top or bottom plate are easy to seal with a shot of foam. In areas where there will be a series of wires entering a single stud cavity, I cut a strip of plywood or OSB that’s just long enough to fit between the studs and temporarily tack it to the plate with a couple of screws. After the electrician has drilled the holes and run the wires, I remove the screws, lift the plywood strip slightly, and inject the space between it and the plate with foam. Hemmed in by the sheathing in back, the studs on either side, and the plate and plywood above and below, the foam expands to completely enclose the wires and seal the holes. Excess foam that spills out the front can be trimmed off after it sets up.
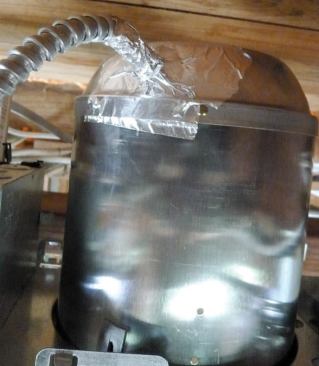
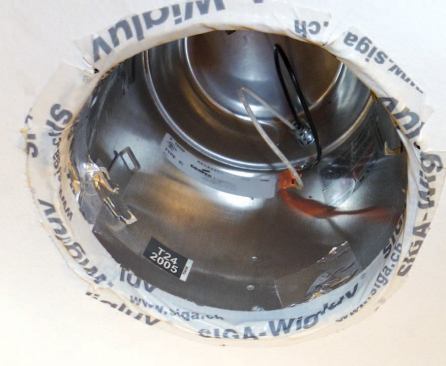
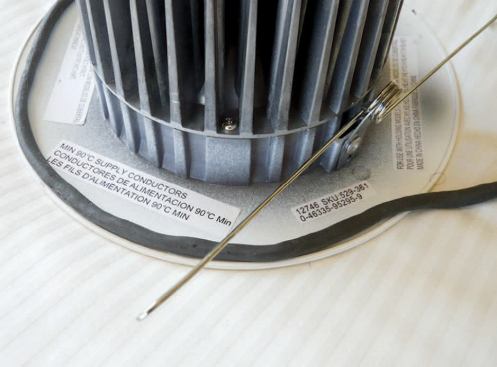
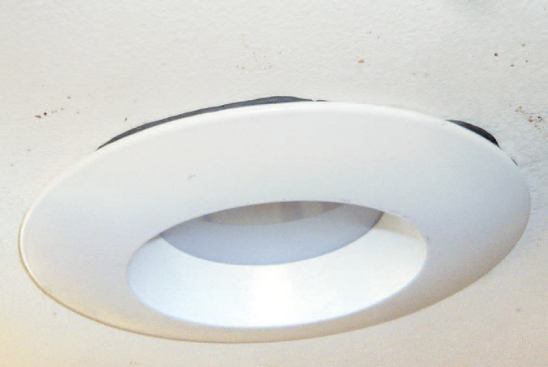
Ceiling cans. Conventional recessed ceiling cans leak huge amounts of air, and even supposedly airtight cans usually have holes in them. I seal up any holes in the body of the airtight cans with foil tape and close the gap between the can and the ceiling drywall with Wigluv or Rissan tape. Some new retrofit LED cans have an airtight module that actually is reliably airtight. The interface of the fixture and the drywall can still leak air, though. When installing this type of can, I create a reliable seal by rolling a “shoelace” of duct putty between my hands and adhering it to the inside of the trim ring/diffuser, since its design makes it impossible to seal with tape.
Framing, Sheathing, and Drywall
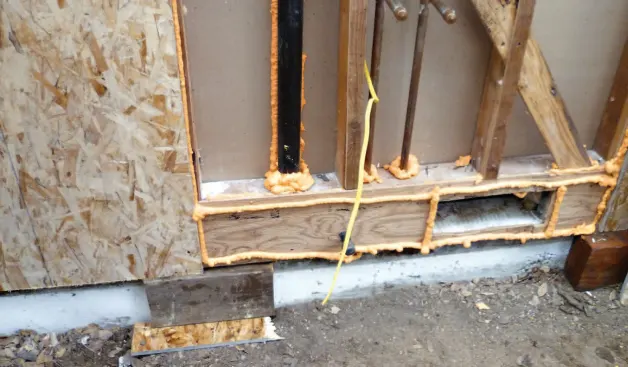
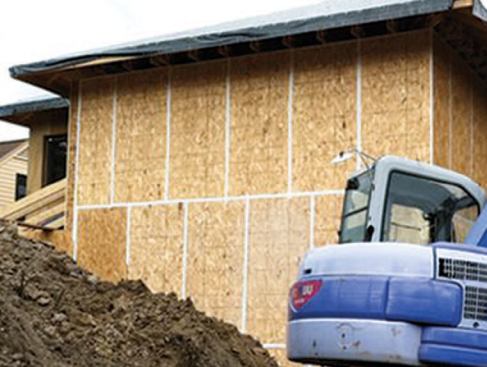
Before fastening exterior wall sheathing, I apply a continuous bead of spray foam to the studs and plates. The idea here is to provide an air-sealing gasket between the two surfaces, not a glue joint. Gluing the sheathing to the framing leaves a structure more vulnerable to catastrophic failure in an earthquake by preventing it from flexing at the nailed connections.
To avoid that problem, I let the foam set up for about two minutes before pressing the sheathing into place. At the end of that time, it’s developed a thin skin that prevents it from bonding to the sheathing yet remains pliable enough to provide a good seal. This method works well, but I’m gradually moving toward using bulk caulk rather than foam for this application, mostly because I don’t like hauling so many empty foam cans to the landfill – I’d rather end up with a 5-gallon bucket that I can reuse.
I also use caulk instead of foam to seal the drywall to the framing, because it’s less likely to make a mess of the interior finish. But we do use foam to seal the quarter-inch gap we purposely leave between the bottom edge of the drywall and the subfloor (or finish floor).
Tightening up tongue-and-groove. A lot of existing homes in my part of California were built with tongue-and-groove ceilings. In some cases, the T&G was nailed to ceiling joists instead of drywall and the attic space above was insulated with fiberglass. Cathedral ceilings were also popular, where the T&G was nailed from above to widely spaced timber rafters – which became part of the interior finish – and covered with a layer of plywood, followed by asphalt felt and shingles. Sometimes there’s a layer of insulation board between the boards and plywood.
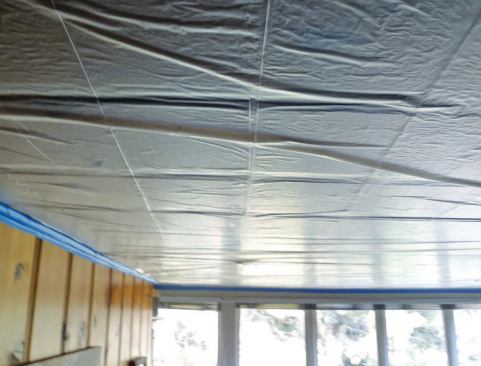
Both versions leak huge amounts of air. This was memorably illustrated during a recent energy retrofit of a house with a flat T&G ceiling. We took the precaution on this job of taping a sheet of poly tightly around the edges of the ceiling to catch the dust and debris that were sure to sift through the cracks as we removed the old fiberglass batts from the attic. When the sun heated up the attic and warm air began to flow out the gable vents, we were surprised to find that the sagging sheet of poly was sucked firmly against the ceiling, as if it were a vacuum-sealed package. The homeowner was delighted with how warm and easy-to-heat the house had suddenly become – even though we’d temporarily removed all the insulation. After vacuuming the attic floor, we reinsulated the floor with 6 inches of spray foam, which sealed the cracks between the boards at the same time.
In a similar situation where the attic was not foamed, I sealed the cracks in the attic floor with a nonfibered asphalt sealer called EF-7 (seaboardasphalt.com). It’s water-based, remains flexible, and can bridge up to a 1/4-inch space in one application.
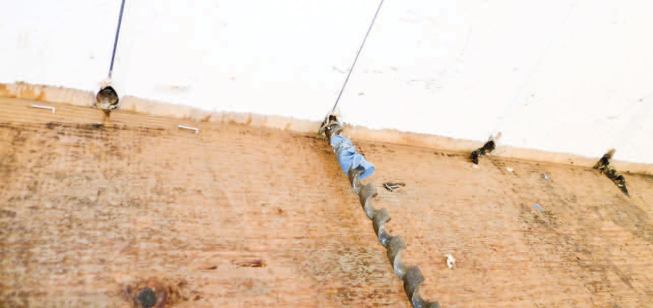
Although cathedral ceilings don’t have an attic, they leak air in their own way: Because the T&G ceiling extends beyond the outermost rafter pairs to form the gable-end overhangs, the gaps between adjacent boards form a series of uninterrupted air channels between the indoors and outdoors. I’ve found that the best way to cut off the airflow is to bore 3/4-inch holes for the full depth of the T&G tight against the outer face of the gable-end rafter. The holes are then filled with a quick shot of spray foam. Finally, I’ll cover the inconspicuous foam “buttons” with a trim strip.
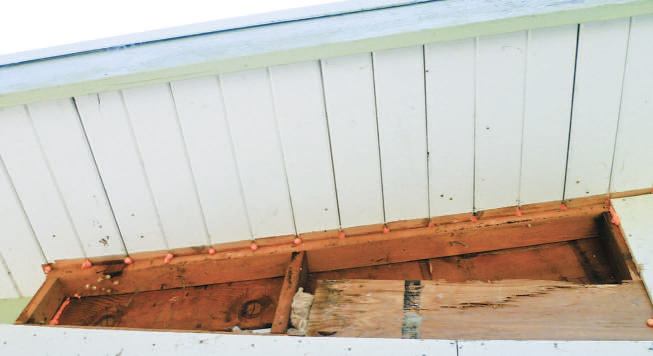
Exposed rafter tails. In houses with sloping T&G ceilings, the timber rafters typically extend beyond the plane of the eaves walls and are left exposed. The spaces between rafters are ordinarily closed off with short pieces of blocking, which often serve as the exterior finish as well. Even if the trim boards fit tightly in the beginning, shrinkage of the heavy rafters often leaves gaping cracks. It’s a detail that leaks a lot of air.
We have two approaches to sealing this area. If the rafter tails are going to be left exposed, we apply a bead of spray foam along the edges of the rafter, blocking, and roof overhang and nail up a previously prepared piece of AC plywood. If the area will later be boxed in or otherwise hidden from view, we’ll seal the cracks with strips of tape, which are carefully slitted and folded to provide tight, neat corners.
Terry Nordbye is a building contractor in Point Reyes Station, Calif.