Lee McGinley
Choosing insulation for a high-performance home in Northern Vermont—where temperatures as I write hover around the zero mark—requires thought and care. The right choice can make a huge difference in both comfort and cost efficiency.
I did my research and was leaning toward the most popular choice in our area—dense-packed cellulose—when I discovered Roxul (roxul.com), a new/old product by a Danish company. The material I can get locally is manufactured in Canada, and it’s gaining popularity in this region—so much so that it’s now carried here in one of the big-box stores.
Rock Wool Revisited
As the name implies, Roxul comes from rock that is spun like wool (“ul” is the Danish word for wool). The material is volcanic rock mixed with iron slag (slag is the collection of compounds that are melted off and removed during smelting, when iron ore is exposed to high temperatures).
Something about this product seemed familiar. I remembered that when I was a kid in upstate New York, my parents used “rock wool” to insulate exterior walls during a remodeling job at our house. In those days, it came loose in batts encapsulated in Kraft paper and was stapled to studs.
Today’s Roxul is pea-soup gray in color and comes in boards and batts. ComfortBoard is a rigid board used chiefly for exterior insulation in commercial applications. ComfortBatts hold together without a Kraft-paper or other covering (although they will come apart if they are tossed around on the jobsite too much) and are used for residential construction. I settled on the batts for my own house.
Appealing Properties
I learned that, apart from my key considerations of R-value and cost, Roxul has some very appealing qualities. Among them are the following:
- It doesn’t burn.
- It repels water
- .It won’t support mold growth.
- Its density results in a quieter home
- .It’s easy to install.
- Density is consistent, not installer-dependent.
The last two points were especially significant. Since my crew and I could install the Roxul ourselves, I would not have to hire or accommodate the schedule of a specialty sub. And whereas with dense-packed cellulose, the skill of the installer and jobsite conditions can affect the uniformity—and therefore quality—of the end-product, Roxul’s density is uniform from the factory, regardless of who installs it.
R-Value—the Critical Factor
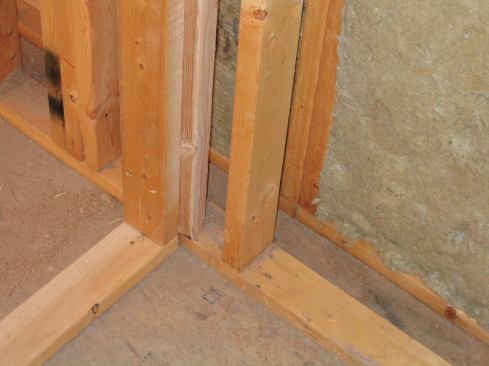
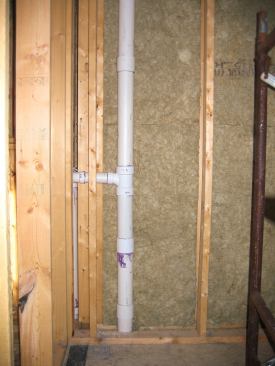
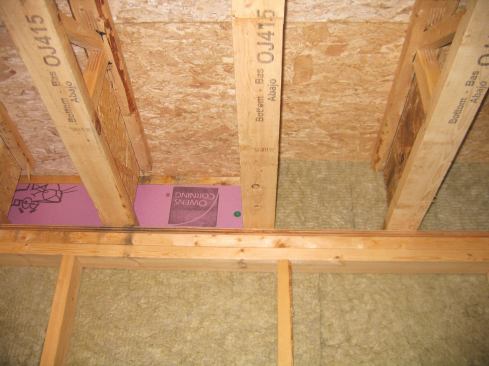
I built my house with double-stud wall framing that has 10 ½-inch wall cavities into which I could place three layers of 3 ½-inch Roxul. The photo shows my double-wall assembly, with an outer and an inner 2×4 wall separated by a 3 ½-inch space. Staggering butt joints from course to course, I placed the first and third layers vertically and the middle layer horizontally.
Each 3 ½-inch batt has an R-value of 15, meaning that my total cavity insulation would be R-45. Dense-packed cellulose would have yielded R-38. (Fiberglass insulation, which I didn’t seriously consider, has to be about 15 inches thick to achieve a comparable R-value.)
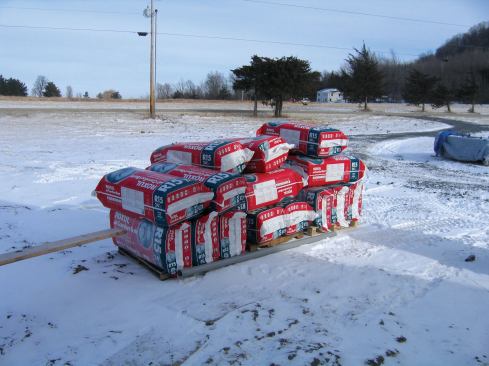
There are eight 3 ½-inch batts to a bag, which covers 60 square feet, and because each bag of Roxul was wrapped in a heavy plastic film, I could leave it outside without worrying about rain or snow damage. Detailed, illustrated installation instructions are also printed on the wrapper.
If you need other batt sizes, Roxul is available in 5 ½-inch and 7 ¼-inch batts with R-values of 23 and 30, respectively. The company also manufactures “Safe ‘n’ Sound,” which reportedly has greater fire resistance and sound absorbency than its other insulations.
Cutting Batts to Size
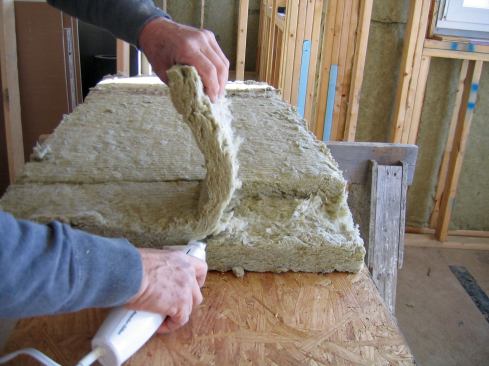
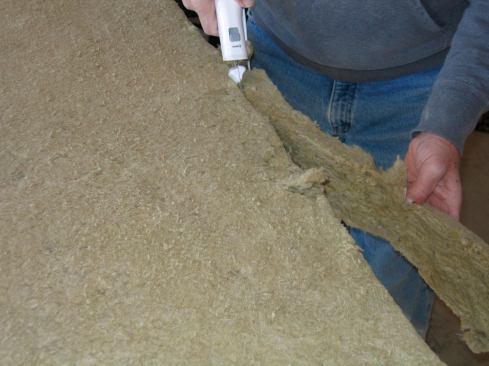
We discovered that the batts can come apart if they’re tossed around. They’re not fragile but it helps to keep this in mind when handling them. And although Roxul isn’t itchy like fiberglass, the manufacturer recommends wearing gloves, eye protection, and a dusk mask during installation.
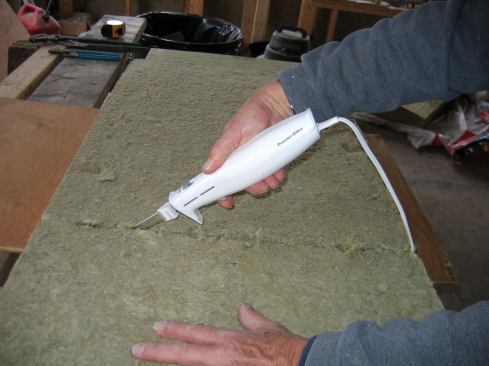
To cut the batts, a long-bladed knife, rather than a utility knife, is recommended because they are dense. And because Roxul is spun rock, the cutting knife needs frequent sharpening. A serrated bread knife works well, but what worked beautifully for me was a $15 electric carving knife. This knife also allowed me to shave off narrow strips easily. This was helpful for a narrow bay or when my first cuts proved to be too long
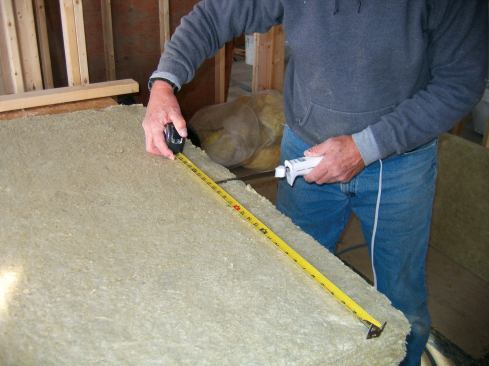
I created a cutting table by stretching a couple of plywood rips over sawhorses and simply ran the electric knife down the middle. For narrow pieces, I hung one edge of the batt beyond the plywood, and carved off what I needed.
When I cut pieces to length, I cut them ¼- to ½-inch longer than my measurement to ensure a tight fit. I laid out my measurements and with a 4-foot level connected my references, creating a straight line to cut along. Surprisingly, I was able to draw a legible line on the ComfortBatts with a black permanent marker.
The house has four different window sizes. I pre-cut batts to match the heights of the wall cavities above and below the windows, and cut the batts to width as I placed each one. I sped up installation further by pre-cutting widths for several full-height bays at once.
With many narrow bays and cuts around windows, there could have been a lot of waste, but because Roxul is self-supporting, I was able to recycle the drops, butting and stacking them to fill cavities.
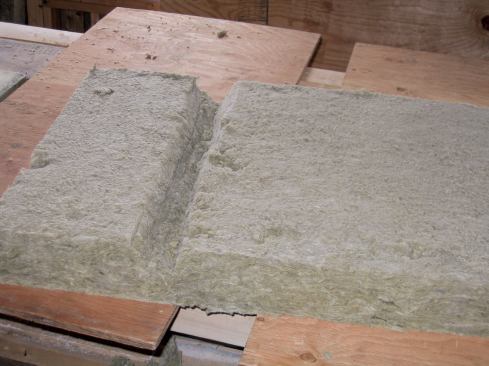
Squeezing any fibrous insulation behind electrical boxes is not a good idea, so we cut around the boxes. For wires, we scored the Roxul and inserted the wires into the grooves. For plumbing pipes, we made a V-groove to accommodate each one, always keeping the pipes to the warm side—the inner wythe of my double-stud wall framing served as a utility wall.
Installing Batts
Roxul’s batts are intentionally ½-inch wider than a typical framing layout. Batts for 16-inch on-center framing, for example, are 15 inches wide, rather than 14 ½ inches. Batts for 24-inch on-center framing are 23 inches wide, rather than 22 ½ inches. To place a batt, we inserted it between cavity studs while compressing its sides slightly, then released it. The result was a nice, snug fit.
Installation went quickly. For example, for a second-floor installation, I was able to install the first layer of Roxul on 1,200 square feet of exterior wall—cutting around 16 windows—in approximately 12 hours. This included lugging the 12 bags upstairs, vacuuming the bays, and sweeping up afterward.
Like any fibrous insulation, Roxul does not stop air, so we were careful to air-seal with rigid board at critical areas, like the band joist, before packing out the wall with Roxul
Bottom line
The lowest quote I received for filling a 10 ½-inch cavity with dense-packed cellulose was $3.88 per square foot, including netting. With Roxul, using three 3 ½-inch batts would set me back $1.68 per square foot plus labor, which ran about $1 per square foot. My installed cost for Roxul, therefore, was about 70% of the cost of dense-packed cellulose.
Another way of looking at the value is as R-value per inch. At R-38, dense-packed cellulose comes in at around 10 cents per inch per square foot, while Roxul weighs in at 5 cents. Both of these costs include labor.
Lee McGinley is a Certified Passive House Tradesperson and designs and builds high-performance homes. He lives in Addison, Vt.


