
Since I first started working as a carpenter (more than 40 years ago), I have enjoyed the challenge of a client showing me a picture from a book or magazine and asking, “Can you do that?” These projects have ranged from elaborate mantels, staircases, and built-ins to wainscot, custom doors, and out-of-the-ordinary trim details. As my career progressed, I realized that most of these demanding projects required a way to join wood other than nailing pieces together.
At first I used dowels, and then I switched to a biscuit joiner, but things really changed for me when I saw the Kreg pocket-hole jig for the first time, at a trade show. What jumped out for me was that pocket-hole joints are very forgiving—I would need to machine only one side of the joint, and on large projects, I would be able to work on only one joint at a time (with dowels or biscuits, the whole project needs to go together at one time).
The next thing that grabbed my attention was the speed of pocket-hole joinery: It took only a couple of seconds to drill the holes and a few more seconds to drive the screws to create a finished joint. Additionally, I could simply clamp the joint together while I drove the screws, and I wouldn’t need to spend time waiting for glue to dry. I was hooked and couldn’t get my credit card out of my wallet fast enough.
Before You Bring Out The Jig
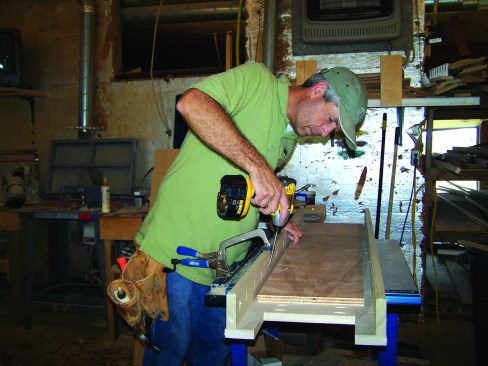
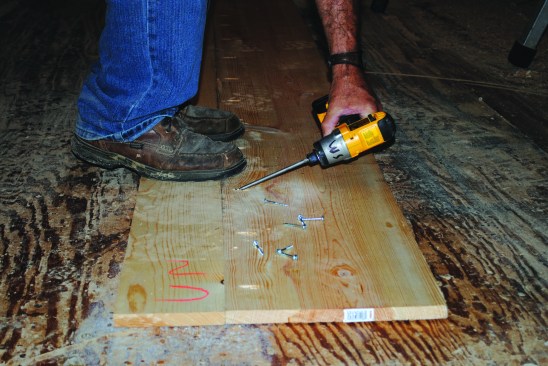
A pocket-hole joint starts with holes drilled at a very steep (15-degree) angle, with a jig. A specialty bit creates a flat-bottom hole, and a stop collar sets the bit at the correct depth for the material you are joining. You then drive pan-head screws to join the two sides.
Since buying my first pocket-hole joinery kit more than 15 years ago, I have developed a checklist for making the best joints possible. Though this list is for pocket-hole work, some of these rules can apply to any type of joinery:
- Always work with clean, square edges. I run lumber through a jointer or on-edge through a planer to eliminate saw-blade marks and any unevenness along the edges that will be joined.
- Set your saw to cut perfectly square, and use a good, sharp blade in your saw for clean cuts.
- Eliminate variations in thickness with a thickness planer.
- Plan your joints so that the screws will be driven into the edge of the wood—never into the end grain.
Helpful Pocket-Screw Clamps
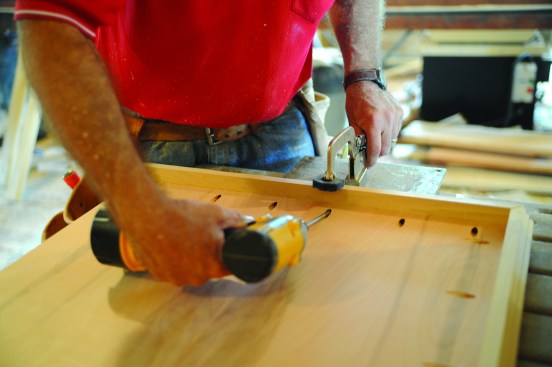
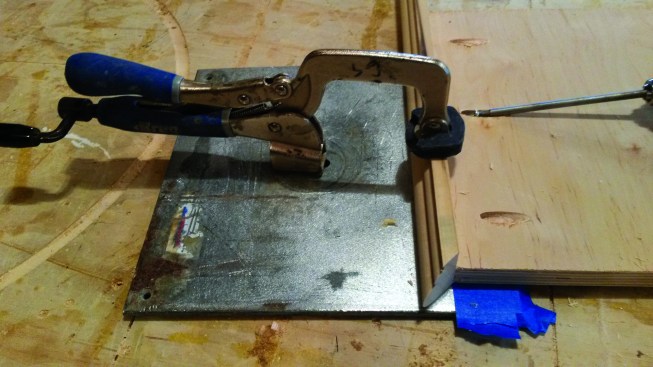
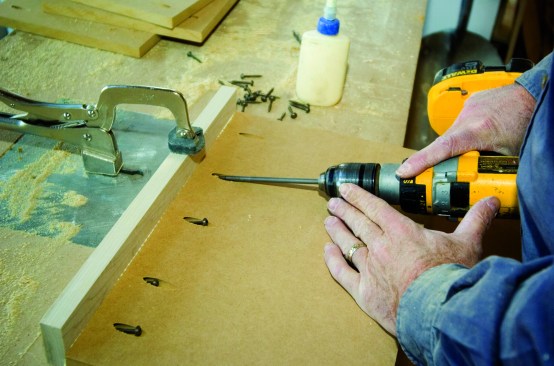
Quick-release clamps are essential for working efficiently with pocket-hole joinery. The most common are face clamps that are basically locking pliers with giant jaws. The ends of the jaws have wide, flat “washers” or pads that span the two pieces you are screwing together, to hold the faces flush. The pliers action lets you tighten and release the clamps quickly when moving from one screw position to the next. These clamps come in a variety of “reaches” to accommodate different depths that you need to clamp.
Another useful tool is a right-angle clamp. Instead of both jaws being flat, one jaw has a rounded taper, which slips into the pocket-screw hole to hold two pieces at right angles to each other.
I frequently use my workbench with a couple of different bench clamps that are a huge help. Plate clamps have a metal plate that you mount flush with the workbench top. The plate has a key way into which you insert the clamp. The entire bench top then becomes the other “jaw” of the clamp.
I also have a Kreg clamp table that has special metal track along two edges. The key way in this track accepts the same clamps as the plate system, and you can use more than one clamp to hold work on the bench as you drive the pocket screws. You can buy lengths of track to attach to your own workbench, too. Bench-top clamps stabilize the work better than face clamps do.
Face clamps have wide washer-like faces that align the pieces and hold them together while they are being joined.

These specialty clamps have a pointed jaw that inserts into a pocket hole to hold the pieces together at right angles.
These clamps insert into a plate with a keyway that holds the clamp and makes the whole bench-top part of the clamp.
The same clamps that work in the plate system also key into tracks that can be mounted directly to the edge of the workbench.
Frame and Panel: Pocket Hole 101
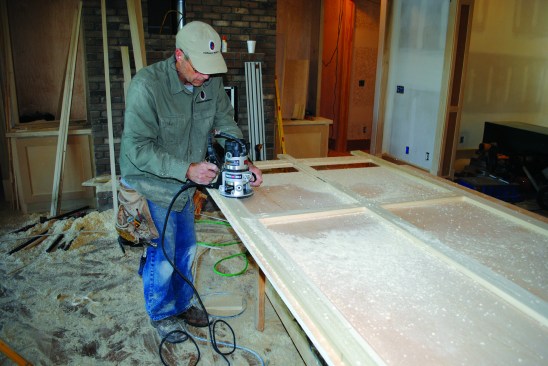
The first projects I used pocket hole joinery for were frame-and-panel trim details on wainscot, over-mantels, and the like. For those, I pocket-screw a frame together, attach plywood to the back of the frame, and then fit panel molding inside the frame.
I still use pocket-screw joinery for frame-and-panel trim details more than anything else. Most of the time, I staple the plywood to the back of the frame or, if I use 1/4-inch plywood for the panel, I rabbet the back of the frame to accept the panel. For wainscot, I often cut the panel to fit inside the frame.
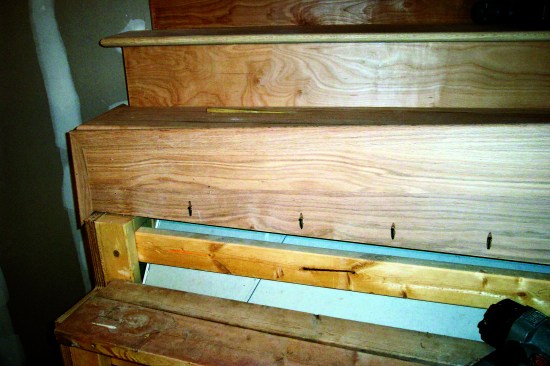
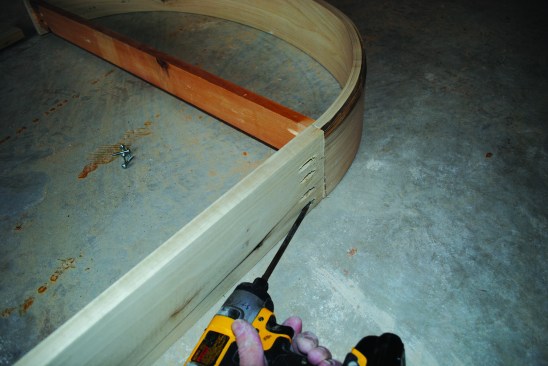
For many projects, such as mantel pilasters, the frame-and-panel details need to be thicker than the 3/4-inch frame. Rather than using thicker wood, I can build a corner return, pocket-screwing a narrow piece of 1-by to a 3/4-inch frame to simulate a thicker, richer-looking mantel pilaster.
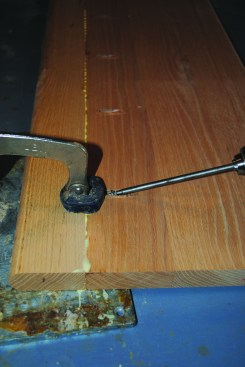
I start by making sure that the ripped piece has a clean edge that is free of saw marks, and I drill pocket-screw holes every 4 inches along the edge. To get a great joint, I squeeze out a bead of glue along the edge of the ripping and attach it about 1/16 inch in from the edge of the frame. As soon as the last screw is driven, I wipe off the excess glue and rout the edge with a flush trim bit. With a little sanding, the joint becomes almost invisible, and the pilaster looks like a single, thick board. This trick also works great for adding depth to fluted pieces.
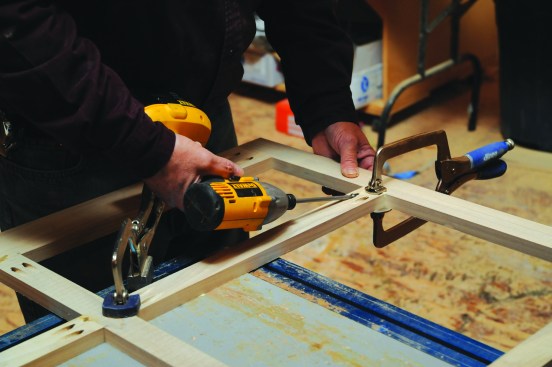
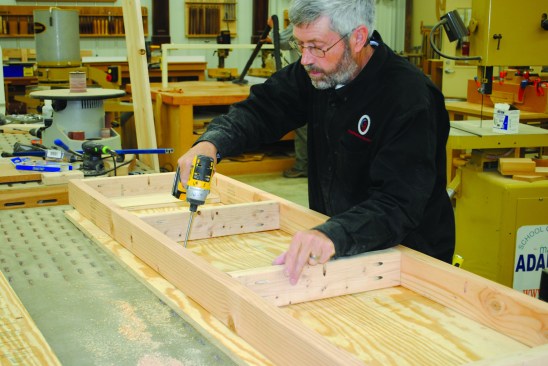
The author's first pocket-hole joinery projects were face frames for wainscot, over mantels, and the like. The pieces are joined on the flat with screws that are always driven from the end of one board into the edge of the other.
Once the face frame is assembed, the author routs a groove in the back that the panel fits into. Then decorative molding can be added around the panel on the front side.
Pocket screwing sides to a face frame turn it into a thicker component for pilasters on a fireplace surround. Note that the face frame is slightly proud of the sides. The excess will be routed off later.
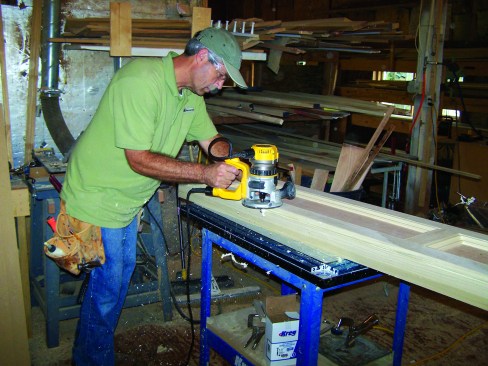
A router with a flush trim bit takes off the excess material. A little sanding, and the joint between the sides and face frame becomes almost invisble.
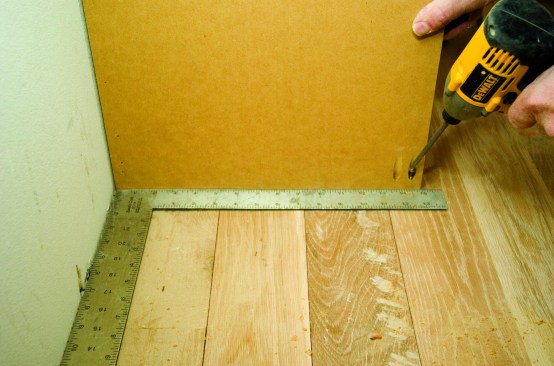
Edge Banding for Shelves and Countertops
In the houses we build, we install a lot of plywood mantels, shelves, and countertops. It’s much faster and cheaper than edge-gluing solid lumber, and the plywood stays pretty straight and flat. The only drawback is you must cover the veneer edge with a strip of lumber or molding. To get a really good joint, I used to clamp the edge strip to the plywood about every 5 inches and then leave the clamps in place for at least a half-hour until the glue dried.
Now I just use a pocket screw every 5 inches or so, and I can skip all the clamps as well as the time waiting for the glue to dry. Pocket screws go in at an angle and can pull pieces out of alignment, so I make sure that the edge strip or molding is flush with or slightly proud of the veneer surface after the screws are driven. I use a plate clamp at each screw location to hold the edge piece flush with the plywood while I drive the screw. To leave the edge strip slightly above the plywood for a bit of final sanding, I sometimes add a couple of thicknesses of masking tape to the part of the plate that will be in contact with the plywood. I have also added edge banding to MDF in the same manner. The MDF is much more forgiving, because you don’t need to worry about sanding through the veneer.
The author uses pocket screws to attach edging to plywood for shelving or a mantel. Plywood is stronger and more stable than solid wood.
The author applies several strips of painter's tape to the plate clamp to keep the trim slightly proud of the plywood. The small excess is then sanded down flush.
MDF also can be pocket screwed, and you never have to worry about sanding through the veneer, as you do with plywood.
Edge-Gluing Boards
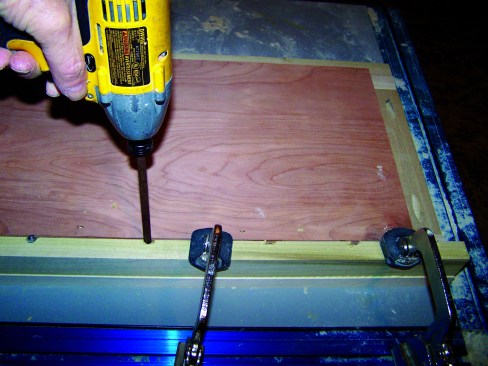
When I need to edge-glue solid lumber for things like custom stair treads, I often just pocket-screw the boards together one strip at a time. The biggest advantages are that I don’t need to use a lot of clamps and I don’t need to wait for the glue to dry. For curved-stair work, I glue up the angled pieces for the stair treads using pipe clamps, but then I attach the bullnose edging to the tread with pocket screws.
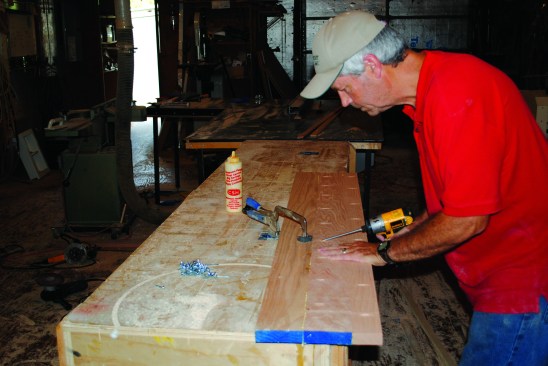
The author uses pocket screws to join oak boards for a stair tread. Thanks to the pocket screws, he doesn't need to spend time waiting for the glue to dry.
For curved-stair work, the author glues the angled pieces for the stair treads using pipe clamps. He then uses pocket screws for attaching the bullnose edging to the tread.
Cabinets and Built-Ins
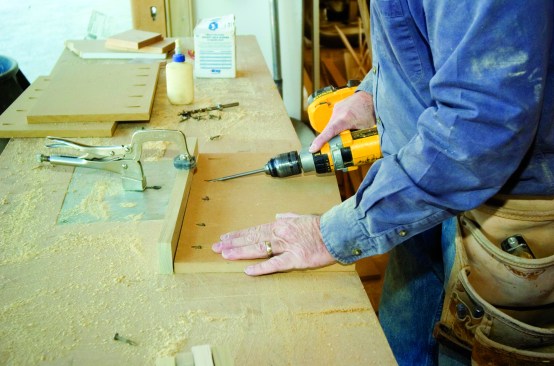
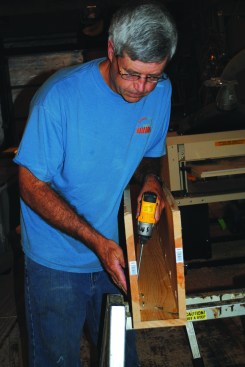
On every project, there always seem to be a few cabinets that I build on site. Window seats and closet built-ins are great examples. I build these cabinets using pocket screws for many of the joints. To attach the tops and bottoms, I use a shallow dado just deep enough to hide the joint. Then 1-inch pocket screws (along with glue) give strength to the joint and pull it together. At the top back of each cabinet, I pocket-screw a stretcher rail for attaching the plywood back and for screwing the cabinet to the wall. The pocket screws are stronger than nails, and I don’t have nail holes to fill. I also use pocket screws to join the plywood cabinet carcass to the face frame and to build strong drawer boxes that have no visible fasteners.
For simple doors, I pocket-screw a frame together with butt joints, and rout a panel in from the back, with molding around the opening in the front. Changing the width of the frame and the molding profile gives me dozens of door styles. Another option is building the doors with mitered corners. For this type of cabinet door, I make the frames from 2 3/4-inch-wide material, which is wide enough for drilling two holes at each joint using the Kreg Micro jig.
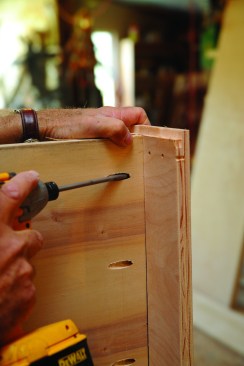
The author inserts the top of the cabinet into a shallow dado before driving the pocket screws.
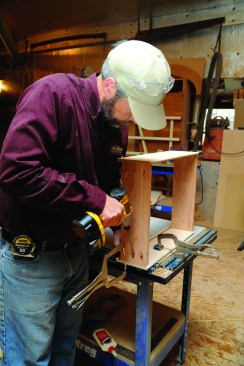
Pocket screws can give you very strong doors much faster than cutting dovetails would. When all is assembled, no fasteners are visible unless the drawer is completely removed.
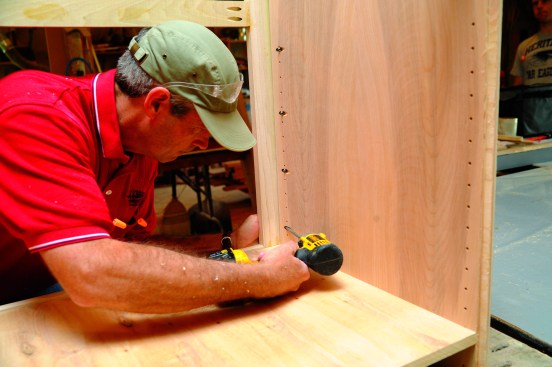
Pocket screws driven from the inside attach the cabinet carcass to the face frame.
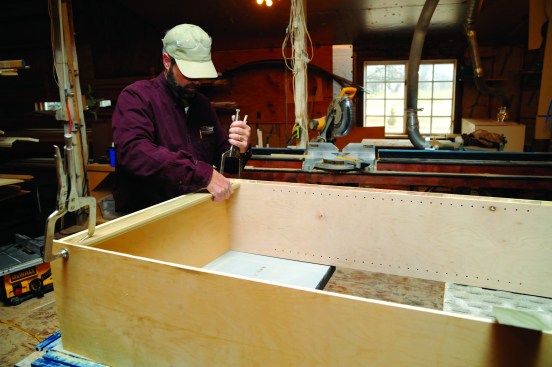
The author pocket screws a stretcher rail at the top of the cabinet for a place to attach the cabinet back as well as for a place to attach the cabinet to the wall.
Box Beams
We install a lot of box beams made from 1×12 pine (the nicest finish lumber available in this area). For most jobs, I rip a 1×12 in half for the bottom and then pocket-screw 1×12 sides to it. Pocket screws give me tight joints that will look good for the long haul.
If we stagger the butt joints of the pieces, we can easily build beams 16 feet or longer. If we need to make beams with sides wider than 12 inches, we pocket-screw the wide boards instead of using clamps. This works best as a two-person job: one person to drive the screws and one to stand on the boards to keep the faces lined up. We still glue the joint and sand the wide boards, but the joints are nearly invisible when we are finished.
The author pocket screws 1×12 sides to a bottom to create a deep box beam with hidden fasteners. The beam can be attached to blocks on the ceiling.
If wider boards are needed for bigger box beams, two boards can be edge-glued and pocket screwed together. Standing on the boards aligns the edges where clamps can't reach.
Pocket Screws Instead of Toenails
As a carpenter, I use toenails to hold boards in place on just about every one of our projects. A long pocket screw can function like a toenail on steroids. A pocket screw will always be stronger than a nail, and it can be backed out if you change your mind.
The first time I used a pocket screw instead of a toenail was to attach the vertical element of a closet system to the floor.
That worked so well that I began to use long pocket screws to anchor box newel posts to staircases, and to attach cabinets to floors, bar tops to cabinets, and display shelves to walls (note, however, that for any structural application of screws as anchors, you should always get approval from the local building official).
Using a hand-held jig, I’ve even used pocket screws to remedy squeaky stairs and floors from the bottom side. I also figured out that I could pocket-screw treads to risers to create a much stronger stairway.
Pocket screws can be used instead of toenails for strong connections. Here the side of a cabinet panel is screwed to the floor.
The author pocket screws stair treads to the riser above from underneath. Here the tread is ready to be tipped down and screwed in.
Temporary Connections
I’ve shown many examples of how pocket screws can make strong and permanent joints. But pocket screws are also incredibly useful for making strong temporary joints. Cabinetmakers use pocket screws all the time for temporary support at places such as dishwasher openings.
I often assemble cased openings on the workbench, with a spacer pocket-screwed to both sides at the bottom. After installing the unit, I back out the screws and remove the spacer. Pocket screws are handy if I have a curved-top opening—I use a temporary spreader to hold the arch at the proper width and then attach the jamb legs with pocket screws.
At trade shows, using pocket screws speeds up building and breaking down our booth, and I use pocket screws to secure the booth parts in my trailer. I even use pocket screws to make the workbenches that I use for pocket-screwing.
A temporary spreader holds an arch at the proper width while legs are screwed on. Note that this is one of the rare occasions that you need to screw into the end grain.
With the drilling jig properly adjusted, framing lumber can be pocket screwed for things such as this workbench top.
All photos by Gary Striegler


