I always enjoy seeing Dave White’s name pop onto the screen of my smartphone. Over the years, we have done a number of remodeling jobs for Dave and his wife, Donna, on their late-1800s row house in Hoboken, N.J. Unlike our other clients in Hoboken, who typically want to save as many of the original features of their homes as possible, Dave and Donna prefer a modern design aesthetic, which is a nice change of pace for us.
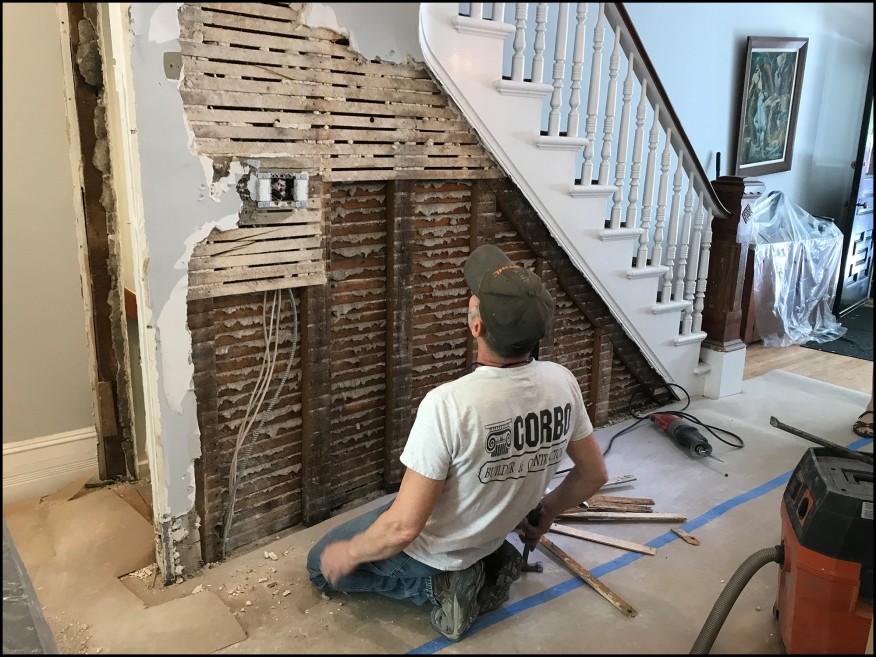
The author (standing) and project manager Danny DoCouto surgically remove trim on the wall separating the living room and kitchen from the basement stairwell.
They are also inventive about maximizing every square inch in their narrow 15-foot by 40-foot-long four-story home (see “Updating a Row House Bathroom,” Dec/19), while creating a sense of openness (see “Retrofitting an Oversize Door in Structural Brick,” Oct/14, which describes our installation of a large, triple-glazed slider to transform an existing gloomy kitchen into a bright space).
On this occasion, they reached out to us to remove a wall separating their living room and kitchen from the basement stairwell to add to the area’s open feeling. We have removed similar walls during numerous Hoboken renovations where we’ve matched the new open guard to the main stairway, but Dave and Donna wanted to replace the wall with a glass panel guard.
Demoing the wall. The stairwell’s wall had a slight 4-inch curve along its length, while the adjacent wall mainly consisted of a narrow door to the basement. We began by surgically taking down the lath-and-plaster wall, evaluating the structural integrity of the stair stringers and the landing above as we went along.
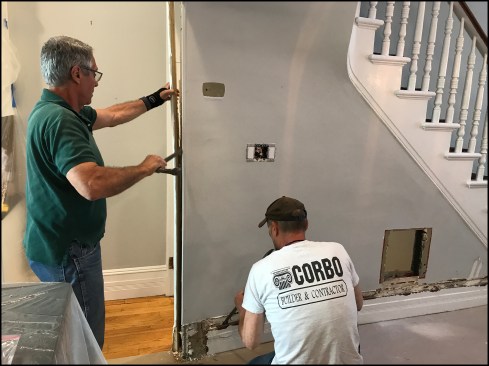
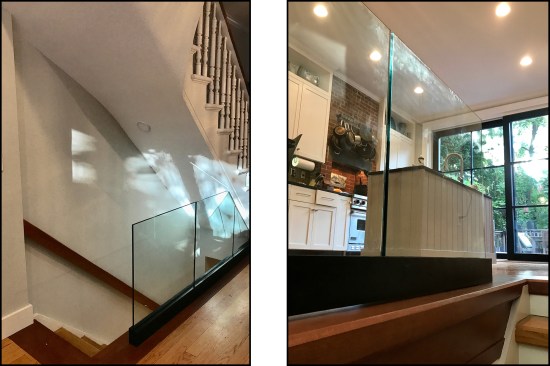
The basement stairwell separation wall was curved along its length to improve the flow of foot traffic between the living room and kitchen (left). The adjacent return “wall” mainly consisted of a 24-inch-wide door to the basement, which the homeowners had difficulty navigating while moving large items, such as laundry baskets, up and down the stairs (right).

Fighting for every square inch of interior space, the original builders framed the separation studwall “on the flat” to thin out the wall, a typical strategy in Hoboken row-house partitions.
In row houses with open guards, it’s typical for posts to be used to support the stair stringers and landing above. But here the homeowners wanted a clean, open look without posts, rails, and balusters hindering the view. We called in a stair specialist we often work with who is familiar with Hoboken row-house stairs to evaluate the stair framing. He devised a new header support made up of 4-by stock and a custom steel connector to transfer the stair loads to the home’s furred-out brick party wall.
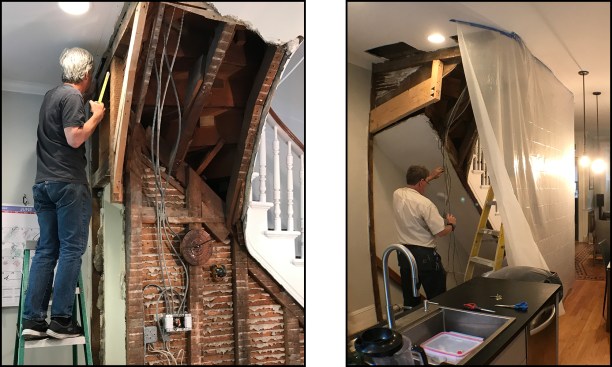
Architect Beau Thibault (left) and stair-specialist Marty Anderson (right) were brought in to assess the removal of the separation wall. A new header support made up of 4-by stock and a custom steel connector was devised to transfer the stair loads to the home’s furred-out party masonry wall.
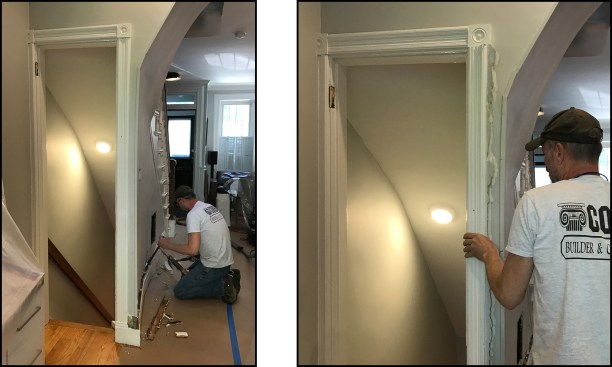
Contrasting border trim. The demolition of the curved wall left us with a wide gap between the existing oak strip flooring and the edge of the stairwell. We came up with the idea to install a wide cherry border trim to make up the difference, matching the cherry wall-mounted handrail and stair treads beyond. The contrasting colors looked sharp and gave a visual cue at the top of the stairs, adding a degree of safety.
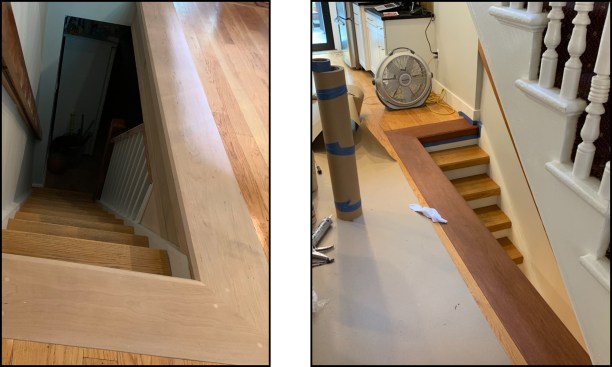
Wide, contrasting border trim (left) was stained to match the existing cherry handrail and treads beyond (right).
Frameless glass guard
With the stairwell prepped and finished, the homeowners selected a glass guard system and arranged hiring a glass installation company on their own. There are many types of systems available offering different ways to support the glass, such as integral posts with clips clamped onto the glass and optional top rails. But the homeowners wanted a simple, clean-looking guard, so they chose a frameless glass guard system, similar to what you might see in a commercial setting like a mall.
The system was manufactured by C.R. Laurence Co. and it included a heavy-duty aluminum U-channel, or “base shoe,” which was bolted to the floor with 9/16-inch-diameter by 5-inch-long lag bolts sunk into the floor framing. Driven through predrilled slotted holes in the aluminum, the bolts supplied enough grabbing power to counteract any forces applied laterally to the guard.
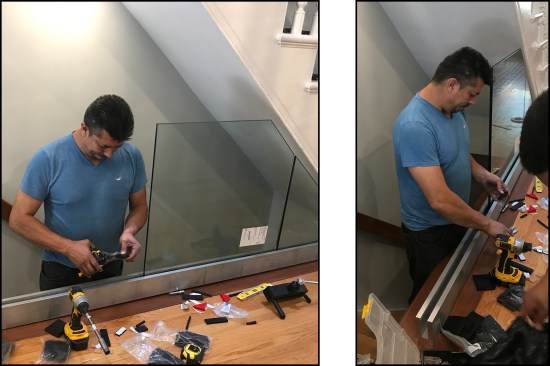
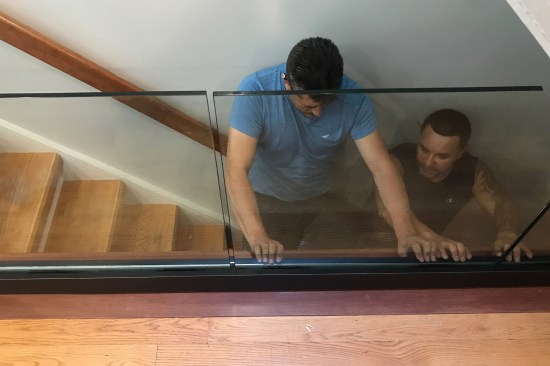
After installing a heavy-duty solid aluminum U-channel, the glazing subs set the tempered glass panels with a Dry Glaze Taper-Lok system (left, right).
Two of the three pieces of 1/2-inch tempered glass had to be angle cut to fit under the stairs. The pieces were set using C.R. Laurence’s Dry Glaze Taper-Loc system, in which rubber setting blocks and tapered wedges lock the glazing panels securely in place. Aluminum cladding with a factory finish was installed over the U-channel, then glazing gasketing was applied.
Factory-finished aluminum cladding is installed over the solid aluminum U-channel.
The frameless glass guard system was reasonably priced at roughly $3,000 and added light and easier stair navigability to this high-traffic area of the home.
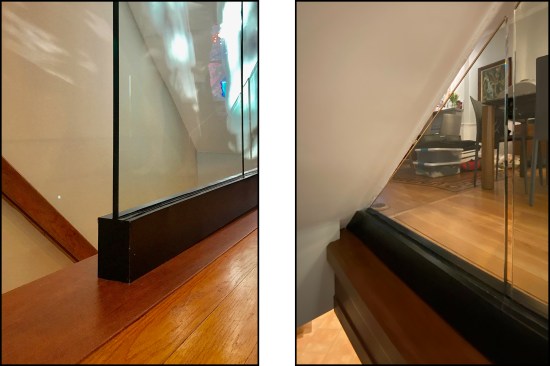
A factory-finished end panel covers the open U-channel (left). Typically, the small triangle space under the first few risers of the upper stair are closed off with a small wall and trim. Here, the triangle space was glazed to maximize lighting and the sense of openness (right).
A contoured lath-and-plaster finish was installed to match the home’s existing curved under-stair treatment (left). The finished guard helped open up the room (right).
Photos by David White and Rob Corbo


