

David White Studio
Workers unloaded the two large glazed door panels one at a time …
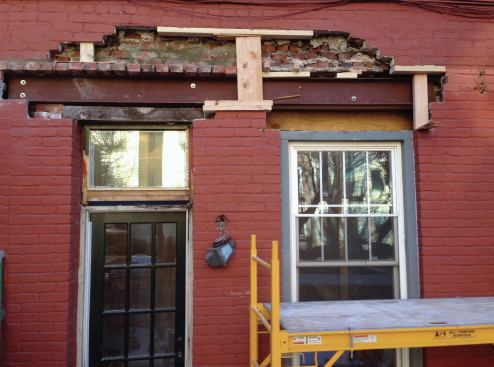
In the 30-plus years we’ve been working in the Hoboken, N.J., area, we have replaced the window-door-window configuration on the rear wall of numerous row houses with a three-panel slider, mainly to bring in more light and provide better access to the backyard, but also to replace worn-out components, as many of these homes were built before 1900. Most Hoboken row houses were built with structural brick, so opening up the rear wall requires adding steel to support at least one upper story and sometimes two.
Typically, two pieces of steel are installed: The first is set into place on the inside half of the wall while the outer half of the brick wall remains intact; once that piece is fully supported, the outer brick is removed and the second piece of steel is installed (see “Retrofitting a Steel Header,” Jun/12).
Most of the projects we’ve done have been similar, but with each one there always seems to be something different that needs to be dealt with. This job was no exception, on two counts: The exterior wall had three wythes of brick instead of two, and the door was larger (and heavier) than usual—a 9-by-9-foot, triple-glazed Zola slider that weighed upward of 900 pounds. And there were also a couple of surprises along the way that required an on-the-spot change of plan.
Unloading the Door
The owner wanted to maximize the door’s height, which meant locating the top as close to the ceiling joists as possible while allowing for trim. In many row houses, we would have had to work around a 9-inch plaster crown molding, but in this case, a 3-inch wood crown had been installed during a previous kitchen remodel. Accounting for that plus trim, we had room for a 111-inch–tall door.
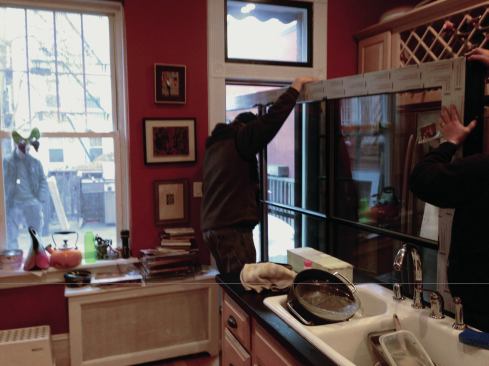
Lead time on a custom Zola door can be as long as 15 weeks, so we didn’t start work on the house until the day the door was delivered to the site. There was no alley in back, so the semi carrying the door parked on the street in five “emergency no parking” spaces I had reserved to ensure that the end of the truck box was in front of the house. Even though the door was delivered as a five-piece knock-down, the largest component—the fixed panel—weighed nearly 600 pounds, too heavy for me and my crew to comfortably handle. So I hired three boiler technicians recommended by my plumber, who uses them to unload, assemble, and disassemble large boilers and other heavy equipment. They unloaded the two panels one at a time from the semi onto dollies, rolled them to the front stairs, and carried them up the stairs and through the front entry door. Back on the dollies, the panels were carefully rolled to the back of the house, out the back door, and onto the deck, where we wrapped all the pieces with movers blankets and tarps to protect them while the structural work was being done. Start to finish, unloading the door took about 3 1/2 hours.
Demolition
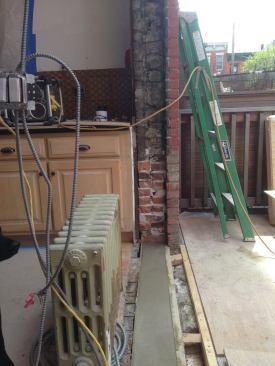
In many Hoboken row-house floor plans, the kitchen is at the back, and we usually end up altering the rear wall for a new door as part of a kitchen remodel. But in this case, the existing kitchen was staying in place, and the architect dimensioned the door to fit snugly between the existing cabinets along the sidewalls. The brick jamb of the rear window would define one side of the new door, so the cabinets that abutted the rear wall in the corner next to the window stayed in place. On the opposite wall, we temporarily removed the corner pantry cabinet, the refrigerator, and the wine rack above it to make room for the structural work. And we relocated a radiator from the middle of the rear wall, ultimately substituting an electric squirrel-cage toe-kick heater in the base cabinet next to the window.
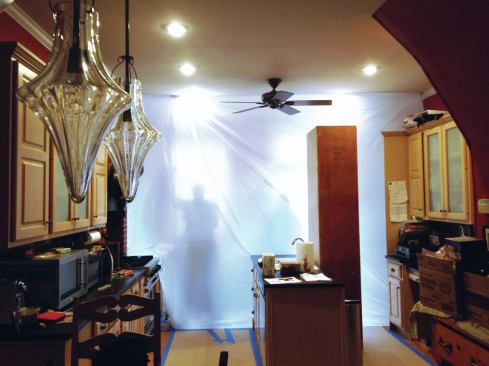
Because the demolition would be dusty work, we erected two temporary barriers, using poly with a pole system and zipper doors. We placed one barrier about 4 feet from the rear wall, up against the kitchen island, and left it in place the whole time. The other barrier ran full-width on the other end of the island and provided extra protection. Once the demolition was finished, we took this barrier down. In the meantime, both barriers had zipper doors to give us access to the interior of the house, and the homeowners access to the kitchen, which was mostly still usable (though we’d moved the refrigerator into the living room for easier access). A third barrier went up on the rear wall itself.
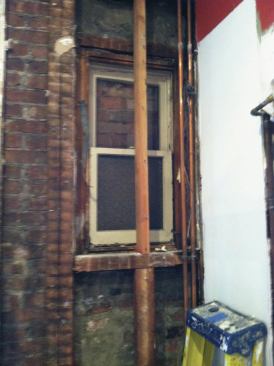
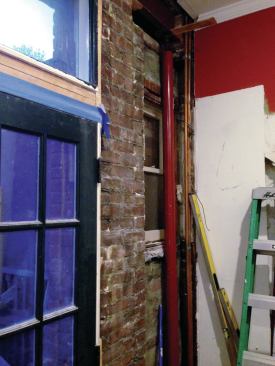
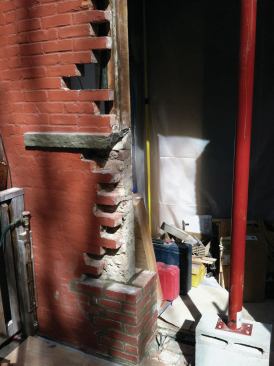
We found a big surprise when we removed the corner pantry cabinet and drywall in the corner: A window that was bricked-up on the outside still held the original double-hung on the inside. We had planned for one jamb of the new door to fall in the middle of this window, assuming that the opening had been filled solid with brick that could support one end of the flitch beam. But only a single veneer layer of brick had been used to close up the window.
This required a change in plans. The two steel channels that were to be installed—one inside, then one outside—were originally designed to be equal lengths. Given this new wrinkle, we ordered the inside beam about 16 inches longer—long enough to be temporarily supported by the brick jamb on the corner side of the bricked-up window.
Inside Steel
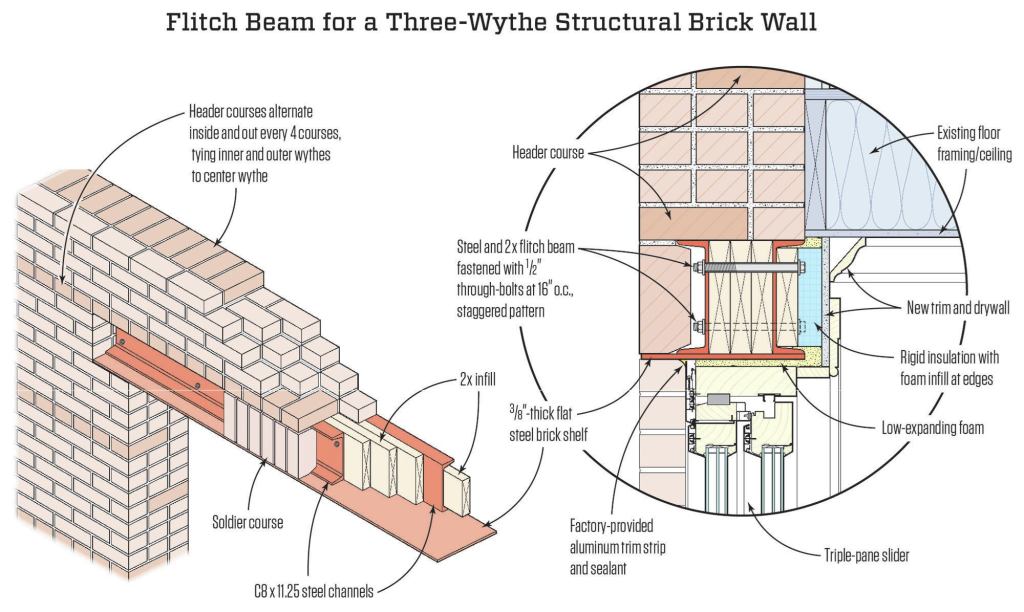
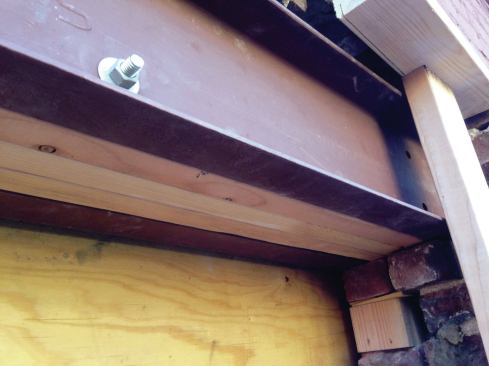
Installing a flitch beam in two steps ensures that the building is structurally supported at all times. Given three wythes of brick, the plan called for two C8x11.25 beams (8-inch-high steel channels weighing 11.25 pounds per foot) with full-length 2-by material sandwiched between them. Everything would be through-bolted together to form a flitch beam that would span about 10 feet.
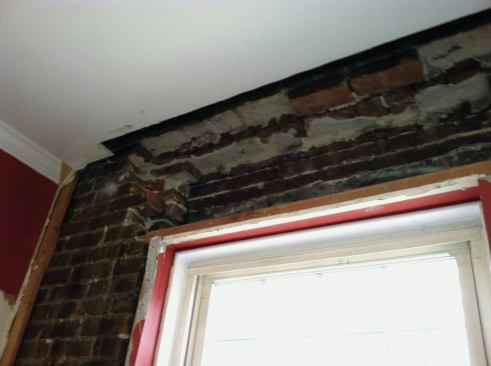
We began by removing the inner and middle wythes of brick above the rear window. The height of the door plus the steel channels determined which course to start with. We cleared away enough brick to make room for the beam plus about an inch of clearance to allow us to shim and eventually grout above and below the flanges.
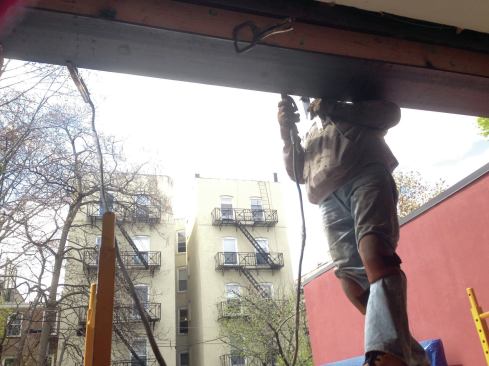
Danny DoCouto was the foreman on the job. He’s union-trained and he knows his way around steel and the brick in these old row houses. He likes to do the brick demolition himself because it gives him an opportunity evaluate the masonry and adjust his work plan if he finds problems. He found this wall to be very fragile. This, combined with the discovery at the bricked-up window, prompted him to proceed carefully when removing brick, looking for loose mortar or cracks in brick that would be load bearing.
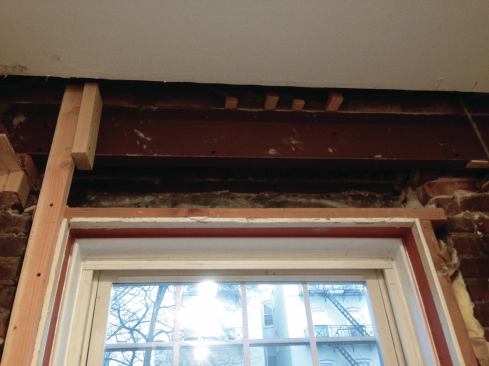
When it came time to hoist the first, longer steel channel into position, we blocked it up on the brick to the left of the kitchen window and shimmed the top flange along its length. At the other end, Danny wasn’t confident that the brick bearing surface was large enough or strong enough to support the load even temporarily, so we set a Lally column in front of the window to temporarily support the steel. This also bought us time to complete almost all the masonry work before we had to remove the bricked-up window. We reset the Lally later to make room for the new door jamb.
Before lifting the steel into position, Danny drilled both steel channels with a series of matching 5/8-inch holes staggered every 16 inches on-center, with a stacked pair on each end. Usually our steel supplier punches these holes, but I needed the steel quickly—because we had lost time figuring out how to handle the bricked-up window—and my supplier was unusually busy. So he cut and delivered the steel, and we primed and drilled it on site. Danny used three different sizes of Irwin black oxide high-speed bits and a Makita 3/4-inch hammer drill. He first drilled a small 1/4-inch pilot hole, drilled again with a 3/8-inch bit, and finished it off with a 5/8-inch bit. Total drilling time for all 20 holes was about 2 hours.
With the inside steel in position and temporarily supported, Danny grouted the top flange in all of the spaces between shims. After waiting a day for the mortar to set, he removed the shims and grouted the remaining spaces, then moved outside.
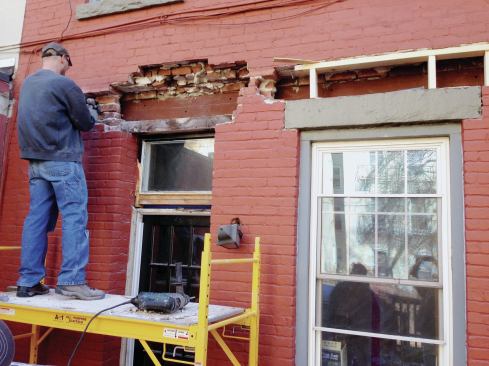
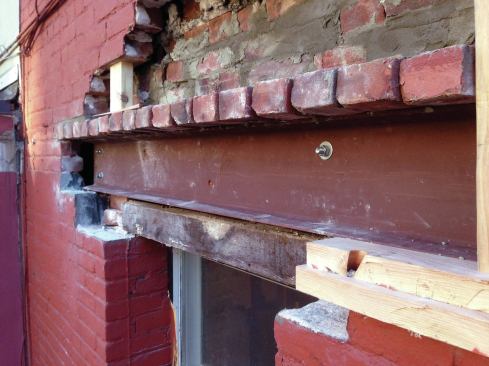
Outside Steel
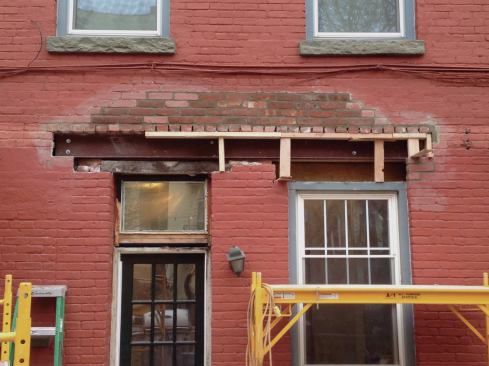
Again we started above the kitchen window, removing the remaining single course of brick, and adding blocking down to the granite lintel to provide temporary support. The goal here was to remove just enough to be able to slip the 2-by stock and second steel channel into place. But Danny also removed some brick in a few courses higher up that had come loose, again using scrap lumber to provide temporary support.
Danny chose to drill the dimensional lumber in place, using the holes in the steel as guides. After sliding the three 2-bys into position, he carefully installed the outer steel channel with one end aligned as closely as possible with the end of the inner channel. Working from the inside, he drilled 5/8-inch holes into the wood, keeping the drill as square to the work as possible. When the bit reached the outer channel, he punched in from the outside. Then he used 1/2-inch through-bolts to fasten the steel and wood together at both ends and in every third hole in between; he finished the bolting after the brickwork was completed.
At this point, the outer steel channel, which was shorter than the inner channel, was cantilevered above the bricked-over window, and supported by the Lally column set under the inner channel. At the other end, the beam was blocked down to the existing brick.


