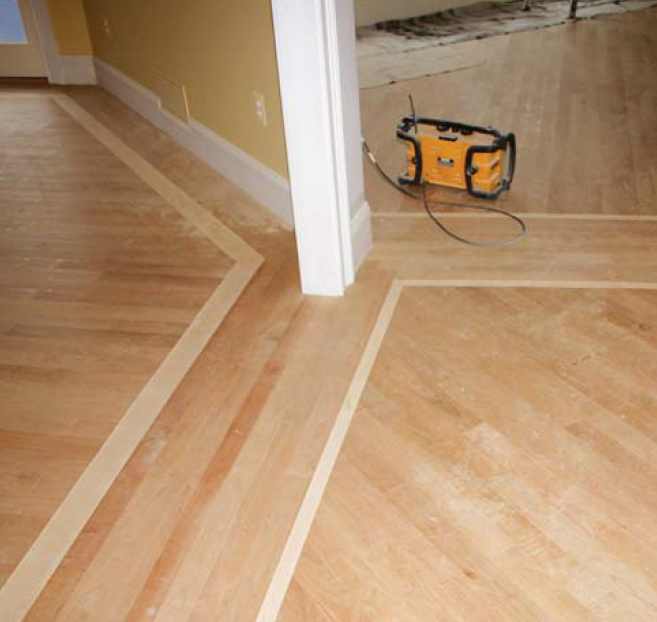
Our design-build company is always looking for ways to make average jobs more interesting. For the project shown here, a new client called us in to update kitchen cabinets. One idea led to another and we found ourselves gutting the kitchen and laying cherry floors in it and three adjacent areas. To help define each space within the open floor plan, I proposed installing opposing diagonal layouts and framing each area with contrasting borders.
The border design consists of three courses of 3 1/2-inch cherry, followed by a contrasting strip in bird’s-eye maple that’s either 1 1/2 or 3 inches wide. In the past when I worked with borders, I’d install the border first, then the field. Although that method got the job done, it was time-consuming—and it would have been a nightmare with this complicated layout.

Our lead carpenter came up with a better approach. We installed the field flooring first, running the ends rough to within a few inches of the walls and taking care not to nail within the border zone. Once all four fields were completed, we snapped reference lines for the borders. Then we simply laid our newly acquired Festool plunge-cut saw and guide rail (888/337-8600, festoolusa.com) on the lines and cut the edges clean.
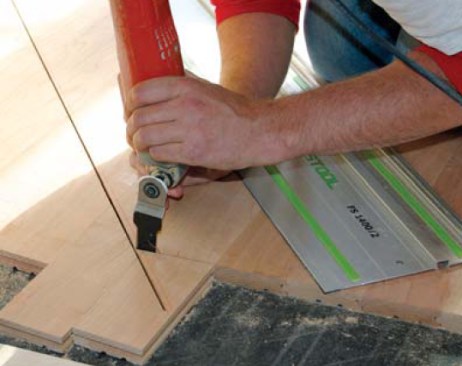
Integral nonslip strips on the bottom of the guide rail saved us the hassle of fastening it to the floor. At adjoining angles, we completed the cuts with a flush-cut saw.
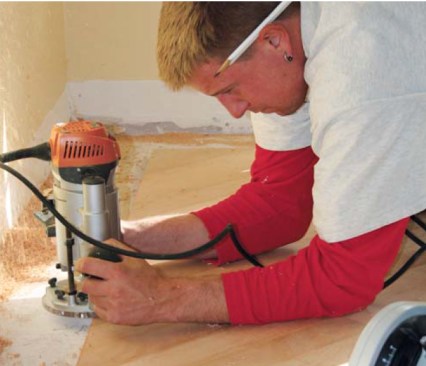
Next, we ran a router equipped with a stacked pair of wing cutters along the sawn edges, creating a groove for the tongued maple inlay strip. We had to replace the locking nut on the router with a thinner version—and even then we cleared the subfloor by only about 1/16 inch.
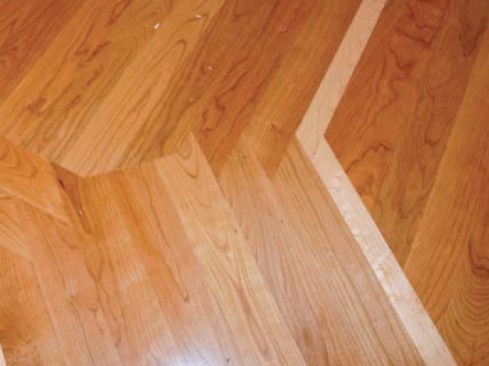
We prepared the maple strips back at the shop, using a table saw with a stacked and spaced dado blade to create tongues on both edges. The two-way tongues allowed us to orient the cherry strips tongue-to-the-wall for easiest installation. Rather than mitering the borders at corner junctions, we stepped the pieces, to add visual interest.
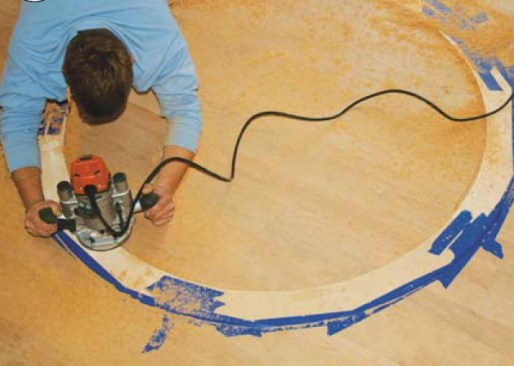
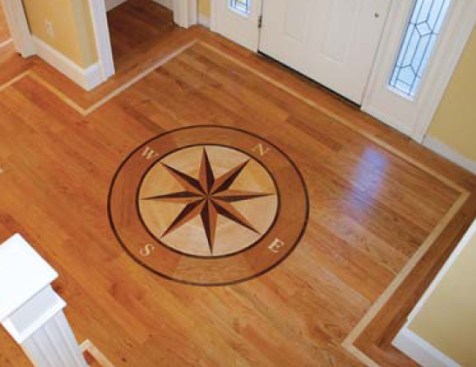
In the entry hall, an inlaid compass-rose medallion prefabricated by Oshkosh Designs (877/582-9977, oshkoshdesigns.com) put the icing on the cake. The inlay came with a prepared routing template and router bit, simplifying its installation. As with the borders, we were careful to keep nails out of the 4-foot-diameter inlay area.
The border process added about a day and a half to the field installation but went without a hitch. And the finished floor looks fantastic.


