
Modern engineered lumber and trusses make it easy to build massive rooms with vaulted ceilings and large volumes; these days, at least half of our projects feature a great room with a vaulted ceiling. Historically, those big, open spaces called for timber framing with large timbers to support the roof structure. Timbers are still popular today, but instead of serving a structural purpose, they are more often just large trim details.
One way we create a timber look is to build hollow box beams out of 1×12 pine. We have developed several tricks for making test cuts, fitting beam pieces, and attaching beam parts, but for the most part, we build these timbers piece by piece, in place. We always use a smooth finish, whether we stain the beams (which is typical) or not.
Occasionally, clients ask for a more rustic look, which requires solid wood beams. In Northwest Arkansas, we can order rough-sawn fir or cedar timbers and even get custom-milled air-dried oak beams from a local sawmill, but for the project shown here, the clients were looking for something with a little history. Their research led them to Heritage Restorations (heritagebarns.com), a company that finds, disassembles, and restores vintage barns, but that also has a huge inventory of reclaimed beams, siding, and other old barn parts.
Ordering the beams. To get a quote, I needed to estimate the sizes and lengths of the beams. I always plan for beams that are slightly deeper than they are wide, or at least square. In this case, I also wanted the main beam at the ceiling to be a couple of inches deeper than the hip beams butting into it. My client approved the estimate, but before we placed an order, I set up scaffolding to double-check the lengths. I ended up adding a couple of feet to the length of the main ridge beam just to be safe.
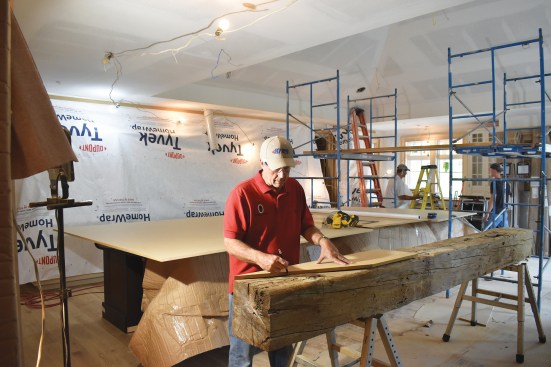
After determining the angle where the sloped and flat sections of the ceiling converged, the author made an MDF template and used it to mark that angle on both sides of the beam.
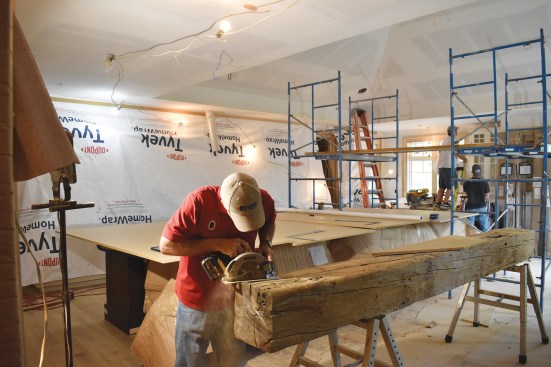
Next, he cut to the lines with a circular saw set to maximum cutting depth.
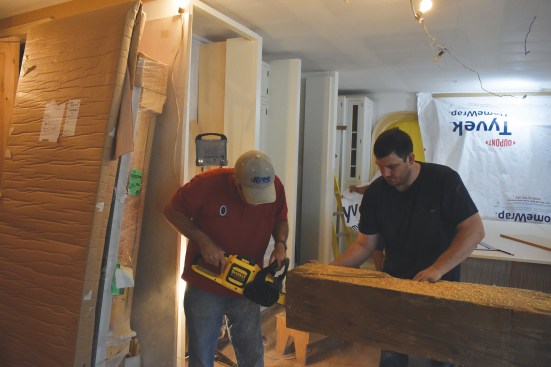
After cutting into the beam from both sides with the circular saw, the author finished the cut with a chain saw while a helper supported the offcut.
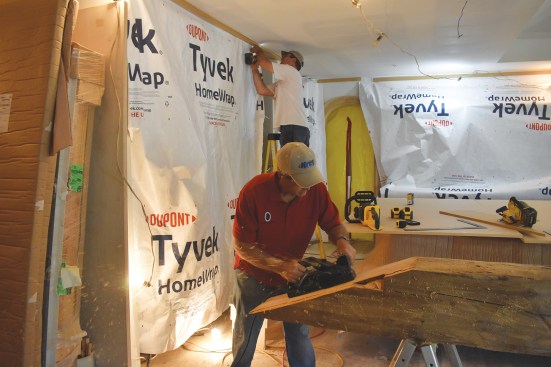
Finally, he smoothed out the cut with a hand-held power planer.
While awaiting delivery (it took about a month), I had to come up with a plan for accurately cutting the beams and securely fastening them in place. My contact at Heritage Restorations suggested using long LedgerLok structural screws to mount the beams to the ceiling framing. I was a little concerned that the large head size of the LedgerLoks would make them too visible, but the countersink holes for the heads aren’t noticeable on the rustic beams. We also decided that we could use long trim-head screws for the wood-to-wood attachments. From past jobs, I knew that having good scaffolding and lots of help would be critical.
Cut to fit. We had enough room to store and cut the beams next to where they were to be installed. The beams had to fit tight to the drywall with no trim or scribe. Usually, when we do beam work, I use a short test piece to get the angle of my cuts right, but I couldn’t figure out a good mockup that would be the same size as the beam for a test cut, short of stacking a lot of pieces of framing lumber together. Instead, I marked the end cuts with a scrap of MDF cut to the angle of the sloped ceiling, allowing a couple of extra inches so that I could test the fit of the beam in place. My plan was to start the cut with a circular saw from each side of the beam, finish it with a sharp electric chain saw, and then fine-tune each cut with a hand-held planer.
The crew cut the ridge beam long by 2 inches to allow for fine-tuning the fit, then lifted and propped it in place.
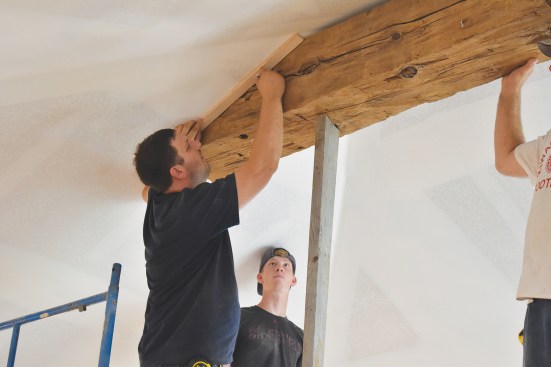
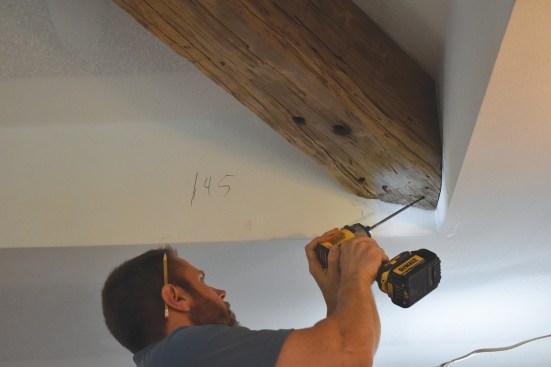
Both ends of the beam had to be scribed in place for the final precise fit.
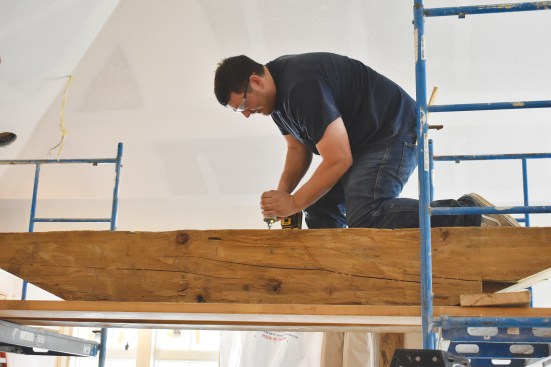
Before installation, a worker drilled a hole in the middle of the beam for an electrical fixture.

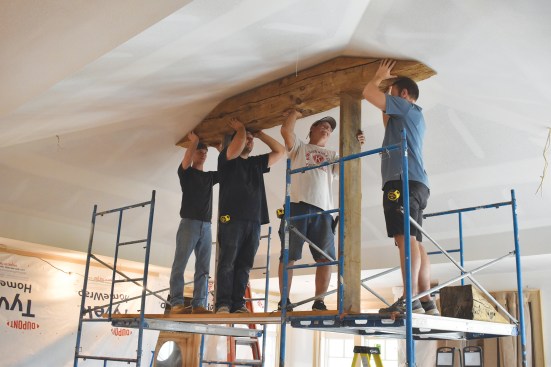
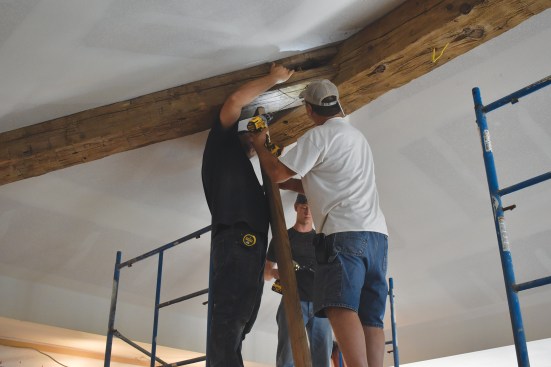
Satisfied with the fit, the crew fastened the beam to the framing above with long TimberLok structural screws.
The ridge beam had to go up first. To check the fit and scribe a final cut line with a 1×2 held against the ceiling, we quickly figured out that cutting temporary legs to prop the heavy beam in place worked better than four guys straining to hold it over their heads. It took about three test fittings, making slight adjustments with the planer each time, before we were ready to drill a hole for the chandelier wire. To install the beam, we drove a pair of 10-inch LedgerLoks at each end into framing and toe-screwed the beam in the middle from each side.
Hips. I was even more careful with the first of the four hip beams, cutting it long by about 3 inches to test the fit. Doing that meant several extra tries lifting it in place to check the cut, but the fit had to be perfectly tight, and I didn’t want to order (and pay for) an extra beam. We focused on the top wood-to-wood joint first, using our temporary legs to prop the beam in place for each test fit. It took a lot of patience from the crew, but right before lunch, we were able to screw the beam in place.
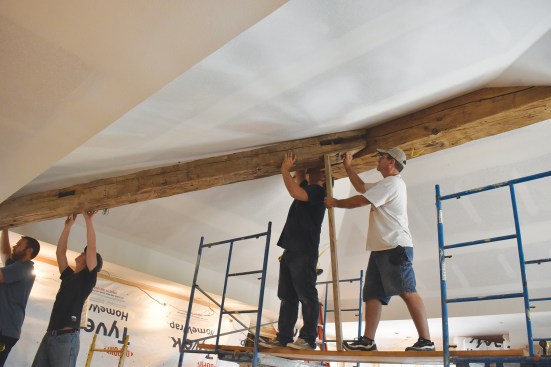
The first hip beam was cut long by 3 inches, then gradually trimmed to fit following the same procedure as for the ridge beam.
As I became more comfortable with the process, I added only an inch and a half instead of 3 inches to the measured length for the test cuts. We also learned that removing a little drywall from the inside corner at the bottom made it easier to get a good fit at the bottom.
Once they were satisfied with the fit of the first hip beam, workers fastened it in place using long trim screws for the wood-to-wood connection to the ridge beam.
Removing a little bit of drywall underneath the bottom corner of the hip allowed for a tight fit.

After honing their technique on the first hip beam, the crew was able to install the remaining three beams quickly.
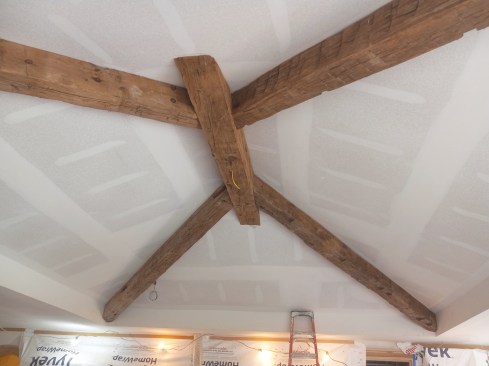
The ceiling is ready for the paint crew. When viewed from floor level, the screw heads are virtually invisible.
When we first started talking about the project, I thought it might take most of a week to install the beams; there was no margin for error. It got easier as we went along (the guys doing the lifting might not agree), though, and we finished in just under two days. I have always been proud of the pine box beams we build in place, but I have to admit, nothing looks as nice (or is more work) than these historic hand-hewn beams.
Photos by Gary Striegler.


