Roe Osborn
The covers for the hydronic heat in this studio were fabricated …
Recently a friend asked me about making covers for the hydronic baseboard heat in his art studio, located in a converted 1920s barn. When he bought the place, the barn had been used as retail space for flooring products and the walls had been covered with ugly gray carpet glued to CDX plywood—literally wall-to-wall carpeting. When he went to remove the carpet, he discovered that the sheet-metal covers for the existing baseboard heat had been installed after the wall carpeting, so they would have to come out first. The covers were in poor shape, so he didn’t reinstall them. Instead he asked me to help him design and build new wooden covers.
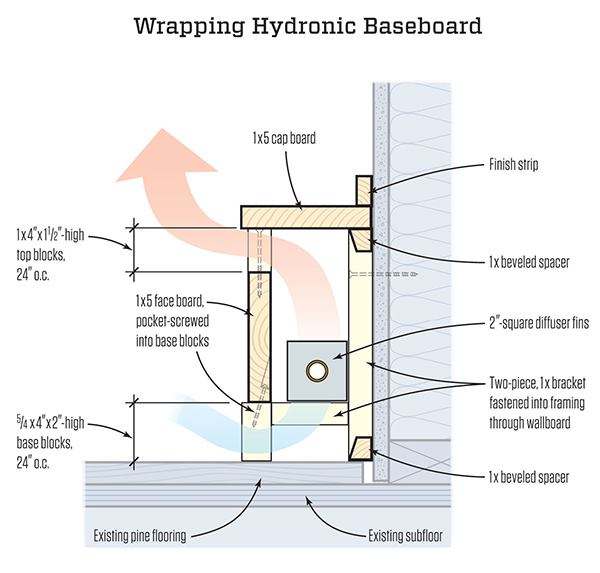
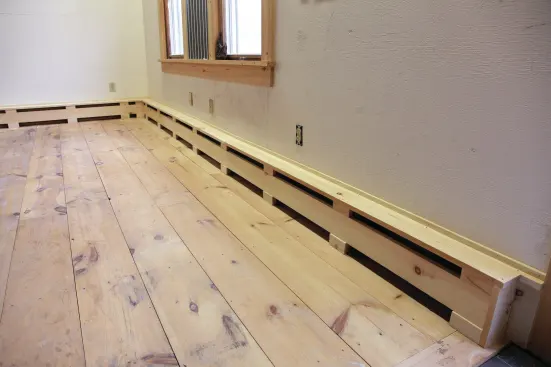
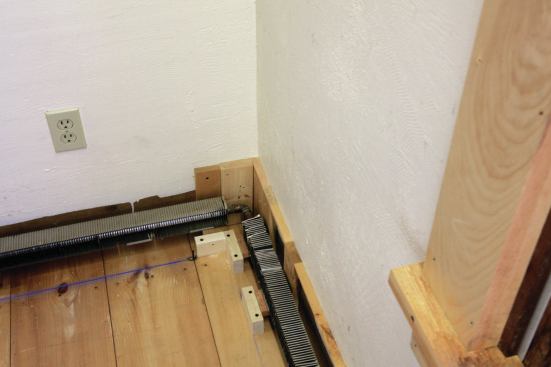
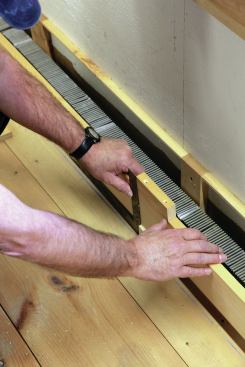
Our design for the covers was easy to build and called for stock-size lumber for the major components (see illustration, above). The covers start with simple right-angle brackets made from scrap 1-by pine that support the heating element. Each bracket consists of an 8-inch vertical with a 2 3/4-inch horizontal piece glued and screwed to it (2 inches for the element plus a 3/4-inch ventilation space). The brackets attach to the wall with a single screw at the top and are screwed to 5/4 base blocks that are in turn screwed to the floor. Stock 1×5 boards screw to the blocks for the vertical component, with 1-by blocks screwed to the top edge of the 1×5 to create the top ventilation slots. We also put bevel-edge spacer strips between the brackets: The bottom strip covered the gap between the flooring and the wall, and the top strip served as a cleat to support a second 1×5 board that screwed down on top to complete the cover.
Before beginning the assembly, we made a pile of base blocks and top blocks, each cut to 4 inches and pre-drilled for the attachment screws. The plywood walls in the studio meant that we could attach the brackets exactly where we wanted them. (With ordinary drywall, attachment would be through the wall and into the studs).
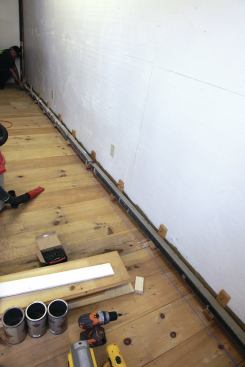
We snapped a chalk line on the floor to align the base blocks, which we spaced 24 inches on-center starting at the end of the first run. After installing the first bracket and base block, we pulled the 24-inch layout to the corner. We put the next block and bracket on the layout and cut spacer strips to fill in to the end bracket. The bracket stock was 2 1/2 inches wide, so for the remaining brackets that would fall 24 inches on-center, we cut pairs of strips 21 1/2 inches long, which would automatically put the brackets at the proper spacing. Then it was just a matter of screwing each base block to the floor on its layout, nailing in the spacer strips, then sliding the next support bracket over to the strips and screwing it to the wall.
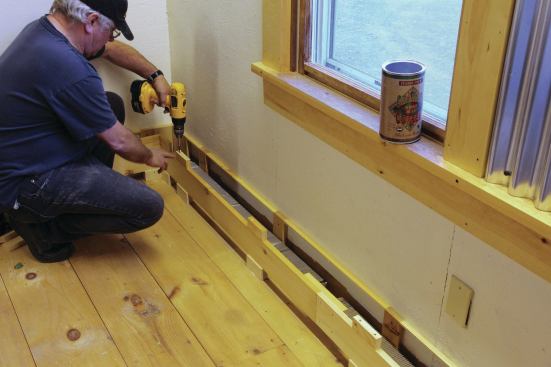
Because my friend’s studio was in a converted barn, he had established a rustic aesthetic of exposed fasteners with unfinished #2 pine trim. So after positioning and installing each base block and bracket, we drove a single trim-head screw through the block and into the horizontal component of the bracket to join them. Where the heater continued onto an adjacent wall, we cut and joined two base blocks at right angles to form a corner with equal legs. We had a space of about 4 inches left between the last base block on the layout and the corner, so we used that same spacing to begin the layout for the adjacent wall. From there we installed base blocks and brackets along that wall using the same process as before.
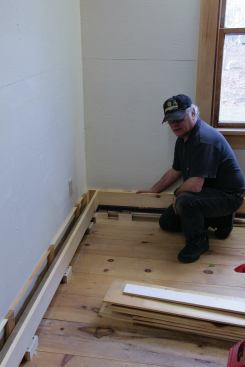
For simplicity, we made the face boards out of 1×5 stock straight from the supply house. Because space behind the corner face boards would be tight, we opted to pre-assemble them and work out from there. We began by cutting each leg of the corner to a length that would fall between brackets. Then we set both face boards on their base blocks to mark the locations for the pocket screws. After drilling the pocket holes, we screwed the two boards together to form the corner and positioned the assembly on the base blocks. To deal with the tight quarters in back of the face boards, we drove the pocket screws into the base blocks using a 6-inch driving bit chucked into a right-angle drill. To complete the run of face boards on each side, we pieced in the remaining lengths, joining the boards with butt joints and backer blocks.
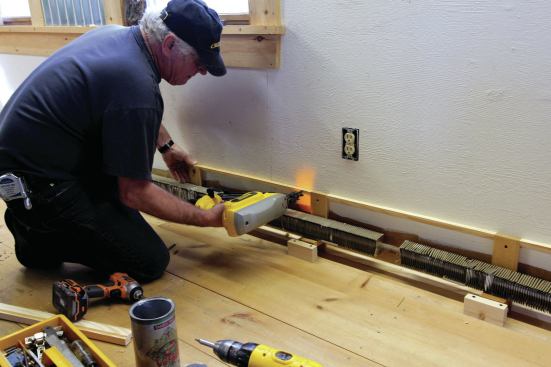
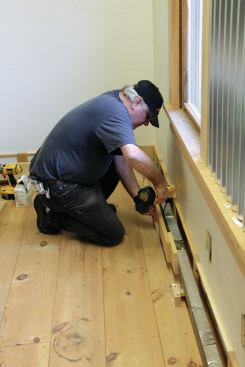
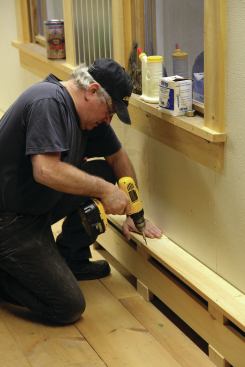
The next step in the assembly was installing the top blocks. Because they sat flush with the face board below, I opted to glue them in place and let the glue begin to set up before driving the screws. (The glue keeps the blocks from moving if the screws start to wander as they’re being driven.) I positioned each top block by butting a square against the base block below. I glued the top blocks onto both legs of the entire run before going back and securing them permanently with screws.
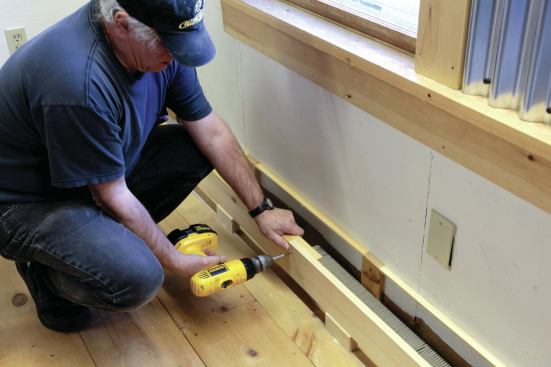
For the cap board, we again started in a corner, joining the lengths of 1×5 with butt joints. But this time we landed the joint over a block and bracket for support. We secured the cap board to each of the top blocks as well as to the top of each bracket along the wall with trim head screws, letting the outside edge of the cap overhang the block by 1/4 inch. We also screwed the cap to the upper spacer strip between the bracket positions.
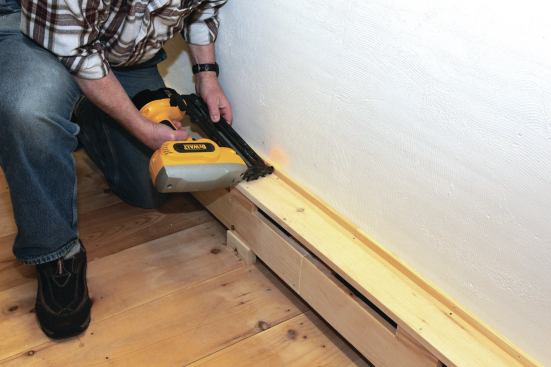
We didn’t try to scribe the top board to the wavy walls of the barn. Instead, we nailed in a thin finish strip to cover any gaps caused by the uneven walls. In the end, we were able to construct around 40 feet of baseboard cover in less than five hours. The heat has been on constantly for almost three months and there has been no wood movement at all.
The design was perfect for this rustic studio, and it would be easy to upgrade the design using just about any type of wood to match a home’s interior. But to make baseboard covers with a more finished look, I would seal or finish every surface of the components before assembly.


