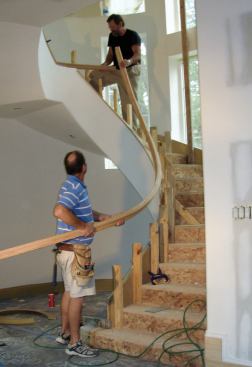


Thanks to bending rail, it’s not that difficult to form curved handrail sections for a circular staircase on site. But cutting the fittings and assembling the rail can be tricky, especially when the stair also has doglegs or landings that alter its run. These transitions have to be finessed to make the handrail look as if it uniformly follows the steps – even though the rail height keeps changing from tread to tread.
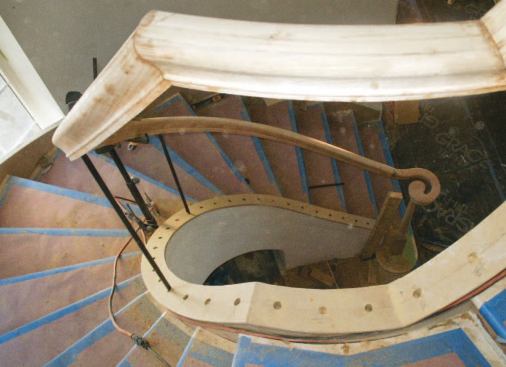
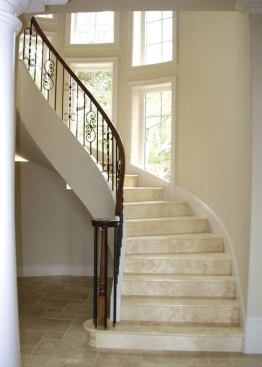
I recently built a circular staircase that has a short landing in the middle and a dogleg at the bottom after three straight steps. In this article, I’ll explain how I installed the balustrade, which curves continuously from the starting volute up through these transitions to a level landing rail at the top, staying within the code-mandated 34 to 38 inches the entire way.
Materials
When I first began building curved stairs more than a decade ago, installed bending rail resembled Baltic birch plywood, with its telltale stripes. Today most manufacturers do a much better job of matching wood colors in the interlocking pieces that form the handrail. For this project, I ordered two 16-foot lengths of 2 1/4-inch-wide red oak bending rail, matching fittings, and iron balusters from WM Coffman (800/346-8435, coffmanstairs.com) through a local vendor; on other jobs, I’ve used online rail-parts sources to get similar quality with better pricing.
This rail was shipped with solid poplar bending mold, the profiled forms that orient and protect the molded edges of the rail when the rail laminations are clamped together. Solid poplar is strong and bends uniformly, so I prefer it to finger-jointed bending mold, which tends to break if not reinforced with fiberglass strapping tape.
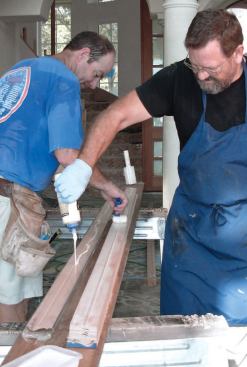
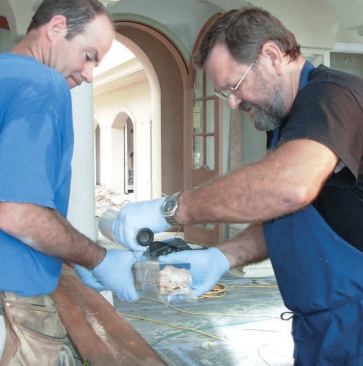
Glue. The only glue I use with bending rail is Titebond II Extend (800/669-4583, titebond.com). It wets out easily, and because it’s waterproof it can be used for both interior and exterior applications. Most important, it tacks slowly, which allows the handrail laminations to slide around in the bundle while the rail is being clamped into shape. With about 30 minutes of working time to spread glue on the laminations, wrap the bundle every few feet with plastic, and form the rail sections, my partner and I had to work quickly – but we didn’t have to rush.
Bending the Rail
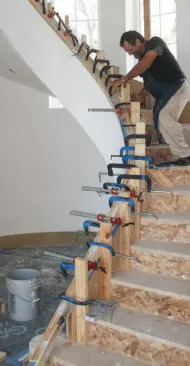
Since this was a closed stair, I formed the three handrail sections on its curb. I made sure that the curb was leveled to the stair’s radius lines before capping it with two layers of 3/8-inch-thick MDF. Then I screwed 2×4 blocking into each riser and against the curb to act as forms and clamping surfaces. I had a bucket of shims I could use to center the glued-up rails over the curb when we clamped them into place, but in this case the bundle thickness happened to equal the curb width exactly.
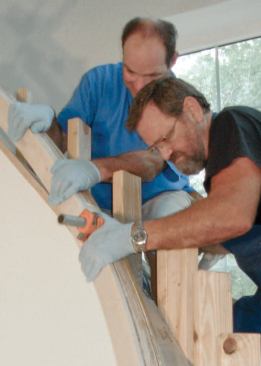
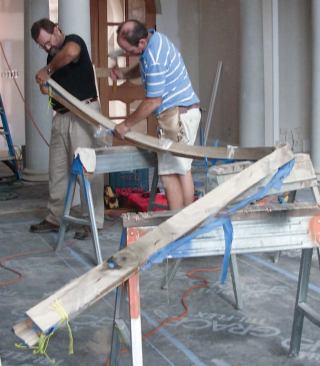
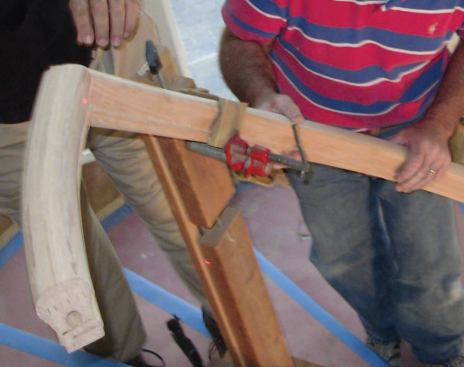
Not only do rails have to bend, they also need to twist as they rise up the staircase; for every 180 degrees of rotation, a rail must twist more than 90 degrees (the math is complicated, but the steeper the stair, the more the rail must twist). To achieve this, I fasten the middle of the bundle with a pipe clamp, then twist the bundle as we pull it back against the blocking.
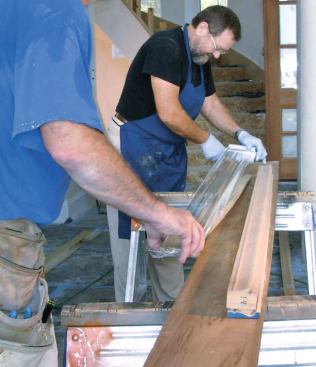
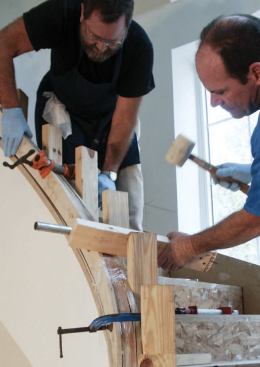
Clamps. With the rail twisted and pulled into shape and bottomed on the curb, we clamped it everywhere we could, typically with at least one clamp per riser and two per tread. At each end, I clamped a 1/2-inch-thick wedge between the rail and the blocking to overbend the rail slightly and account for springback.
On curved handrail projects I use all the clamps I own, but I particularly like 6-inch and 8-inch C-clamps. They’re just as strong as bar clamps, and they’re deep-throated enough to reach the middle and bottom of the rail. If these areas aren’t compressed tightly against the blocking, the layers tend to separate and will need to be reglued and reclamped.
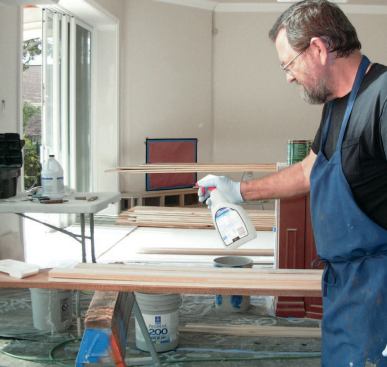
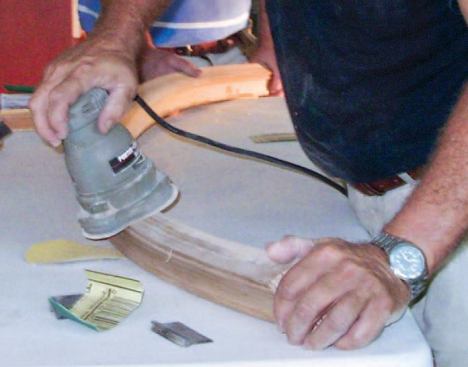
Cleanup. Once the rails were clamped, I tried to clean up as much of the glue squeeze-out as possible. To minimize springback, I waited 72 hours before removing each bent handrail section from its form. After pulling off the plastic wrap and bending mold, I removed dried glue with a card scraper and smoothed the bottom of the rail with a random orbit sander. I used a set of Tadpole profile sanding grips to clean up the rail’s beads and hollows.
Rail Assembly
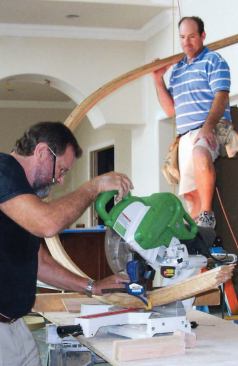
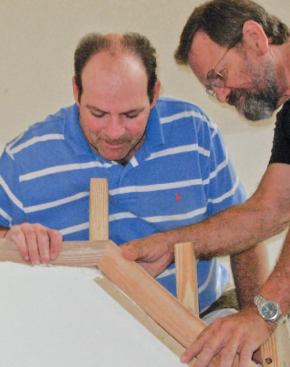
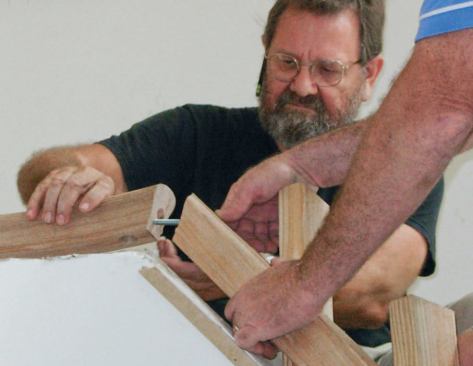
On a straight handrail, the rake angle of the stair determines the cut angles for fittings. I can register cuts against the miter saw’s fence, confident that the saw will cut the indicated angle each time a piece of straight wood is placed against it. In curved work, I determine joint angles and set up my miter saw using short pieces of handrail scraps. Instead of registering cuts against the saw’s fence, I register them against the blade with the help of an offcut clamped to the right of the blade.
I typically begin with the longest rail section. After setting the miter angle on the saw, my helper and I position the rail with the cutoff end clamped to the fence. To hold it steady, I support it with a piece of bending mold placed between the fence and the rail section. I assume that the first cut is 90 degrees to tangent, so I don’t rotate the blade at all. After making the cut and testing the fit, I tap the offcut to the left slightly – about half the width of the saw blade – rotate the blade a degree or so as needed, and reposition the rail section so that the two rail faces match together again. When I make the new cut, the offcut records the new angle and becomes the reference point for the next cut.
It usually takes several adjustments to get the fit precisely right, so I always start long – I don’t want to cut a section short. Only when I’m satisfied that the cut angles are perfect do I make final cuts.
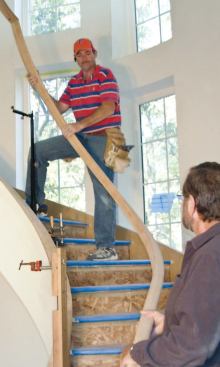
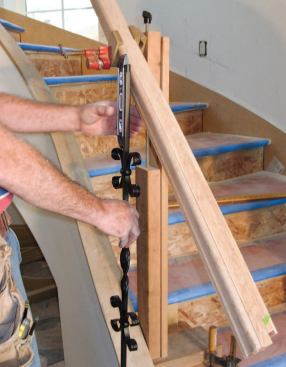
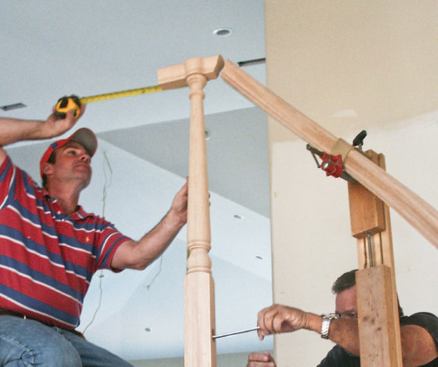
I fastened the sections together with rail bolts but without glue and raised the assembly into position using rail jacks so that I could fit the starting volute and upper tandem cap. Since these have to be level in all directions, they need to be installed while the rail is up in the air and in its final position.
Upper and Lower Fittings
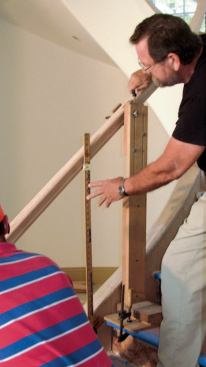
I build a lot of stairs, and to help install their handrails I’ve developed a number of different jigs, including the rail jacks I used here to hold the assembled rail above the curb (see “A Stairbuilder’s Tool Kit,” 1/11). I centered the handrail over the curb using spacers and bending mold, and aligned it vertically over a registration point marked with my plumb laser at the joint between the lower handrail and the middle landing.
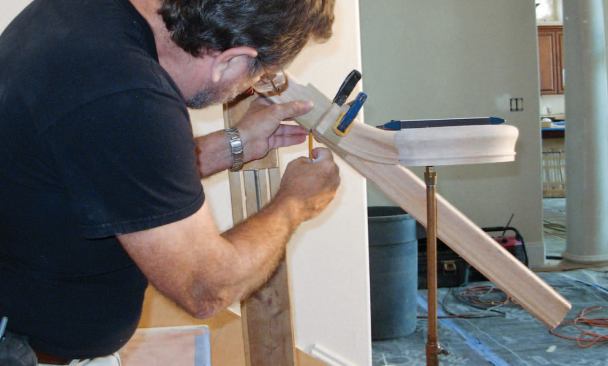
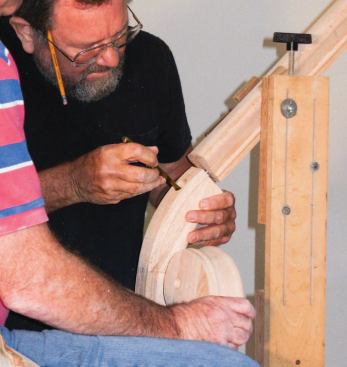
Starting volute. After cutting the easing on the lower volute to the proper angle, I marked the centerline on the curved end of the starter step and estimated the position of the starting newel’s center point. Then I clamped the volute in place, plumbing up from the centerline to a small pilot hole I had previously drilled in its center.
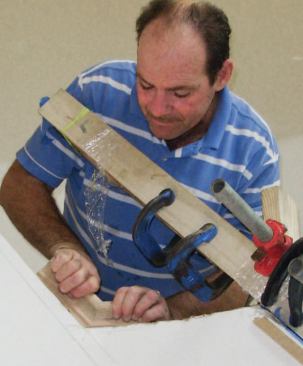
When I clamped the volute to the rail, I steadied the assembly with a couple of pieces of bending mold placed back-to-back between the volute assembly and the handrail. A piece of squared-off bending mold is perfect to use as a guide for marking the cut, because it will produce a straight line on the convoluted handrail and confirm that the cut is correct if it butts up squarely against the end of the volute.
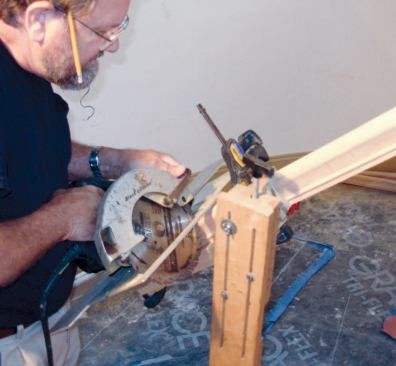
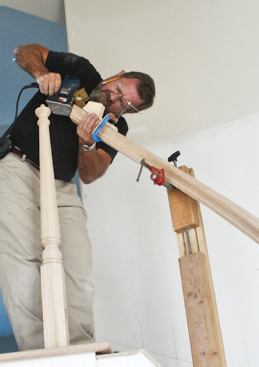
This is a square cut, and I made it in place with an 8 1/2-inch circular saw guided by a shooting board. I clamped a 2×4 under the rail above and below the area to be cut to support the pieces and prevent movement during the cut.
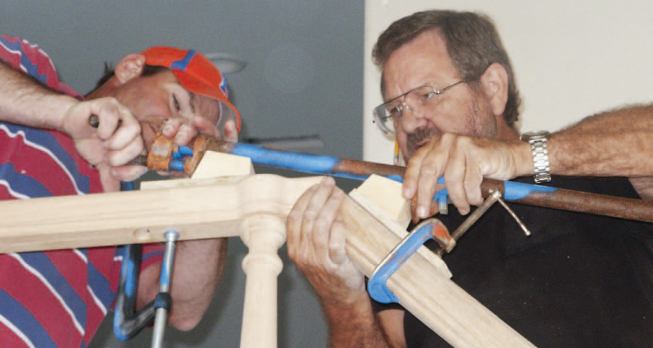
When I attached the volute to the handrail with a rail bolt, I used pieces of bending mold to align the bead. I know that the other faces can be sanded smooth without changing the presentation of the handrail, but the bead is a detail that can’t be altered.
Tandem cap. At the top of the stair, the handrail transitions to a level balcony rail that is 42 inches above the floor (as measured to the top of the rail). After installing the lower newel post and attaching the handrail to it, I re-established the rail’s registration with the laser and re-positioned the rail. Then I marked the intersection of the handrail with a 42-inch-high level line and cut the tandem cap to one-half that angle. On a pitch block, this is the angle from rake to level.
I cut the handrail to the same angle, again using a circular saw and shooting board, then refined the cut on the tandem cap until the fit was perfect. The tandem cap is fastened to the level rail with a rail bolt, and I used a small biscuit and epoxy to join the rake and level sections.
Glue-up. Before gluing it together, I set the handrail on the newels and checked that the volute and upper tandem cap were perfectly level. Instead of Titebond, I used Loctite Hysol E-20HP epoxy (800/786-6272, loctite.com) so I didn’t have to size the end-grain joints. I always try to get the joints as pretty as possible, but if things are not perfect (and they never are), I can hand-sand the rail joints smooth with my Tadpoles.
Balusters
Iron balusters are often used in patterns that complicate the layout. At the start of every project, I send my clients to an interactive baluster design program (cheapstairparts.com) where they can select different styles, visualize their placement, and settle on a design. Using their pattern, I can then determine the exact baluster spacing between each set of newels and generate a bill of materials.
Layout. The landing is a central focal point on this staircase, so the design started there with a scroll. I walked off the baluster layout in both directions on the curb’s centerline with a pair of dividers. Then I plumbed up to the handrail and used my dividers to start walking off that layout. Because the rake angle doesn’t stay consistent on a doglegged circular stair, I checked that every fourth point was plumb and adjusted my dividers accordingly to maintain the 4 1/2-inch-on-center layout.
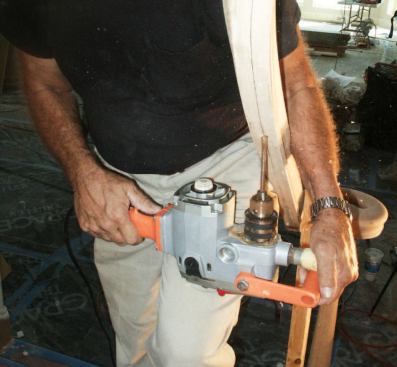
Installation. I used a right-angle drill equipped with a couple of stick-on bull’s-eye levels to bore 1/2-inch-diameter baluster holes in the handrail and 5/8-inch-diameter holes in the curb. The holes in the rail are one inch deep, while most of the holes in the curb are only 1/4 inch deep. Every third layout mark, though, where there was a bar rather than a patterned baluster, I drilled a 2-inch-deep hole. After cutting and dry-fitting the balusters, I sanded and stained the handrail, then finished it with several coats of waterborne polyurethane varnish.
The long bar balusters stabilize and reinforce the rail, so I installed them first with the rail still securely held in place by the rail jacks. I filled the handrail holes with Polyseamseal clear adhesive caulk (800/624-7767, polyseamseal.com), which won’t drip and easily cleans up with water. On the curb, I filled the deep holes two-thirds full with Simpson SET anchoring adhesive (800/999-5099, simpsonanchors.com). Since I couldn’t use rake shoes on this job, I held the balusters in position with a pair of narrow wedges inserted into the hole. When I installed the shorter balusters in the 1/4-inch-deep “cup” holes, I filled the cups with Loctite epoxy, then gently popped those balusters in place and cleaned up any squeeze-out.
After the epoxy set, I removed the wedges from the deeper holes and patched around all of the holes in the curb with Bondo. Before turning the job over to the painters, I always thump each baluster with my hand. If I get a deep thump, it’s a solid installation; if the thump is tinny, I need to secure the baluster better with more epoxy.
Cost
I used 32 lineal feet of bending rail at $18 per foot to build this handrail. The fittings and newels added another $214 to the total, while the balusters for the raked part of the balustrade (there were several balconies, too) cost about $600. It took about 46 man-hours to bend the rails and assemble the balustrade, though this total doesn’t include wait times for the glue to dry. It also doesn’t include the considerable time I had to spend fine-tuning the inside and outside skirts on the stairs or leveling and capping the curb.
Bruce Abernathy is a stairbuilder in Niceville, Fla.


