For years I avoided building ladders because unlike the code guidelines for stairs, those for a safe ladder were always a bit fuzzy to me. Then a few years ago, I found out that Custom Service Hardware (CSH) offered kits that eliminated the guesswork of building a library ladder. CSH sells kits with prebuilt ladders as well as kits with just hardware, and when a client requested a library ladder to access built-in bookshelves that we’d built in a bedroom, I jumped at the challenge. I also saved them a little money by building the ladder myself, out of maple that matched their hardwood floor.
Ordering the kit. We’d talked about a library ladder when we were building the shelves, so I made stiles and rails that were large enough to attach the mounting brackets for the ladder track to. Before placing the order, my clients selected the style and finish of the hardware, and they opted for bottom wheels that lock when you put weight on the ladder. They also selected the “captive roller” system, with two sets of rollers that fit around a cylindrical track to hold the top of the ladder. (Other options include top rollers that let you move the ladder between two tracks, and roller and track systems that allow the ladder to travel around a corner).
I called CSH with my client’s selections and the overall height of the built-in cabinets, and the company helped me determine the exact kit to order. I gave CSH the wall-to-wall measurement for the length of the rail (because the room was more than 8 feet wide, we would have to use two track sections with a splice kit), along with the bracket style. Within a week, the kit arrived at my shop.
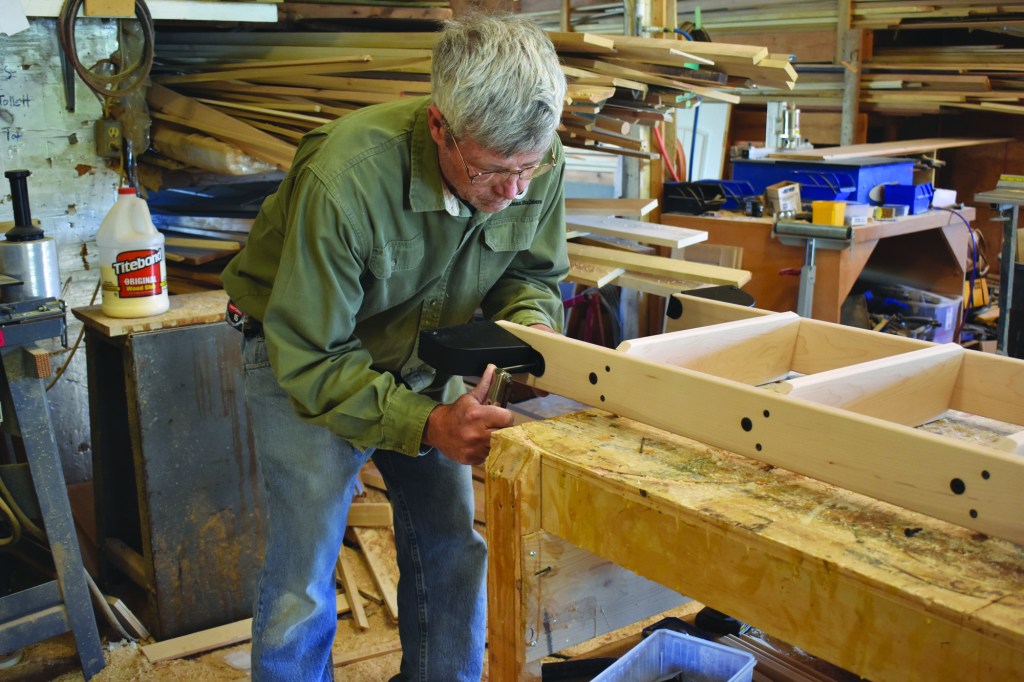
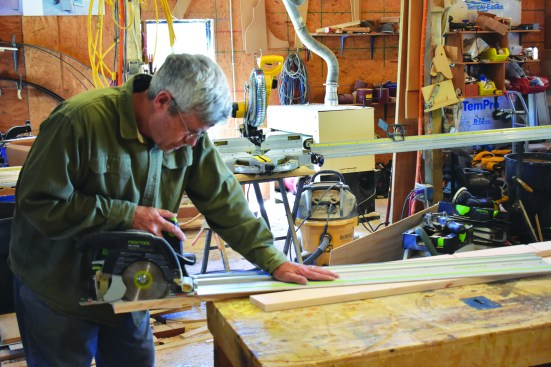
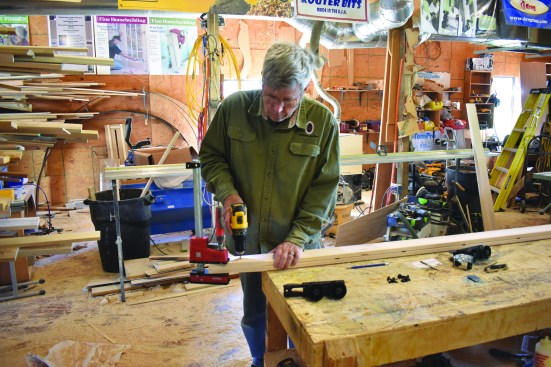
The author tacks two side rails together for milling.
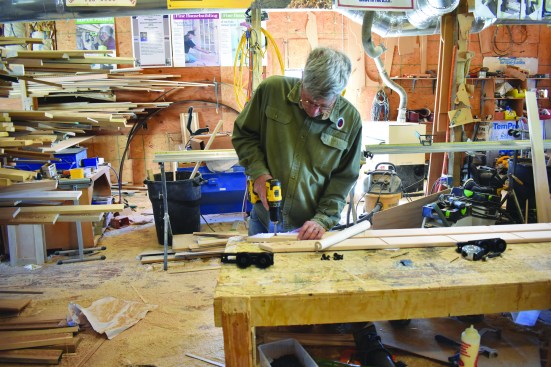
He spaces the treads.
Making the rails and treads. CSH offers an online guide with the dimensions and angles for making your own ladder. Building the side rails began with selecting the flattest material I could find. Because of the work involved in milling the side rails, I decided to make a spare set of rails for a future ladder. Following the CSH guidelines, I made the finished rails 3 1/2 inches wide and 13/16 inch thick. I ripped the rails 3/16 inch oversize and straightened one edge on a jointer. To true the other edge, I ran the stock through a planer on edge.
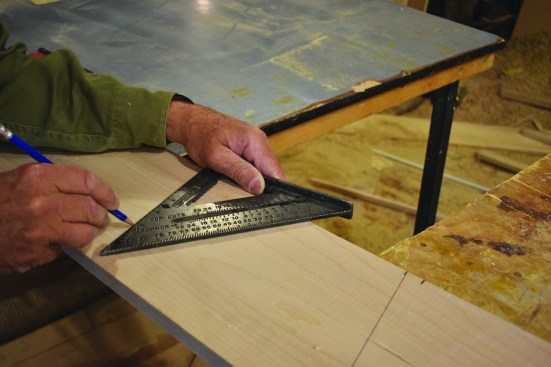
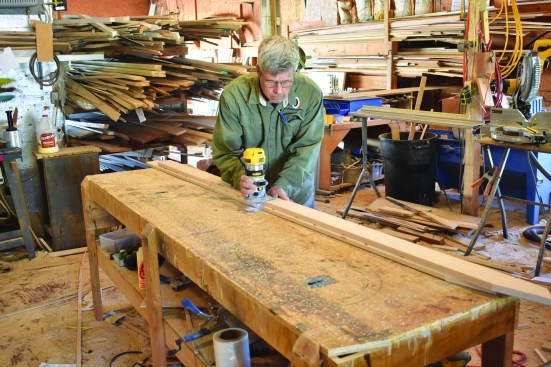
Then he draws layout lines with a rafter square.
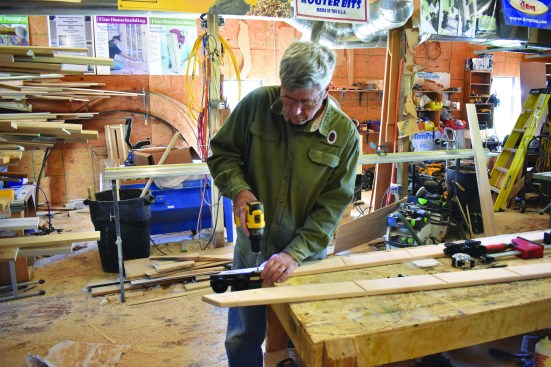
A stepped jig guides a router to cut the dadoes.
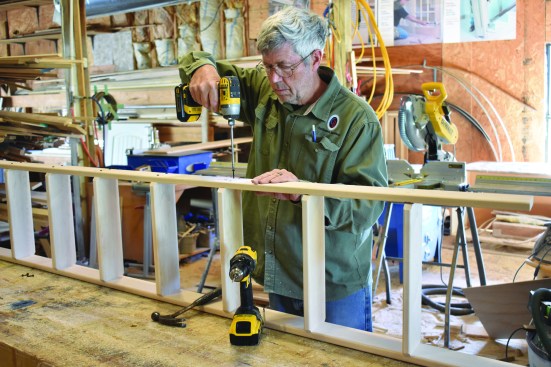
The guidelines recommended fitting the ladder treads into shallow dadoes cut into the rails at a 12-degree angle. Before cutting the dadoes, I tacked a scrap of 1-by stock to join the ends of each pair of side rails while I laid them out and routed them. I gave the treads 10 5/8 inches of rise between steps and drew layout lines with a rafter square set at 12 degrees. I made a stepped jig to guide the router for the dado cuts, with the step width being the distance from the edge of the 3/4-inch-diameter dado bit to the edge of the router base. I clamped the jig to the rails with the edge positioned on the layout line, and then let the router base travel along the edge of the step on the jig.
He makes a cut at the top of each rail.
The edges are rounded over.
On the bottom of each rail, I cut a 12-degree angle aligned with the dadoes for the bottom rise. With a track saw, I cut the top angles on each rail at 78 degrees—the complementary angle to the tread angle.
To soften the sharp edges on the rails, I ran a 1/4-inch round-over bit along every edge (6). I test-fit the upper rollers that mount along the 78-degree cut, then marked and drilled the mounting-hole locations.
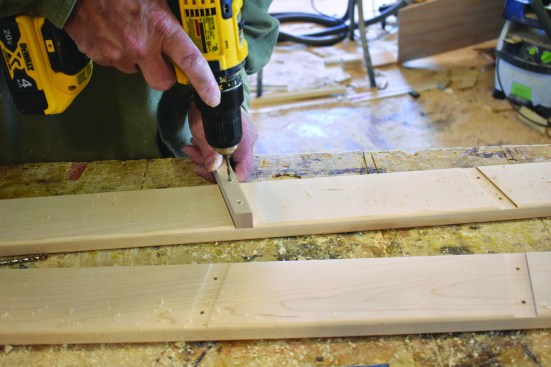
The author drills holes for the rollers …
… and a pilot hole for the top rung.
By comparison, the treads were easy to make. The finished treads were 4 inches wide, and I used the same milling process for the treads as I did with the rails. Because I used a 3/4-inch-diameter router bit to cut the dadoes on the rails, I planed the boards to exactly 3/4 inch thick and rounded over all the edges. Then I set up a stop on the miter saw and cut the treads to 14 5/8 inches, which gave me a ladder 16 inches wide. At 4 inches deep, the treads were slightly deeper than the rails, so I clipped each corner slightly at a 45-degree angle.
Building the ladder. Every library ladder has a turned rung between the tops of the rails where the rollers mount. I could have gotten one from CSH, but for this ladder, I turned a simple dowel on a lathe in the same maple as rest of the ladder. I cut the dowel to an overall length of 15 3/8 inches, and made 1/2-inch-long by 3/4-inch-diameter sections at each end to fit into round slots in the rails.
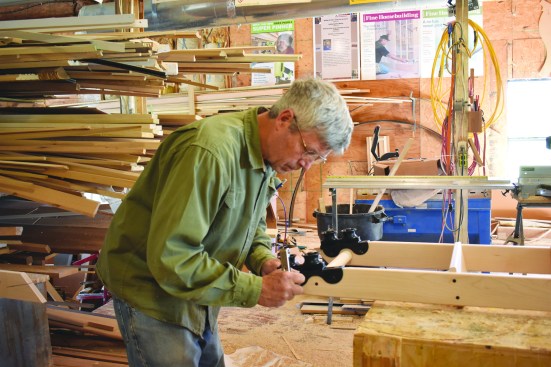
To install the dowel, I first clamped two opposing sides together, lined up the ends, and drilled a tiny pilot hole through both sides (8). I centered the pilot hole between the holes I’d drilled earlier for the rollers, and using a 3/4-inch Forstner bit, drilled a 9/16-inch-deep hole on the inside of each rail, using the pilot hole to start the bit.
He drills a slot for the top rung.
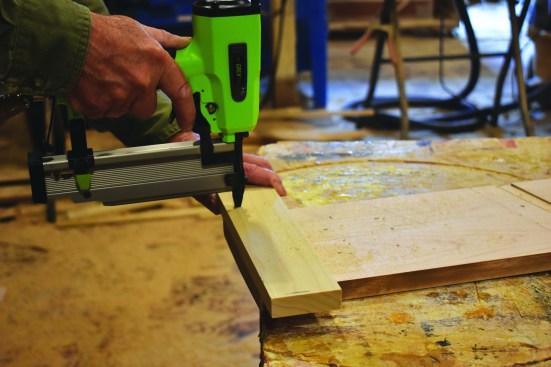
A jig is used for the tread attachment screws.
Because the treads would be held in place with exposed screws, I wanted uniform spacing for the screw heads. I made a drill guide out of 3/4-inch stock that fit into the dadoes to drill screw holes for each tread.
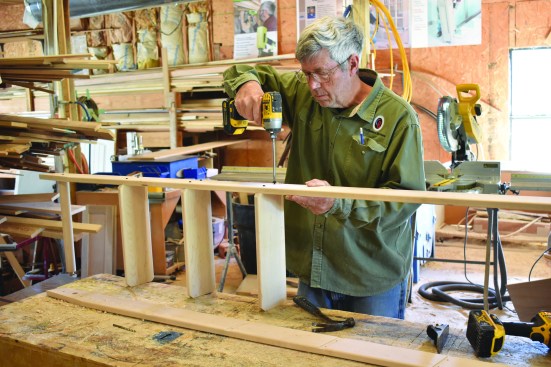
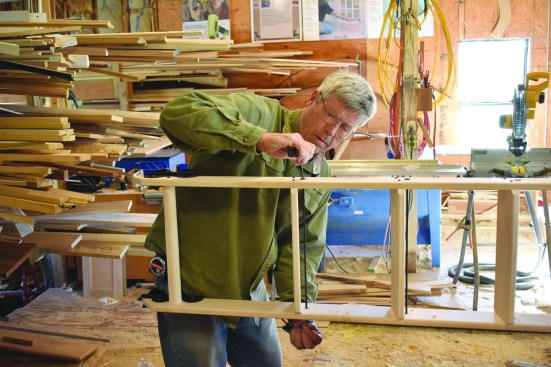
After predrilling for the screws, the author attaches one rail to the treads and the top rung.
He then flips the assembly over and attaches the other rail.
To ensure that everything would go together smoothly, I test fit the treads, shaving a little off the ends with a block plane to slide them easily into the dadoes. To assemble the ladder, I slipped the treads into one rail, predrilled holes in the treads, and drove in a pair of the 1 3/4-inch washer-head screws that came as part of the kit.
When I’d attached the treads and the top rung to one rail, I flipped the ladder over and attached the opposite rail (12). After attaching the treads to both rails, I attached the top rollers.
The author attaches the roller hardware to the tops of the ladder rails.
After drilling holes, he installs the spreader rods, which are held at each end with cap nuts.
The ladder has step support rods below each tread to keep the rails from spreading and to keep the ladder rigid. I should have drilled the holes before assembling the ladder, but I was able to drill clean holes by backing up the holes with a scrap block to keep the wood from blowing out. The 23/64-inch holes were centered on the rail and located on a line 7/8 inch below the screws for each tread. Each end of a support rod is threaded with a cap nut that screws onto it. It only took a few minutes to slip the rods in place and tighten them with a pair of Allen wrenches.

The bottom roller hardware is the last part to attach to the ladder.
The last shop task was attaching the bottom rollers. The rollers have metal tabs that wrap around the bottoms of the rails and provide a lot of strength. One bolt and one screw hold each bottom roller in place. Even though the painter needed to finish the ladder before the final installation, I wanted to test fit the ladder and install the track, so I loaded up everything and headed to the jobsite.
The cylindrical track came in sections that were cut to fit the built-in shelves. Brackets slide into the track on the first side and attach to the shelves. The ladder then slides onto the track.
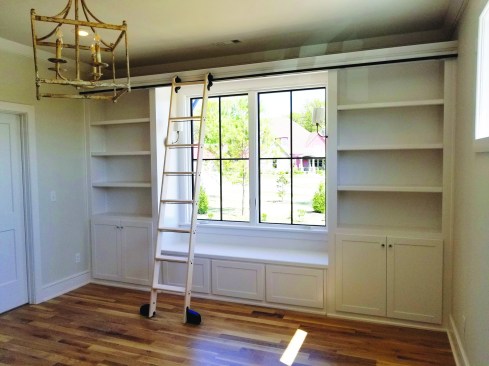
After inserting the splice hardware into the track (16), the second section attaches to the first, installed in similar fashion. The finished ladder is handsome and useful for accessing the bookshelves.
Ladder installation. The top ladder rollers travel on a cylindrical track that mounts on horizontal L brackets. Installing the ladder was a two-person job. First, we slid the mounting brackets into the slit in the track. Then one person held the track up while the other attached the brackets to the shelves, spacing them no more than 32 inches apart. We then slipped the ladder onto the installed section of track. After cutting the second track section to length, we secured it in place with the mounting brackets and connected the two sections with splice hardware inserted into the track.
Photos by Gary Striegler


