
Dan Bugsch
I welded a small steel plate and a 1/2-inch nut to the bottom of…
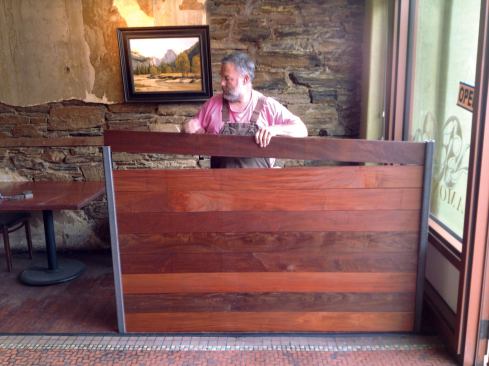
Several years ago I built a popular restaurant in Sonora, Calif., called the Diamondback Grill. My client, the owner of the restaurant, contacted me at the beginning of last winter. He’d been getting comments from diners about the cold air coming in the front door, so he asked me to build two small half-walls to separate the dining room from the entry area.
The restaurant’s interior features a lot of bare steel, and for the room dividers the owner envisioned something simple and streamlined yet strong enough to meet code requirements. We chose a straightforward design: 5/4-by-6-inch ipe decking boards stacked between two steel posts to create thin, elegant dividing walls.
The only catch was that these walls had to be independent structures with no other walls to tie into for rigidity. Fortunately there was a basement below the dining area with good access. So I planned to use the floor structure to give the posts their strength.
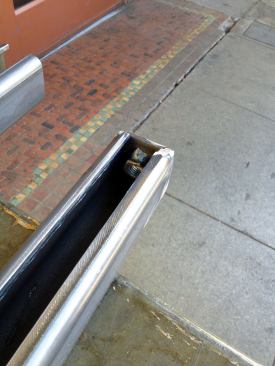
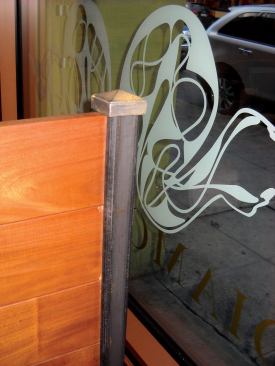
The 2-inch-square tubes made of 3/16-inch-thick steel came from Trotter Welding and Steel Supply in Sonora. I mounted a 7 1/4-inch Diablo 48-tooth “Steel Demon” blade on my table saw and ripped a channel in each post, using a short length of the decking to gauge the width of the channel. The blade cut through the steel almost as easily as a regular saw blade cuts through wood.
Cutting steel produces a shower of tiny, very sharp shards exiting at a rather high velocity, so you need to protect your eyes and any exposed skin while cutting. And although the steel “sawdust” is supposed to be warm but not hot, I cleaned out the wood dust from under the table saw before I started cutting the steel, as a precaution against fire. I ripped all four posts—more than 40 feet of rips—easily using the same blade.
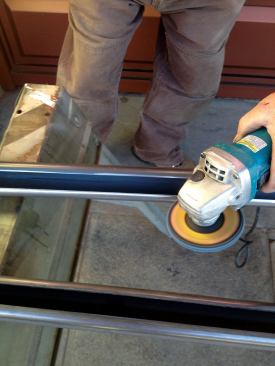
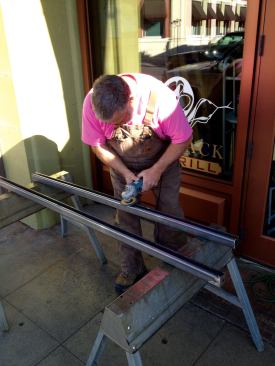
I welded a small steel plate and a 1/2-inch nut to the bottom of each post for attachment and used a flap wheel and an angle grinder to remove burrs from the edges of the ripped channels. I also smoothed over the welds on the bottom ends of the posts to ensure that they didn’t stick out past the edge of the tubes.
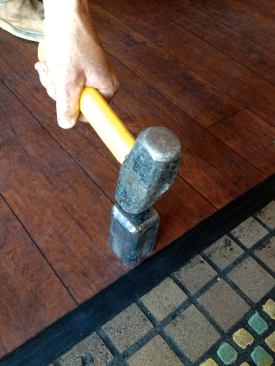
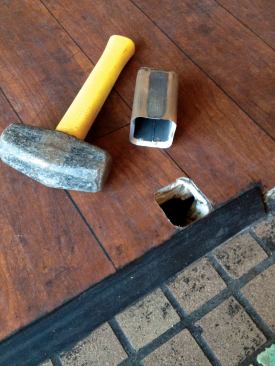
To send the posts through the floor with a perfectly tight fit, I needed to cut holes the exact shape and dimensions as the steel tubing. These square tubes have rounded corners with 3/8-inch radii, and I could have created the holes by drilling the four corners with a 3/4-inch drill bit and then chiseling out the material in between those holes. But to get the closest fit, I fabricated a square chisel from a short section of the tubing. Inspired by hollow chisel mortisers for making square holes on a drill press, I ground and filed the inside of the tube section to create a sharp cutting edge around the perimeter. I welded a plate on the other end so that I could drive it with a hammer.
After driving through and removing the top layer of linoleum, I drilled holes just inside my initial cut and continued to drive the square chisel all the way through the floor, alternately driving and drilling as necessary.
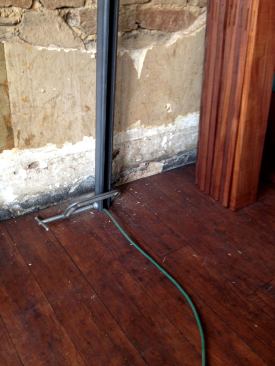
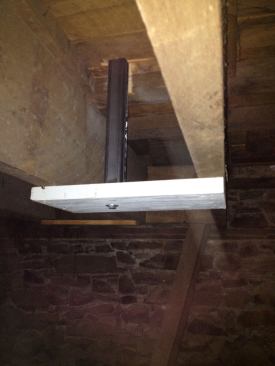
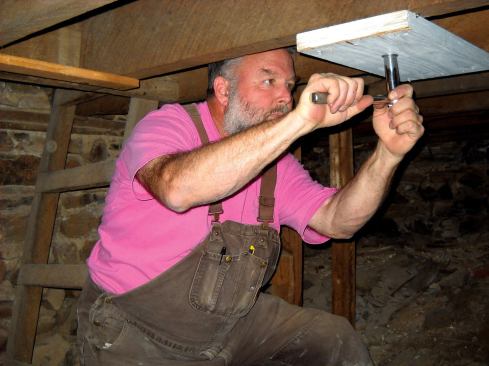
I slipped each post through a finished hole and held it at the proper height using a C-clamp. In the basement, my helper bolted a 2×8 block to the bottom of each post. While I kept the posts perfectly plumb with a level, he screwed the blocks to the bottoms of the floor joists. The channel in the post was great for running an extension cord into the basement. When finished, I tightened the bolts until the washers slightly compressed the surface of the block.
Next came the ipe boards, which I cut about 1/8 inch short so that they wouldn’t bind as they slipped into place. Because I’d cut the channel in the tubing for a friction fit, no mechanical attachment was necessary. I simply slipped the boards into the channels at either end, stacking them on top of one another. I cut a slot in the center of each board with a biscuit joiner and used a single biscuit to keep the boards aligned with one another. I dry-fit the biscuits without glue so that the boards could be removed and replaced easily in the event of damage.
I topped each post with cast steel caps from Trotter Welding & Steel Supply, in Sonora, Calif. These are designed to be welded in place and have a fairly loose fit. But I wanted them to be removable, so I peened the top of each post with a hammer and cold chisel just enough to create a friction fit. I then tapped the caps into place and made sure that they couldn’t be removed by hand.
I finished the ipe with two coats of tung oil and left the steel bare to acquire a patina of scratches and a light coating of rust over time. That evening my wife and I were the first customers to enjoy dining in the newly protected area. The walls did their job of fending off the cold and the food tasted better than ever.


