Tile Types
Wear Ratings
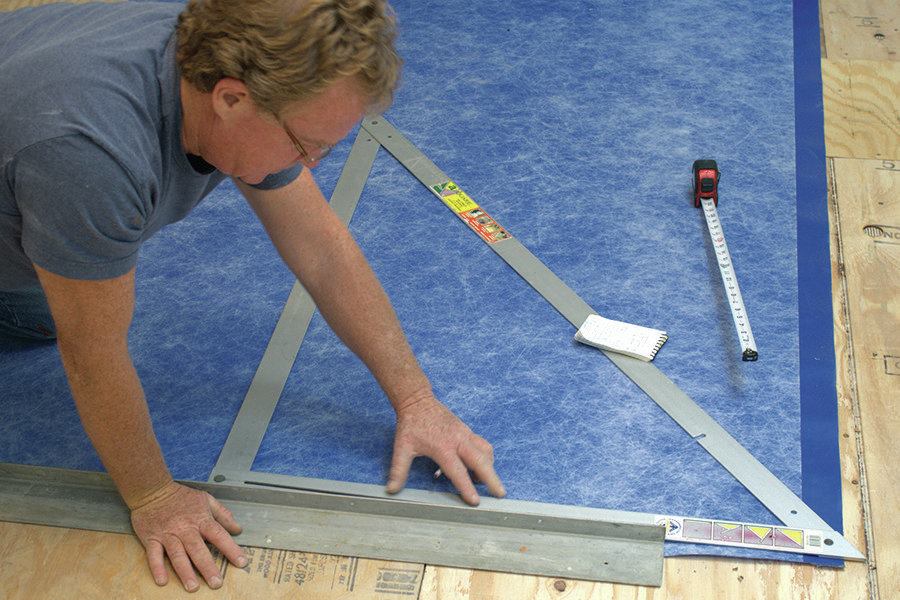
Most manufacturers use the Porcelain Enamel Institute (PEI) guide to rate the durability of tile (Figure A).
Water Absorption
The capacity of a tile to absorb water is determined by its firing temperature, duration of firing, and composition of the clay. Ratings range from non-vitreous (porous) to impervious (Figure B). Do not use highly absorptive tile, such as quarry tile, in wet areas. If this can’t be avoided, install waterproofing under the tile and add a latex additive to both the thinset adhesive and grout. Avoid mastic set tile in wet areas.
Glazed and Unglazed Tile
Glazed tiles have either a glossy or a matte waterproof surface glaze. Nonskid tiles have an abrasive grit baked into the glaze.
Mosaic tiles have the color added to the clay itself, so it goes all the way through the tile. They’re suitable for nearly any surface.
Quarry tiles are usually deep red and unglazed. They’re porous, and are mostly used for interior floors. They must be sealed after installation or they will be easily stained. Install with thinset (see Setting Tile).
Paver tiles are also used for floors and are usually unglazed, requiring sealing. The machine-made types are typically vitreous and non-vitreous. The hand-made type is non-vitreous. Install with thinset.
Floor vs. Wall Tile
Glazed wall tiles come in a wide range of colors and designs, and are easy to clean. However, they can get scratched when used on countertops or floors since the glaze is relatively soft. Glazed floor tiles come in fewer colors but are tougher and often have a slip-resistant surface.
Tile Substrates
Tile may be laid over concrete, plywood, drywall, plaster, or cement backerboard. The substrate must be dimensionally stable.
Floor Substrates
Floors should have a maximum deflection of no more than L/360 of the span and they should be level to within 1/8 in. in 10 ft. A wall plane may vary up to 1/8 in. in 8 ft. With thinset installation, however, surface variations should not exceed 1/32 in.
Mortar beds. A Portland cement mortar bed can range from 3/4 to 1 in. thick on walls, and from 3/4 to 11/4 in. thick on floors. It smooths out irregularities in the substrate and can be used nearly anywhere.
Concrete slabs. A concrete slab that will be covered with tile should be steel-troweled and fine-broomed to a smooth finish. Thinset or mortar-bed installations are acceptable. The slab should include expansion joints to prevent cracking (see Expansion Joints in Setting Tile).
Plywood. Plywood subflooring for tile should be nailed to framing spaced no more than 16 in. o.c. While 3/4-in.-thick T&G plywood is preferred, a mortar bed installation can be applied over 5/8-in. plywood; thinset applications require an additional 1/4-in. underlayment of cementitious backerboard (see Cementitious Backerboard, below). When using two layers of plywood, glue and screw the two layers together to stiffen the substrate and reduce the chance of cracking the tile or grout line. Make sure all butt joints fall over joists; do not gap plywood sheets.
Wall Substrates
For walls, 1/2-in. cementitious backerboard (see Cementitious Backerboard, below) is the best option in wet areas, such as bathrooms, though plywood can work if care is taken to support edges and protect against moisture.
Plywood can be used as the substrate on walls. Use minimum 3/8-in.-thick panels if running them perpendicular to the studs. If the sheets must run parallel to the studs, use 1/2-in. panels. Solid blocking should be added beneath unsupported edges. Nail 6 in. o.c. along the edges and 12 in. o.c. in the field. In bathrooms and other moist areas, seal the panel edges with an exterior primer before installation.
Drywall should be installed in the longest lengths possible. Cover taped joints and fasteners with two coats of mud before installing tile. Do not install tile over drywall in wet areas (not even over moisture-resistant drywall).
Plaster should be steel-troweled to a smooth finish with no trowel marks. Ridges should be no more than 1/32 in. in height. Do not install tile over drywall in wet areas.
Cementitious Backerboard
Cementitious backerboard consists of a sand and cement core with either a woven fiberglass skin or a fiber-reinforcing mixed into the core. Both types come in a variety of thicknesses and types, some (but not all) of which are suitable for exterior use. Although these materials are unaffected by water, they do not provide waterproofing since moisture can pass through them. In wet applications, such as a shower pan, a waterproof membrane is also required.
Floors. Use 1/4-in. backerboard over a 5/8-in. plywood subfloor (3/4-in. preferred). Joists should be minimum 16 in. o.c. and level to within 1/8 in. over 10 ft. Embed backerboard panels in a layer of latex-modified thinset mortar spread evenly with a notched trowel. Do not use a thick layer of the thinset to correct an out-of-level floor; this will create a weak spot. Instead, use a self-leveling compound made specifically for tile.
Most cementitious products require a 1/8-in. gap between panels (check manufacturer’s instructions). Also, panel joints should be offset with plywood joints, and no more than two panel corners should meet in one spot.
Fasten boards with either galvanized roofing nails or special corrosion-resistant screws made for backerboard, which can cut their own countersink. Do not use drywall screws, which are too weak and susceptible to corrosion.
Fill the joints between panels with thinset mortar and then cover with 2-in. open-weave fiberglass-mesh tape.
Walls. For wall installations, attach 1/2-in. cement backerboards to studs with galvanized roofing nails or special screws (as for floors). For tub surrounds and shower enclosures, install the panels over 4-mil poly or #15 asphaltic felt hung from the studs. Wall tile installations require 16-in. o.c. stud spacing with horizontal blocking to support panel edges. Steel studs should be 20-gauge or heavier.
Tile Membranes
Water can penetrate any tile system through the grout joints. Membranes can protect the structure from water leakage and protect the tile from structural movement. Membranes are typically applied beneath tile in wet areas, over cracks and control joints in concrete slabs, as well as at the juncture of dissimilar substrates. When used over a crack or control joint, the grout joints on either side of the crack should be replaced with “soft joints” of foam backer rod and high-quality silicone caulk (Figure C).
Membranes come in liquid and sheet varieties:
One-part membranes are liquid coatings that are poured, brushed, or troweled on. They will work fine for a floor that gets occasional spills, but not for a shower stall.
Two-part membranes are composed of ready-to-use or site-mixed liquids and a fiberglass or polyester fabric (Figure D). They are the most practical choice for waterproofing a complex area like a set of stairs leading into a tub.
CPE membranes are sheet membranes available in rolls of different sizes and thicknesses (Figure E). One type that can be used as a water barrier on walls, floors, and countertops is reinforced with spun polyester. The unreinforced type can be used in shower pans and sunken tubs.
Tile Adhesives
Tile may be installed with mastic or thinset adhesives (see chart below).
Both mastic and thinset are spread with the straight edge of a trowel and then combed with a notched trowel. Use a square-notched trowel for large tile and a V-trowel for small tile. The thicker the tile, the larger the notches should be. To test the size of the combed ridges, as well as the consistency of the adhesive mix, press down on a test tile, remove it, and inspect the back. The back should be fully covered with adhesive.
When tiles break, it’s often due to the substrate or installation methods. The video below shows the accepted way to trowel out adhesive to ensure adequate coverage. Troweling in swirls (at one time considered good practice and still common in the field) can create voids that leaves the tile unsupported and in not recommended practice, particularly for large format floor tiles.
Once the adhesive sets on a floor, no one should walk on the tile for 24 hours.
Mastics
These are expensive and come ready to use, but aren’t as strong or flexible as thinsets. They’re suitable for light-duty floors and walls only, but should not be used around fireplaces or in wet areas. They require a smooth backing.
Thinset Adhesives
These come in three types:
Dry-set mortar. This consists of Portland cement, sand, and additives, which are mixed with water at the job. It is often used over mortar beds and concrete slabs, as well as on backerboards, and provides good bond strength and compressive strength.
Latex and acrylic thinsets. These are stronger, more flexible, and more water-resistant than water-based thinsets. They can be used over most tile substrates, but only some are recommended for use on plywood. The additives may be part of the dry mix or may be added as a liquid. Bond strengths and set-up times vary. Check label for specific substrates and applications. Clean up immediately after use.
Epoxy mortar and modified epoxy emulsion mortar. These are suited for high bond strength or chemical resistance. They are well-suited to plywood substrates but will work with any setting surface. Combine with epoxy grout when water and chemical resistance are needed. Careful and precise mixing is required; working times can be short, and cleanup is difficult.
Setting Tile
Floor Installations
On light residential floors under dry conditions, mastic over plywood is acceptable. For better quality with some water resistance, upgrade to a latex-modified thinset approved for use on plywood, or an epoxy mortar and epoxy grout (Figure H). For still better quality and improved water resistance, use a cement backerboard with a dry-set or latex/acrylic-modified mortar (Figure I). Always use a membrane in wet areas, or where substrate movement is expected.
Wall Installations
In dry areas, use standard drywall (not MR board) with either mastic, dry-set, or latex/acrylic-modified mortar.
On wall areas subject to wetting, such as a tub surround, never use moisture-resistant drywall—a.k.a. “M.R. board” or “green board” as a tile substrate. Use a cement backerboard or traditional mortar over a minimum 4-mil poly or 15-lb. felt. Reinforce backerboard joints and corners with thinset mortar and mesh tape. Tile corners, perimeters, and penetrations should be protected with a flexible-sealant expansion joint.

To eliminate most of the absorption problems associated with both mortar-bed and backerboard installations, install a sheet or trowel-applied waterproofing membrane on the surface of the setting bed. This helps isolate the porous setting-bed materials, preventing them from absorbing moisture and germs.
Best practice on tiled walls (as on floors) calls for installation of a sheet or trowel-applied waterproofing membrane over backerboard or a mortar setting bed. An alternative is to use a waterproof backerboard, such as Kerdi-Board (for more, see “Prepping Shower Walls for Tile,” 07/15).
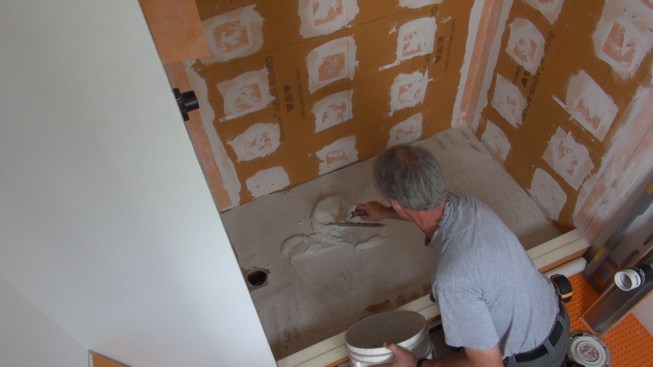
Shower Pans
For a tile shower built on a mortar-bed floor, use a heavy 40-mil plastic pan liner. Wrap it over the curb and seal it in place at the drain with a two-part subdrain assembly, as shown in Figure K.
Some pan liner systems may require a backboard in addition to a membrane over the mortar bed. The installation, however, is relatively straightforward, as the example in this slideshow illustrates.
Countertops
A light-duty countertop that won’t see much moisture can be made using a mastic- or epoxy-based mortar applied directly to 3/4-in. plywood (Figure L). Leave a 1/8- to 1/4-in. gap between sheets and screw a 1x batten under each joint.
For a counter that will get heavy use in a wet location, install a trowel-applied or sheet membrane over cementitious backerboard. Extend the membrane up into the backsplash area.
The backerboard should be laid over a 3/4-inch exterior-grade plywood substrate, attached with a leveling bed of thinset mortar in between. Secure the backerboard with a ceramic- or epoxy-coat hi-lo screws (such as ITW Rock-On screws) or galvanized roofing nails. Do not use of drywall screws.
Use a natural cement-colored grout mixed with a latex additive (or use a polymer-modified grout). The width of the grout joint can vary, but narrow joints (1/8 inch or less) are easier to clean than wide joints. See Grouting Tile below.
Use a heavy-duty sealer as well (not an inexpensive silicone liquid). Most important, include caulked expansion joints around sinks, cooktops, chopping blocks and at the joint between the top and the backsplash, as shown in the illustration below.
Expansion Joints
Expansion joints are needed wherever a tiled surface meets another
material or at a change in plane. In residential work, expansion joints
are rarely needed within the fields of a tile surface, but are needed
where a tile floor meets a wall, where counter tiles meet a backsplash,
sink or cooktop, and at corners in a shower enclosure or tub surround.
Fill these joints with a flexible sealant, not hard grout. Use urethane
sealants for maximum durability, and sanded, colored caulks to match the
color and texture of the grout.
Grouting Tile
Grout comes sanded and unsanded. For joints 1/8 in. or smaller, unsanded grout is appropriate. For joints larger than this, sanded grout is recommended. Use a coarser sand for joints over 3/8 in. wide. The sand adds strength and reduces shrinkage (Figure M). Don’t use sanded grout on shower and tub enclosure walls, since it is difficult to clean and may feel rough.
Tile Grout
Additives. Many installers use latex- or acrylic-modified grouts, or add acrylic or latex additives to standard grout. These additives increase bond strength, water resistance, and flexibility. However, cleanup may be more difficult.
Epoxy grouts are also available for special applications. These are very resistant to chemical staining, making them a good choice for kitchen floors and countertops. However, they require special application skills. A more economical alternative with many of the same benefits is modified-epoxy emulsion grout.
Joint width. This is largely an aesthetic decision. In general, the larger the tile, the wider the joint. A 1/8- to 1/4-in. joint works well for most tile that’s 4×4 in. and bigger. Larger joints look better with irregular tile, but joints larger that 1/2 in. are prone to cracking.
Grout color. Grouts are available in a wide array of colors, and a close match to the tile is usually possible. Gray mortar-colored grouts are a safe choice for most applications. Avoid white grout on floors.
Prep Work for Grouting
Tile-sealing. Acrylic- or latex-modified grout may stain some tile that ordinary grout wouldn’t. Test a soupy mixture of modified grout on the tile surface and, if necessary, seal the tile with a water-based sealant before grouting. All unglazed tile should be sealed before grouting to prevent staining.
Clean joints. Before grouting, remove spacers and adhesive remaining between the tiles. This will prevent discoloration caused by variations in joint depth.
Misting. When working with a non-vitreous tile, dampen the surface and the sides of each tile with a sponge or garden sprayer to keep the grout from drying too fast. In dry, hot weather, do this on all tile. Do not create puddles, however, as they can weaken or discolor the grout. Keep direct sunlight off fresh grout to prevent uneven drying.
Applying Grout
Mix the grout according to the manufacturer’s instructions and apply to a small area at a time using a rubberized grout trowel (not a steel trowel).
The consistency of the grout mix should be stiff enough to hold its shape but fluid enough to fill joints when pressed into place with a rubber trowel. Mix subsequent batches in a clean bucket to keep the old grout from causing the fresh batch to set up too fast.
Work the grout forcefully into the joints, densely packing it before scraping away the excess. Force the grout into joints by holding the rubber trowel at a shallow angle as you sweep it over the tile from several directions. To scrape away the excess, hold the trowel on edge and stroke the surface on a diagonal to the joint direction.
Cleaning. Once the grout starts to set, use a dull knife or the tip of a trowel to slice it out of expansion joints, which will later be filled with caulk. Begin cleaning by wiping the tile with a clean, damp sponge, using a light circular motion, and then make a final pass with the sponge, using long, straight strokes. After the tile dries, remove any grout haze from the surface with a soft cloth or towel.
Clean the face of the tiles before the residue hardens — or you may need to use a special “grout-haze” cleaner later. Avoid using acids or other harsh chemicals since these can harm some glazes.
Curing. Keep the grout moist and loosely covered with kraft paper or plastic sheeting for as long as is recommended — typically several days for grout with latex additives. Also, once the grout sets, no one should walk on the floor for 24 hours.
Expansion joints. Never grout expansion joints, cove-tile-to-floor-tile joints, or joints between tile and another material, such as wood, porcelain, or metal (including the tub lip-to-tile joint). Instead, use a resilient caulk to seal these joints.


