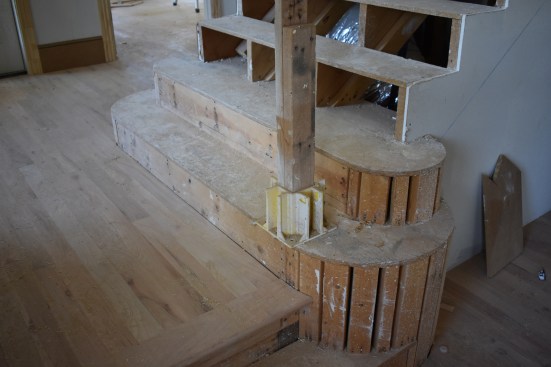
BEFORE
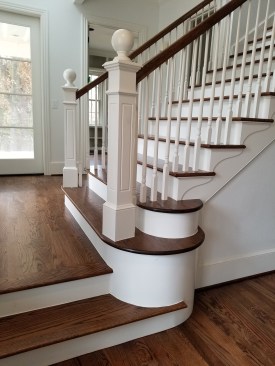
AFTER
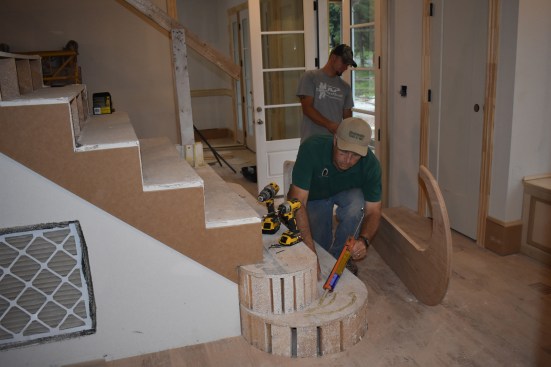
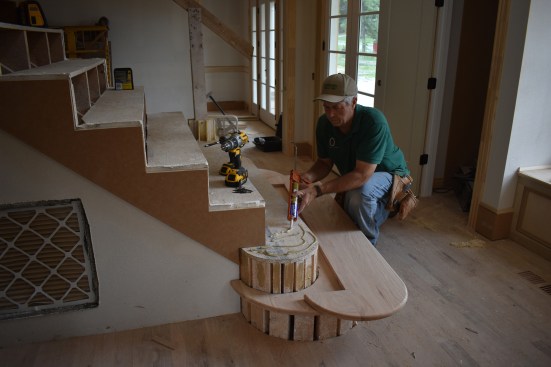
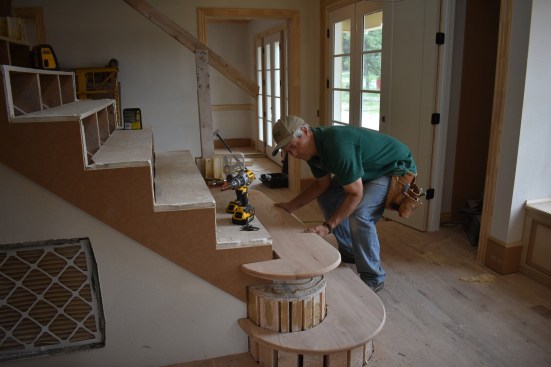
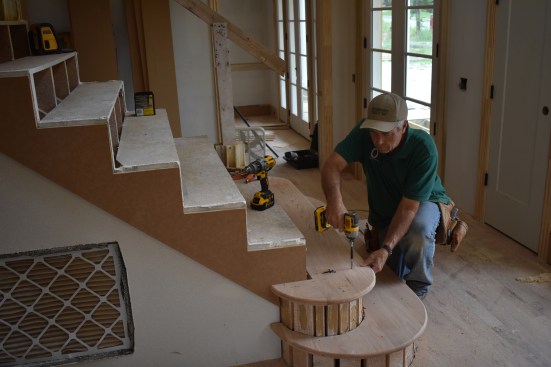
Most of the homes I build have standard stairways with wooden treads that fit between two walls or that have mitered returns and a skirt board on one end. But on a recent project, the staircase in the plans was far from standard. The main stairway featured a double starter step (open-ended treads with radiused ends). Then the stairs stepped down to a lower level with a single tread that fit against the curved riser of the starter steps.
The framer did a great job building a solid support structure for the steps. He created each radius with lengths of 2-by material of various widths installed on end, and then he crafted the rough treads from 3/4-inch OSB subfloor. The resulting frame provided a good, sturdy platform for the steps as well as plenty of fastening surfaces for the curved risers.
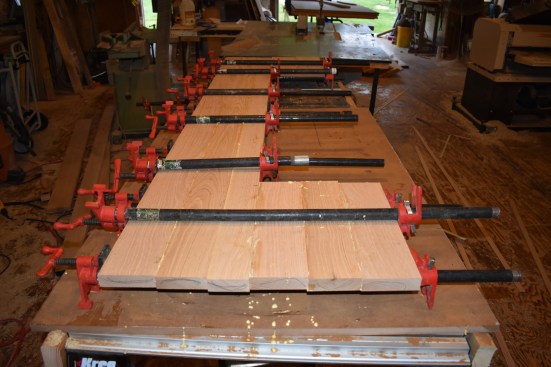
The author glued up strips of 5/4 oak alternating the grain up a…
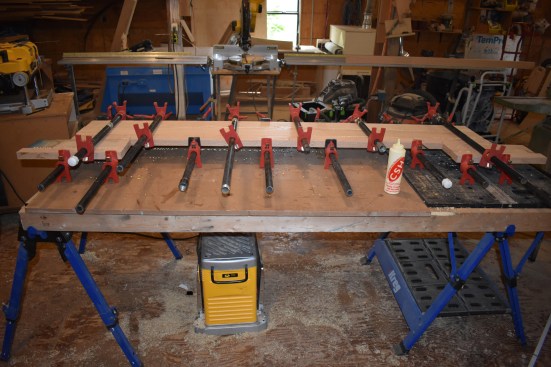
Stair-Blank Glue-Ups
In a perfect world, you could open a catalog and order starter steps that were the right length with the right overhang and that had the right inside and outside radii, but last time I checked, this carpenter’s world wasn’t perfect. The good news is that I enjoy the challenge of custom work like making these treads, and the eye-catching results help cement my reputation as a truly custom builder.
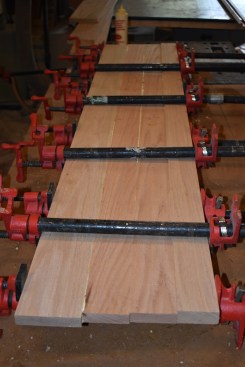
To make these stair treads, I needed to glue up three custom blanks. I made the two starter steps from three 4 1/2-inch-wide rippings of 5/4 oak. To give the tread blanks more stability, I alternated the orientation (up and down) of the growth rings of each board. After clamping the straight-section boards together at the exact finished depth that I needed, I added shorter pieces of board to the ends for crafting the radiused returns.
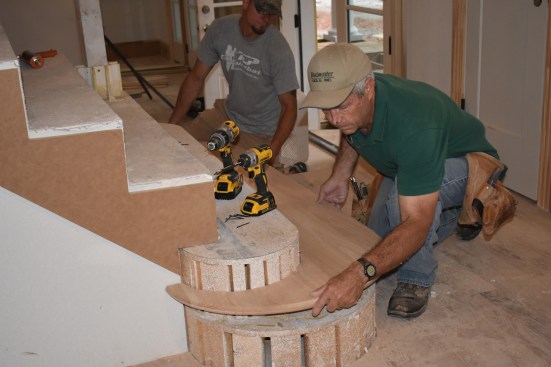
For wide, flat glue-ups, I have a small arsenal of Bessey pipe clamps that I like to use. These clamps have “feet” on each end that keep them from rolling over, allowing me to align multiple boards for a wide glue-up. Alternating clamps above and below the boards that I’m gluing up keeps the assembly flat while the glue is curing. These wide glue-ups require a lot of clamping pressure, and the handles on these pipe clamps make it easy to dial up the pressure for tight joints.
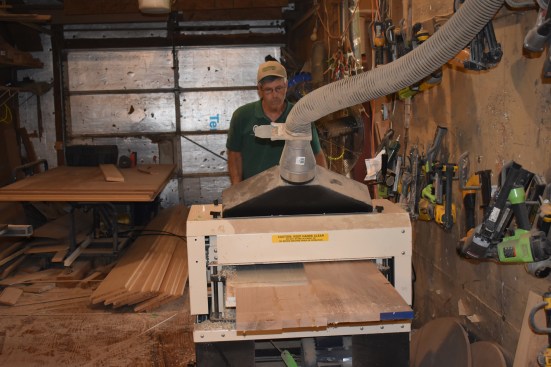
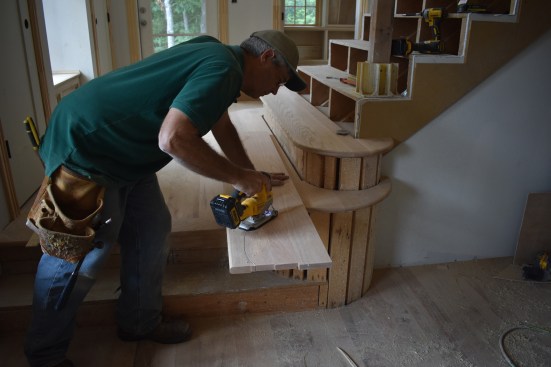
The next step was running the glued-up blanks through a Woodmaster planer. The final width of the lower starter step was larger than the 24-inch planer could handle, so I glued up that blank at just under 24 inches. Then after I’d planed the blank to the 1-inch thickness I needed, I added an extra piece to each side to achieve the required finished width. I attached the add-on pieces using glue and dominoes. The blank for the upper starter didn’t need to be as wide; I was able to feed its entire width through the planer, and I didn’t have to add pieces to it afterward.
The glue-up strategy had to be a little different for the step down to the lower level. The way that step was framed, the height of the rough step dictated that I had to use 3/4-inch-thick stock for the tread (probably with the idea that the finished step could be made from oak flooring). For this step, I glued together three strips of 3/4-inch-thick stock with a strip of 5/4 stock on one edge for the bullnose, which would keep the appearance of the treads consistent.
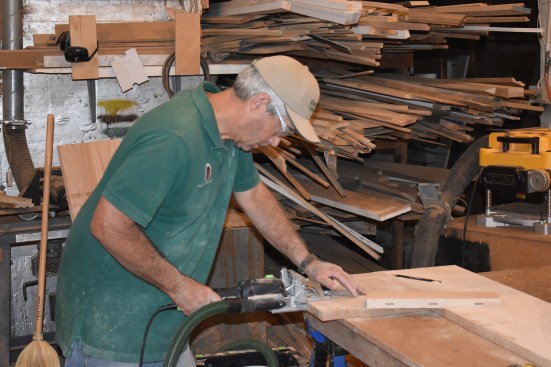
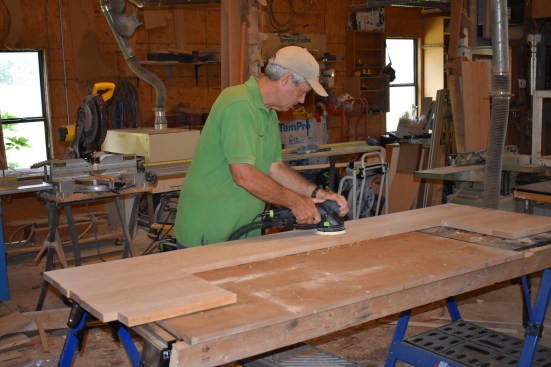
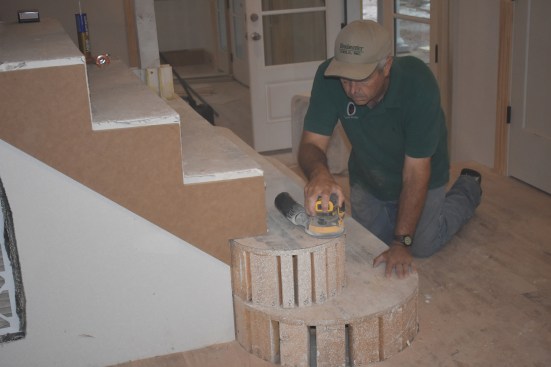
Because of that piece of 5/4 stock, however, there was no easy way to run the blank through the thickness planer. With very little thickness to spare, I flattened the blank with a belt sander. To flatten out a glued-up surface with a belt sander, I first sand 90 degrees to the glue joints until the surface is flat. Then I sand with the joints to remove cross-grain marks. I’ve found that when I start out sanding with the grain (parallel to the glue joints), it’s far too easy to end up with grooves or ruts in the surface. Once I had the last blank belt-sanded flat, I went over all three of the stair blanks with a random orbital sander, and they were ready to take to the jobsite.
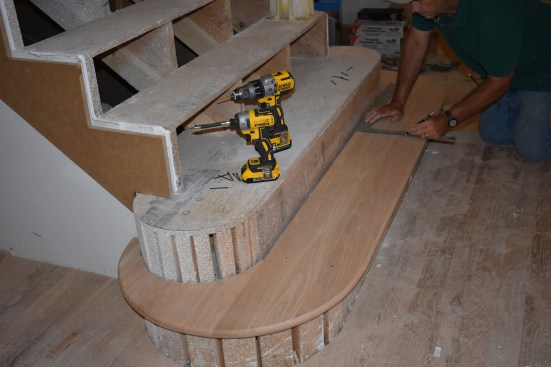
Double Radius for the Lower Step
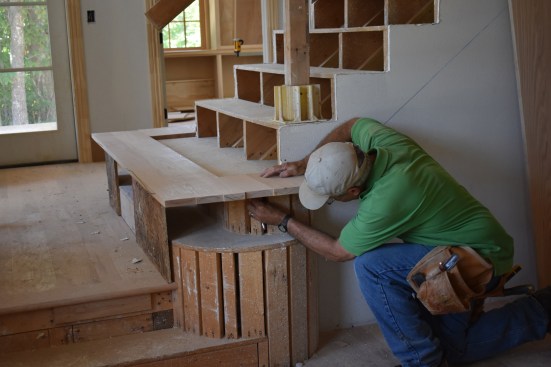
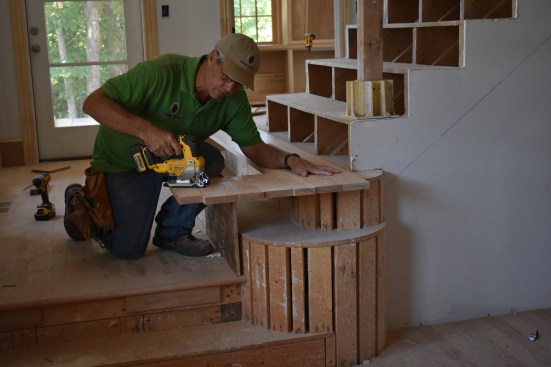
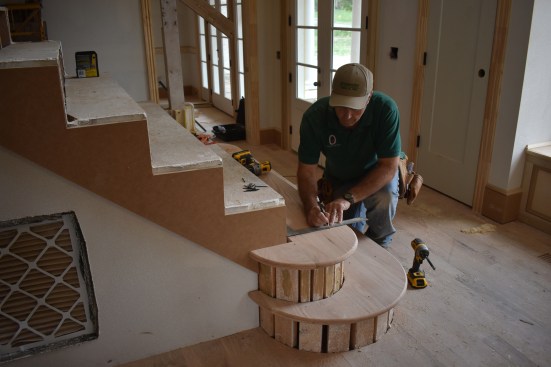
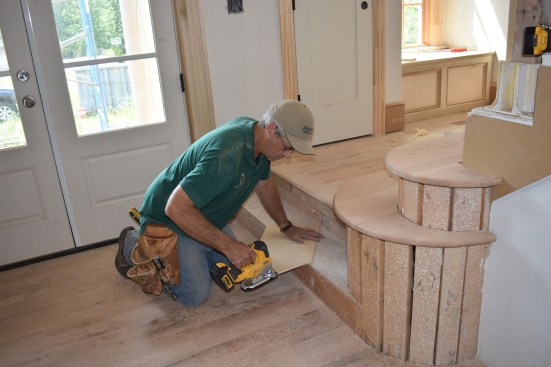
Because the upper starter step overlapped some of the same curved footprint as the lower step, I needed to cut and install the lower tread first. The lower starter step had two curves cut into each end: an inside radius that wrapped around the curved riser above and an outside radius that extended over the curved riser below. Before scribing the inside radius, I measured out from the center and notched both of the side “ears” so they would slide over the skirt boards.
I set the blank for the lower step in position on top of the upper radiused riser, propping up the leading edge of the step to keep it level. Reaching under the blank, I scribed the inside radius by following the edge of the rough tread. Then I flipped the blank over and cut to the scribe line with a jigsaw. When that cut was finished, I slipped the blank down around the upper radius onto the lower radiused riser. I reached underneath and followed the edge of the rough tread to scribe the radius of the lower riser.
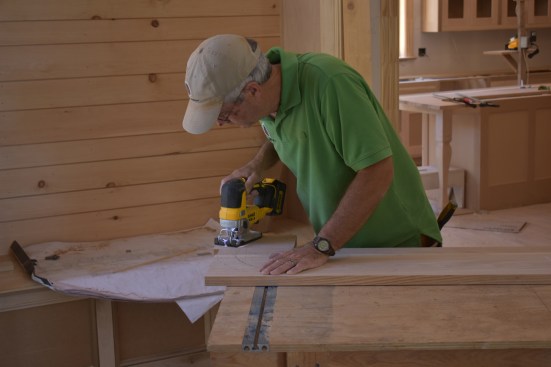
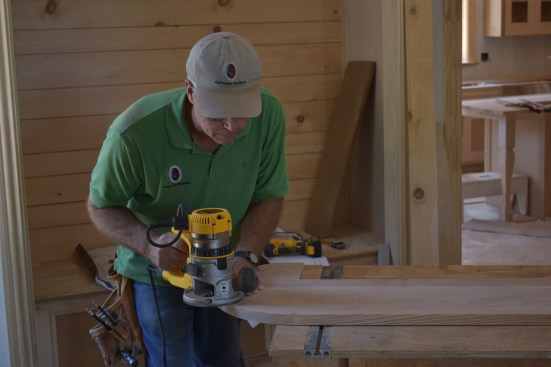
The finished tread needed to sit 2 1/4 inches proud of the rough tread (1 1/2 inches for the overhang and 3/4 inches for the riser that I would add later). Using a 2 1/4-inch-wide block, I extended the cut line out from the scribed line, and then cut the radius with a jigsaw. My jigsaw work was close, but I had to touch up the outside curve with a belt sander. After sanding, I finished the edge with a 1/2-inch round-over bit set slightly shallow in the router to create close to a full bullnose on the edge.

The author had to scribe and cut the inside radius first before …
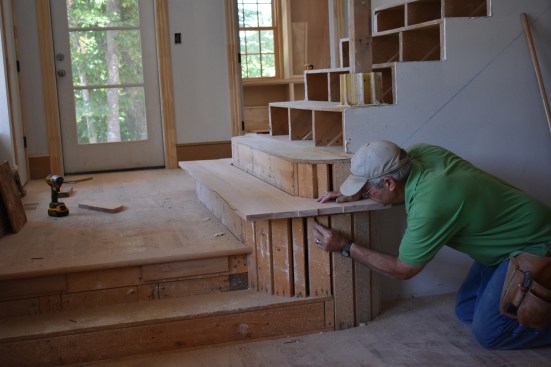
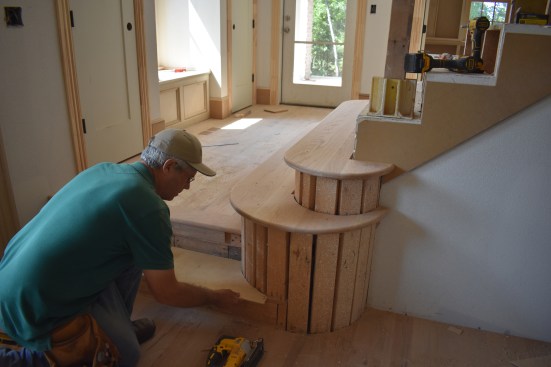
Only One Curve for the Upper Step
The upper starter step returned to the skirt board, so it required scribing for only the outside radius. Measuring out from the center, I cut the inside edges of the ears to fit around the skirt boards. I’d made the main part of the tread the right depth to create the same 2 1/4-inch overhang, so I slid it into place with the back edge up against the next riser. As before, I scribed the curved riser on the underside of the tread.
I used the same 2 1/4-inch block that I’d used on the lower tread to mark the projected radius at the required distance. Then I cut to the line with a jigsaw. After fairing the curve with a belt sander, I routed a bullnose into the edge of the tread.
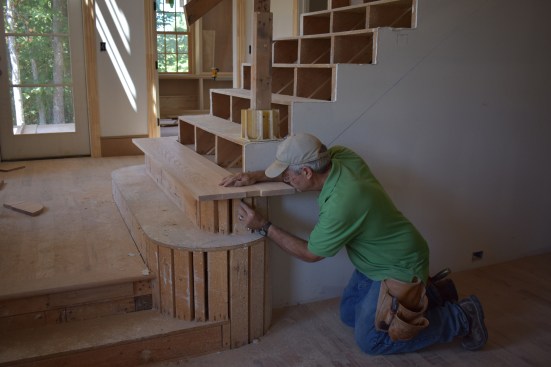
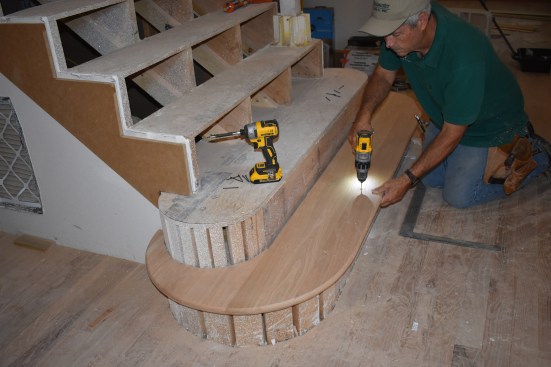
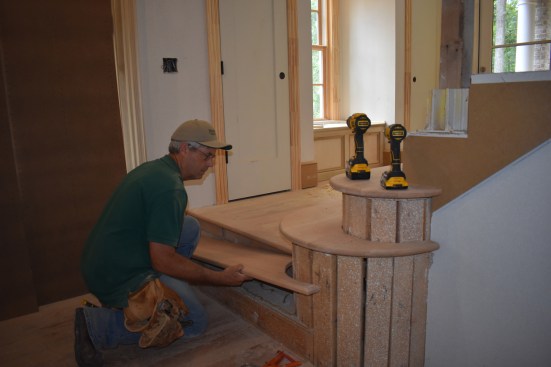
Glue and Screw the Starters
When both starter treads were ready, I sanded the rough treads to clean them up before finish treads went in. Starting with the lower one, I put down a healthy amount of construction adhesive on the rough tread. With the help of another crew member, I carefully slipped the tread down around the upper curved riser and pressed it into the adhesive.
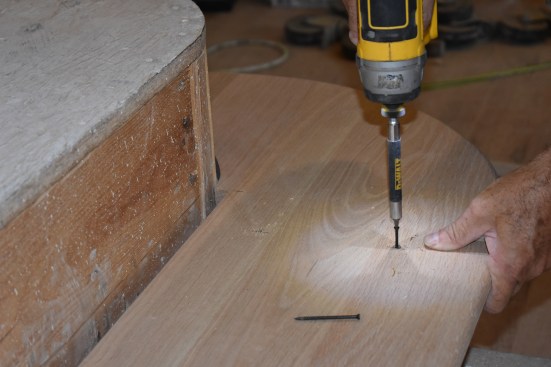
For a highly visible finished area such as a staircase, I like the screw layout to be consistent, so I used a framing square to mark the exact screw positions. Plotting the location of the screw holes with a square takes a little more time, but the careful layout is worth the effort.
To attach the finish treads, I opted for 2 1/4-inch trim-head screws. The straight sections of the starter treads were 52 inches wide, and I used four pairs of screws to fasten each one. After drilling straight holes at each screw location, I drove the finish-head screws to secure the lower tread. The upper starter tread came next, with a generous amount of construction adhesive applied to the rough tread. I was able to slip this tread into place without help. As with the lower tread, I laid out the fastener positions, then drilled and drove the screws to secure the tread.
I should mention that these treads were to be lightly stained and polyurethaned to match the wood floors in the rest of the house. In instances like this, I find that the way to make the fasteners least visible is by driving the finish-head screws into straight holes (with no countersink). The floor finishers then typically fill the holes with a stain-compatible filler before sanding, staining, and finishing the treads.
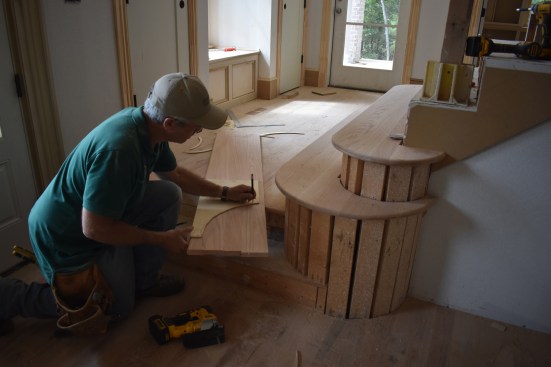


For the step down to the lower level, the author cut and templat…
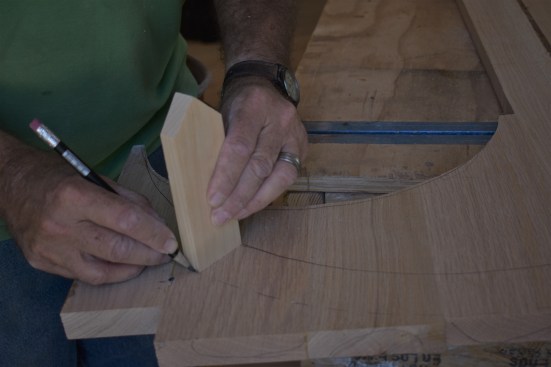
Template for the Step Down
As mentioned earlier, there was a single step down to a lower level that was below and at a right angle to the double starter steps. The end of that step fit against the curved riser that extended down from the lower starter step. I’d invested a lot of energy in making the blank for this step, so to make sure that I cut it right the first time, I made a template out of 1/4-inch plywood. To scribe the curve of the riser, I used a large pair of dividers and then cut to the line with a jigsaw. I fine-tuned the template until it fit almost perfectly to the curve.
I had decided that the best look would be for the lower tread to extend to the middle of the tall curved riser. So with the template in place, I measured over to that point on the riser from a position marked on the template and recorded the measurement. I also measured over to the opposite corner so that I could place the template precisely on the blank.
After cutting the curve with a jigsaw, I routed a bullnose into the edge of the tread, including the end where it returned to the curved riser. As with the starter treads above, I bedded this tread in a layer of construction adhesive, and then drilled and drove fasteners to attach the tread.
To craft the paint-grade curved risers, I used multiple layers of 1/8-inch-thick untempered Masonite that bent easily to the curve. I spliced the straight sections of the risers into the curves, blending them together with a little Bondo filler that looked seamless when the painters had finished.
In more than 45 years as a trim carpenter, I’d never done a staircase like this, but I’m sure glad that I got to tackle this one. I was able to use many skills that I’d learned in the past—and take those skills a little bit further. I always enjoy having my skills as a craftsman challenged, but by the time I finished this one, I was hoping for a nice standard straight run of stairs next time around.
Photos by Gary Striegler


