Emanuel Silva
Before assembling the rack, I laid out the spacing for the line …
At the start of last winter, I landed a project to re-shingle an older home in New England. Because red cedar would match the existing shingles and last a long time, that’s what the clients wanted. They also wanted a specific color. I looked into buying pre-stained shingles, but the only ones available were white cedars, which don’t have the longevity of red cedars. So it would be up to me to stain the shingles.
I’ve tried different methods for staining shingles: stacking them on sticks, laying them against walls, hanging them from clotheslines, even using a heat gun. But I always thought there must be a better way. One evening my son, Carter, and I sketched out some ideas and came up with a lightweight rack that would be easy to build from mostly readily available scrap material.
With cold and snowy weather on the way, I needed a warm place to pre-stain and dry the shingles before I could install them. A local lumberyard graciously offered me space in a corner of one of its buildings, so I built the rack to fit that area. All it took was a bit of creativity and some rudimentary skills and tools
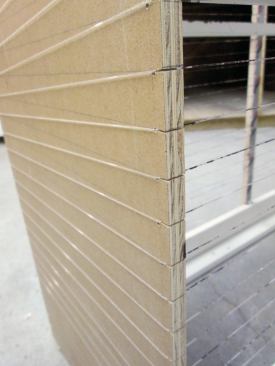
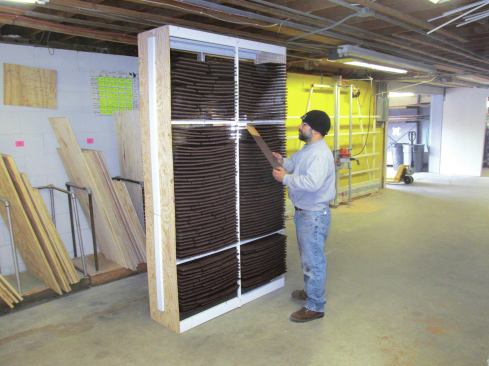
I started by ripping 1-foot-wide pieces out of 3/4-inch plywood for the side panels, which I cut down to 90 inches to fit under the ceiling. I decided on 4 feet for the rack’s width so it could easily be moved around, and cut horizontal spreaders out of 1×4 accordingly. At the top and bottom corners, I joined two lengths on edge to make an L-shape for strength, then put single lengths of 1×4 at 30 inches and 60 inches for the intermediate spreaders. Finally, I ripped narrow widths of 1-by stock for the vertical center pieces, which gave the rack more stability and helped support the fishing line on which the stained shingles would rest. I used .0185-inch-diameter/20-pound test fishing line because it’s thin, strong, and inexpensive. (I’m not a fisherman, but the guy at the tackle store insisted that this would do the trick.)
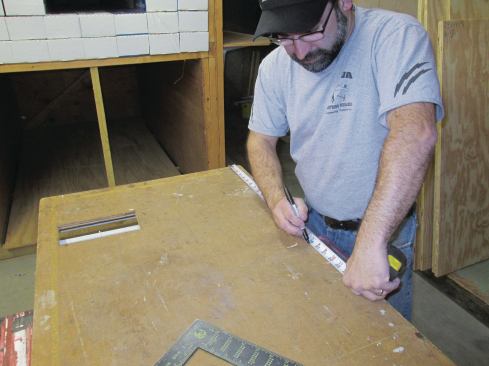
Before assembling the rack, I laid out the spacing for the line at 1-inch intervals along both edges of one side panel, and transferred the layout to the second panel, as well as to the center support strips. At each layout location, I cut a 1/4-inch-deep kerf with my Japanese hand saw to hold the line. When all the parts were ready, I screwed the rack together using deck screws. I held the spreaders about 1/2 inch in from the edges of the side panels so they wouldn’t interfere with the fishing line. The center support strips screwed to the spreaders, which lined up the kerfs in the strips with the kerfs in the side panels to support the fishing line in the middle of the rack.
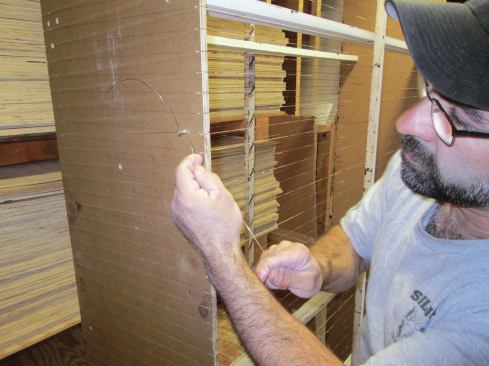
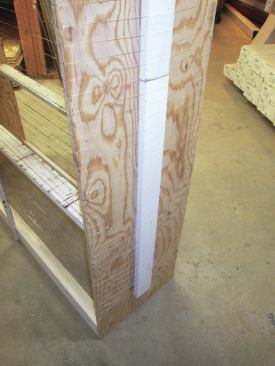
Running the fishing line around the rack was easy but slow going. I anchored the line to a screw driven into the side near the bottom, and fed it outside the edges of the side panels and inside the center support strips. After slotting the line into the kerfs on four corners to create one “shelf,” I led the line up diagonally to the next level and went around again. The challenge was feeding the line and making it tight enough to support the shingles without sagging, but not so tight that it pulled the sides in. When the first spool of line ran out, I drove a screw into the side panel at that level and tied off the loose end to it, and used it to attach the new line. The screw also gave me a place where I could adjust the tension in the line. After I’d strung the entire rack, though, I found the line needed to be tighter, so a friend helped me slide a 1×4 board behind the line along one of the sides, which gave me the extra tension I needed.
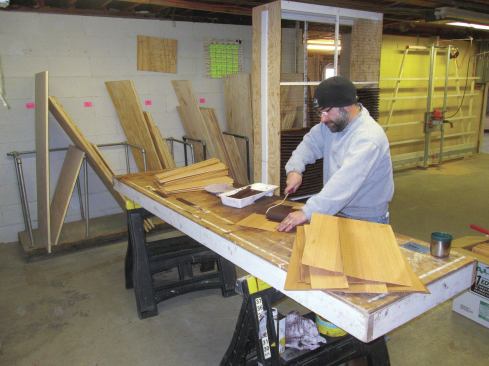
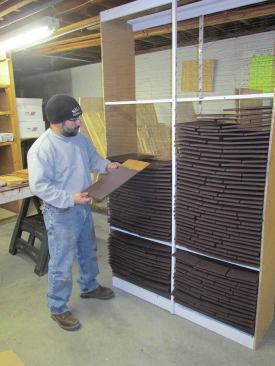
Once the rack was assembled, I was ready to stain the shingles. I set up my work table next to the rack. Using a roller—the fastest way to apply the stain—I coated all the sides and edges of each shingle. I loaded the rack from the bottom up so I could see the fishing line as I slipped the shingles in. The rack held three boxes of shingles or about one square, which I could stain in a couple of hours.
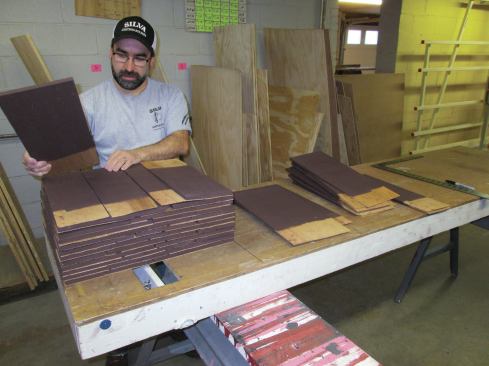
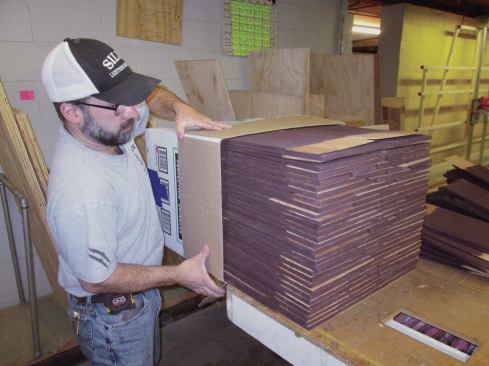
When the rack was full, I decided that it would be best and cleanest to store and transport the shingles in their original boxes. I came up with a quick, easy way to put them back. First I measured the width of the shingle box and marked that measurement on my table, subtracting 1/2 inch for clearance. I then sorted the stained shingles into three sizes. Using the marks on the table, I stacked rows of shingles, taking the appropriate sizes from the sorted piles and alternating the butts on each row to keep the stack straight and square. Once a stack was tall enough to fill a box, I slid the pile into one and taped it closed.
Overall, building the rack and pre-staining the shingles was time and money well spent. Pre-stained red cedars would have been an expensive custom order, and even then I probably couldn’t have gotten the exact color my client wanted. Staining them on site in the winter would have been miserable and messy. Instead I invested about $85 in materials and a couple of hours to build the rack. Then I was able to apply the stain in a warm place, which meant that the stain could dry properly and that I could concentrate on the business of installing the shingles when I got to the jobsite.


