
Here's how to install top-quality, solid-core doors that weigh …
As the punch-list guy for a high-end builder in Osterville, Mass., I end up installing plenty of top-quality solid-core doors. These doors are at least 1 3/4 inches thick and weigh 100 pounds or more, so I have to work smart. And because the door hardware is likely to be removed and re-installed by the painters and flooring installers after the initial hanging, I have to make sure they don’t fall out of adjustment. Here’s how I approach the job.
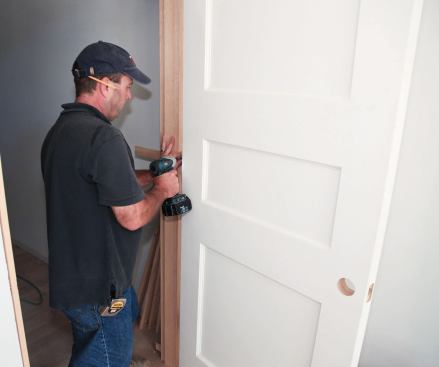
Typically, the doors are prehung units shipped in the jambs without any trim applied. When I remove the shipping cleats, plastic straps, and protective cardboard, I pocket any small shipping screws. They’ll come in handy later. The hinges are usually of the heavy-duty 4-by-4-inch variety with a drop-in pin and a decorative screw-down finial. To avoid accidental damage, I remove the finials and store them in a safe place, to be re-installed at final finish.
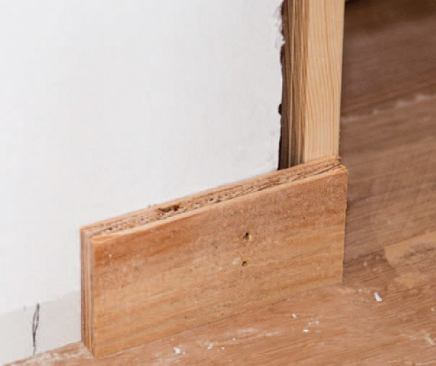
I pull the pins and remove the door from the jambs. I also remove the jamb hinges, because they can interfere when plumbing the jambs. To keep the jambs parallel, I install a temporary spreader just below the bottom hinge location. It’s cut to the exact length of the head jamb and held in place with a couple of finish nails shot through the jambs from the back. It’s easily knocked out later; I pull the nails all the way through the jambs from the finished side. To ensure a level head jamb, I first check the level of the floor and then mark and cut any difference from the jambs accordingly.
Installing the Jambs
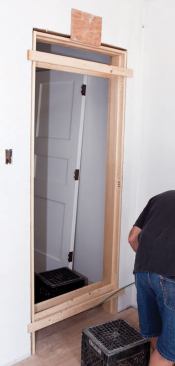
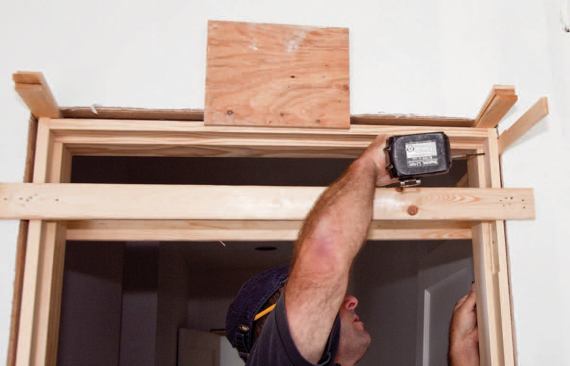
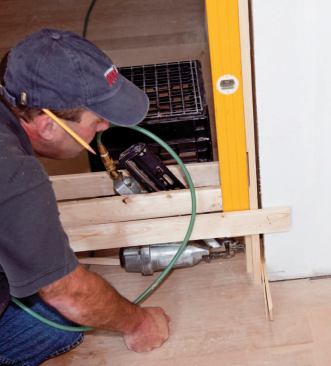
After determining the active side of the door swing, I shoot temporary retainers across the opposite side of the opening, making sure that they don’t coincide with the top and bottom hinge locations. I place the jamb in the opening and capture it by nailing opposing pieces of strapping across the active side. This holds the jamb in the rough opening with its edges in plane with the finished wall. I also install a scrap of plywood on each side of the head jamb to keep it under control. I shim between the header and the tops of the side jambs to pin them firmly to the floor. Since I use shims in a variety of tasks, I cut them by the bucketload, from tapered cedar shingles. I rip them to a uniform 2 inches wide; that way, they’re still adjustable when they’re centered behind a 4-inch hinge with only the outermost screws installed.
I try to make sure that the door is in the best possible position. For example, a door in a hall end wall looks best centered, so that there’s an equal margin for trim on either side. Once I’ve established the door’s placement, I stabilize the head jamb with a finish nail into the header. Then I install a pair of opposing shims at the top of the hinge jamb and permanently secure it to the framing with a pair of screws.
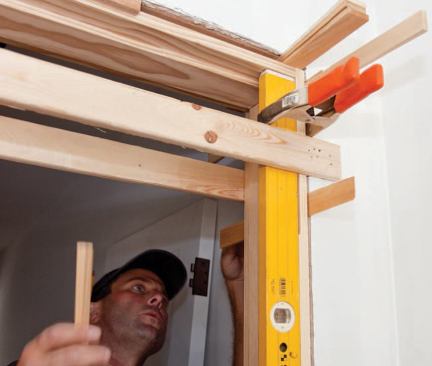
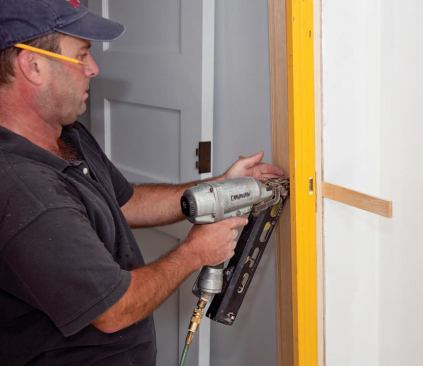
Next, I use spring clamps to hold my 6-foot spirit level against the hinge jamb, covering the hinge mortises. This leaves both my hands free to install shims and provides a constant straightedge for truing the jamb. When adjusting the shims, I make sure that the jamb is in continuous contact with the level, eliminating any high or low spots along its length. My primary shims are centered directly behind the hinge locations, with others added as needed to straighten the jamb. Since the hinges were removed, I don’t have to worry about interference from ones that aren’t flush or from a screwhead that stands out.
I’m careful when shimming not to “pigeon-toe” the jambs out of parallel. The top hinge carries the lion’s share of the door load; one or more 3-inch screws typically ship with the door and are intended to secure it to the framing. I install these screws at the end of the job. I’ve often seen them omitted on others’ installations, but they are crucial to preventing a door from sagging over time.


