Gary Striegler
The cabinet for the bed was a three-sided box (a top and two sid…
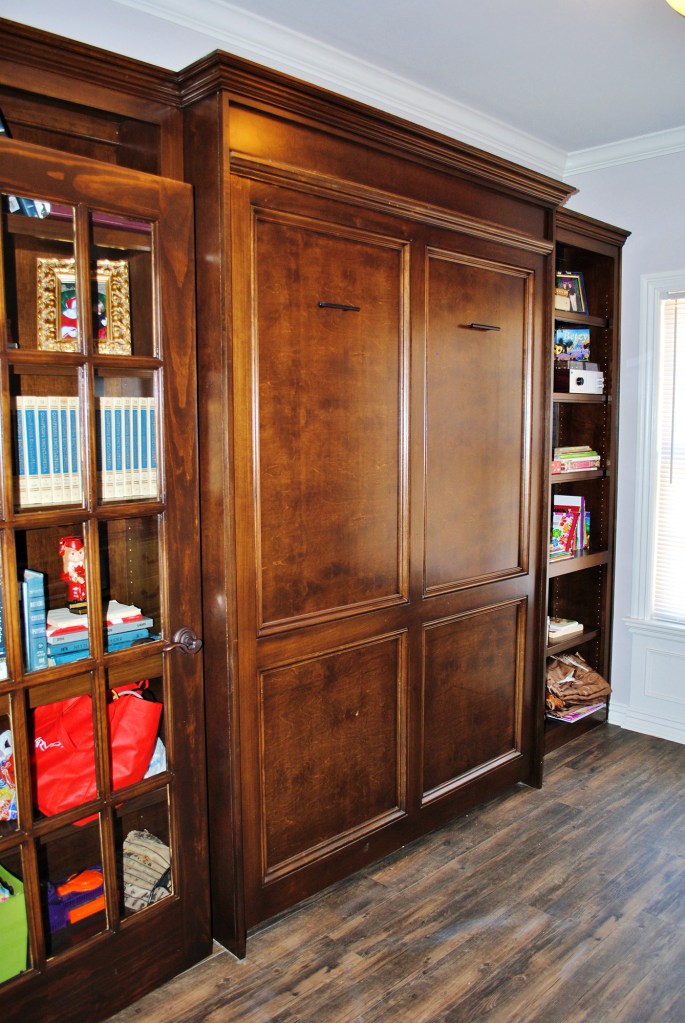
Wall beds (also called Murphy beds) have always been a big hit with clients. They make a lot of sense, freeing up floor space and letting a room serve multiple functions.
Recently, a client decided that an office/guest bedroom would be a better use of space than the existing formal dining room, which was cramped at best. We started by putting French doors with a transom in the door opening. With a window on the opposite wall, one of the remaining walls in the room was long enough to fit a wall bed with a small bookcase on either side for office stuff. To leave enough space for the bookcases, we decided on a full-size (double) bed instead of stepping up to a queen.
Start with the Mattress
The wall beds I build have three basic components: an outer cabinet, an inner platform for the bed, and a hardware kit. In the past, I’ve had good luck with Hafele hardware, so I went with it again. It’s a simple system to install and comes with good instructions (although I do wish that the measurements were in inches instead of metric units). And the finished bed always operates well.
To build the bed, start with the mattress size (width and length). I like to make the inside dimension of the bed platform 1 inch bigger than the mattress to allow room for bedding. For the standard full-size mattress I planned to use, I made the inside of the bed platform 55 inches by 76 inches.
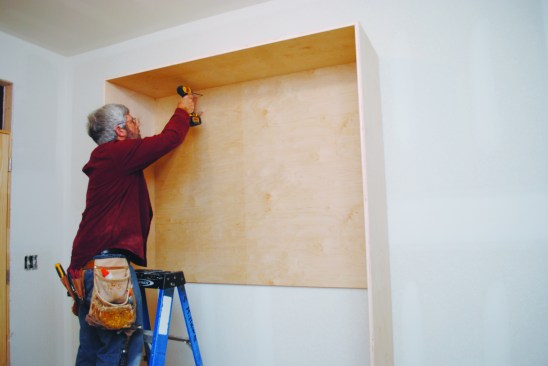
The Outer Cabinet
I usually build the platform first, but space was a little crowded on this job, so I started with the outer cabinet. To find the inside measurement for the cabinet, I added the combined thickness of the hardware (around 2 5/8 inches for the Hafele system) to the total width of the platform. To match the height of the planned bookcases, I made the bed cabinet taller than it needed to be and then added horizontal trim at the end to make up the difference.
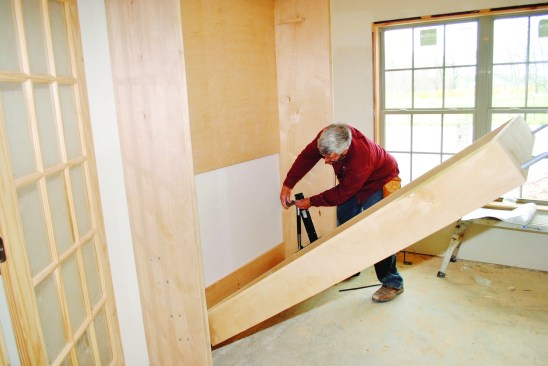
The cabinet was a three-sided box (a top and two sides) that I pocket-screwed together. For racking strength, I added a piece of 3/4-inch plywood for the upper back, and ripped a narrower width of 3/4-inch plywood and installed it at the bottom. Then I stood the cabinet up, centered it on the wall, and screwed it into place.
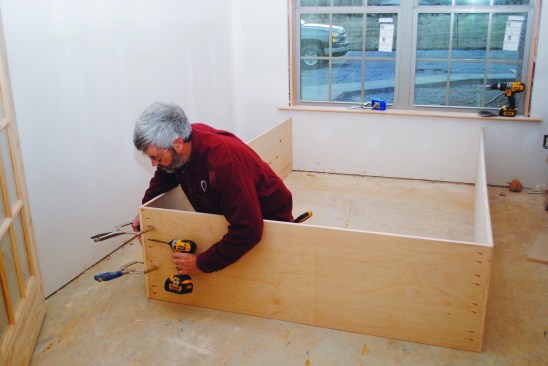
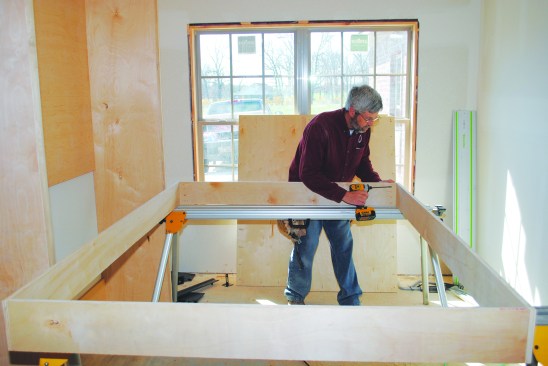
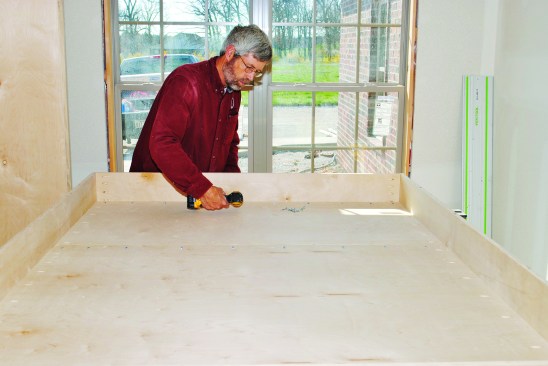
Building the Box
The bed platform starts with a 6 3/8-inch-deep plywood box. When building the box, I joined the sides to the head and foot to cover the plywood edges so the only time the edges are visible is when the bed is down.
For strength, I built the box with a 3/4-inch-plywood bottom, which I made in two-pieces. (A single piece of plywood can be used for a twin-size bed). The plywood pieces fit inside the sides and I pocket-screwed them in place. (Later, I add a frame-and-panel detail to finish the bottom of the platform, as described on page 24. This covers the plywood edges, as well as the joint between the two back pieces of plywood.)
The Bed Grows Feet
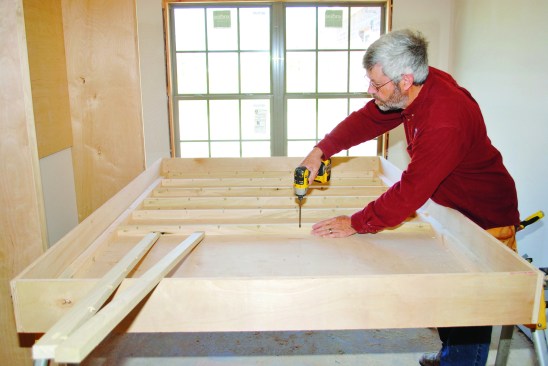
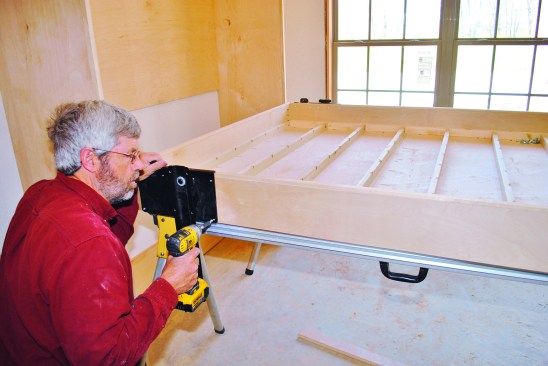
For the fold-down feet that support the bed, I used the Hafele system. The feet store out of sight when the bed is in the raised position, and the hardware for the feet hides inside the platform in a grid of slats that add rigidity to the platform.
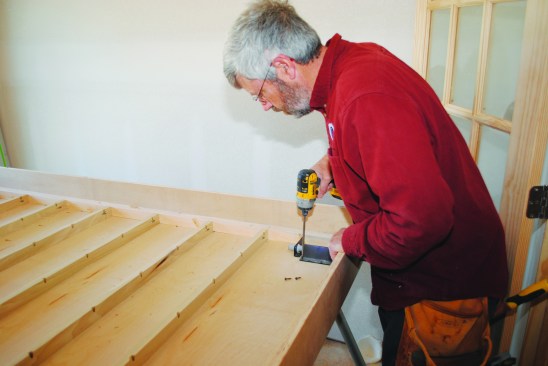
To make this grid, I nailed 1 1/2-inch by 1 1/2-inch strips along the inside edges of the platform, and then I screwed the slats to the bottom between the edge strips on 10-inch centers. The mattress actually sits above the slats on 3/8-inch plywood that screws to the slats and edge strips. But I waited to install this plywood so I had access to mount the handles used to pull the bed down.
To install the feet, I located and drilled holes in the outside end of the bed according to the manufacturer’s instructions. The hardware that holds the feet attaches to the bottom of the platform inside the box.
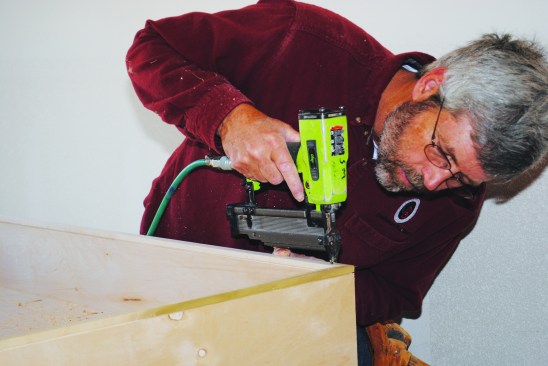
Because the edges of the platform are exposed when the bed is folded down, I covered them with 3/4-inch by 3/4-inch-thick pieces of solid-wood trim. I made a 1/8-inch rabbet along the edges of the trim to add interest and to avoid having to make a perfect joint between the plywood and the trim.
Installing the Hardware
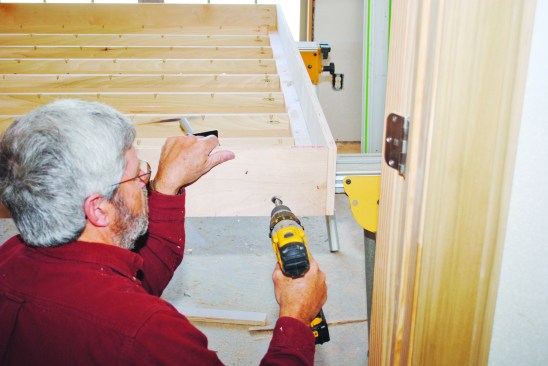
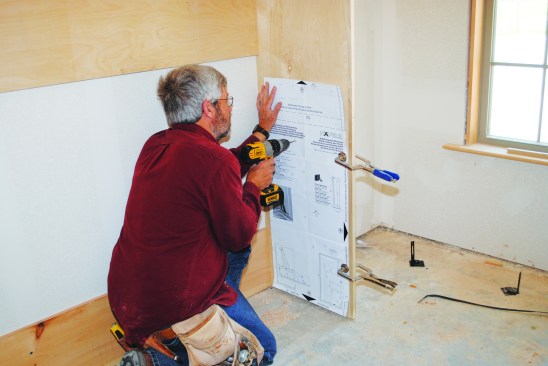
With the main components built, I turned my attention to the hinge hardware. I don’t always read instructions, but with folding-bed hardware, it’s critical to do so. It’s also important to use the paper template provided by the manufacturer as a guide for mounting the hardware.
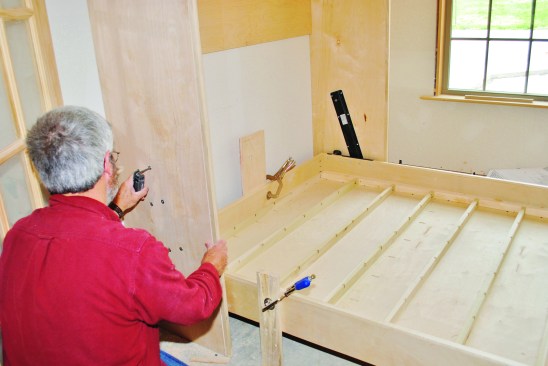
I started by drilling holes and attaching the bracket to the platform. Then I clamped the paper template to the sides of the cabinet, and I drilled the holes, taking care not to blow out the plywood veneer on the outside. Because I was working by myself, I clamped temporary legs to the platform to support it while I lined up the bolts to join the platform to the cabinet.
Next, I installed the pistons that help drop and lift the bed. This is really a two-person job. The pistons are held with a metal band in just the right position to fit on the bracket with the bed partially open. It helps to have one person hold the bed in position while the other attaches the pistons. Once both pistons are attached, opening the bed slightly compresses the pistons so the bands can be removed. Don’t discard the bands in case the pistons need to be removed for some reason in the future.
The pistons come in several strengths depending on the size of the bed and, in my case, how much extra weight I add with the trim. I usually buy the strongest ones. Once the bed was operational, I added a stop at the top of each side to keep the bed lined up with the cabinet when it’s in the closed position.
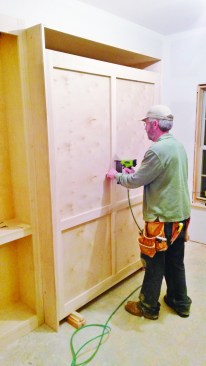
Finishing it out. The final step was the trim. I always like to add frame-and-panel molding to the bottom of the platform, which will be exposed when the bed is folded up. I checked a couple of things before making my frame. First, the frame needs to be taller than the platform to hide the feet when the bed is closed, but if it’s too tall the feet can’t pivot to their down position. Second, the frame also needs to extend below the bottom of the platform, but if it’s too low, it hits the floor as the bed opens. Keeping in mind the thickness of the finished floor, I screwed a test piece onto the platform and opened the bed to check the clearance. I also gave the frame 1/4 inch of clearance along the sides.
I pre-assembled the frame using pocket-hole joinery and nailed it to the platform. I added panel molding inside the frame for a decorative touch. A two-piece crown detail across the bed cabinet and the two flanking bookcases finished the top, and I added a filler piece between the top of the bed platform and the top of the cabinet.


