Ten or 15 years ago, interior glass block was all the rage. I installed it regularly in bathrooms and kitchens and often as a design element in entries and living rooms. Glass block both lets in light and obscures visibility—all in the texture of a block wall. While glass-block installations here in the Northeast have become rarer, they are still common on the West Coast and in Florida.
I recently installed a freestanding glass-block partition as part of a walk-in shower. The glass-block wall helps keep an adjacent vanity dry while offering a modicum of privacy to the person in the shower. The installation methods I use haven’t changed much since my first glass-block projects. As with most projects like this one, proper preparation is the key to success.
The glass-block wall in this shower is nonstructural, meaning that it doesn’t support anything other than its own weight. The block wall sits on the tile floor, attaches along one wall, and stops a couple of feet shy of the ceiling. We opted to finish the exposed edges of the block with limestone tile.
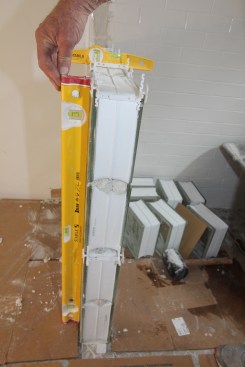
The most important thing to remember when installing glass block is to keep the courses plumb, level (both across the block and across the courses), and in plane. Also, always use the proper mortar and reinforcement, and don’t try to install too much in one stint.
Layout and Prep for the Glass Block
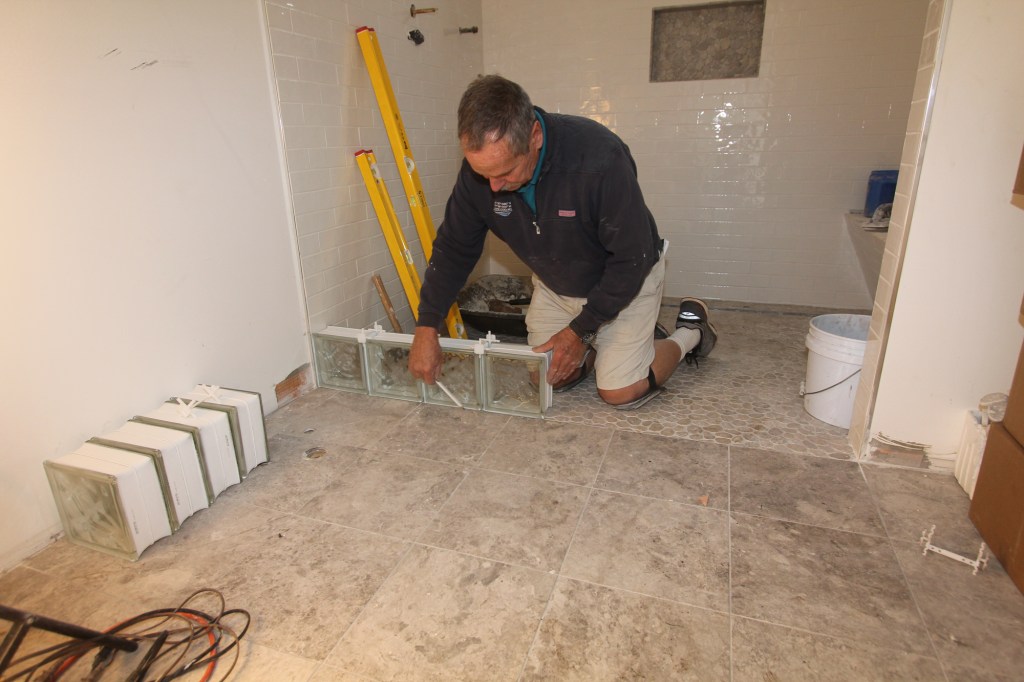
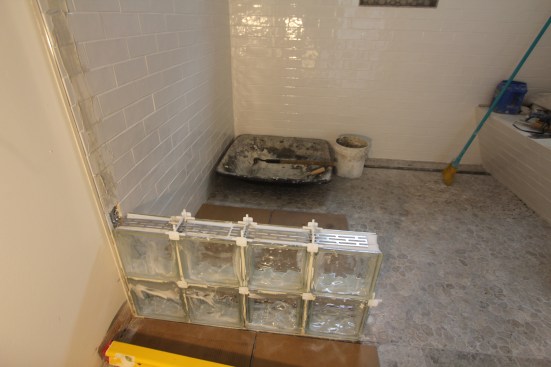
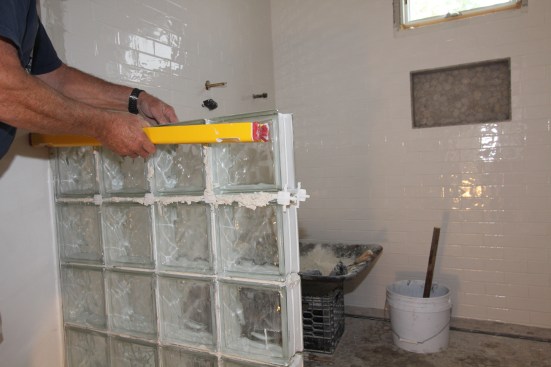
This glass block wall is to be four blocks wide and ten blocks tall. The author begins by laying out four glass blocks on the floor and then tracing around them to mark the position of the wall.
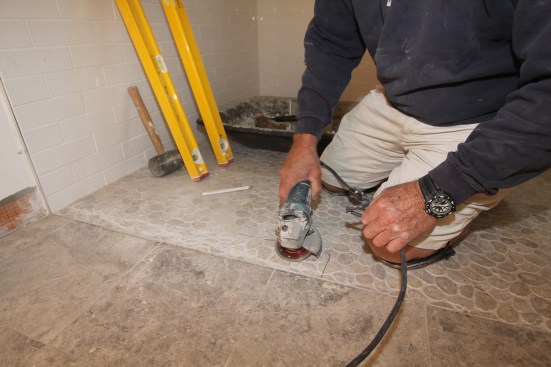
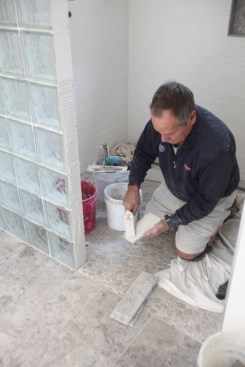
He scarifies the tile on the floor with an abrasive wheel on an electric grinder, which roughs up the surface of the tile to help the thinset adhere.
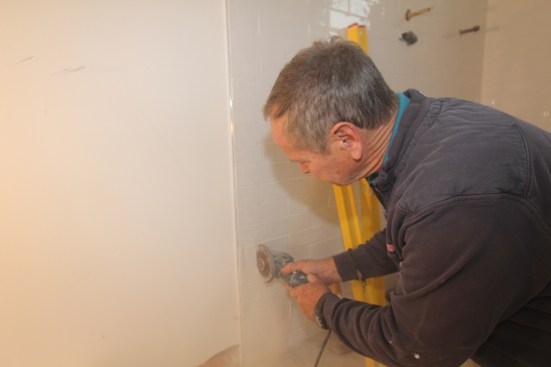
After extending the layout up the wall with a long level and scarifying the wall tile inside his layout, he cuts out and removes small sections of tile to expose the wall framing for attaching reinforcement as he builds the block wall.
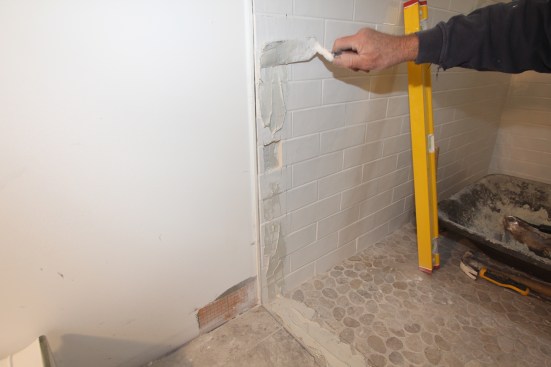
He coats the floor tile and wall tile with a layer of modified thinset that will help the glass block mortar adhere.
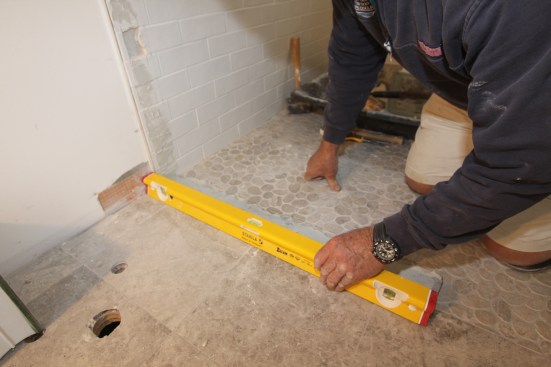
One final quick check of the floor for level and he is ready to begin installation.
Install the First Blocks
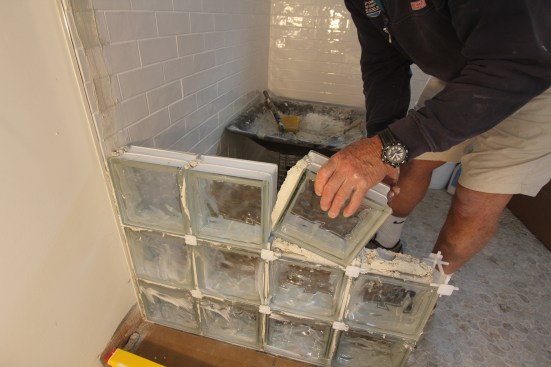
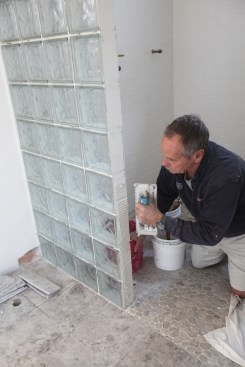
Because glass block is nonporous and does not absorb moisture, the author uses a premixed mortar specially formulated for installing glass block that contains lime and sand. He spreads a thick layer of the mortar on the floor layout.
After spreading the mortar on the floor tile, he butters the two sides of the 8×8 block with mortar.

To keep the mortar from sliding off the edge of the block, the author holds the block at an angle as he begins to install it.
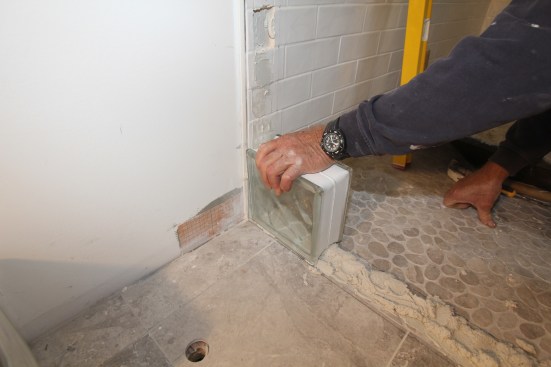
He then sets the block in place using a rolling motion, pressing it into the mortar on the floor as well as on the wall.
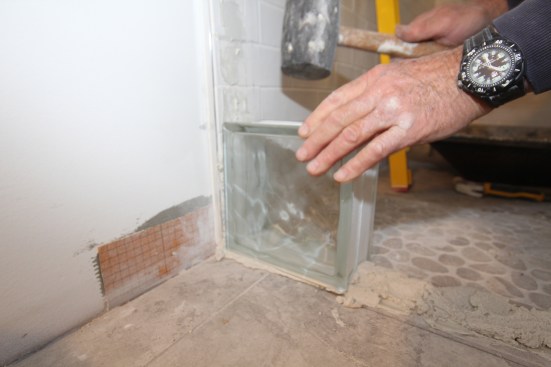
After placing each block, he gives it a tap with a rubber mallet to insure complete adhesion. Glass block is quite heavy, so the author installs only a few courses at a time, allowing the mortar to set up overnight before starting the next set of courses. When scheduling glass-block projects, he tries to coordinate the installation with other nearby projects that he can jump to while waiting for the mortar to cure.
Checking After the First Course
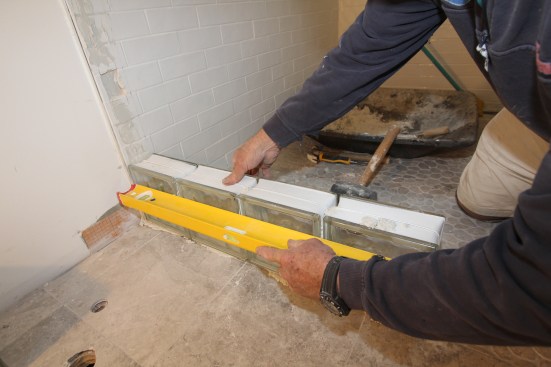
The author continues installing the glass block for the first course, buttering each block and tapping it into place. When the course is finished, he checks to make sure the blocks are in plane and on the layout lines on the floor.
Next, he checks to make sure the course is level along its length, tapping it down as needed.
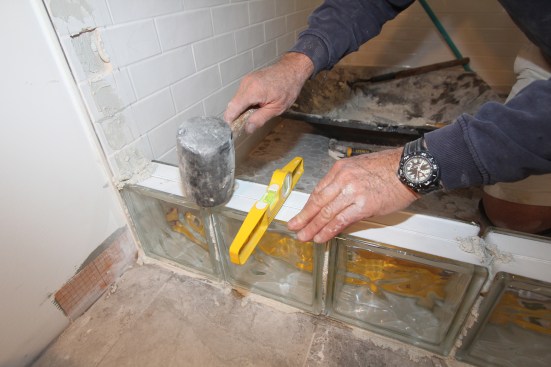
The third and final check for each course is leveling across the block, again tapping the block into line if necessary.
Spacers for the Second Course

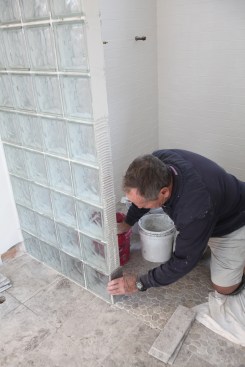
The author spreads a layer of the glass-block mortar on top of the first course and inserts plastic spacers that adjust to the width of the block—in this case, 4 inches. These spacers keep the horizontal and vertical joints at the recommended 1/4-inch width. (The square plastic guides come off after each section cures.)
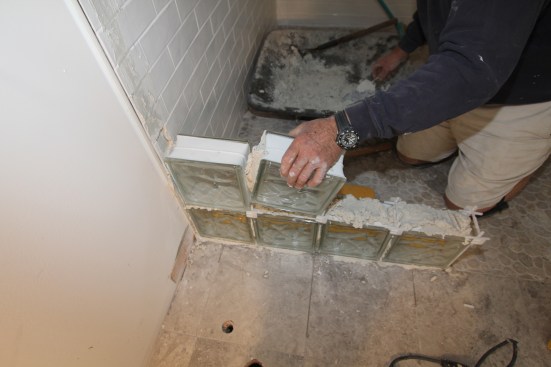
He then installs the glass blocks for the next course, setting the blocks tight onto the spacers.
After installing the final block for each course, he taps it over with a mallet to take out any extra slack from between the blocks.
Installing Reinforcement
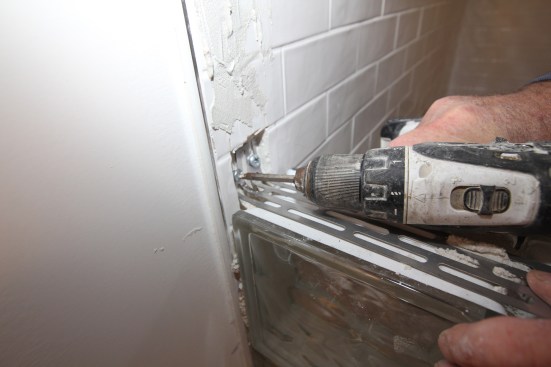
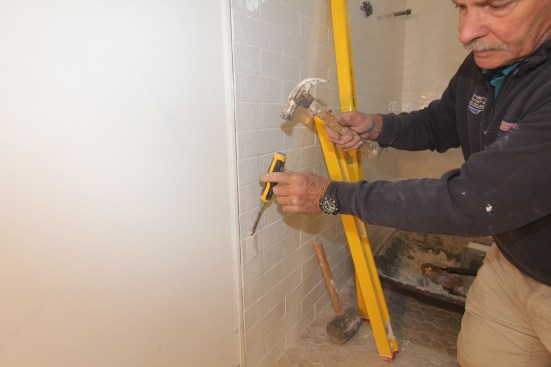
After two courses are done, the author installs a stainless steel panel anchor (which comes in 16-inch lengths) to tie the glass block to the bathroom wall framing. After bending one end of the anchor into an L-shape, he inserts that end into the pocket cut into the tile earlier, and he screws the panel anchor directly to the wall framing.
With the rest of the anchor resting on the block, he inserts the spacers for the next course.
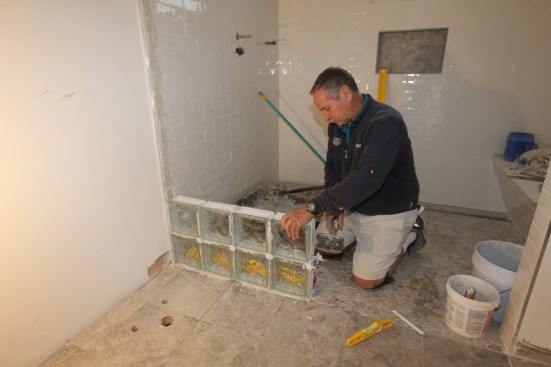
The Next Two Courses
The author spreads mortar over the reinforcement anchors and installs the third and fourth courses.
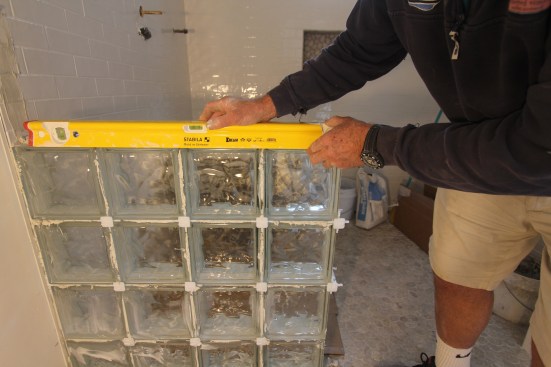
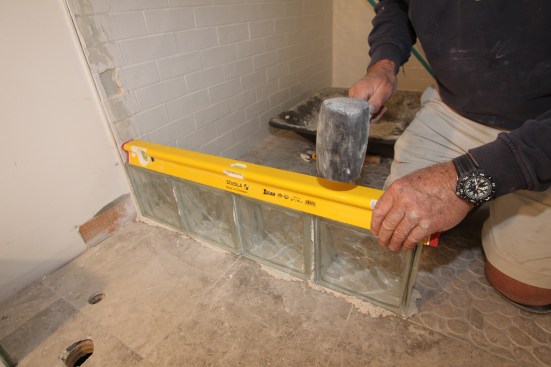
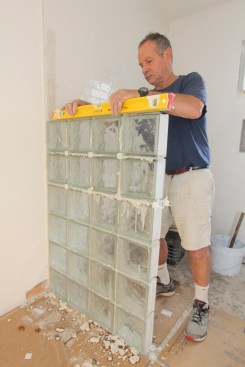
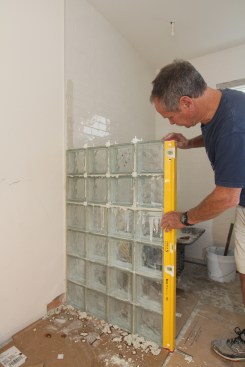
When those courses are installed, the author rechecks the glass block for level.
As before, he also checks the wall for plumb, making sure the block is also level across its width.
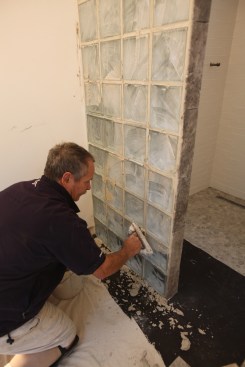
And he checks to make sure the courses are in plane. At this point, he scrapes the excess mortar out of the joints and lets the first four courses of the wall sit overnight to allow the mortar to cure.
Day 2
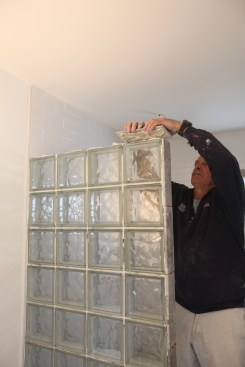
After letting the mortar for the first four courses cure overnight, the author begins the next day by breaking off the plastic tabs that hold the spacers in place. He then attaches another panel anchor to the bathroom wall for reinforcement.
As before, he spreads a layer of mortar over the panel anchor …
… and then adds spacers for the next course.

With four courses of the block wall completely solid, he is confident to continue installing the next few courses.
Continue Checking Courses
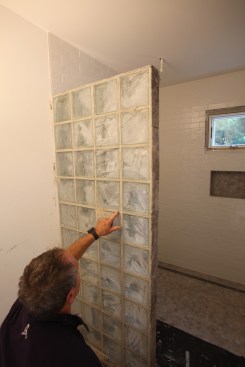
After installing next two courses the author stops again to check the glass-block wall for level.
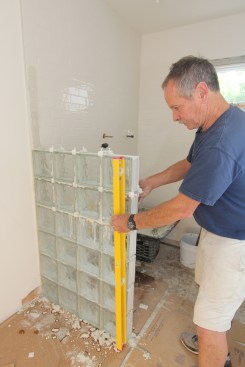
As before, he also checks the wall for plumb …
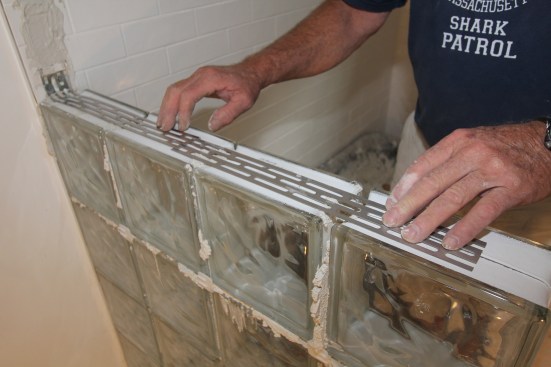
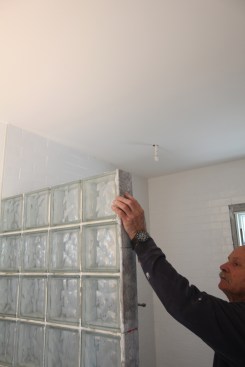
… and he checks the outside edge of the wall for straightness and plumb. He continues to add panel anchors every two courses for the entire height of the wall.
Finish Installing the Block
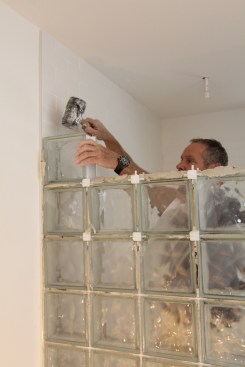
On the third day, the author installs the last few courses of glass block.
Spreading the installation out over three days lets the mortar for each section fully cure before he adds more courses to the wall. After letting the final courses cure for 24 hours, he coats the edges of the glass-block wall with a layer of modified thinset as a base for the limestone cap that he will install to finish the edge of the glass block wall.
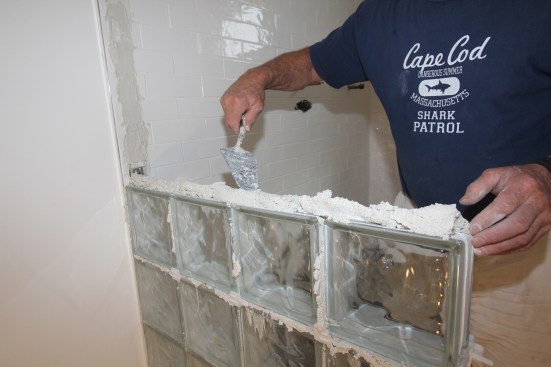
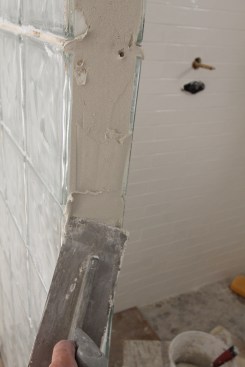
Capping the Edge With Limestone
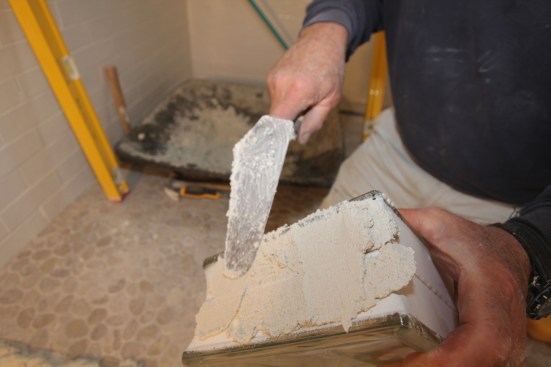
For the cap, the author rips 4-inch-wide strips of limestone from 12-inch limestone tile, and then rounds over the edges of the strips with an abrasive wheel on an electric grinder. After the thinset coating on the edge of the glass-block wall has fully cured, the author spreads another layer of modified thinset for installing the limestone cap tile.
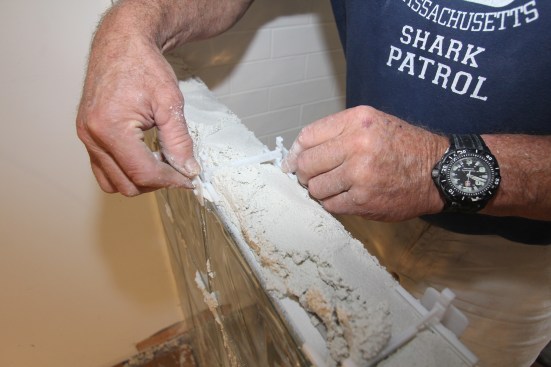
He then butters the back of each stone tile …
… and presses the tile into the fresh thinset.
Starting with a partial tile at the bottom lets him finish at the top with a full tile, and using plastic wedges helps him to maintain even grout joints between the tiles.
He continues installing the stone strips across the top of the wall to finish wrapping the edges of the glass block wall.
Grout: The Final Step
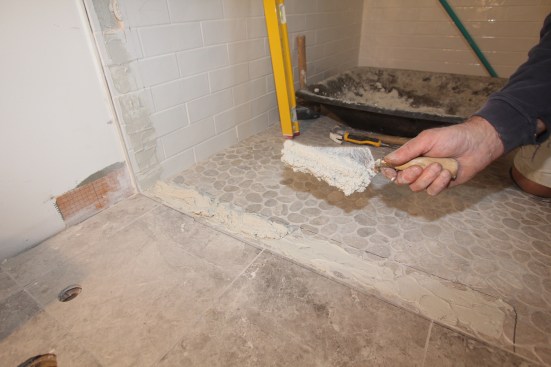
After the mortar holding the edge tile has cured for 24 hours, the author spreads sanded grout on the glass block using a rubber-edged grout float. As with grouting a tile wall, diagonal strokes ensure that the joints get filled completely.
He lets the grout sit for 15 minutes or so and tests it with his finger before beginning the cleanup.
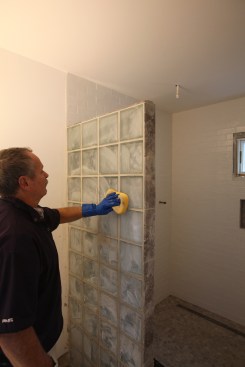
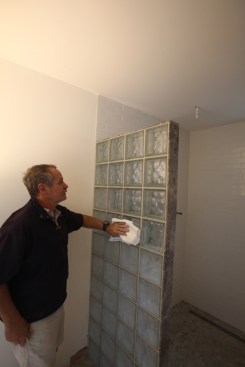
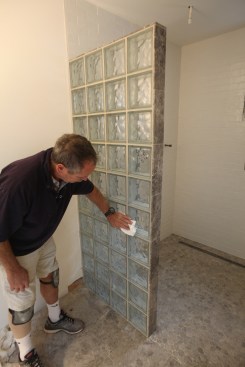
When the grout has set up sufficiently, he gives the block an initial wipe with a clean sponge, rinsing the sponge often in clean water …
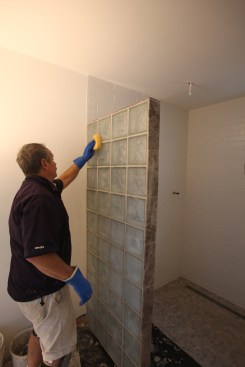
… and then wipes down the wall a second time with the sponge and fresh water.
Next, he goes over the wall with highly-absorbent paper towel to remove the grout haze and any residual moisture.
A final wipe with a clean paper towel finishes the job.


