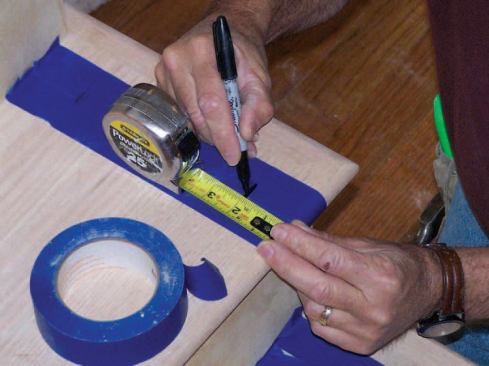
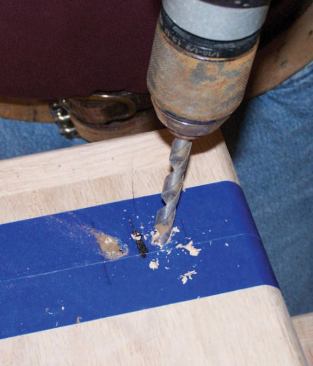
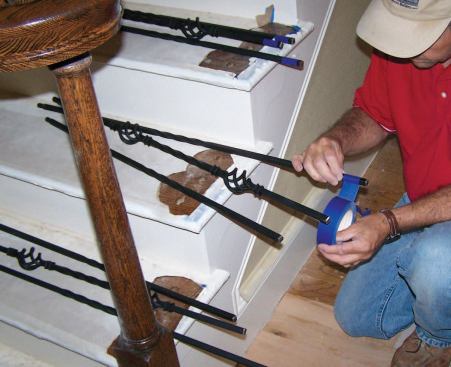
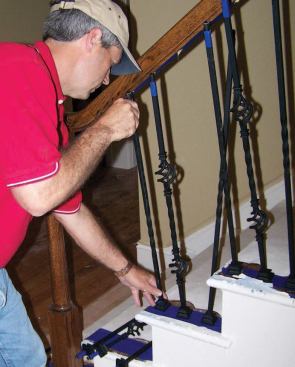
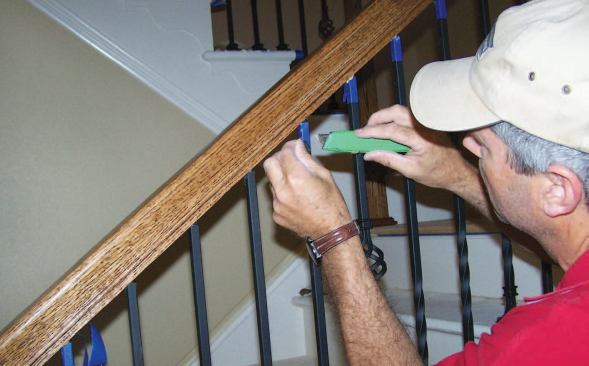
Double widths of masking tape protect the treads; the baluster l…
My company’s first encounter with wrought iron balusters — which happened several years ago — left us licking our wounds. We bought an expensive two-sided caulking gun to mix the epoxy needed for the installation, but we were completely unprepared for how messy the epoxy was. We also thought we could trim the balusters to length with a reciprocating saw rather than waste money on a metal-cutting chop saw — but when we started cutting the iron, our progress slowed to a crawl. Epoxy ended up everywhere, and it took everyone I could muster on the job site to assemble the balustrade.
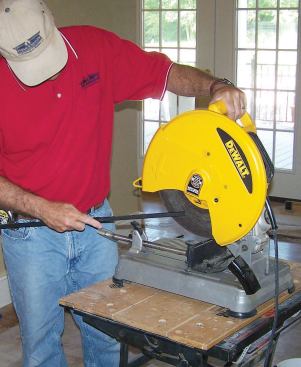
Since then, metal balusters have become increasingly popular and more widely available, and a growing number of my clients have been requesting them. Most systems are now easier to install, primarily because manufacturers have replaced the top shoes with round profiles that fit snugly into holes bored into the handrail. And I’m better prepared to install them, too, thanks to the lessons I learned on that first job. To speed up cutting, I invested in a chop saw equipped with an abrasive cutoff wheel. We approach every job armed with plenty of masking tape, and use two-part 10-minute epoxy tubes that fit in a standard caulking gun instead of the expensive epoxy dispensers offered by the manufacturers.
All these products help, but a couple of simple changes in my method of work have made the biggest difference. On that first job, we epoxied the top and bottom of each baluster per the manufacturer’s instructions. That meant we had only a few minutes from the time the epoxy went into the first hole until everything had to be in place and lined up — quite a challenge on a long handrail run. Worst of all, the runny epoxy dripped out of the handrail and down the balusters.
Now we use construction adhesive instead of epoxy in the top holes. It stays put and offers plenty of strength. And I learned to drill three holes instead of one for the base of each baluster. This gives me more control over the assembly sequence and the chance to check my work and make minor adjustments. With my process, I can do the installation myself without raising my heart rate and without wasting a lot of time cleaning up.
Baluster Layout
Although we usually use stair parts from Latham Stairs & Millwork (866/383-8680, stairsandmantels.com), even my local lumberyards and big-box home centers now carry iron balusters. There’s a wide range of metal-baluster styles, but my method is intended for a certain kind: ones with round tops that fit in drilled holes in the wooden handrail, and with metal shoes that fit over the bases. If you’re installing shoeless balusters, plan on working fast and lining up lots of help.
To begin, I cut and fit the wooden handrail and temporarily install it with long trim-head screws. Then I lay out the centerline of the balusters on each stair tread. Double widths of masking tape protect the treads; the baluster locations go right on the tape. I use a laser to transfer those locations to the underside of the handrail, then drill holes in the rail 3/4 inch deep and about 1/8 inch wider than the diameter of the baluster tops.
That first time I installed metal balusters, I drilled tight holes in the treads that roughly matched the width of their square bases. But shooting epoxy into each hole, inserting the balusters, and assembling the railing was a two-or three-man job with little margin for error. In looking for a way to install the balusters one at a time instead of all at once, I realized I could drill slightly oversized base holes with two smaller holes on each side to accommodate the tip of the epoxy tube. This allows me to shoot construction adhesive in the handrail holes and then position the rail in place with the balusters sitting in their holes. Then I raise the balusters in place and shoot epoxy into each base, one at a time. As long as I install at least one baluster every minute, the epoxy does not set up in the mixing nozzle.
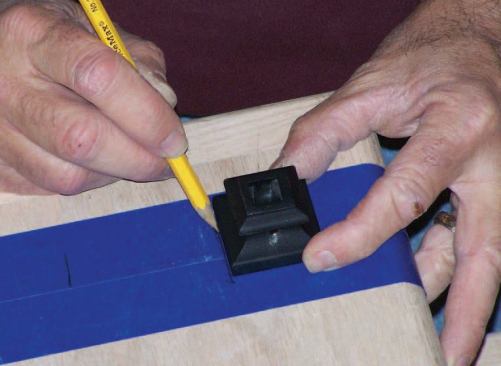
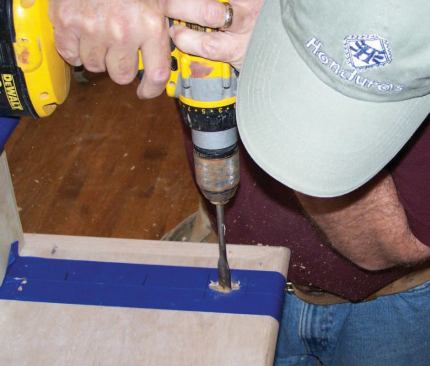
To lay out the hole positions on each tread, I use the metal shoe that the balusters fit into as a template. After marking the outside of the shoe, I drill the two 3/8-inch-diameter nozzle holes so that they go all the way through the tread and penetrate the stringer by about 3/4 inch. I angle these outer holes slightly toward the center hole. Then I use a spade bit to drill larger holes for the baluster itself, sizing the hole so that it is about 1/4 inch larger in diameter than the baluster’s base and penetrates the stringer by about 3/4 inch.
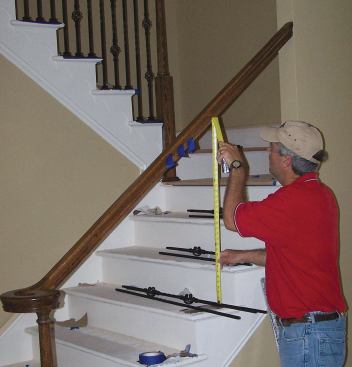
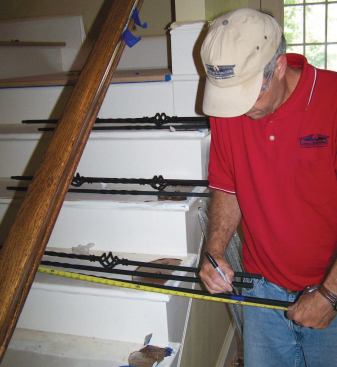
With the handrail in place, it’s a simple matter to measure an…
Assembly
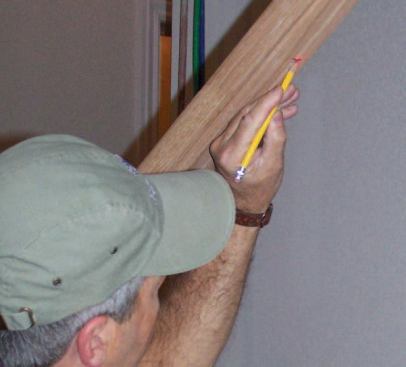
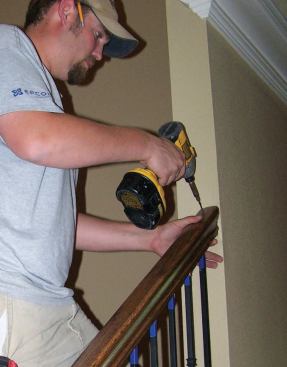
With the handrail in place, it’s a simple matter to measure and cut each baluster. I add enough to the baluster’s overall length so that the base will penetrate the tread by about 3/4 inch when the top is fully inserted into the handrail, and use a piece of masking tape wrapped around the base to help indicate my cut line. There are often burrs and rough edges on the baluster base after the cut, so I clean them up using the side of the spinning cutoff blade.
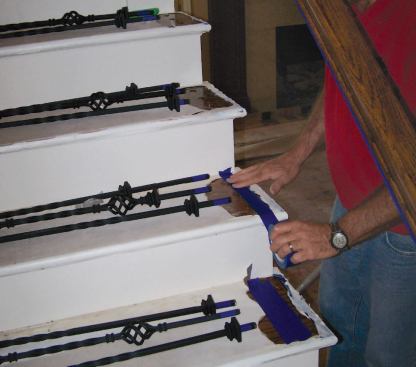
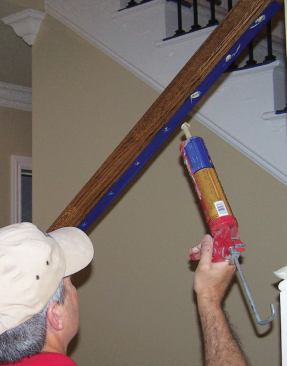
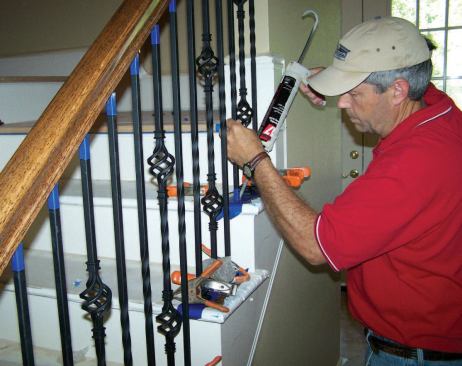
While construction adhesive is okay for the handrail holes, you really have to use epoxy in the stair tread holes, because the square balusters need to be rock-solid in the round holes when you’re finished. Both epoxy and construction adhesive tend to get everywhere, so I wrap the base and top of each baluster with masking tape before installation to make clean-up easier. Since the stair parts usually have their final finish when it’s time to assemble the balustrade, I retape the drilled treads and mask off the underside of the handrail before injecting its holes with construction adhesive.
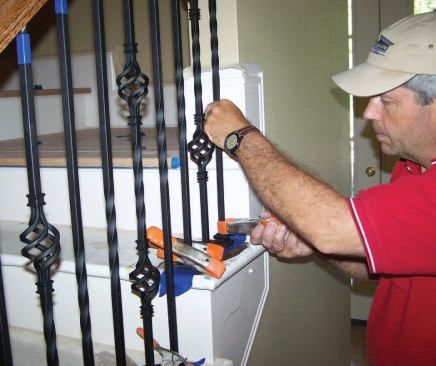
Next I insert all of the precut balusters into the treads without any epoxy, fit the tops into the glued handrail holes, and reattach the handrail to the wall with long trim screws. Then I lift each baluster up fully into its handrail hole, slide the shoe up away from the base, and inject the two smaller holes at the base of each baluster with enough epoxy to completely fill them. To keep the balusters from sliding back down into the tread holes, I fix each one in place with a spring clamp while the epoxy sets up.
Cleanup
When the epoxy is partially cured but not fully hardened, I carefully remove the protective masking tape from the treads, handrail, and balusters. Compared with trying to remove dried construction adhesive and epoxy from unprotected metal and wood, this is a relatively painless step.
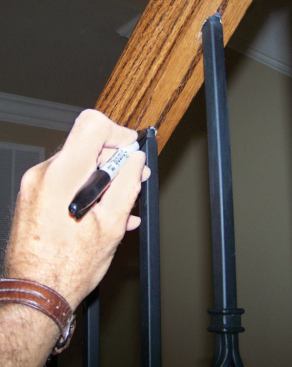
A black Sharpie pen is handy for touching up any exposed epoxy at the tops of the balusters. Once everything is cleaned up, I slide the base shoes back down to cover the holes in the treads and fix them in place with a dab of either epoxy or silicone.
Cost
My clients pay about twice as much for a metal balustrade as they would for a finished wooden one. The metal version takes two or three hours longer to install, and the balusters cost $9 to $20 apiece (compared with about $5 for unfinished wood).
Gary Striegler is a builder in Springdale, Ark.


